Save as
The Save as action either makes an identical copy of your genealogy under another Gedcom file name, or makes a partial copy of your genealogy as another Gedcom file, using several very useful filters.
The Save as function can also be used to export branches of a genealogical tree.
Description
The Save as window is not just a classic file explorer. It has the great particularity of having several filter tabs on the right hand side, which can be combined together to define precisely what you want to extract from your genealogy.
As with classic file tools, the file list allows you to choose the directory and the name of the file to save your genealogy, with the possibility of creating a directory that does not already exist.
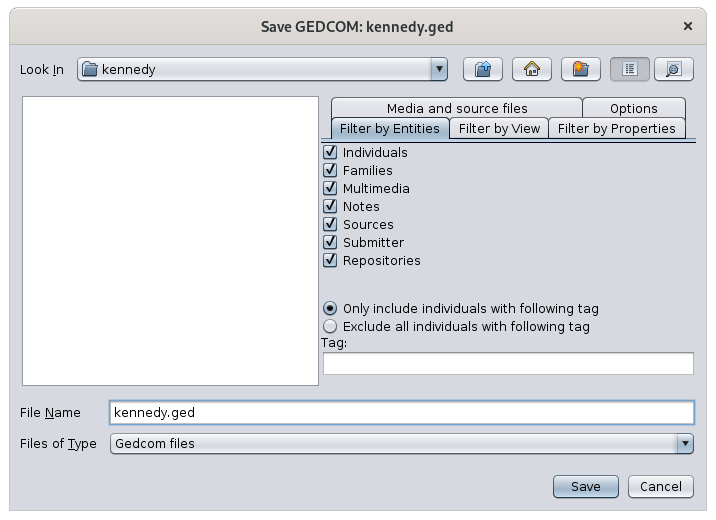
The filters are made of 5 tabs:
- Filter by Entities: used to include or exclude categories of entities
- Filter by Properties: used to exclude specific properties of each entity
- Filter by View: used to limit the entities to those included in the views currently displayed
- Media and source files: used to indicate whether media files should be copied along as well or not
- Options: used to indicate whether the file should be sorted, specify the encoding and encryption of the saved Gedcom file
Usage
The Save as action can be used to:
- make an identical copy of your genealogy
- make a partial copy, including extract a branch
To make it easier, Ancestris asks you first what you want to do with the following window:
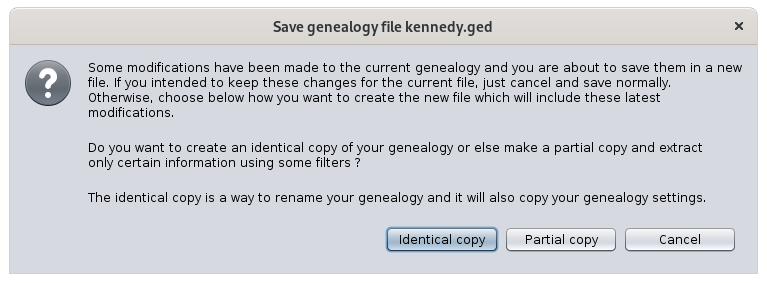
If you choose to make an identical copy, Ancestris will also copy your genealogy settings.
If you choose to make a partial copy, Ancestris will create another Genealogy and open it as it if were a new one and will not copy your settings.
In case some modifications are pending, Ancestris will notify you with the first paragraph in the message above. Make sure you save these modifications before making the copy if you intended to keep them in the current file rather than the copy.
The most significant benefit of this Save as function is to export tree branches as part of the partial copy choice. The other possibilities are pretty self-explanatory.
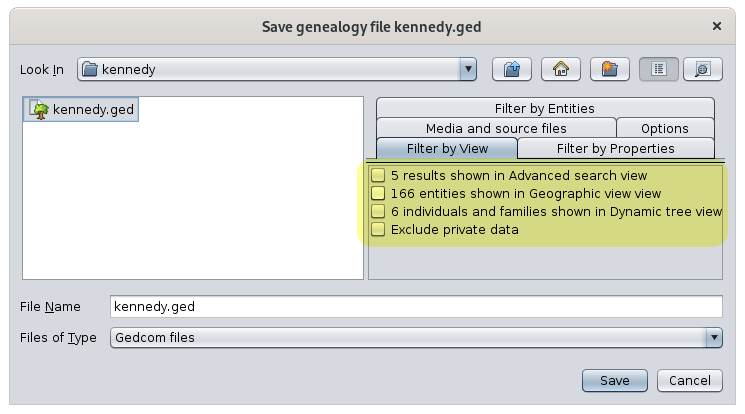
Exporting branches is done using the Filter by View tab. In the example below, we have restricted the display of the Kennedy tree to 3 generations and then we have folded a branch. There are therefore 4 individuals and 2 families displayed.
Here is what the Dynamic tree looks like as well as the Save-as window Filter-by-View tab:
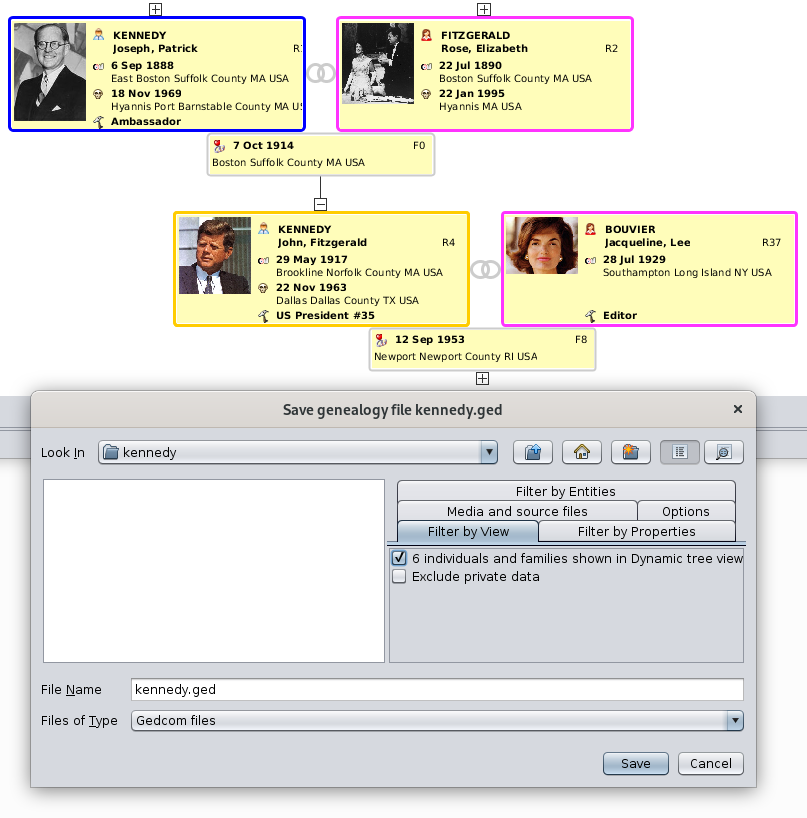
By checking the corresponding box "6 individuals and families", we will create a Gedcom file extracted from the main genealogy, with only the 6 individuals displayed in the Dynamic tree view in this example.
Combined with the other filters, we can add the corresponding media, notes, sources, etc. to make it a complete Gedcom file but limited to that part of the tree branch.
Views that can be used in a similar way are:
- the Dynamic tree view,
- the Geographic map view, where you can display a limited number of events and individuals using geographic filters
- the Advanced search view, where you can select individuals and families meeting some specific criteria on names, occupations, places, etc.
- the Timeline view
- the Graph view
- the Family group report
Here is what the Save-as Filter-by-View tab could look like:
This is a powerful way to finely define genealogical exports.
Please note it is also possible to export the visible individuals of each view from the view itself, using the Export-to-Gedcom button in the view menu bar.
Example
We had the following question from a user.
I would like to extract from my gedcom, a gedcom limited to the 5th generation.
That is to say a gedcom that would only include my SOSA 16 to 31 and all their descendants.
How can I do this?
Here is a possible solution for this:
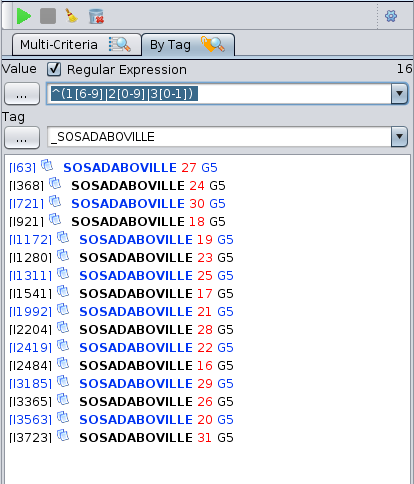
You select the 16 SOSA individuals with the Advanced search view.
- Remember to check "Regular expression".
- Type in the magic formula for regular expression. It looks for the numbers 16 to 31 in the value of the tag. Include a space character à the end.
- Choose the tag _DABOVILLE or _SOSA (the one you use for your SOSAs).
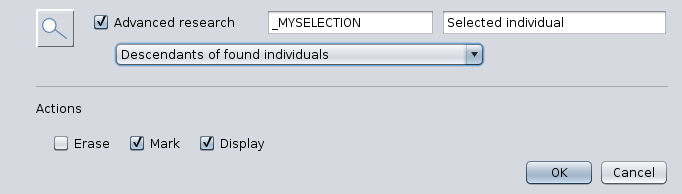
You then mark all their descendants with the Edit / Mark tool.
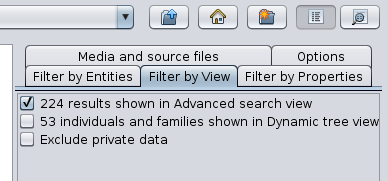
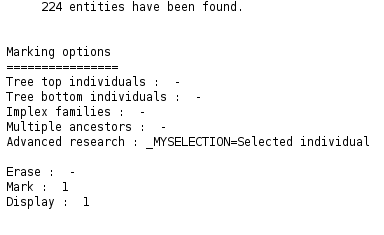
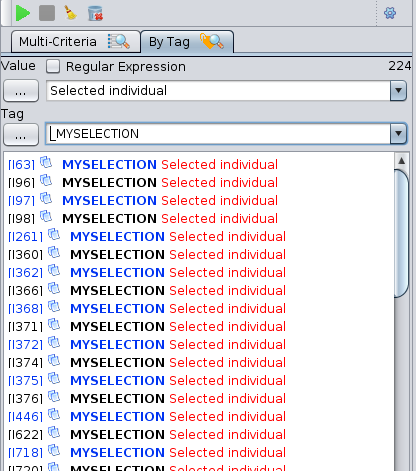
There are 224 of them here.
Then you select these 224 marked individuals with the Advanced search view again.
- Uncheck regular expression this time
- Type "Selected individual" since this is the value used for marking in the previous step.
- Choose the label "_MYSELECTION" since it is the previous label as well.
Ancestris finds the 224 marked individuals.
Finally you go to File / Save As... where you select the 224 individuals to be exported.