Lists and reports
This function launches the Ancestris reports.
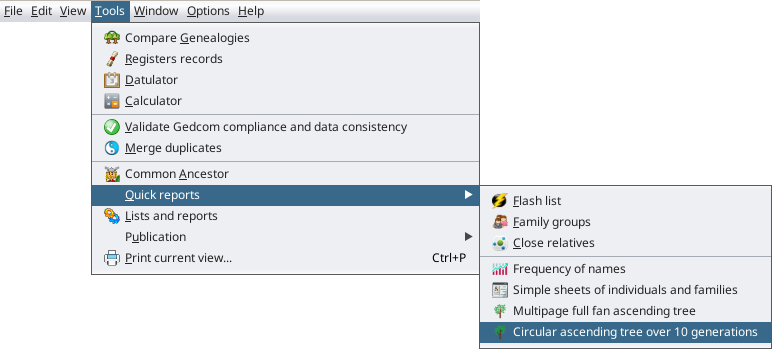
Some reports can be run directly from the Ancestris Menu, Menu/Tools/Quick Reports.
They are: Quick List, Family Group and Close Relatives reports.
You can add reports as menu items to this list or as Launch buttons in the menu bar. See Launching a report section below.
Description
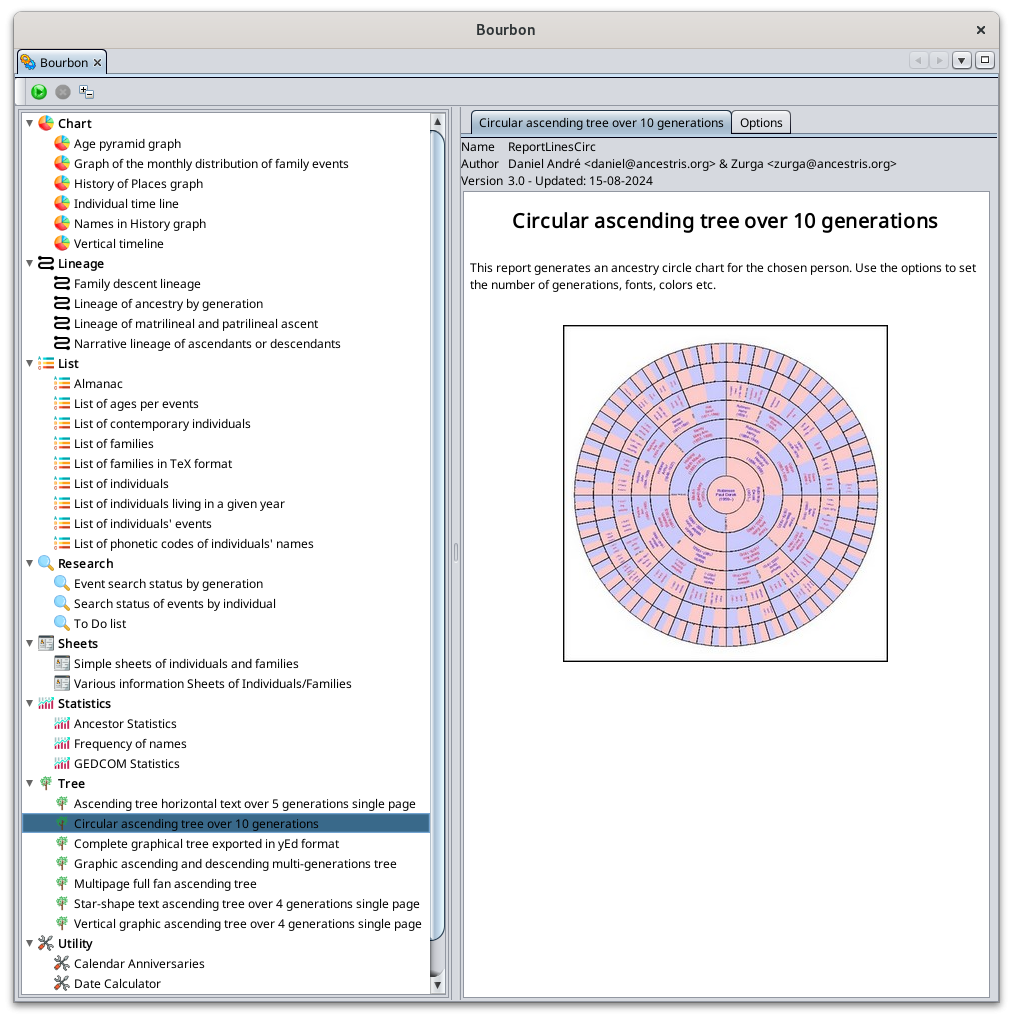
This window lists all available reports on the left, and the explanation of the selected report is on the right.
The toolbar allows you to launch the selected report or change the layout of the list.
Toolbar
Start Button
This button starts the selected report. Make sure you have set your launch options beforehand.
Stop Button
This button is used to stop a report that would take too long to run. Indeed, depending on the size of your genealogy, some reports may take time to produce the result.
Sort List Button
This button toggles the list from a category list to an alphabetical list and vice versa.
Reports List
The reports in the list are sorted by category: charts, lineages, lists, research, etc.
When a report is selected, its description and launch options appear on the right hand side in the corresponding two tabs.
This list includes reports from several contributors and we gratefully thank them. The reports were originally the first way for each Ancestris user to meet specific needs. It is always possible to make your own reports in Java programming if you feel like it. We will help you make your first attempts. Check out the contribution pages.
One of the consequences is that the reports might be different from one another, and the output formats may depend on each report.
Therefore, it is important to read the description of each one.
Description of a report
The description of the report specifies the author and the date of creation.
In general, you will find an illustration, a description and mainly the explanation of the launch options.
Report Options
This tab allows you to modify the launch options.
Some reports have a lot of options.
If the options or their explanations are not explicit enough, try to run it on a small amount of data to test the output.
Usage
Reports allow you to visualize your genealogy from different angles, make analyses, or even extract data from it.
Did you know ? Ancestris has contributed to health science. In 2009 and 2010 the Ancestris team collaborated with Nadine Pellen, a cystic fibrosis researcher. Thanks to algorithms developed for the occasion in Ancestris, she was able to succeed in her research by manipulating 250 family trees and 258,000 individuals. On March 18, 2013, she published "Cystic fibrosis as an inheritance".
For her thesis, Nadine Pellen used a report that we produced quickly and specifically for her to codify the ancestry of patients carrying the cystic fibrosis gene and to produce a file from which she was then able to carry out all the analyses.
Launching a report
A report can be started in several ways.
- From the Report selector window, accessible from the main menu Menu / Tools / List and Reports.
- From the context menu by right clicking on an entity, then selecting the Launching a report menu item and finally navigating through your report
- From the Quick Reports Menu / Tools / Quick Reports by adding reports yourself to the menu list
A report can deal with all the individuals in a genealogy (list of acts to be researched, age pyramid, etc.) or focus on a particular individual (ancestry report).
From the Report selector window
This is the window shown at the top of this page.
When you launch a report from the List and reports window, you can sometimes choose the individuals on which you want to run the report if it is available in the options.
From the Context Menu
When you launch the report from the Context Menu, the menus expand to offer you to launch the report for the whole genealogy or only for the entity you clicked on.
Adding shortcuts to reports in the Quick Reports Menu and in the main Toolbar
When you install Ancestris, the Quick Reports menu looks like this.
You can add a report to this menu list from the Report selector window.
- Select the report you want to add
- Right click on the selected line
- Choose Add this report to the "Quick Reports" menu
- That's it
To remove a report from the menu, proceed exactly the same way but choose Remove this report from the "Quick Reports" menu instead.
When you have added reports to the Quick Reports menu, it looks like this.
You can add a report to this main Toolbar.
- First add the Report to the Quick Reports menu, as described above
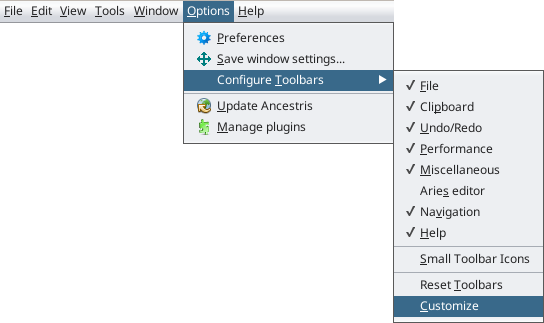
- Then go to Menu / Options / Configure Toolbars / Configure
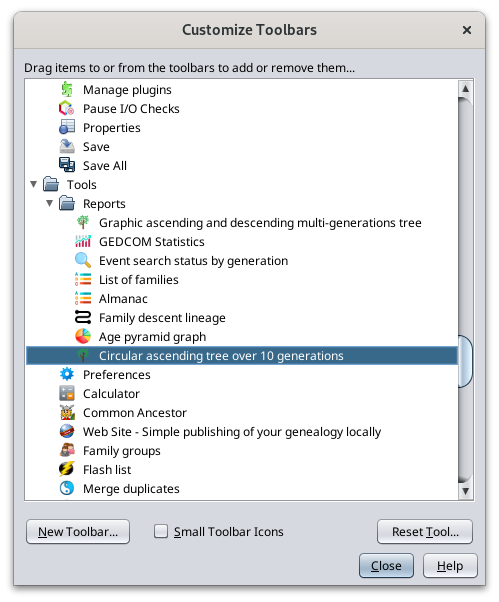
- The following window shows all the action buttons
- Locate the Report you want to add to the Toolbar as shown above
- Drag and Drop the button to the location in the Toolbar than you prefer
- That's it
When you have added reports to the main Toolbar, it looks like this.
Please note that it is possible to add the same report several times with different launch options, and also to customise the report action and button tooltip. See Customization section below.
Description of reports
Since the documentation of each report is included in its description, we do not document each of them again in this page.
Only complex reports that require further explanation will be detailed in this online documentation.
This is the case of the Information Sheets of Individuals/Families report. It is described in a dedicated page.
Customization
With a right click on the report name in the list of reports, you can add personalised actions and buttons launching reports, edit the settings of the actions or remove them.
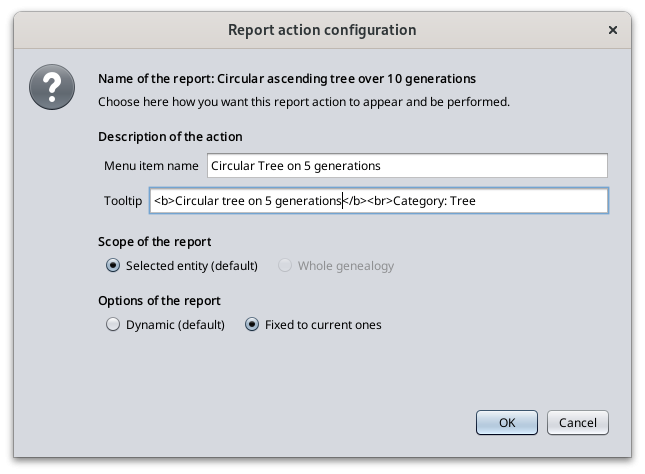
When you add or edit the action settings, the following window appears.
In this example, we chose to define a specific action to launch the circular tree report with 5 generations and to keep these options set.
- Dynamic: the report options that will be used are those defined in the Report Options pane when the report is launched (identical to launching the report from the report window).
- Fixed: the report options that will be used are those that were defined in the Options pane when the report launch action button in the Quick Reports menu was created.
The choice "Fixed options" lets you run the same report with a different set of options.
In case of Fixed options, you need to previously set the options in the Options panel of the corresponding report.
The tooltip text appears when you move the mouse over the button. It is necessary to distinguish between action buttons from the same category in the Toolbar as they would all have the same icon.
Note than when the report cannot run on the Global genealogy, the choice is disabled.
Tutorial
There is a tutorial on printing trees from the reports list. It is in French and in PDF format. You can download it here.

