Dynamic tree
The Dynamic tree shows a genealogy in the form of a tree.
You can quickly select any individual in the tree, and you can also use this view to build the tree.
The view is the closest to that of a traditional family tree, and it best captures the simple relationships between individuals and their families.
Description
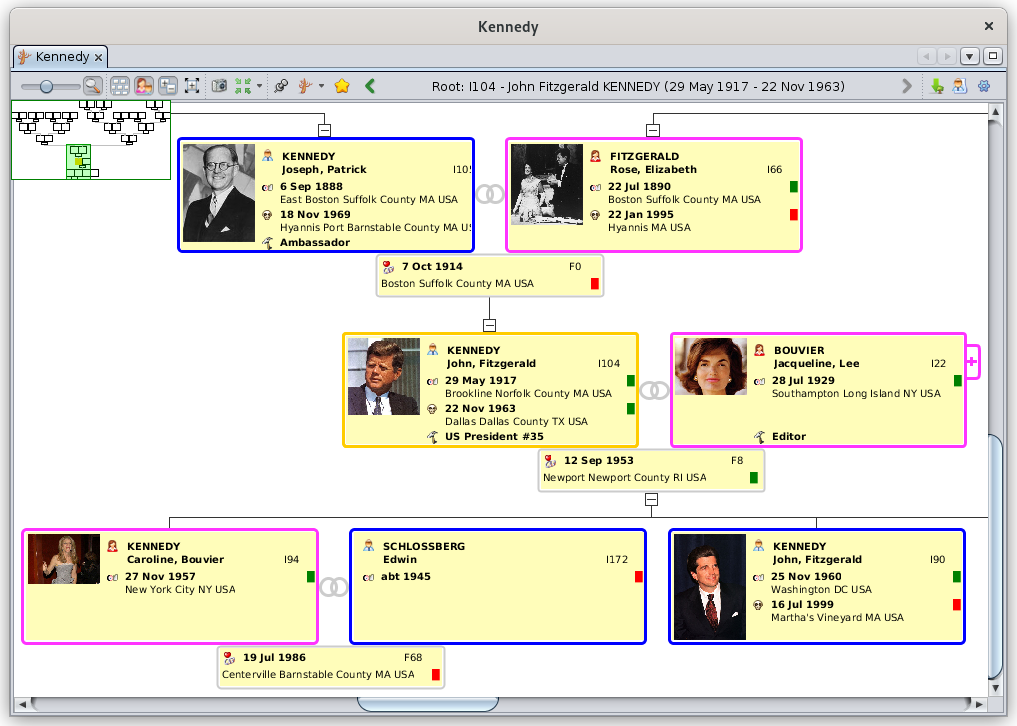
The Dynamic tree is displayed below a toolbar.
Tree
The tree is structured around a root individual. The tree is actually a "double-tree". Ancestors form a tree on one side of the root individual, and the descendants form another tree on the other side.
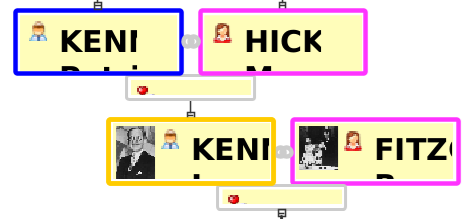
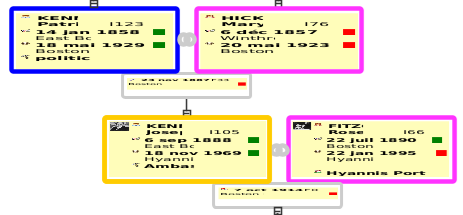
Individuals and their families are represented by boxes. These boxes are joined together by lines of filiation, and organized in an ascending and descending tree-like manner.
The tree is a partial view of the genealogy and it does not show all the individuals of the genealogy.
- Only ancestors and descendants of the root individual are visible
- All spouses of a descendant are visible, because they all have originated - or will originate - other descendants. Only one spouse is completely visible at a time though. See below.
- Not all spouses of an ancestor are visible. Only the one who is the ancestor of the root individual is visible.
- All the other individuals of the genealogy are not visible in this tree, but they can be visible in other trees, when you change the root individual.
The tree can be displayed vertically (ascending at the top) or horizontally (ascending on the left).
When the tree is too large to be displayed in its entirety, scrollbars at the bottom and on the right allow you to move over the entire tree. You can also use the green minimized-tree to move around the tree.
Root Individual
The root individual is the one around which the double tree is built.
The root can also be a family which does not fundamentally change the display of the tree. For this discussion, we will therefore call it the root individual or simply the root.
Th name of the root is indicated in the tree toolbar. By default, it is the individual -or the family - inside the brown frame, except when it is the selected individual, in which case the border is yellow.
The tree changes each time another individual is chosen as root. This is why the Tree is called dynamic.
Please note that the root individual can be a different person from the selected individual.
Indeed, in order to be able to move in the tree to select one by one the individuals and display them in the views and editors, it is preferable that the tree does not change at each selection of an individual.
Selected individual
The selected individual is the one that appears by default in a yellow frame.
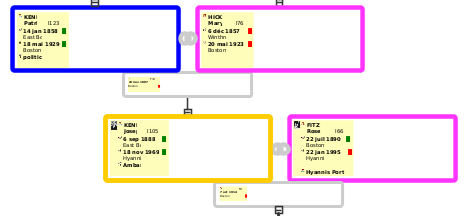
Individual and family boxes
Each box displays information about the individual or the family it represents.
Aspects of the boxes (fonts, alignment, colors, dimensions, etc.) as well as the categories of information they display (name, dates, locations, etc.) can be customized using the blueprints or the Configure view button.
Boxes can be right-clicked to call the context menu. This is how you add individuals or families to the tree.
When an individual has entered into multiple unions, the box on left or right hand side, depending on where the box is, has a button with a clickable 'plus' sign on it. Each click on this button displays successively all the spouses of the individual.
 When the person is not a direct descendant of the root individual, the root of the tree will be changed and the tree redrawn in order to see the corresponding spouse. Use the root navigation buttons to come back to the previous root individual.
Colors
By default the outlines of the boxes have the following colors.
- Yellow for the selected individual - and the root individual if it is the same one.
- Brown for the individual or the root family if different from the selected entity
- Blue for men, pink for women, dark grey when sex is unknown
- Light grey for families
It is possible to change these colors. See the paragraph on customization.
Union Symbol
This symbol  is located between two spouses and indicates that the tree displays families and spouses. It is possible to hide spouses and families.
For divorced couples, the symbol is  .
.
Buttons for contracting or extending a branch
Buttons are placed at both ends of branches. These are branch contraction and branch extension buttons that allow to fold or unfold
  a branch. This is to optimize the display of certain parts of the tree.
Toolbar
The toolbar of the dynamic tree lloks like the following:.

Hovering over a button with the mouse gives you the function of the button.
Zoom slider
The zoom slider changes the zoom level of the tree in the display area.
- Towards the left, the zoom level moves backwards: more individuals can be seen in the display area.
- Towards the right, the zoom level moves forward: we see fewer individuals but the information is more readable and the boxes are likely to display more information.
Thanks to this cursor, you can instantly adapt the scale of the display area to your needs.
You can also use the Control key and the mouse wheel to change the zoom level.
Show/Hide Overview Button
The overview shows the entire tree as a miniature tree that you can use to move quickly anywhere in the tree, in case the tree does not fit entirely in the display area.
When the overview button on the toolbar is activated, a small overview appears at the top left of the display area.
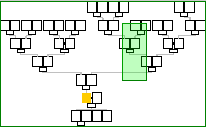
This window displays a scaled model of the complete tree. We see in yellow and brown the selected and root individuals. Here, they are the same, therefore in yellow.
A new click on the button hides this overview.
Inside this overview, a green rectangle represents the currently visible area of the tree, depending on the size of the window or the size of the screen. Moving this colored rectangle with a mouse drag immediately affects the entire display area, so that some areas that were not visible until now become visible without having to manipulate the scrollbars.
A click on a mini-box inside the overview repositions the tree: the corresponding individual is placed at the center of the display area.
This movement of the tree in the overview or the repositioning click does not modify either the root individual nor the selected individual.
Moreover, it is possible to modify the size taken by the overview, by means of a drag and drop of the mouse from its lower right corner.
Show vertical or horizontal layout Button
This button toggles between vertical and horizontal display of the tree.
- Vertical display: according to the meaning usually associated with the opposition ancestors / descendants, the ancestors are placed at the top, and the descendants at the bottom.
- Horizontal display: according to the usual representation of a time line (from left to right), the ancestors are placed at the left, and the descendants at the right.
Show or Hide Families and Spouses Button
- Family mode: shows spouses and families
- Individual mode: hides spouses and families
Hiding spouses and families saves space in the display area.
Each click on the icon button immediately switches the display to the other mode.
Show fold/unfold symbols Button
- Visible mode: shows the symbols for branch contraction or extension
- Hidden mode: hides these same symbols
Each click on the icon button immediately switches the display to the other mode.
Fold/Unfold branches Button
- Extended branches: unfolds all the branches that may have been contracted before individually.
- Contracted branches: folds back all branches that were previously unfolded
This is a way to remember the folded branches, and to switch more easily between the two modes, if it is always the same branches that you want to fold.
Each click on the icon button immediately switches the display to the other mode.
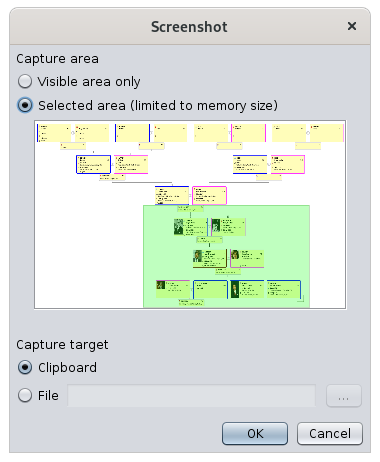
Screenshot Button
In the example below, the captured part will be the green area, and it will be put in the clipboard. This green area can be moved and modified with the mouse (drag and drop or stretch lower right corner).
Center the tree Button
- Center the tree on the selected entity: places the current selected entity at the center of the display area.
- Center the tree on the root: places the root entity at the center of the display area.
Stick current view Button
This button fixes the display of the selected entity in the tree when you select another entity in another Ancestris view.
If the pin is not pushed, the yellow frame follows the selected entity in Ancestris.
If the pin is pushed, the yellow frame sticks to the individual it was on regardless of the selected entity in other Ancestris views..
Change Root Entity Button

- Rebuild the tree from the selected entity: makes the current selected entity the new root of the tree.
- Rebuild the tree from an entity of your choice: offers to select an indivudual or a family from the genealogy and makes it the new root of the tree.
- Rebuild the tree frm the DeCujus: makes the DeCujus, if it has been generated, the new root of the tree. If no DeCujus has been generated, using the Generate Sosa Numbers tool, this action is disabled.
Here is an example of dropdown list with 5 entities that have been bookmarked previously:

As bookmarks are fully user-configurable, this menu is empty if you have never defined any bookmark.
To create a new bookmark, use the context menu on the entity you want to bookmark.
- Open the Context Menu by right-clicking on the visible entity.
- Select the Bookmark this entity action.
- A confirmation window let you define a name for the bookmark.
- After validation, the bookmark is created and then appears in the dropdown menu.
You can only put a maximum of 16 bookmarks in the list. If the user tries to create a 17th bookmark, it will replace one of the 16 already saved, which will be permanently deleted without any warning.
The Manage bookmark choice helps you sort the list of currently saved bookmarks, or remove bookmarks.It can also be done in the Bookmarks tab of the Configure View window. Check the Customization section at the end of this page.
In the toolbar is next displayed the name of the root individual - or family - of the tree between two arrows to navigate in the root history: a backward arrow to move back to the previous root that was defined during the session, and a forward arrow to move to the next tree root in the root history.
Export a branch or a tree of individuals into a new Gedcom file button
It is therefore possible to export a branch or a tree to a file that can then be sent to another person. You just have to choose the root individual from whom to build the tree and then fold the branches you do not want to export.
This can also be achieved using the "File/Save as" menu.
Change display of individuals/families Button
A click on the button opens the list of blueprints corresponding to either an individual or a family.
Ready-to-use templates allow the user to adapt the display to its personal taste. See the Blueprint instructions to change them.

Configure View Button
This button customize many elements about the presentation of the dynamic tree. It opens the customization panel of the Dynamic tree view.
Usage
The main goals of the dynamic tree view are to :
- Visualize the relationships between individuals, publish parts of the tree to share it, or partially export branches
- Navigate in the genealogy to quickly display and edit an individual or a family
- Build the tree, by adding or removing individuals
Visualize the relationships between individuals
The Tree displays the ancestors and the descendants of a root individual.
As already mentioned above, the other individuals will not be visible. Your first choice is therefore to choose this root person in such a way as to have the maximum number of individuals in the tree, or at least to make sure you will see the branches you expect to see.
Once chosen, there are several ways to change the root individual.
- The Change Root Entity button on the toolbar
- The Bookmark button in the toolbar, provided you have defined bookmarks beforehand
- A double-click on the box of the chosen entity in the dynamic tree view
- A double-click on the chosen entity in the entity table or the Gedcom editor
- The context menu and select "Make root in the dynamic tree".
As soon as a new root is defined, the displayed tree changes and redraws the corresponding ancestors and descendants.
The root entity also becomes the selected entity until another entity is selected.
In order to see or hide elements to optimize the presentation of your tree, use the buttons of the toolbar.
You can also customize the way the tree is displayed and use styles. Refer to the customization section below.
Once the tree looks the way you want, you can print it or make a screenshot of it to keep an image of it.
It is also possible to export the visible individuals to a new Gedcom independent file. To export a branch of the tree, make sure then that only the corresponding branch is unfolded and visible. Then refer to the save as function for the extraction details.
Navigate in the genealogy
From the root individual, you can navigate through family relationships within the ancestors of the root entity, or within the descendants and their spouses.
- Press and hold the mouse anywhere on the tree to move it around until you see the desired individuals
- A double-click on the box of an entity to make it the new root entity, which then makes you see its ancestors and descendants.
- A single click on an entity's box to select it and display its information in the other views and in particular in the editors.
To navigate within the ancestors of an ancestors of thee root individual, or the descendants of a descendant of the root individual, you do not need to redraw the tree with another root.
You will have to redraw the tree if you want to see the descendants of an ancestor, or the ancestors of a descendant.
For example, to see the brothers and sisters of an individual, set the root individual to their father or any of their ancestors.
Whatever the way of operating, the selection of an individual or a family in the dynamic tree is instantaneously reflected in the other windows.
Selecting an entity does not modify the choice of the root, and therefore has no effect on the structure of the displayed tree.
The root entity is in the brown box. If the brown box is not visible, it is probably because it is also the selected individual. There are indeed two situations resulting in the selected individual and the root individual being the same: it is when the root is selected, or when the selected individual is double-clicked.
Build the tree
The dynamic tree view can also be used as a sort of editor, to add or remove relationships and the corresponding individuals and families.
You can build a tree visually directly from the dynamic tree using the context menu, with a right-click on the individual from which you want to add an entity, or which you would like to remove.
Creation of an additional individual
In the Dynamic Tree view, the creation of an individual or a family is done by means of the context menu which opens with a right click on the box of an entity chosen as reference.
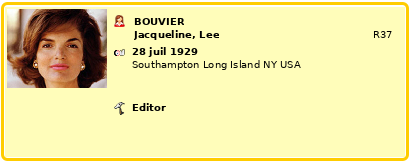
Here, you can see the context menu from the individual Jacqueline Bouvier :
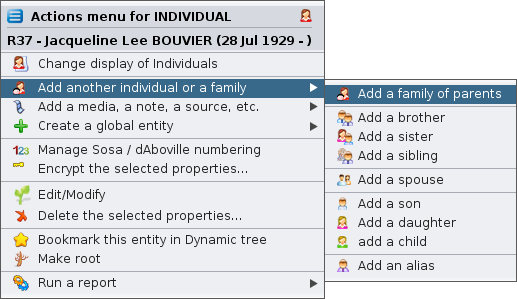
- To create or add an individual related to Jacqueline Bouvier, choose the action Add another individual or a family, then, in the sub-menu that is displayed, choose one of the desired actions Add a family of parents, Add a brother, etc.).
- You can also directly add other categories of entity with the action Add a media, a note, a source, etc.
- For the creation of an entity without any link with this reference entity, choose the action Create a global entity
When adding an entity, Ancestris asks you via, the following window, to confirm whether you want to create a new entity or link an existing one. Example here to add a brother, as indicated in the last sentence:

In case of a new entry, Ancestris will put you in the default editor on a new individual to start entering its description.
You enter the corresponding information, validate it, and the individual is then added in the tree, provided that the added individual is an ancestor a descendant of the root individual. Otherwise, it has been created but does not appear.
Modification of an individual or a family information
The modification of an individual is either done by selecting on it and then using the editor if one is already open, or else by opening the context menu and chose Edit/Modify.
Make your modifications. They will appear immediately after your validation, as long as they are part of the information displayed in the boxes.
Deleting an individual or a family
Deleting an individual or family is done through the Context Menu.
Choosing the Delete the selected properties action then confirm your choice.
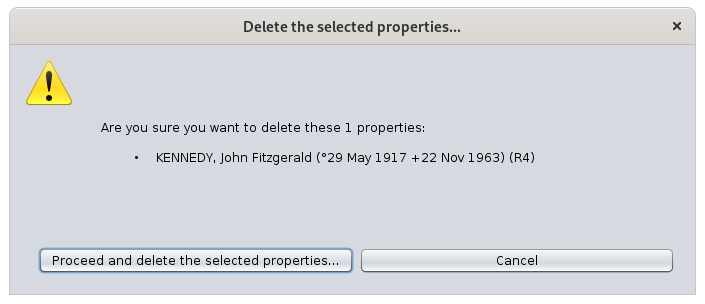
If the deletion is confirmed, the tree updates its structure immediately.
This can significantly change the tree display if the selected entity was the root or the middle of a branch.
If the root individual is deleted, the tree disappears completely.
If an individual in a branch is deleted, the whole end of the branch disappears.
Customization
Customization of the tree can be done using two buttons in the toolbar:
- Change display: changes the Blueprint which is what is displayed inside the boxes
- Configure View: changes the structure of the tree, the colors of the borders and the size of boxes. You can also save your display settings in your own style.
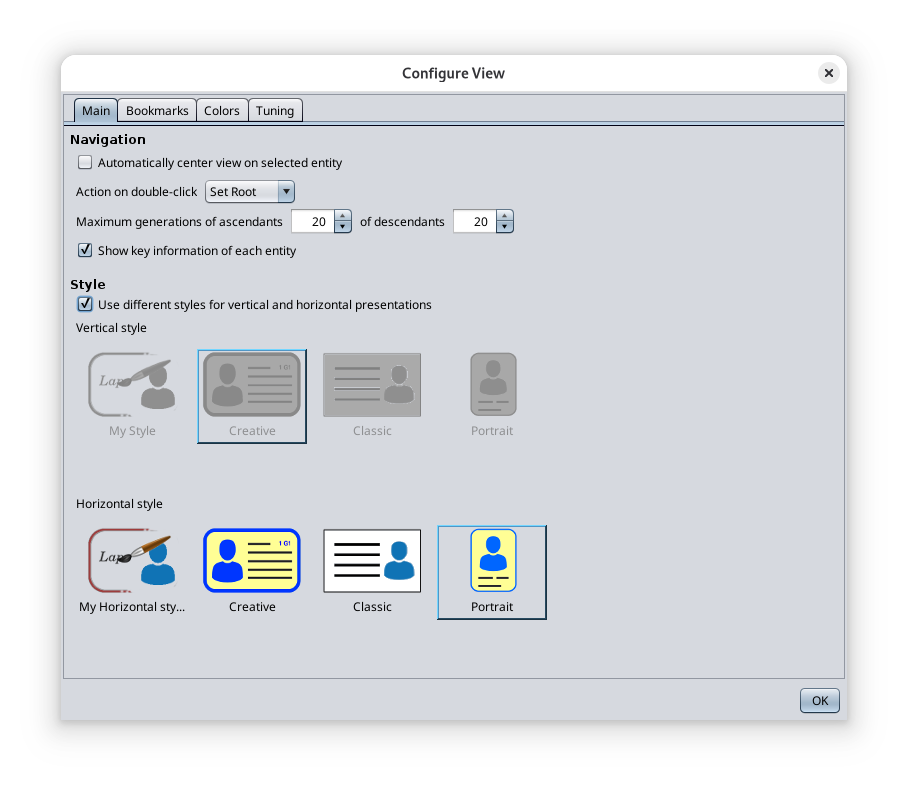
Here is the Configure View window.
Make your modifications in the various tabs.
The tree is modified instantly.
Main Tab
This tab allows you to change navigation settings and display style.
Navigation
- Automatically center view on selected entity: forces the tree to position the selected entity at the center of the display as soon as one is selected.
- Behaviour on a double-click: defines the action to be performed when double-clicking on an entity:
- None
- Center
- Set root (default choice)
- Maximum generations around root: displays only the corresponding number of generations. When changing this parameter, the tree changes immediately, and folds or unfolds branches so respect that constraint. The maximum is 99 generations on either side of the root.
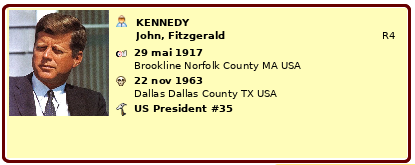
- Show key information on each entity: displays a tooltip window when hovering over an entity with the mouse. This window includes basic information about the entity, in case too little information is displayed in the boxes, or if this information in the box is not visible enough.
Style
Three styles are predefined by default, and a fourth allows you to define your own.
When you choose a style, the tree changes immediately.
To create your own style, select My Style and then go to set the blueprint, the colors and sizes you want. These will be stored as your style.
If you want to set different styles depending on the orientation of the tree, vertical or horizontal, check the corresponding box.
Bookmarks tab
The Bookmarks tab is used to manage bookmarks: order and deletion.
It consists of the list of currently saved bookmarks, under which there are three buttons: Up, Down, Delete and Separator.
The order of the bookmarks in this list is an exact reflection of the order in which the bookmarks appear in the Bookmark button on the toolbar. To change this order, select the bookmark to be moved from the list, and use the Up and Down buttons.
To delete a bookmark, select it and then click on the Delete button.
This tab does not allow you to create or rename a bookmark. To create a bookmark, see the Bookmark Button paragraph. To rename a bookmark, you must first delete it, then create another one from the same entity and with the appropriate name.
Colors tab
This tab customizes the colors of the connectors between boxes, the borders, and the background of the tree.
Zone of choice of the element to be colored
The upper area of the Colors tab lists the elements in the tree view whose color can be changed, each line ending with a square of the currently selected color for that element.
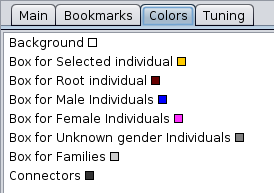
When one of the above items is selected with a mouse click, its color can be changed in the lower area.
Color Selection Area
The lower area of the Colors tab itself contains a number of tabs that are different ways to choose colors.
Choose the color you want, this will update the small square in the element in the upper area.
Tuning tab
This tab allows you to choose the font and its size, a display modes, and the size of the boxes.
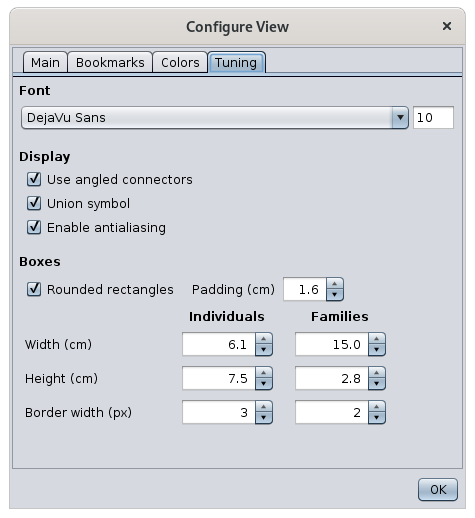
Fonts
- The Font menu allows you to select the type of font from a drop-down list.
- The Font zise is changed using the entry field on the right.
Display
- Use angled connectors: turns the filiation links between the boxes into broken or angled lines, rather than straight lines.
- Union symbol: displays a double ring between the two individuals making up a family.
- Enable antialiasing: produces a smoothing of the pixel display for images.
- Box content zoom behavior: allows to choose the behavior of box content when zoom slider is used.
No zoom Zoom respect ratio
Zoom to fit in box


Boxes
- The Boxes area allows you to choose the shape and size of boxes for individuals and families.