Cygnus editor
The Cygnus editor is one of the three main editors of Ancestris.
The philosophy of the Cygnus editor comes from the need for simplicity of use.
The simplicity of being able to manipulate individuals and everything that relates to them, at a glance
Without worrying about how information is stored behind the scenes,
All other information, families, sources, notes, etc. are ultimately only complementary information relating to the life of the individual. For instance, the individuals' marriage should be listed with the other events. This is what Cygnus does.
The advantage is to see almost everything at a glance, like a bird watching the earth from the sky.
Did you know that? Its name comes from the large and brilliant constellation of the Swan. With its stars mainly arranged according to a large cross, it is represented as a bird spreading its wings.
Cygnus efficiently does a lot of work for you behind the scenes. Creating a spouse, for example, takes just one click, whereas it requires more steps with the other two editors.
The compromise is that only the most important genealogical information can be edited with this editor, but still covers 80% of users' needs.
There is a solution for everyone, and Ancestris users often choose to use two main editors: Cygnus + Gedcom, or Aries + Gedcom. Some prefer to use only the Gedcom editor. Here is a comparison of the 3 editors if you still had to make a choice.
| Cygnus | Gedcom | Aries | |
| Focus | The individual and his close environment | The Gedcom standard |
Completeness of |
| Ease of use | ++ | +++ | + |
| Ergonomics | +++ | + | +++ |
| Coverage of needs | 80% | 100% | 100% |
| Data transparency | + | +++ | ++ |
| Efficiency | +++ | + | + |
| Editable Gedcom entities | Many | All | All |
| Compliance with Gedcom standard | 100% | 100% | 100% |
Description and Usage
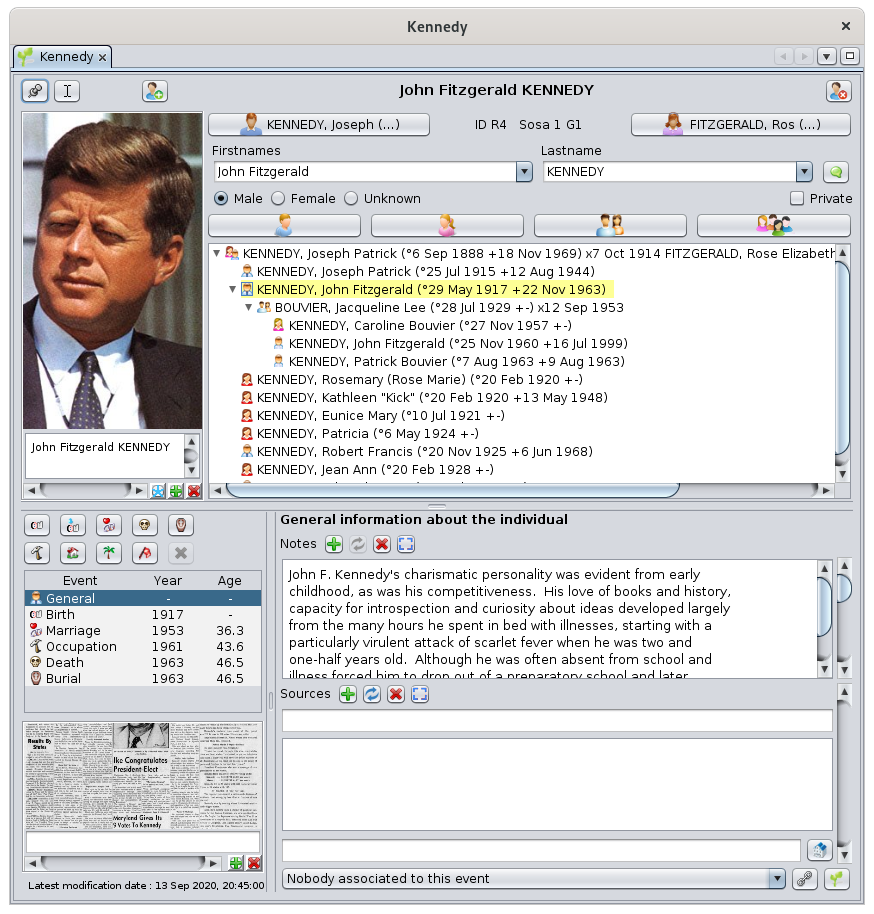
Cygnus displays the individual in the upper part of the window with the Title bar, his family nucleus just below, and the details of his/her life in the lower part, with the associated life events.
Title bar
The title bar displays the name of the selected individual and some buttons.

Hovering over a button displays a tooltip.
Pin Button
Freezes the editor on this individual even if another entity is selected in Ancestris.
Cursor Button
Keeps the focus on the editor when changing entities.
A mouse selection of an individual in the entity table or in the tree, for example, normally causes the focus on the Cygnus Editor to be lost.
If you want to keep the focus on the editor, this button brings the focus back to the first name of the individual and positions the cursor there.
Warning sign
When the warning sign icon appears, it means the information included in the individual data includes an invalid piece of data or an invalid value.. Press the icon to display the source of the invalidity.
Anomalies are detected according to criteria defined in the Ancestris preferences, Extension selection, Validation tab.
Create a new individual Button
Creates a new individual and places him/her in the editor.
Delete this individual Button
Deletes the individual displayed with a confirmation request.
Contextual menu
Right-clicking on this title bar displays the context menu.
Separation bar
The separation bar shown in yellow below can be moved with the mouse. It allows you to adjust the respective sizes allocated to the family nucleus and to life events.

The position of the separation bar is set for each genealogy.
Family nucleus
Above the separation bar is the individual's family nucleus.

Photo frame
This frame displays all the photos and other media (video, soundtrack, etc.) of the individual and of his or her life events.
The photos displayed at each moment are those of the event selected in the life events section.
Media included in the sources are not displayed here, but in the Source photo frame.
The media displayed for a photo is the photo itself. For other media (sounds, videos, documents), the media displayed is the corresponding media icon.
A horizontal scroll bar allows you to scroll through the photos of a given event.
You can specify a short description for each photo.
- The button
 sets the preferred photo to be displayed by default for the individual, in all Ancestris views, in particular the Dynamic tree view.
 - The button
 adds a photo, which will be placed in the selected life event.
 - The button
 deletes the displayed photo


Several actions are possible regarding the displayed media.
- A single left click changes the media, whatever it is
- Right-clicking displays the media in your computer's media viewer.
- If it's a photo, the photo will be displayed in large size in your image viewer.
- If it is a video or a soundtrack, it is played in your default media player.
- When the media is a photo
- Drag and drop with the mouse to crop the photo
- The mousewheel allows you to zoom in and out.
- A Ctrl+Click save the photo cropping
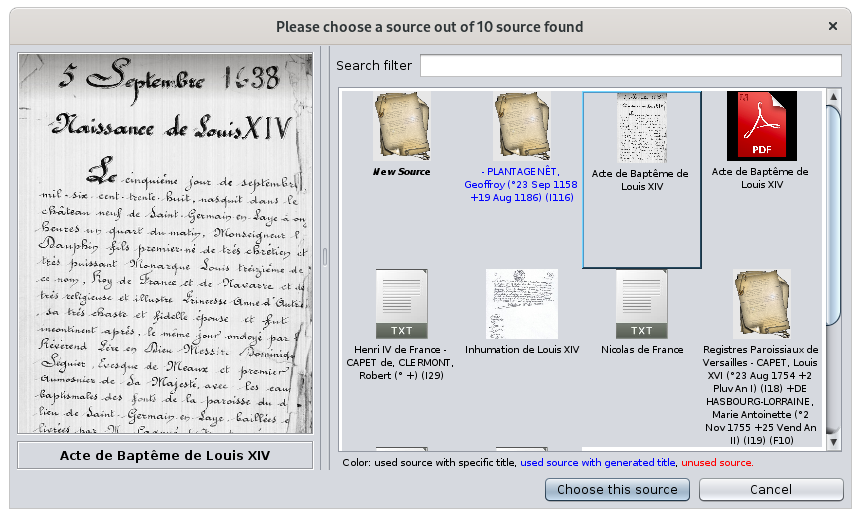
The choice of a photo is made via the media selection window.
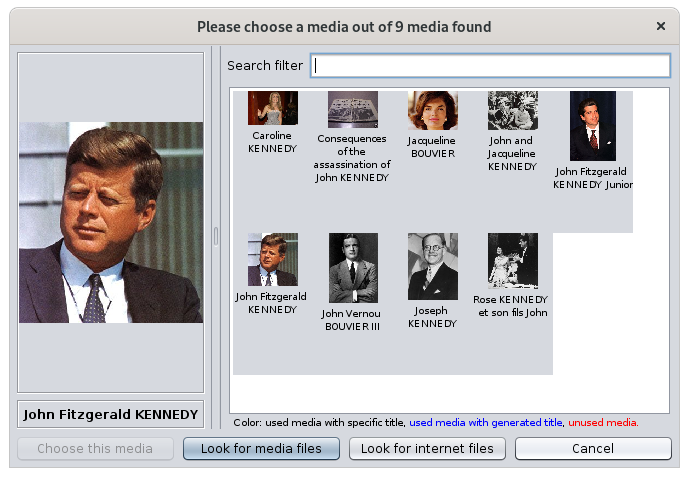
The media are displayed on the right hand side.
The left hand side displays the selected media.
The media titles have three possible colors.
- In black the media whose title is included in with the media
- In blue the media whose title is deduced from the entity that uses it
- In red unused media
The Choose this media button associates it with the individual and closes the window.
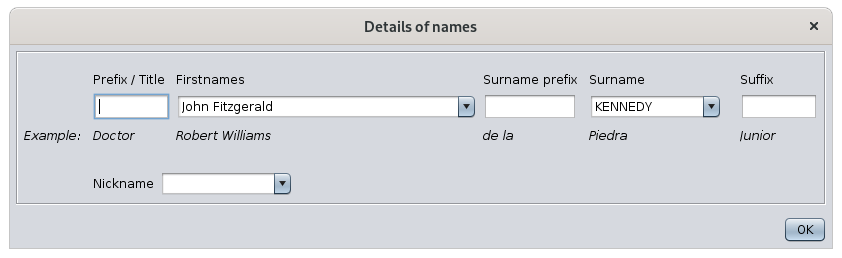
Description of the individual
This panel section is used to edit the name and gender of the individual.
- The Firstname drop-down menu selects a firstname among those already used in the genealogy.
- The Lastname drop-down menu selects a lastname from those already used in the genealogy.
The button  specifies the other elements of the individual's name via another panel that appears.
The radio buttons  set the gender of the individual.
The checkbox  marks this individual as private. For more details on this subject, see the Privacy page in the Preferences.
Above the first and last names is indicated the identification number of the individual and the Sosa number when it is generated.
Around this description are arranged 6 relationships buttons for the parents of the individual, brothers and sisters, spouse and children.
These Relationship buttons have multiple functions.
- A left click on the button will not have the same result depending on whether the related individual already exists or not yet.
- If the individual already exists, it is selected and the editor will navigate to this individual and display it.
- If the individual does not exist, it is created.
- A right-click on the button displays a menu with the choices that seem most relevant to that individual and for the corresponding relationship. These choices are arranged in four categories:
- Navigation to the related individuals, if there are several brothers, sisters, spouse or children
- Creation of the related individual in the genealogy and creation of the relationship with him/her
- Creation of the relationship if the individual already exists
- Detachment of the relationship if the relationship already exists
Family Tree
This tree structure presents:
- in yellow, the selected individual,
- his/her parents at the upper level
- his/her siblings at the same level in the chronological order of births
- his/her spouse(s) are listed below
- and the corresponding children at the lower level
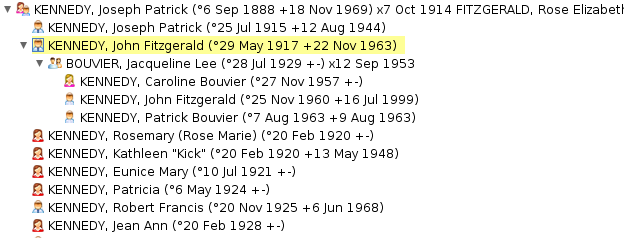
A double-click on any of the individuals selects it.
Life events
This part of the Cygnus editor details the events of an individual's life.
A vertical separation bar delimits the list of events and the media of the associated sources on the left, and the details of these events on the right. It can be moved and its position is memorized from one time to another for each genealogy.
Events
List of events
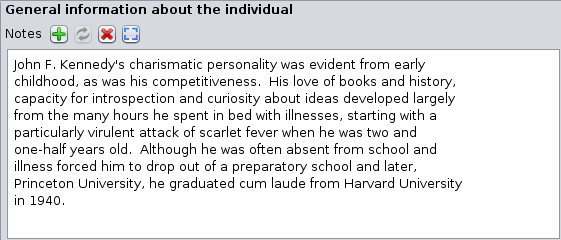
We distinguish the General event from the others.
- It is a particular event that allows you not to define a particular event precisely.
- It can associate notes and sources to the individual to characterize the whole of his life, without attaching them to a particular moment of life.
All other events are those that the Gedcom standard allows to define. They are numerous (birth, marriage, profession, residence, death, burial, etc.).
All events are listed in a single lifeline, including unions. You can therefore create a baptism event and a wedding event in the same place and in the same way.
Indeed, unlike the other two editors, Cygnus being focused on the individual, there is no distinction to edit all events, whether they are the individual entity events or the family entity events.
The list displays the default events in chronological order, using event logic when a date is not indicated (i.e. a death occurs after a birth).
The list can be sorted by clicking on the column header, in ascending order with one click, or descending order with a second click.
The width of the columns can be adjusted with the mouse.
Selecting an event displays its details on the right hand side, and its associated photos in the photo frame at the top of the editor, and source documents in the source media frame at the bottom left of the editor.
Buttons for creating or selecting events
A set of 10 buttons manage the most common events more efficiently.
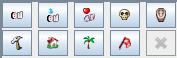
- The first 8 buttons from the top are the most common events used in genealogy.
- The first is that of birth. A click on this button creates the birth event if it does not already exist, and selects the birth event otherwise
- The one underneath is that of the occupation. As there can be several occupations for the same individual, a click on the button displays a drop-down menu asking if you want to create an occupation or offers you to select one of the existing occupations. When there are none, it creates it.
- The penultimate button is a button that displays all other possible events in a list. It is up to you to choose the one you want to create
- The last button deletes the selected event. The General event cannot be deleted
Details of an event
For each selected event, the right hand part of the panel allows you to enter the same information, except for the General event which does not need some of it. All this information is aligned to the Gedcom standard tags.
Description of the event
It is a dropdown list of already defined descriptions, in case the description can be reused.
Date and time
See the dates page for more details.
Below the date is displayed the day of the week if it is dated, and the age of the person at the time of the event except for the day of birth.
Place
Notes
It is possible to enter one or more notes, specific or shared. See the difference in the Shared Information page.
Cygnus can recognize, display and edit both shared and specific notes, but will only create shared notes.
The mouse wheel is used to scroll through the note text if it requires more lines than there is room to display. The right scrollbar allows you to do the same. It appears when all the lines cannot be displayed.
By pressing the <Ctrl> key and using the mouse wheel, you can scroll through the notes. The other scrollbar on the right allows you to do the same thing.
Hovering the right scrollbar with the mouse displays the rank of the displayed note in relation to the total number of notes attached to the event.
The creation and change of a note opens the note selection window:

The right part lists all the known notes of the genealogy. They are of three origins.
- In black, the notes used in the genealogy and contained in Note Entities (shared notes)
- In blue, the notes used in the genealogy and contained in Notes specific to certain entities.
- In red, unused notes.
Sources
It is possible to enter one or more sources, specific or shared. See the difference in the Shared Information page.
For example, here is a source of the baptismal certificate of Louis XIV.
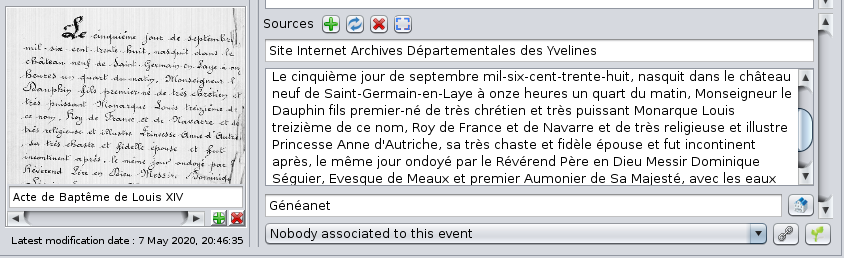
The information for the sources is as follows:
- The name of the source
- A text that is generally used to present a transcription of the source text. Indeed, it is better to make the effort once to decipher a handwritten text that is difficult to read, rather than to do it every time you need it.
- The name of the repository where the source can be found
- Media associated with the same source (on the left)
Sources work on the same principle as notes in terms of :
The photo frame of the source of an event works on the same principle as the photo frame of the individual.
Clicking on the media displays the source selection window:
The Repository field allows you to choose the repository from which the source is taken with the button on the right.  .
.
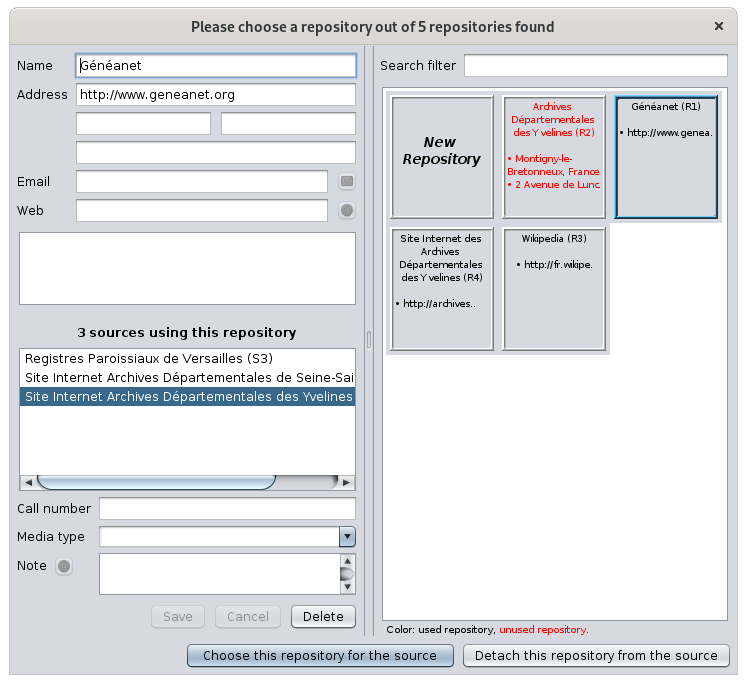
This window contains all the information of the repositories already created or that you would like to create when editing the current individual.
Relations
This is where we enter other individuals in relation to an event, such as witnesses at a wedding or the godparents of a baptized person.

The relationship field is actually a drop-down menu that lists all the relationships currently entered for the selected event.
It is possible to select one of them and then click on the button  to navigate to the corresponding individual.
The button  allows you to manage individuals in relation to the selected event. Clicking on this button brings up the following window:
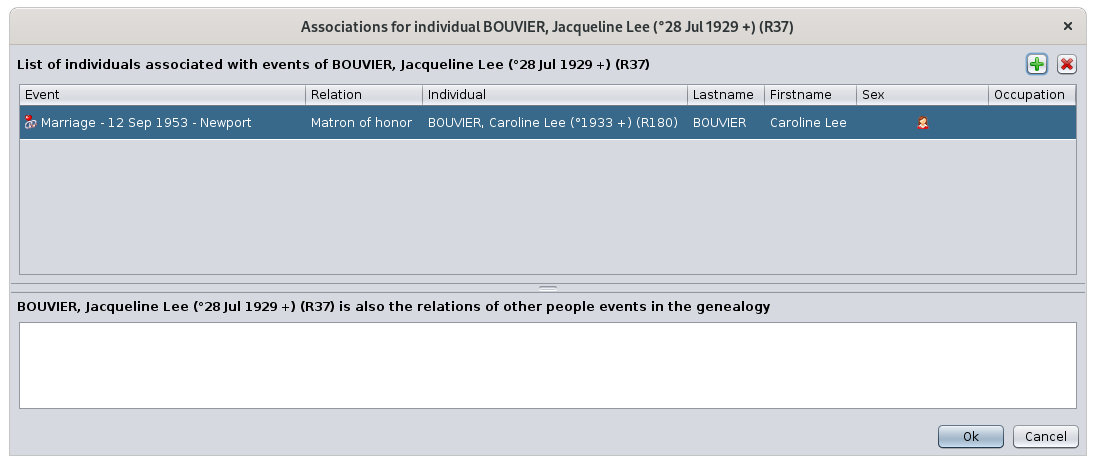
In the upper part, this window allows you to add, modify or delete relationships.
For each relationship in the list of relationships that appears, it is possible to define the event to which you wish to associate a relationship, the type of relationship (witness, declarer, etc.), the name of the relationship, its sex and occupation.
In the lower part, it displays, for information only, the events of other individuals for which the selected individual is himself or herself associated.
Time stamp of last modification of the entity
The last information visible in the Cygnus Editor is the last modification date of the information.

This date is updated automatically at each update.
Synchronization with other views
As we have seen, in Ancestris, at every moment an entity is selected.
When this entity is an individual, this one appears as the main person in the Cygnus editor.
When this entity is not an individual (a family, a note, etc.), the Cygnus Editor displays the individual related to this entity. You can then edit the selected entity as per the various screens described in this page.
The selected entity will be related to the event automatically selected in Cygnus.
Example: if a family is selected in the Entities table, Cygnus will display the husband, select the spouse in the family tree in Cygnus, and select the marriage event.