Geneanet export
The Geneanet export creates a file totally compatible with the expectations of the Geneanet site https://www.geneanet.org
This export also synchronizes your online Geneanet tree with the same genealogy in Ancestris. This synchronization sends the data and documents to Geneanet in one step.
Usage
This is a two-step process:
- Create the export file
- Upload the file with all associated media files.
Create the export file
From the File / Export menu action, you get the following window. You indicate the export file name and the options you want.
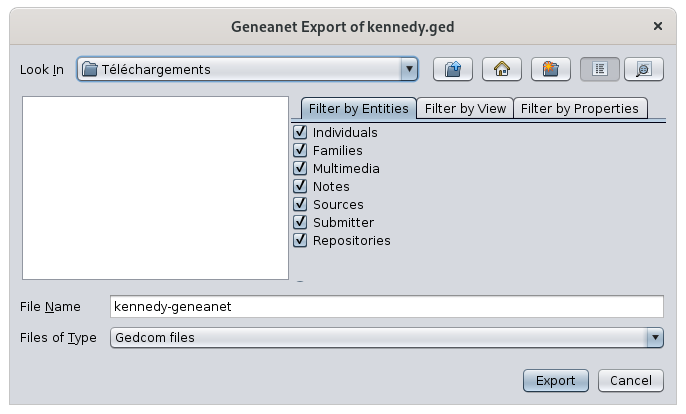
This is the same window as the Save As window.
In the "Filter by View" tab, choose to modify the place names in the Geneanet format, i.e. to use square brackets for subcity names.
[Subcity] - City, ...
instead of
Subcity, City, ...
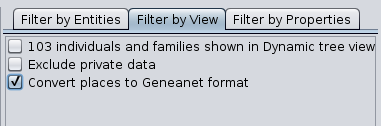
Do not check this option if you use the first jurisdiction of the place names to indicate other information than subcities, like for instance antique names. Geneanet correctly understands antique names as first jurisdictions, without the square brackets.
Once chosen, press Export.
At the end of the export step, you should get the following window:

By clicking Yes, you start the synchronization process described in the next paragraph.
By clicking No, Ancestris takes you to the Geneanet page from which you can import the export file. All you have to do is there, is to select it and upload it from Geneanet web page.
Geneanet synchronisation
If you clicked Yes on the synchronization window above, the following window then appears:
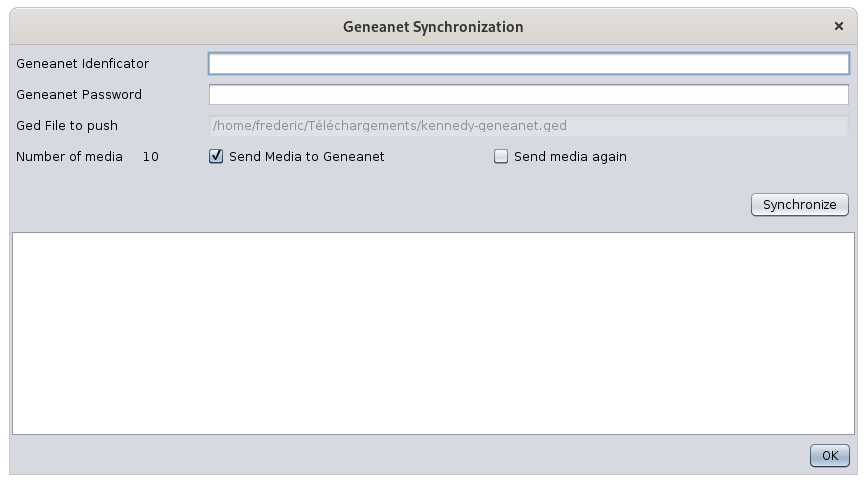
Indicate your Geneanet ID and Geneanet Password.
The window indicates the GEDCOM file that will be sent to Geneanet as well as the number of multimedia objects detected in the original GEDCOM file.
You can choose to:
- send all media files to Geneanet (check the corresponding box if you want to)
- force sending all media files, even though they may have been sent already in a previous upload) (check the box if you want to force the upload)
Then press the Synchronize button.
Synchronization steps
At each step, if a problem prevents you from continuing, an error message is displayed.
- The connection is verified.
- The presence of a tree is checked.
- The GEDCOM file is sent
- The process waits for the end of the update of the file on the account.
- Media are sent and associated with the sheets.
- The process ends.
1. Verify connection
The connexion to Geneanet is opened using the ID and password provided.
2. Check existence of a tree on geneanet
You must have previously created a tree on your Geneanet user account.
If no tree exists on your Geneanet account, the process will stop there.
3. Upload GEDCOM file
The GEDCOM file is uploaded to your Geneanet account.
The maximum size allowed is 250Mo.
4. Update of the Geneanet tree
Depending on the size of the file, some time is needed for Geneanet to update the tree on your account.
Every 5 seconds, Ancestris will check if the update is completed.
The Geneanet update is made of 5 steps as well:
- Preparing your data
- Generating your online tree
- Process contemporary individuals
- Updating links between individuals and documents
- Building the list of individuals
This steps has 3 possible completion statuses:
- In progress
- Completed successfully
- Completed with errors
The successful completion indicates: Completed 5/5 Building individuals list
Ancestris will then proceed to the last step.
5. Uploading media files
If the selection boxes asked for it, media files are uploaded to Geneanet.
Each file name is displayed next to the Synchronize button one at a time.
If a problem occurs with the file, a line is added in the information window indicating the file that has been rejected.
Media files can be local files or remote files. Ancestris will download remote files before sending them to Geneanet. If a file is displayed in Ancestris, it can be sent to Geneanet.
Each file is treated independently from the others. An error on one file does not halt the process.
Ancestris will memorize the files sent. If a file cannot be sent, Ancestris will try again at the next synchronization.
Sent files should not generate any quota issue on Geneanet.
Files are assigned the confidentiality restrictions of the individuals they are linked to.
Image file will be named after the content of the TITL tag associated with the media in the Gedcom file.
It is possible to categorize images by adding the tag _GENEANET_TYPE under your OBJE tags. Possible values are :
- portraits : Portrait
- archive_familiale : Family document
- doc_notarial : Notarial document
- doc_militaire : Military document
- photo_groupe : Group picture
- etat_civil : Civil registration
- recensement : Census
- autres : Others
By default media attached directly to an Individual entity will have the portraits type.
Media attached to any other entity (source, family, note,... ) will have the etat_civil other.
6. End of synchronization
Once all steps have been completed, the information panel should say: Synchronization completed.
