Editor Aries
El editor Aries es uno de los tres editores principales de Ancestris.
La filosofía del editor Aries proviene de la necesidad de ergonomía y exhaustividad.
La posibilidad de poder proporcionar toda la información permitida por el estándar Gedcom.
En una interfaz fácil de usar con ventanas ergonómicas
La ventaja es poder hacer todo, de la A a la Z, de Alfa a Omega.
¿Sabía que? Su nombre proviene de la constelación de Aries, la primera constelación del zodíaco, atravesada por el sol en primavera. Los cuernos de Aries, en forma de espirales, también simbolizan el impulso hacia la vida, el reinicio eterno o renacimiento de la vida, de la luz, correspondiente también al comienzo de la primavera en el ciclo de las estaciones.
Las posibilidades de Aries son numerosas y cubren el 100% de las necesidades.
El compromiso es que agregar la misma información se puede hacer de varias maneras y tendrá que elegir su modo más eficiente.
Hay algo para todos, y los usuarios de Ancestris a menudo eligen usar dos editores principales: Aries + Gedcom o Cygnus + Gedcom. Algunos prefieren usar solo el editor Gedcom. Aquí hay una comparación de los 3 editores si aún tuviera que elegir.
| Cygnus | Gedcom | Aries | |
| Enfoque | El individuo y su entorno cercano | El estándar Gedcom |
Exhaustividad de |
| Fácil de usar | ++ | +++ | + |
| Ergonomía | +++ | + | +++ |
| Cobertura de necesidades | 80% | 100% | 100% |
| Transparencia de datos | + | +++ | ++ |
| Eficacia | +++ | + | + |
| Entidades editables de Gedcom | Mucho | Todo | Todo |
| Cumplimiento de la norma Gedcom | 100% | 100% | 100% |
Descripción y Uso
La apariencia del Editor Aries depende de la categoría de entidad seleccionada.
Por lo tanto, a continuación se describe el Editor Aries para editar cada una de las 7 categorías de entidades existentes en el estándar Gedcom.
Para cada una de estas categorías, Aries utiliza funciones de edición como listas, botones de edición y pestañas que se utilizan de la misma manera. Estos dispositivos de edición comunes se describen solo una vez.
Barra de herramientas Aries
El editor Aries ofrece un grupo de botones en la barra de herramientas de la ventana principal, para una mayor eficiencia.
El primer botón es un acceso directo para abrir el editor Aries en la entidad actual.
Entidad Individual
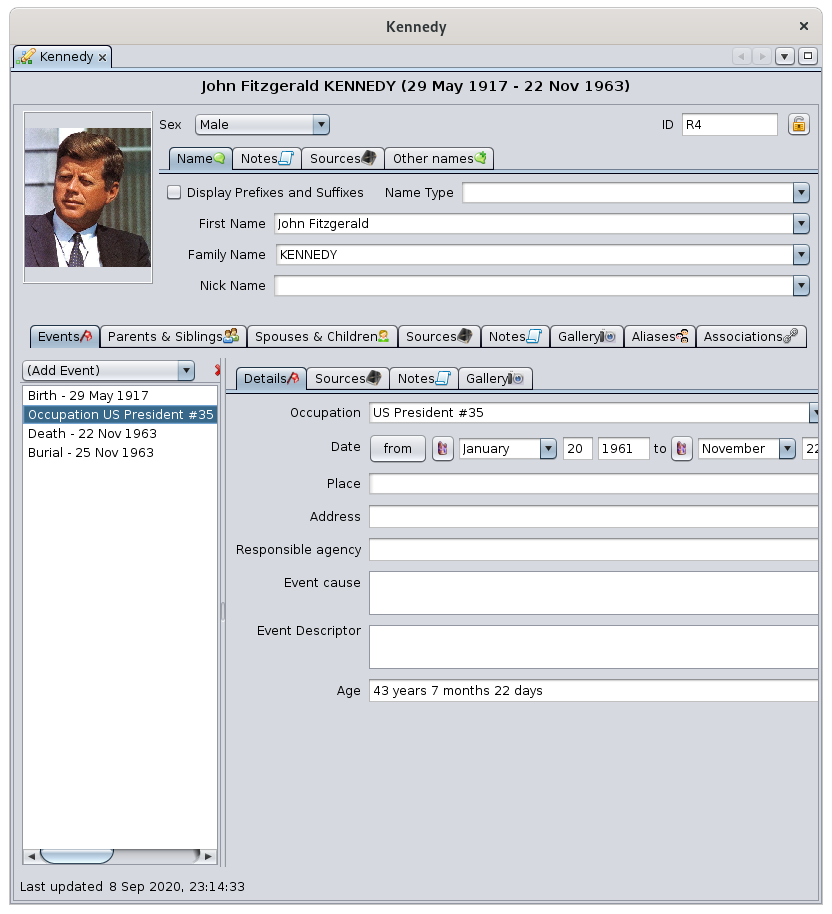
Cuando la entidad seleccionada es un individuo, el Editor Aries se divide horizontalmente en dos áreas: su descripción en la parte superior, eventos y relaciones en la parte inferior, con pestañas.
Descripción del individuo
El área superior está dedicada a la descripción del individuo.
Foto
A la izquierda, encontrará un marcador de posición para asociar una imagen con el individuo seleccionado.
Haga clic en la imagen para editarla o en el marcador de posición en blanco para cargar una.
Haga clic derecho en la imagen para agregar una. La foto que se muestra aquí será la primera que se encuentre en la entidad. Para cambiar el orden de la foto en la entidad, utilice el editor Gedcom y mueva la propiedad correspondiente con el ratón. Para eliminar una foto, elimínela también del editor de Gedcom.
Al hacer clic con el botón derecho debajo de la foto, se muestra Menú Contextual para esa persona.
Sexo
El menú desplegable Sexo le permite introducir uno de los valores Desconocido, Masculino y Femenino.
Número de identificación (ID)
En la esquina superior derecha, encontrará el número de identificación, de la persona seleccionada, posiblemente precedido por su número Sosa si se generó.
Candado
En la parte superior derecha también hay un botón de candado  . Si se presiona, marca la entidad como confidencial
Pestaña Nombre
La pestaña Nombre contiene los siguientes campos:
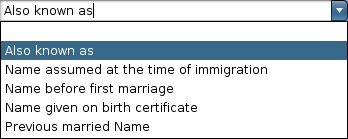
- Tipo de nombre: deje en blanco o elija uno de los elementos de la lista desplegable.
- Nombre: elija de una lista de nombres ya conocidos en la genealogía.
- Apellido: elija de una lista de nombres ya conocidos en genealogía.
- Apodo: escriba un apodo para el individuo si tiene uno.
La casilla de verificación Mostrar Prefijos y Sufijos muestra los siguientes 3 campos que también puede rellenar:
- Prefijo de nombre
- Prefijo de apellido
- Sufijo de nombre
Pestaña Notas
Se pueden agregar notas al nivel del nombre de la persona.
Esta pestaña se usa de manera similar en todo el Editor Aries. Aparte de esta diferencia en el archivo adjunto de nombre, encontrará su uso en la pestaña Notas de un individuo.
Pestaña Fuentes
Las fuentes se pueden agregar al nivel del nombre del individuo.
This tab is used in a similar manner throughout the Aries Editor. Apart from this difference in name attachment, you will find its use in the Sources Tab of an event.
Other names tab
This is a list to add alternative Firstnames and Lastnames to the selected individual. Here is an example:
Editing other names is done with the Edit buttons and brings up a window similar to the whole Name tab already seen above, with three tabs (name, note, sources).
Events and Relationships with the Individual
The lower area is dedicated to the events of the individual, and to the relationships of this individual with other entities.
Events tab
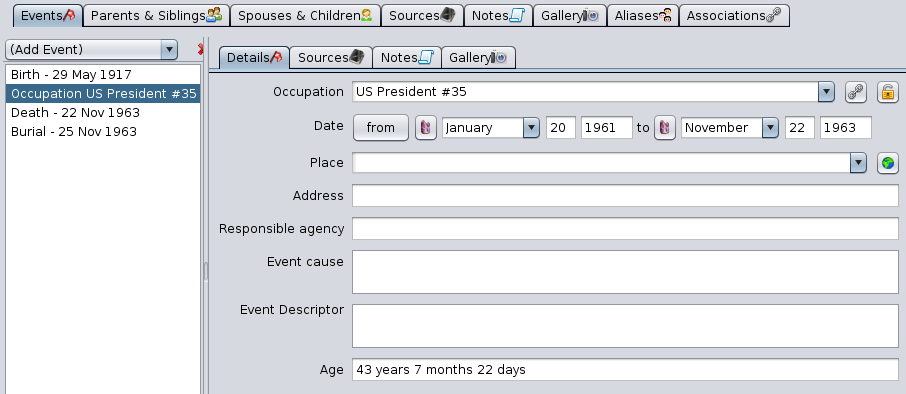
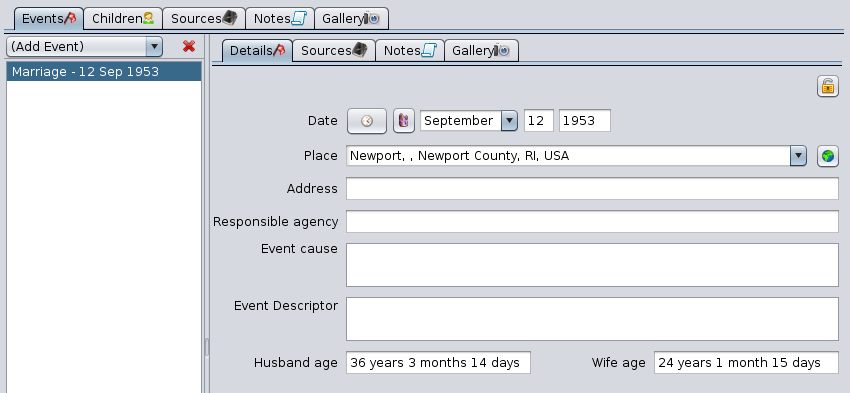
This tab allows you to manage a list of events. It is displayed above.
It has a drop down menu and a list of events on the left, and the description of each event on the right with several tabs: Details, Sources, Notes, Gallery.
The separation bar between the two can be moved and its position is remembered from one time to the next.
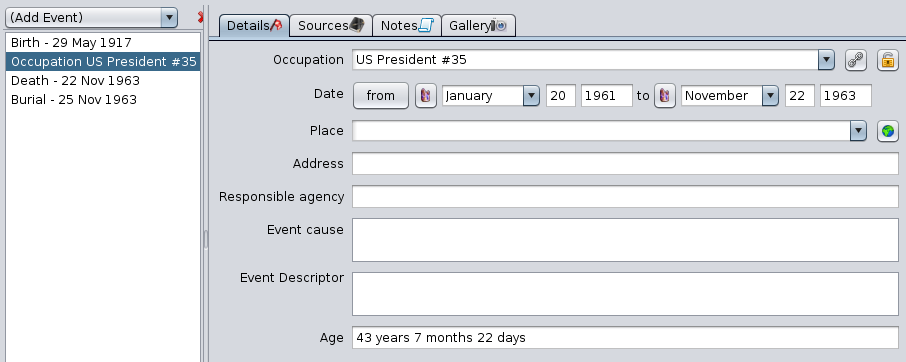
List of events
-
The Add Event drop-down menu offers a choice of events to add to the list underneath
-
The menu lists the most common types of events, both those that can happen only once in a person's life (such as birth or death...) and those that can happen several times (such as occupation, residence or union).
-
If you don't find what you are looking for, choose the Event type. It is generic and allows you to add a category of events not provided for in the menu. Next, specify the nature of the event in the Event drop-down menu located on the Details tab below.
-
-
The list of events displays the different events of the individual, but does not display those of his family, which are in the Family entity.
- Clicking on an event selects it and displays its details on the right.
Details tab
It displays the details of the selected event in the event list.
Sources Tab
Sources can be added to the selected event using the Sources Tab.
This tab is used in a similar manner throughout the Aries Editor. It is described here.
It is in the form of a selection list with the Edit buttons.
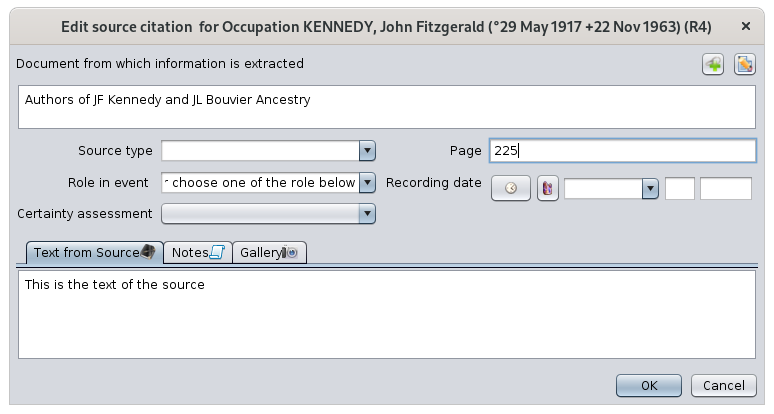
Each line corresponds to a source citation. A source citation usually refers to a shared source and specifies one of the events, its date and the individual's role in the event.
The 5 columns' values are derived from the source citation information window that appears when you click on the edit buttons.
- Source Events: this is the type of event mentioned in the source.
- Source Description: This is the name of the referenced Source entity.
- Page(s): The number of the page in the referenced source.
- Has multimedia object(s): "yes" if a media is attached to the source.
- Has Note(s): "yes" if a note is indicated with to the source.
The two buttons at the top right are the Edit buttons:
The source needs to be attached at the event level, via these 2 buttons. You can attach for example birth and death certificates, after having previously entered and documented them in Source Entities.
The other fields are:
- Role in event: this is a free text but roles such as husband, wife, father, mother, wife, child are proposed.
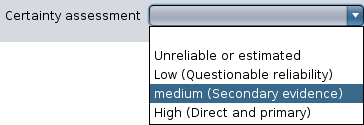
- Certainty assessment: qualifies the quality of the information according to the following predefined criteria:
- Recording date: date when the vent was recorded, and therefore not necessarily the date of the event of the individual we have been talking about since the beginning.
- Text from source: extract of the source text justifying the individual's event.
- If the text of the source has already been transcribed in the Source entity, it is not worthwhile to put it here.
The Notes Tab and Gallery Tab of the window modifying the quotation characterize the source quotation. These tabs are used throughout the Aries Editor like the other Notes and Gallery tabs.
Apart from this difference in how they are attached to source citations, you will find their use in the Notes Tab and Gallery Tab of an individual.
Regarding the photos of the sources (deeds, certificates, etc.), they'd rather be put in the gallery of the source than the gallery of the individual.
Notes Tab
Notes can be added to an individual's event using the Notes Tab.
This tab is used throughout the Aries editor. Apart from this difference in the attachment to events, you will find its use in the Notes Tab of an individual.
Gallery tab
Media can be added to an individual's event using the Gallery Tab.
We will put here, at the level of the event, the photos of the individual at the time of these events.
This tab is similarly used throughout the Aries editor. Apart from this difference in the attachment to events, you will find its use in the Gallery Tab of an individual.
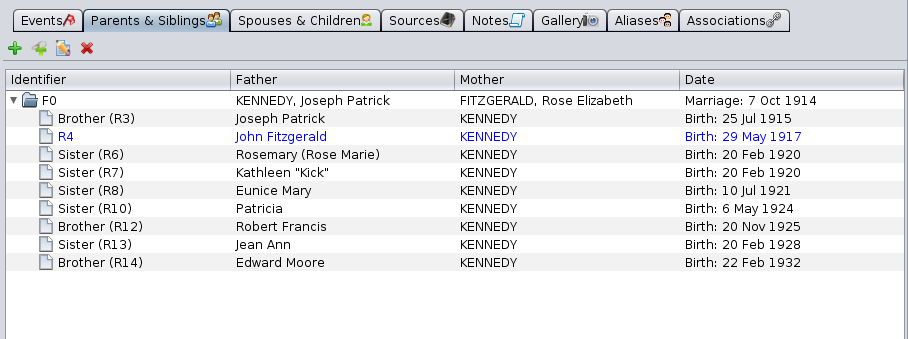
Parents and Siblings tab
This tab manages the parents and siblings of the selected individual.
This tab is in the form of a Tree list with Edit buttons. Their principle is the same as described in the corresponding paragraph, namely :
Spouses and children tab
This tab manages the different spouses of the selected individual as well as the children he or she has had with each of them.
This tab is in the form of a Tree list with Edit buttons. Principles are the same as the tab described above.
Sources Tab
Sources can be added to the individual directly through a Sources Tab.
This tab is used throughout the Aries Editor. Apart from this difference in the attachment to an individual, you will find its use in the Sources Tab of an event.
Notes Tab
This tab is in the form of a selection list with the Edit buttons.
The notes created or attached qualify the selected event.
We can see that there can be two types of notes in the list:
- Notes Entities, therefore shareable with other entities of the genealogy, identified by an ID number.
- Specific (embedded) notes, not shareable, without ID number. See shared information for more details.
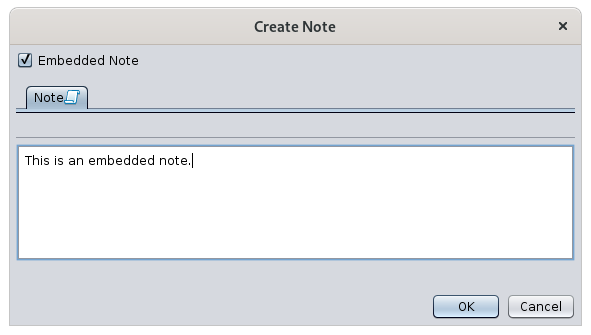
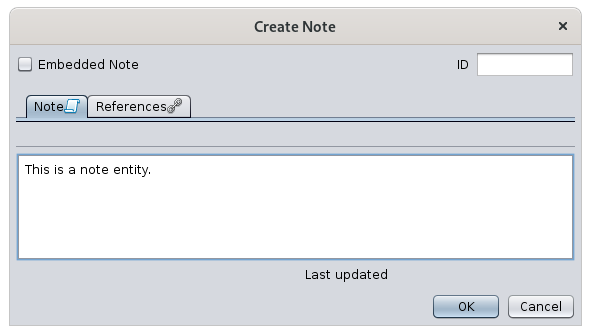
With the create button  it is possible to create a shared Note Entity or a note specific to the event (therefore embedded) as indicated by the check mark in the window that appears.
In this case, if the References tab is visible and if the window shows an identification number for the note, it is a shared note (window below). Otherwise it is a specific note (similar to the window above).
The References tab is described below.
Gallery tab
This tab is in the form of a selection list with the Edit buttons.
The media created or attached qualifies the individual independently of any event.
We will put here, at the level of the individual, and not at the level of the events, the pictures of this individual that will be displayed in the Dynamic tree.
Note here the blue star  which allows you to specify the media to be displayed by default in the family tree, in case there are several media to choose from for the individual.
Aliases Tab
This tab manages the different aliases of the selected individual.
An alias is a relationship between two individuals who are supposedly distinct a priori but who perhaps designate the same person.
-
Their identification numbers are different
-
Their names may or may not be identical, indicating that there is a possibility that these two individuals are in fact one and the same person.
When such a possibility exists, the user can create an alias in order to bring the two individuals together, so that the Aliases tab of the first individual will mention the name of the second, while, conversely, this same tab of the second individual will mention the name of the first.
The presence of an alias expresses a simple hypothesis.
- If later it turns out that the two individuals are two distinct physical persons, the alias must naturally be removed.
- If, on the contrary, it is proven that the two individuals are one and the same natural person, the two records must then be merged.
The Alias tab is presented in the form of a selection list with the Edit buttons.
-
The Add an Alias button
 associates the selected individual with another individual by means of an alias.
 -
The Edit selected alias button
 edits the record of the individual whose alias is selected in the grid below.This command opens a new editor window inviting you to modify the data of the individual.
 -
The Delete selected alias button
 allows you to delete the alias selected in the list below.
-
The deletion does not remove the individual itself but the link between the two individuals.
-
An alias is a reciprocal link between two individuals. Consequently, the deletion of an alias from the first individual, induces the automatic deletion of the same alias from the second individual.
-
Associations Tab
This tab manages associations between the selected individual and other individuals in the genealogical.
An association is a link put between two individuals to indicate that one has been involved in one of the other's events. Example: the godfather of a baptism, the witness of a groom.
An association is a separate link from parental relationships or aliases.
The Association tab is in the form of a selection list with the Edit buttons.
This list of associations contains the events of people in which the edited individual has been involved and the role of the edited individual in these events.
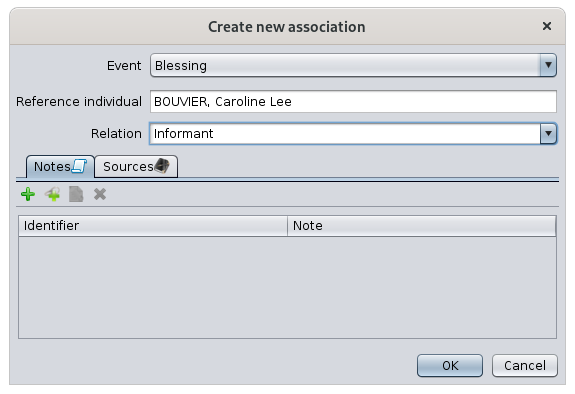
In the example above, if we assume that the individual referenced being edited is called Jacqueline Bouvier, this means that Jacqueline Bouvier was witness of Caroline Lee's blessing (and not that Caroline Lee was informant of Jacqueline Bouvier's blessing).
The associations listed here have therefore been added:
- Either by using the Associate a person to this event button on the Event Details tab of the associated person.
- In the example above, it is therefore by editing the individual Caroline Lee, selecting her blessing event, clicking on the association button, choosing the individual Jacqueline Bouvier and specifying "Informant".
- Either by using the Add Association button in this tab:
As you can see, it's the same window and only the person's name changes. It is therefore the starting point that indicates the meaning of the involvement of an individual in the event of the other.
- Either we start from the event that took place, and we go and look for the individual involved,
- Or we start with the individual involved and point out the event of the other.
Family Entity
When the selected entity is a family, the Aries Editor is divided horizontally into two areas: the description of the couple at the top, and the events and relationships of the family at the bottom, with tabs.
Description of the couple
The upper area is dedicated to the description of the two individuals of the couple currently selected in Ancestris.
ID number
Before the couple, at the top right, the family ID number is displayed.
Privacy padlock
There is also a Padlock button  . It marks the family as confidential if pressed.
The couple
The husband is on the left and the wife on the right. For each of them there is a description, which can be modified with the Modify button:
- Photo
- Last and first names
- Date of birth
- Date of death
Depending on whether this description is occupied by an individual or not, the following buttons appear.
Buttons
- The Add button
 creates an individual, male or female, in order to add him/her to the selected family.
- The Link button
 allows you to select the person you are looking for from the list of individuals already registered in the genealogy.
- The Modify button
 modifies the description of the couple's individual. Aries opens the edit window for an individual, as described above.
- The Delete button
 removes the individual from the family. It does not delete the individual, it simply removes him/her from the family.
Events and relations with the Family
The lower area is dedicated via tabs to the events of the Family entity, and to the relationships of this family with other entities.
The Events, Sources, Notes and Gallery tabs have been described in the Individual section.
Children Tab
This tab manages the children of the selected family, their respective spouses, as well as the children they have had with each of them.
This tab is in the form of a Tree list with the Edit buttons and works as described in the corresponding paragraphs.
Multimedia Entity
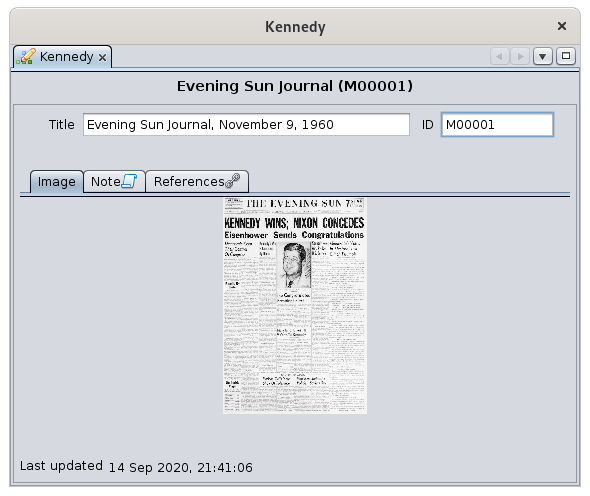
When the selected entity is a multimedia entity, the Aries Editor displays the exact name of this object in the Title field and, below it, the Image, Note and References tabs.
The Note and References tabs are common to all entities. They are described in this page.
Image Tab
It displays the image associated with the currently selected media.
Clicking on the image or on its location modifies it or loads another one.
The Please choose an image window that appears prompts you to choose the file corresponding to the image to be displayed.
Note Entity
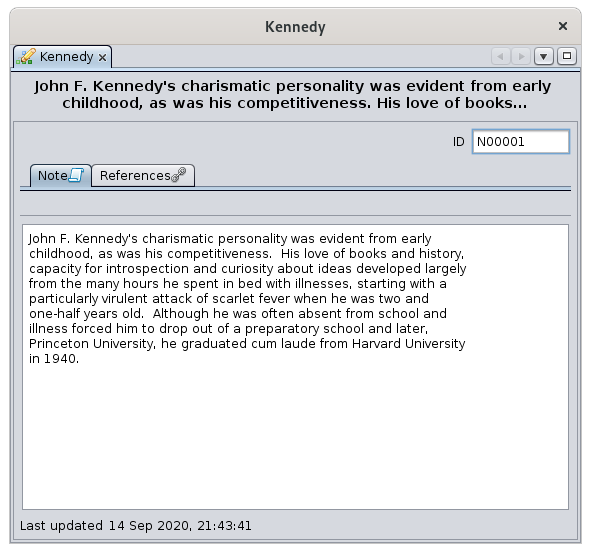
When the selected entity is a Note entity, the Aries editor displays two tabs.
For the purpose of the demonstration, we have created a note entity out of the note property provided in the Kennedy file example.
The References tab is common to all entities. It is described below.
Note text tab
This tab displays the text content of the selected note, for consultation or for modification.
This tab should not be confused with the common Notes tab present in the other entities. Indeed, the latter is used to list and manage the notes associated with these entities, while the Notes tab of the Notes entity displays the value of the note itself.
Source Entity
When the selected entity is a source ensity, the Aries Editor displays four fields describing the source and then a few tabs underneath.
The Notes, References and Gallery tabs are common to all entities. They characterize the source but their use is the same as described in the Individual section.
Description of the Source
- Author: this is the name of the author or creator of the source.
- Title: this is the most important field in the record, since it is the one used by other entities to refer to it.
- Consequently, the user is strongly encouraged to fill in this field in a very precise and sufficiently detailed manner, so that the source can be identified without risk of confusion.
- Abbreviation: this is the abbreviation of a source, or an organization associated with it.
- Agency: is the person or organization responsible for managing that source.
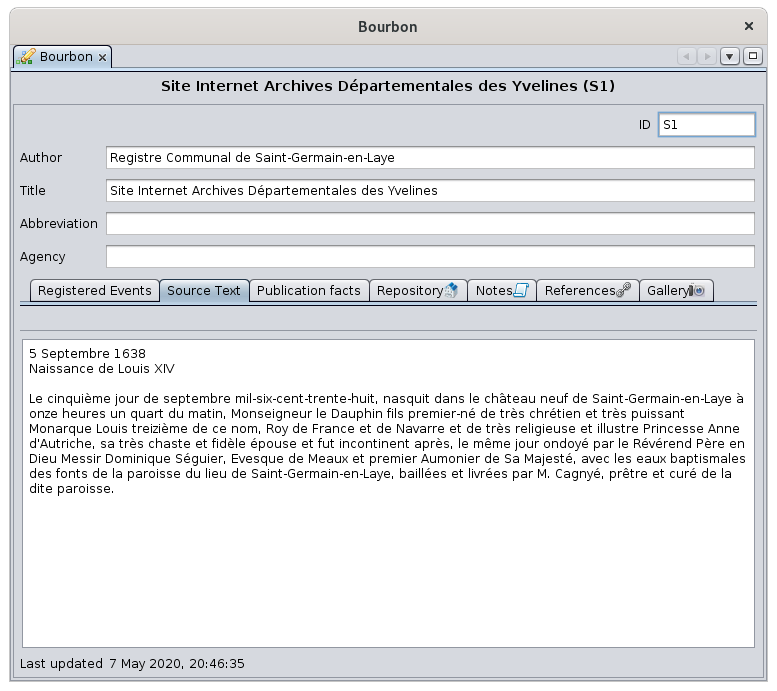
Source Text Tab
This tab lets you enter or modify the source text as it appears on the original document or physical support.
It is displayed above.
It is by far the most useful information of the source.
Repository tab
It indicates the repository or storage location containing the currently selected source. There can only be one repository.
This tab displays the name of the repository, followed by the Edit buttons:
- select the repository with the Add repository button
 or Link existing repository button
- edit

- delete it

Buttons for selecting or modifying the repository
One - and only one - repository must be indicated in order to locate the selected source.
Whether you are creating or modifying a repository, the following window for editing a repository appears. We will see it in the Repository Entity section below.
Once the repository is filled in, two tabs, Call number and Notes, appear underneath.
The Notes tab is common to all entities. It characterizes here the attachment of the source to the repository, but its use is the same as the one described in the individual section.
Call number tab
The Call number tab lists the different references and media types used in the repository to specifically identify the source in that repository. Example: call number referenced Ref 192/3-17801 for parish registers in a regional archive building, in electronic format.
For each item in the source, if there are several, indicate the name of the call number and the type of media (audio, card, electronic, card, film, newspaper, book, magazine, manuscript, photo, tombstone, video, etc.).
Use the Edit buttons to add, edit or delete a call number / media type line item.
Recorded Events tabs
This tab lets you describe the list of different events in the selected source.
For each date and location mentioned in the source, it consists listing the types of events that took place on that date at that location.
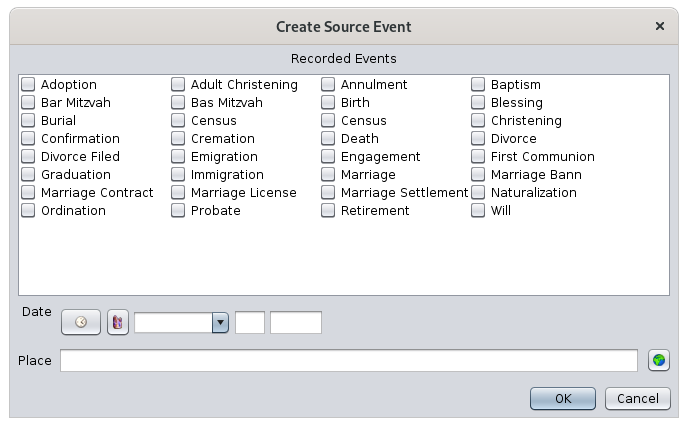
- The Create Source Event button
 creates a new row. It opens a window that allows you to define events for a given place and date.
-
- Check the corresponding events
- Enter the date of these events
- Enter the location of these events
Publication data tab
This tab allows you to indicate the publication details of the source, at least where and when the source was created.
These indications are made by entering a free text.
For published sources, the city of publication, the name of the advertiser, and the year of publication must be indicated.
For unpublished sources, the date and place of the source must be indicated.
Submitter Entity
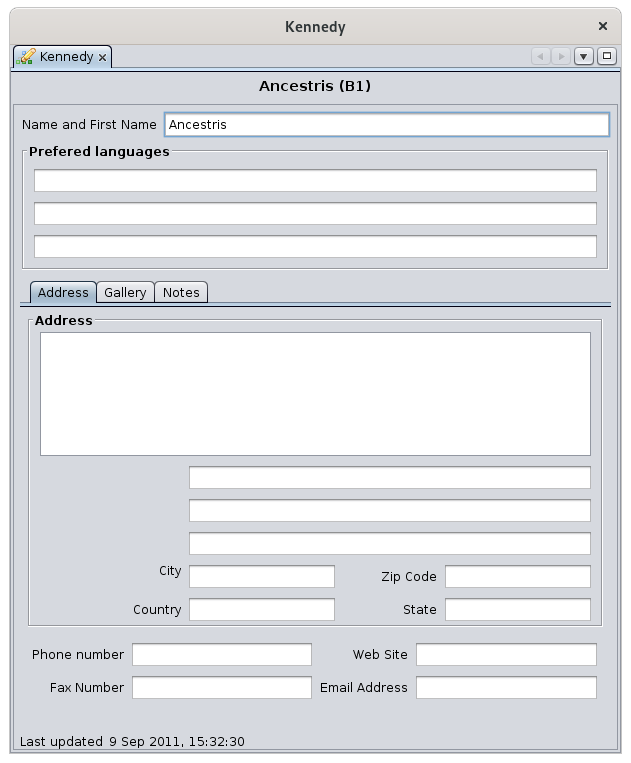
When the selected entity is a submitter entity, the Aries Editor displays the description of the submitter and three tabs underneath.
The first field, Name and First name, indicates the identity of the information submitter.
The three fields below allow you to enter the three preferred languages of this submitter.
The Gallery and Notes tabs are common to all entities. They characterize the Information Submitter here, but their use is the same as described in the Individual section.
The Address tab is used in the same way as the tab for a Repository.
Repository Entity
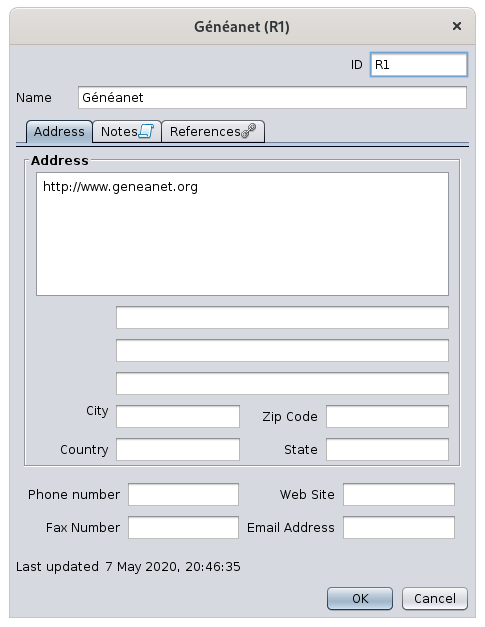
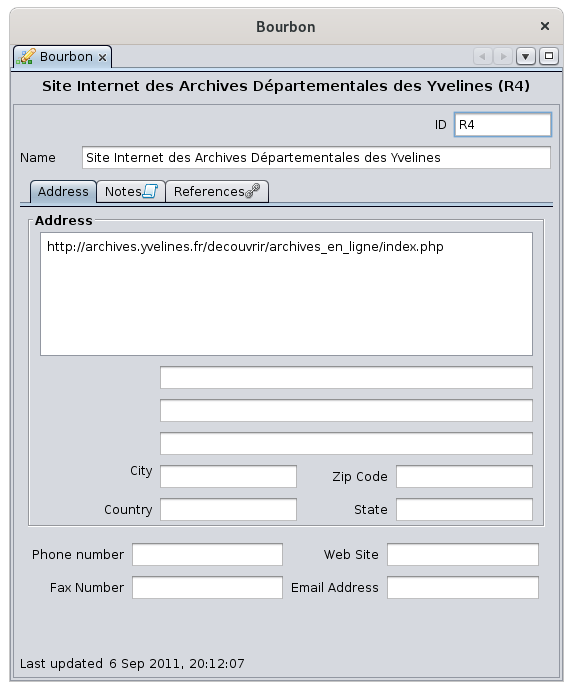
When the selected entity is a repository or storage location entity, the Aries editor displays the following window:
You enter the exact name of this repository in the Name field, and underneath, three tabs Address, Notes and References allow you to complete the description.
The Notes tab is common to all entities. It characterizes the repository here, but its use is the same as that described in the Individual section.
Address tab
It allows you to enter the precise adress of the repository.
It presents the fields of a classic address form (zip code, city, country, etc.). See picture.
You can also enter the Internet details (e-mail address and website) as well as telephone numbers.
References tab
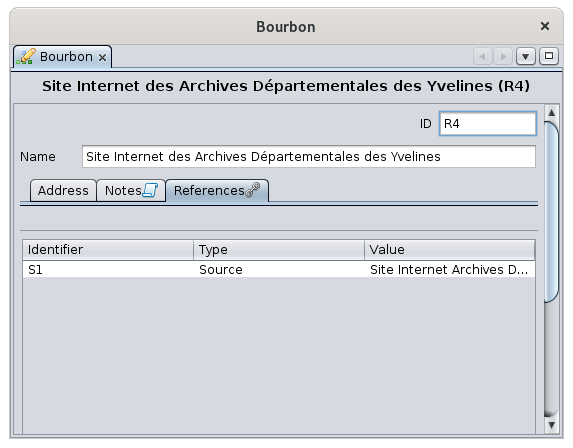
The References panel is in the form of a selection list with three columns.
The table lists all the sources that use this repository.
This References tab is also used in other circumstances, for other entities than for repositories. So more generally, the table is related to a given entity, and it lists all the entities that use that given entity.
-
The Identifier column, which indicates the ID number of the entity using the given entity
-
The Type column, which indicates the category of entity
-
The Value column, which indicates the name of the entity (for example, for an individual entity, it will be the name of the individual).
This tablee is for information only. It cannot be edited or modified.
- Examples :
- In the image above, the repository being edited is used by Sources S1, named Site Internet Achives.
- If a record individual I1, contains in his birth certificate a link to a source S2, this entity S2 will display in its References tab a line corresponding to the individual I1.
When you are about to delete an entity such as a media file, note, source or repository, it is strongly recommended that you first check that the References table of this entity is empty.
When this table is not empty, a deletion will generate a broken link of the entities using it to an entity that no longer exists.
Common editing controls
The following controls are used in the Aries Editor in several places.
This list is for consultation and selection of the displayed data.
Selection: a simple click on one of the lines selects it.
Edition : when the line represents an entity, a double-click opens an aries editor window to edit the entity clicked.
Sorting: column headers can be clicked to sort. A new click reverses the sort direction.
Move column: the columns can be moved with the mouse by clicking and dragging the column header. The column order is memorized from one time to the next.
Tree list
This is a list of individuals ordered in an certain way according to the genealogical hierarchy. It has a flap to unfold or fold the branches.
This type of list is present for the editions of the Individuals (Spouses and Children and Parents and Siblings tabs) and Families (Children tab) entities.
Selection: a single click selects the line.
Edition: when the row represents an entity, a double-click opens an entity edition window.
Sorting: This list is not sorted since it would disorganize the tree structure.
Moving column: Columns can be moved with the mouse by clicking and dragging the column header. The column order is not memorized from one time to the next.
Edit Buttons
The Edit buttons allow you to create, link, modify, delete, prefer data. They are used by most categories of entities.
These buttons work in conjunction with the selection list displayed below them. They appear according to the status of the list.
Add Button 
The Add button adds an item to the selection list by creating it from scratch.
Link Button 
The Link button adds an item to the list without creating it, but linking it to the shared entity already existing in the genealogy.
Edit Button 
The Edit button allows you to modify the indicated item.
Delete Button 
When the item is an entity, the deletion does not delete the entity itself, but the connection only.

