5.1. Cygnus Editor
De eenvoud van het in één oogopslag kunnen manipuleren van individuen en alles wat met hen te maken heeft
Ongeacht hoe informatie achter de schermen wordt opgeslagen.
Alle andere informatie, families, bronnen, notities, enz. zijn uiteindelijk slechts aanvullende informatie met betrekking tot het leven van de persoon in kwestie. Het huwelijk van de persoon moet bijvoorbeeld bij de andere gebeurtenissen worden vermeld. Dit is wat Cygnus doet.
Wist u dat? De naam komt van het grote en heldere sterrenbeeld de Zwaan (Cygnus). Met haar sterren die voornamelijk in een groot kruis zijn gerangschikt, wordt ze weergegeven in de vorm van een vogel die zijn vleugels spreidt.
| Cygnus | Gedcom | Aries | |
| Focus | Het individu en zijn naaste omgeving | De Gedcom standaard |
Volledigheid van |
| Gebruiksgemak | ++ | +++ | + |
| Ergonomie | +++ | + | +++ |
| Dekking van behoeften | 80% | 100% | 100% |
| Transparantie van gegevens | + | +++ | ++ |
| Efficiency | +++ | + | + |
| Bewerkbare Gedcom entities | Veel | Alle | Alle |
| Naleving van de Gedcom standaard | 100% | 100% | 100% |
Beschrijving en Gebruik
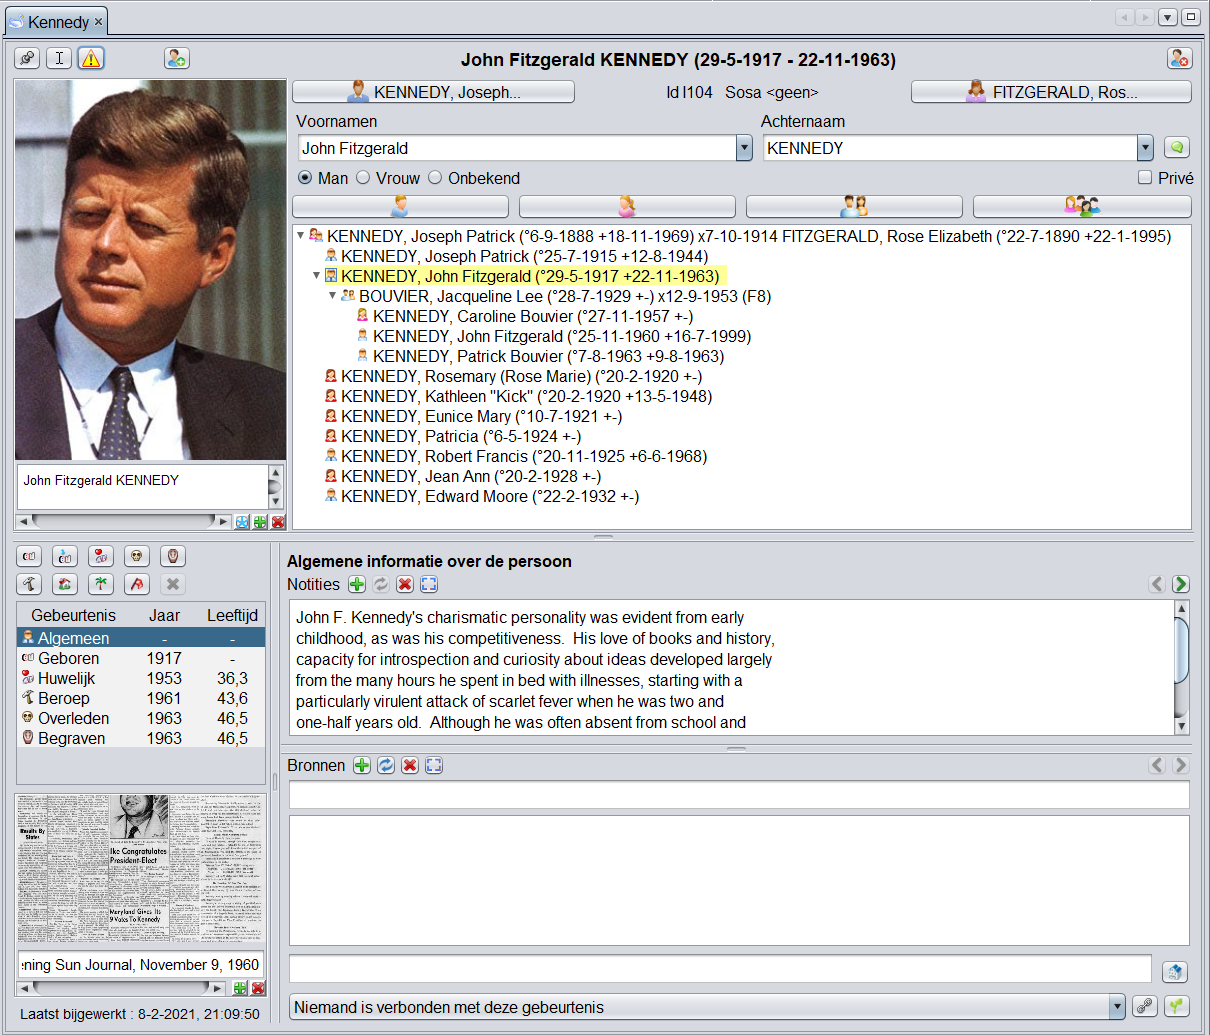
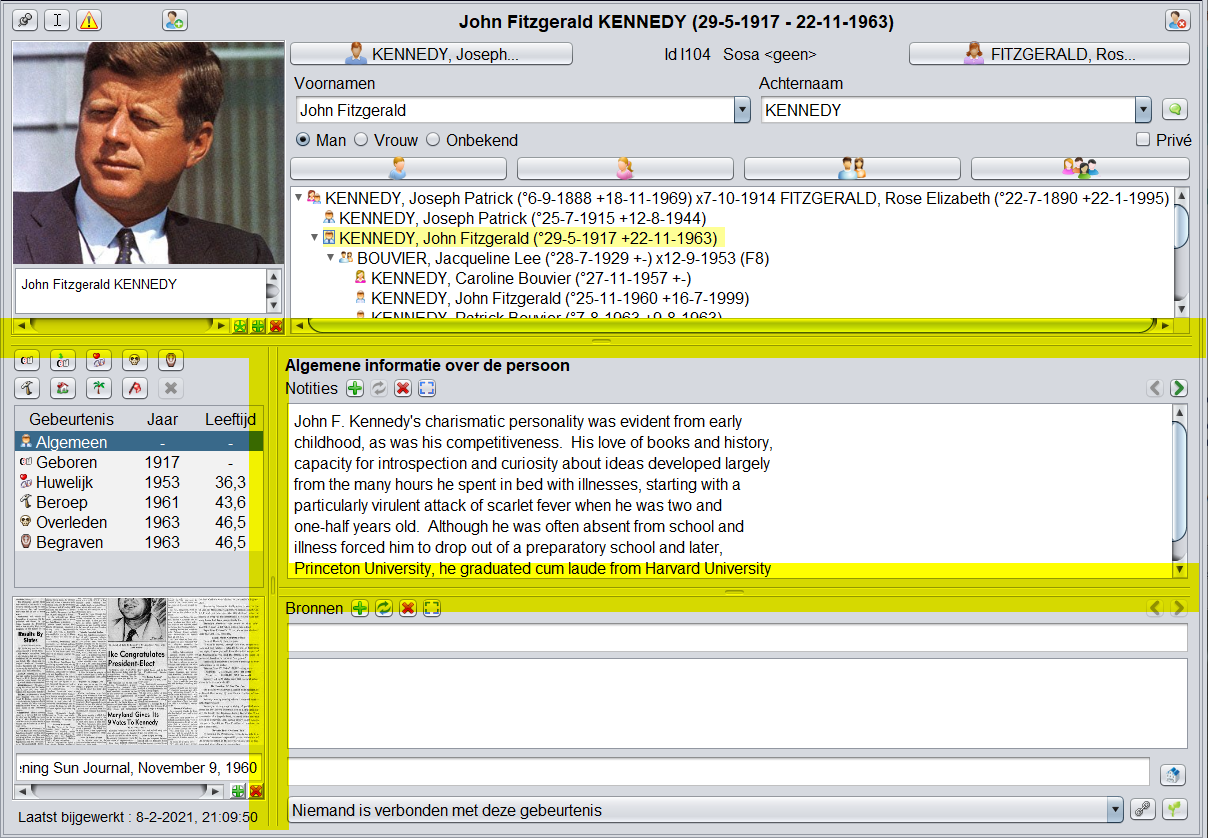
Cygnus toont de persoon in het bovenste deel van het venster met de titelbalk, zijn familiekern daar net onder, en de details van zijn/haar leven in het onderste deel, met de bijbehorende levensgebeurtenissen.
Schermonderdelen van Cygnus
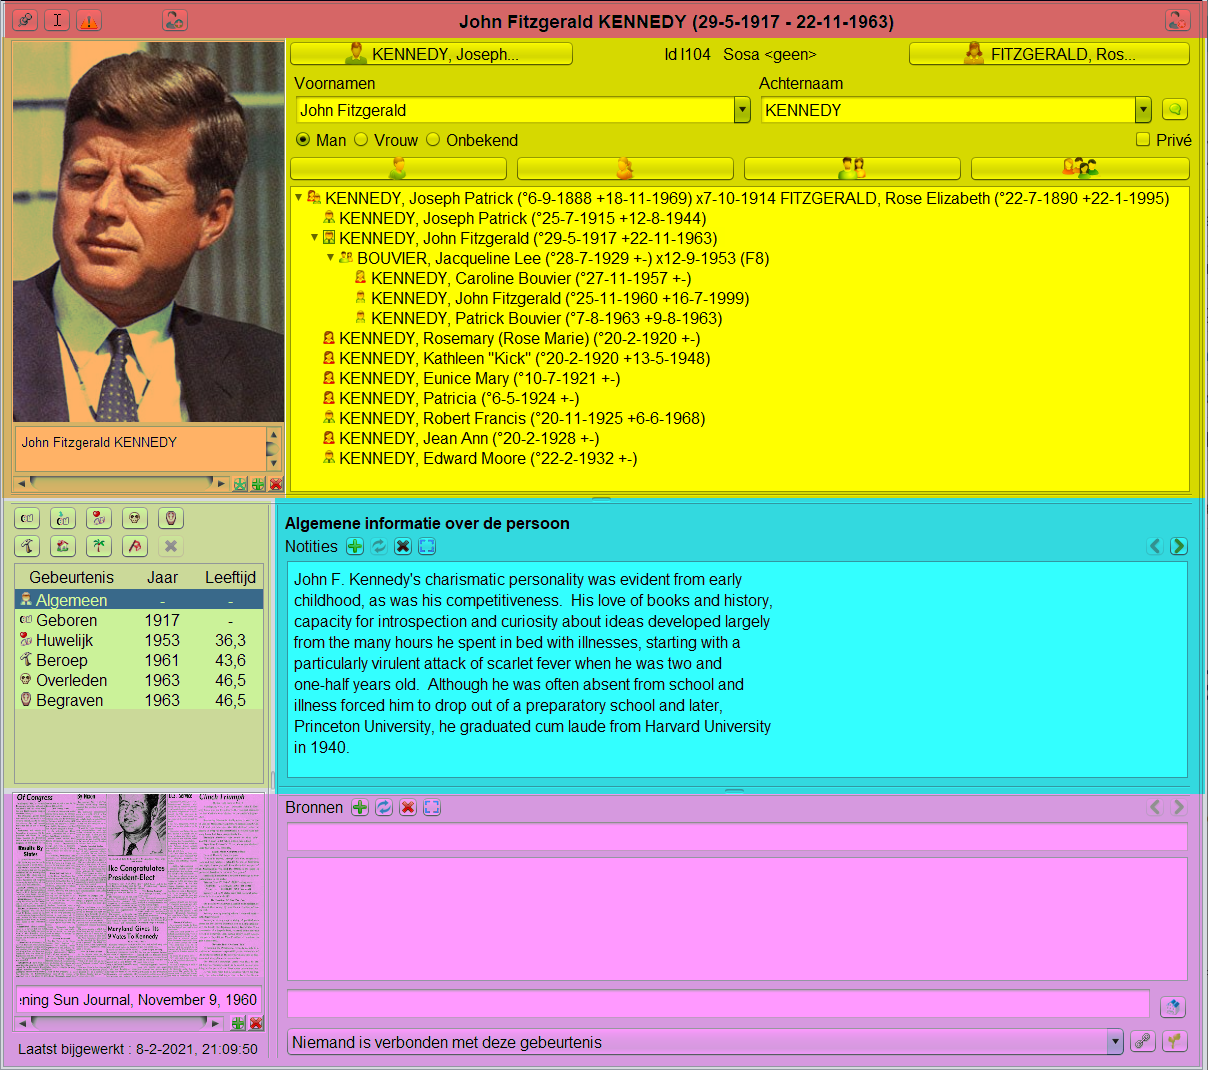
De schermonderdelen van Cygnus zijn:
-
1. Scheidings Balken.
-
2. De Titel balk in rood.
-
3. Het Fotoframe in oranje.
-
4. De Familiekern in geel.
-
5. De Levensgebeurtenissen in groen.
-
6. De Notities in blauw
-
7. De Bronnen (Sources) en Archieven (Repositories) in lila.
De diverse velden en knoppen van Cygnus staan beschreven per schermonderdeel.
Cygnus Editor "Los" gebruiken.
Zoals ook beschreven op de pagina "Werkruimte en Vensters", kunt u de Cygnus Editor "loshaken" van het Ancestris scherm, om meer ruimte te krijgen op uw monitor. U kunt het Cygnus scherm dan bijvoorbeeld zelfs naar een andere monitor schuiven, als u met 2 monitoren werkt. Dit gaat (in het kort) als volgt:
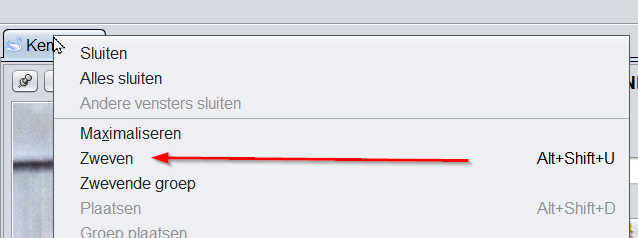
Doe een rechtsklik op de tab van de Cygnus editor. In dit geval bij de Kennedy gedcom. In het contextmenu (Popup menu) dat dan verschijnt kiest u voor "Zweven".
De Gedcom editor "komt dan los" van het gehele Ancestris scherm, en gaat er bovenop liggen:
U kunt dit zien omdat er een aparte "draagbalk" (hier in geel) verschijnt, waarmee u de gedcom editor nu los van het totale Ancestris scherm kunt verschuiven.
Om het scherm weer "vast te maken" op de originele plek binnen het totale Ancestrisscherm, handelt u als volgt:
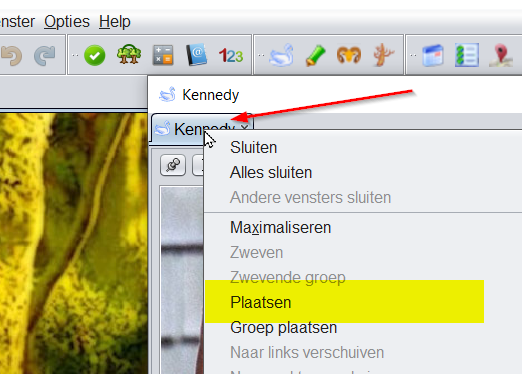
U doet weer een rechtsklik op de tab van het losse scherm (dit kan ook als het zich op een andere monitor bevind!), en uit het popup menu kiest u voor "Plaatsen". Het scherm springt dan vanzelf terug naar de originele positie binnen het totale Ancestris scherm.
1. Scheidings Balken.
De scheidingsbalken kunnen met de muis worden bewogen. Hiermee kunt u de diverse schermonderdelen in grootte aanpassen.
De plaats van de scheidingsbalken wordt per stamboom vastgelegd. Cygnus heeft de volgende 3 scheidingsbalken:
De bovenste horizontale scheidingsbalk, net onder de Familiekern, de tweede horizontale scheidingsbalk, tussen de notities en de bronnen, en de derde scheidingsbalk, verticaal, tussen de gebeurtenislijst en de notities/bronnen.
2. TitelBalk
1. Pin-knop
2. Cursorknop
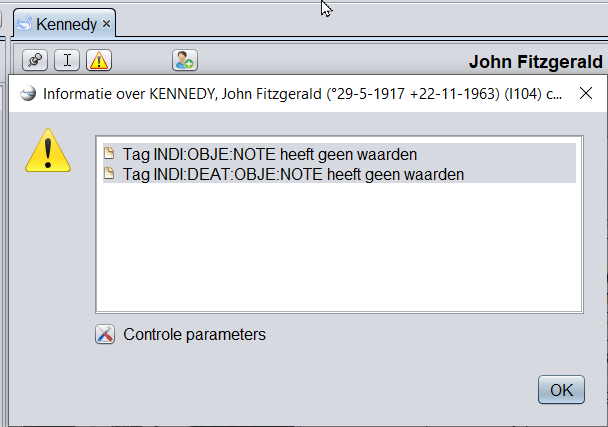
3. Waarschuwingspictogram
4. Knop: Maak een nieuw individu
5. Knop: Verwijder dit individu
 in de knoppenbalk bovenaan de actie terugdraaien.
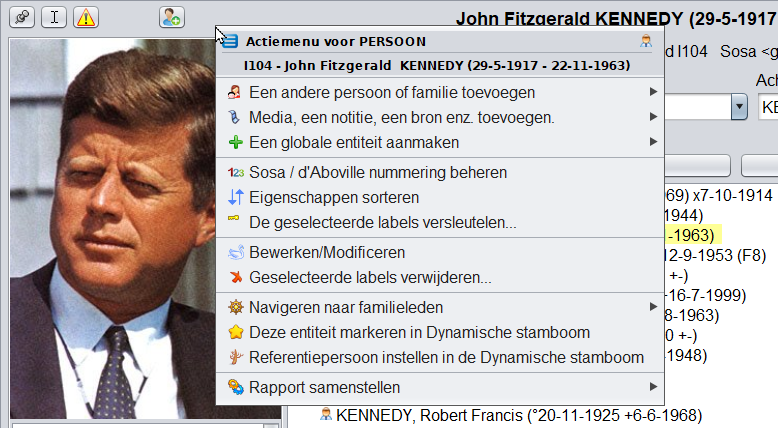
6. Contextmenu - Popupmenu bij rechtsklikken
De volgende context menu regels zijn te zien (alle regels linken naar de uitgebreide uitleg, zie aldaar!):
- Een andere persoon of familie toevoegen. U kunt kiezen welke persoon via extra zijmenu.
- Media, een notitie, een bron enz. toevoegen. U kunt kiezen via extra zijmenu. Let op: Wordt toegevoegd aan deze persoon. (Dus niet globaal)
- Een globale entiteit aanmaken. U kunt kiezen via een extra zijmenu. Let Op, dit worden Globale entities, dus zonder connectie met deze persoon.
- Sosa / d'Arboville nummering beheren.
- Eigenschappen verwisselen. Bijvoorbeeld om een Bron (Source) te vervangen door een andere (te kiezen) bron, via een extra scherm.
- De geselecteerde labels versleutelen. Geselecteerde eigenschappen (Properties) kunnen worden versleuteld.
- Bewerken / Modificeren. Opent de default Editor voor deze Entity of Property. Zie bij Voorkeuren (Preferences).
- Geselecteerde labels verwijderen. Verwijderd 1 of meer geselecteerde labels/eigenschappen, met behulp van een bevestigings scherm.
- Navigeren naar familieleden. Via een dubbel zijmenu kunt u direct naar een familielid gaan.
- Deze entiteit markeren in de Dynamische stamboom. Maakt een Bookmark in de dynamische stamboom zodat u snel naar deze persoon terug kunt gaan.
- Referentiepersoon instellen in de Dynamische stamboom. Ververst de dynamische stamboom met deze persoon in het centrum.
- Rapport samenstellen en uitvoeren. Via meerdere zijmenus kunt u diverse rapporten laten printen.
3. FotoFrame
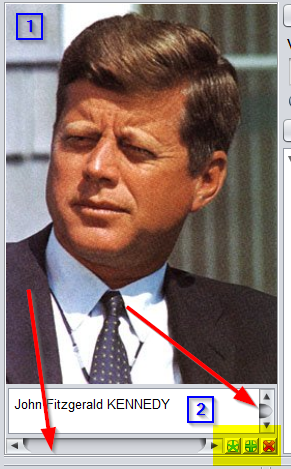
Het FotoFrame bevind zich aan de linkerkant, direct boven de eerste scheidingsbalk:
Dit kader toont alle foto's en andere media (video, soundtrack, enz.) van het individu en van zijn of haar levensgebeurtenissen.
3.1. Foto's.
- Foto's die niet gerelateerd zijn aan een bepaald evenement, worden toegevoegd aan het algemene evenement.
- Geboortefoto's zijn gekoppeld aan het geboortegebeurtenis, etc.
3.2. Beschrijving
3.3. Scrollen door foto's van evenement.
3.4. Knoppen:
Er zijn verschillende acties mogelijk met betrekking tot de weergegeven media.
- Een enkele klik met de linkermuisknop opent een apart scherm, waarmee u de media, wat het ook is, kunt veranderen, zie hierna.
- Door met de rechtermuisknop te klikken, worden de media weergegeven in de mediaviewer van uw computer.
- Als het een foto is, wordt de foto groot weergegeven in uw afbeeldingsviewer.
- Als het een video of een soundtrack is, wordt deze afgespeeld in uw standaard mediaspeler.
- Wanneer de media een foto is
- Slepen en neerzetten met de muis om een andere uitsnede van de totale foto te laten zien. (als de foto groter is dan het kader waarin de foto vertoond wordt)
- Met het muiswiel kun je in- en uitzoomen.
- Met een Ctrl+klik kunt u de bijgesneden foto opslaan.
Andere foto kiezen:
De keuze van een foto wordt gemaakt via het media selectievenster. U klikt eenmaal met de linker muisknop op de foto en dan opent dit scherm:
- In zwart de media waarvan de titel is opgenomen in de media zelf
- In blauw de media waarvan de titel is afgeleid van de entiteit die het gebruikt
- In rood de nog ongebruikte media
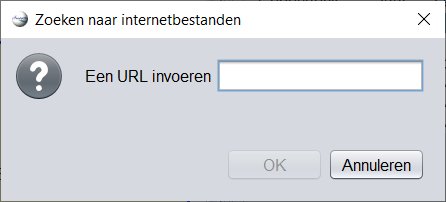
U moet dan een url invoeren van de plek op internet waar het gewenste bestand zich bevind.
De knop "Annuleren", sluit het scherm zonder verdere acties.
4. Familiekern, beschrijving van het individu
De Familiekern bevind zich direct boven de eerste scheidingsbalk:
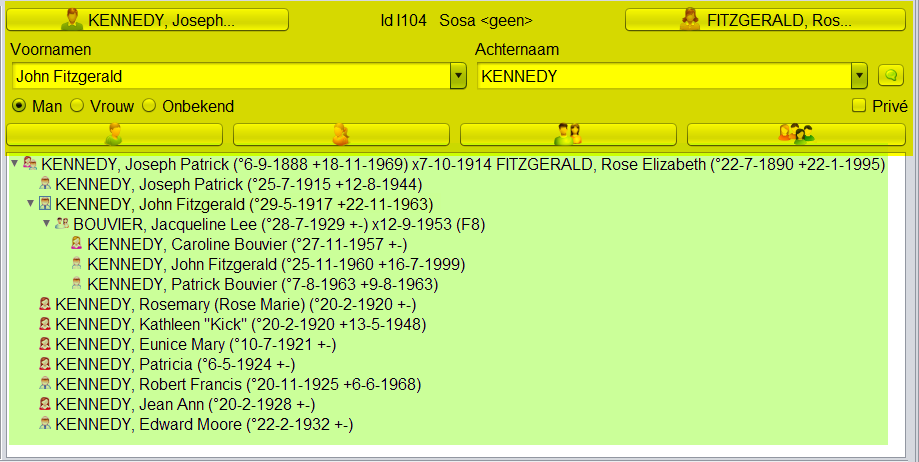
- 4.1. Het bovenste deel (hier in geel), bevat een beschrijving van de persoon, dit is het deel waar u de naam invult, en waar u ook familieleden kunt toevoegen.
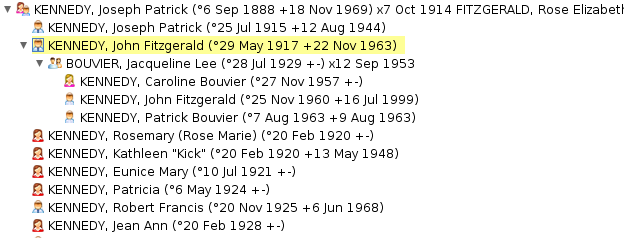
- 4.2. Het onderste, groene deel, is een boomstructuur met de geselecteerde persoon en zijn/haar naaste familieleden.
4.1. Beschrijving van de persoon (Individu)
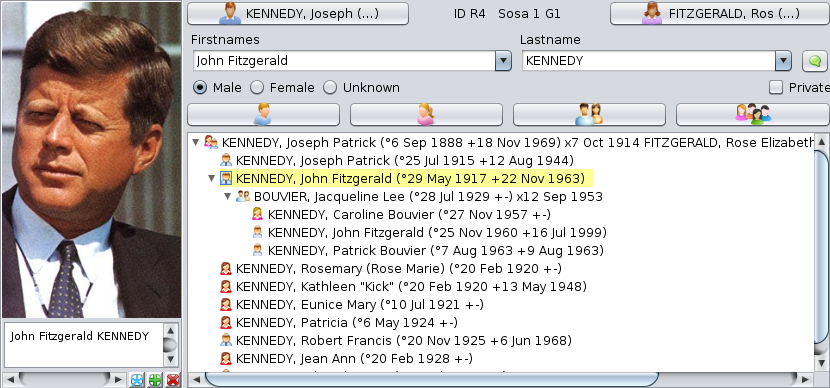
Voor de duidelijkheid hier een beeld met nummers die corresponderen met de betreffende beschrijving:
Algemene opmerkingen:
De knoppen 1, 3, 8, 9, 10, 11, zijn de "Relatie knoppen". Deze knoppen hebben meerdere functies:
- Een klik met de linkermuisknop op de betreffende knop zal niet steeds hetzelfde resultaat hebben, dit is afhankelijk van het feit of de gerelateerde persoon al bestaat of nog niet.
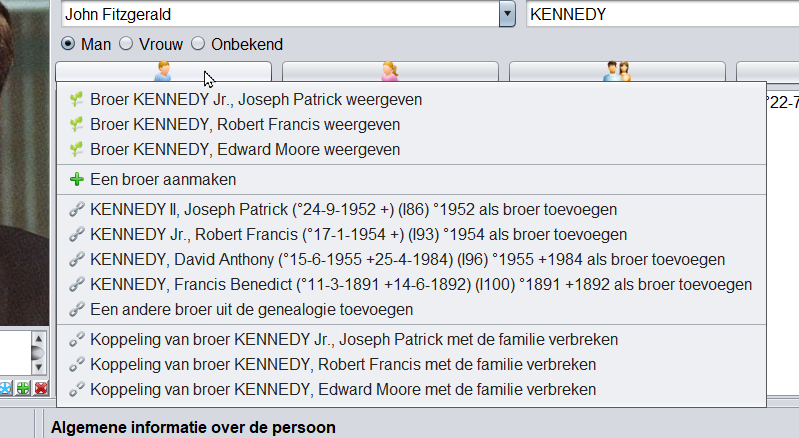
- Als u met de rechtermuisknop op de knop klikt, wordt een menu weergegeven met de keuzes die het meest relevant lijken voor die persoon en voor de bijbehorende relatie.
Deze keuzes zijn gerangschikt in vier categorieën:- Navigatie naar de gerelateerde personen, als er meerdere broers, zussen, echtgenoot of kinderen zijn (1e 3 regels in onderstaand screenshot)
- Aanmaken van het verwante individu in de genealogie en creatie van de relatie met hem/haar ("broer aanmaken" in onderstaand screenshot)
- Aanmaken van de relatie als het individu al bestaat. ( de 5 regels na "broer aanmaken" in onderstaand screenshot)
- Loskoppelen van de relatie als de relatie al bestaat. (de laatste 3 regels)
Een voorbeeld van een dergelijk menu bij klikken met de rechtermuisknop kan zijn:
Dit is een voorbeeld bij een rechtsklik op de knop voor "broer". Bij de andere relatie knoppen is het context-menu, overeenkomstig de relatie knop die geklikt werd.
Knopuitleg:
1. Knop voor Vader.
Met deze knop kunnen de hiervoor beschreven acties voor een vader uitgevoerd worden.
2. Nummering.
Hier staat het IDnummer van de geselecteerde persoon in de Gedcom, en het eventuele SOSA nummer.
3. Knop voor Moeder.
Met deze knop kunnen de hiervoor beschreven acties voor een moeder uitgevoerd worden.
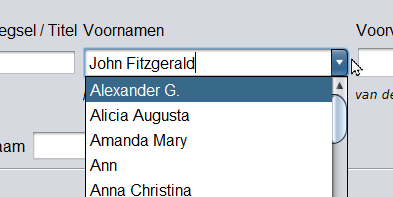
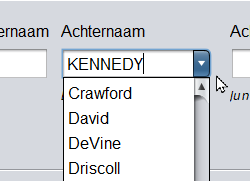
4 en 5 Namen, Voornaam en Achternaam
6. Extra Naaminvoer.
De knop  specificeert de andere elementen van de naam van het individu via een apart scherm dat verschijnt:
Onder de invulvelden staat het naamdeel dat in het veld erboven ingevuld kan worden. De roepnaam is weer een keuzebox. Staat de roepnaam er niet bij dan kunt u deze invullen.
Let op: Een persoon kan meerdere alternatieve voor- of achter-namen hebben. Deze kunnen echter niet via de Cygnus editor ingevoerd worden. Gebruikt u daarvoor de Aries editor of de Gedcom Editor.
7. Prive markering.
Dit selectievakje  markeert deze persoon als privé. Voor meer details over dit onderwerp, zie de Privacy-pagina in de Voorkeuren.
8, 9, 10 en 11 Knoppen voor respectievelijk: Kinderen, Partner, Zus, Broer.
8 = Kinderen, 9 = Partner, 10 = Zus en 11 = Broer.
Met deze knoppen kunnen de hiervoor beschreven acties voor Kinderen, Partner, Zus of Broer, uitgevoerd worden.
12. Radio knoppen voor het geslacht van de persoon.
U kunt kiezen uit "Mannelijk", "Vrouwelijk", of "Onbekend".
4.2. De Familie "boom".
5. Levensgebeurtenissen
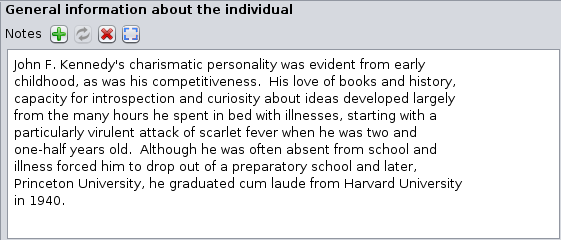
6. Notities
7. Bronnen (Sources) en Archieven (Repositories)
====================================================================================
Family nucleus
Above the separation bar is the individual's family nucleus.
Description of the individual
This panel section is used to edit the name and gender of the individual.
The Firstname drop-down menu selects a firstname among those already used in the genealogy.The Lastname drop-down menu selects a lastname from those already used in the genealogy.
The checkbox 
marks this individual as private. For more details on this subject, see the Privacy page in the Preferences.
Above the first and last names is indicated the identification number of the individual and the Sosa number when it is generated.
Around this description are arranged 6 relationships buttons for the parents of the individual, brothers and sisters, spouse and children.
These Relationship buttons have multiple functions.
Aleft click on the buttonwill not have the same result depending on whether the related individual already exists or not yet.If the individual already exists, it is selected and the editor will navigate to this individual and display it.If the individual does not exist, it is created.
Aright-click on the buttondisplays a menu with the choices that seem most relevant to that individual and for the corresponding relationship. These choices are arranged in four categories:Navigation to the related individuals, if there are several brothers, sisters, spouse or childrenCreation of the related individualin the genealogy and creation of the relationship with him/herCreation of the relationshipif the individual already existsDetachment of the relationshipif the relationship already exists
Family Tree
This tree structure presents:
in yellow, theselected individual,his/her parents at the upper levelhis/her siblings at the same level in the chronological order of birthshis/her spouse(s) are listed belowand the corresponding children at the lower level
A double-click on any of the individuals selects it.
Life events
This part of the Cygnus editor details the events of an individual's life.
A vertical separation bar delimits the list of events and the media of the associated sources on the left, and the details of these events on the right. It can be moved and its position is memorized from one time to another for each genealogy.
Events
List of events
We distinguish the General event from the others.
- It is a particular event that allows you not to define a particular event precisely.
- It can associate notes and sources to the individual to characterize the whole of his life, without attaching them to a particular moment of life.
All other events are those that the Gedcom standard allows to define. They are numerous (birth, marriage, profession, residence, death, burial, etc.).
All events are listed in a single lifeline, including unions. You can therefore create a baptism event and a wedding event in the same place and in the same way.
Indeed, unlike the other two editors, Cygnus being focused on the individual, there is no distinction to edit all events, whether they are the individual entity events or the family entity events.
The list displays the default events in chronological order, using event logic when a date is not indicated (i.e. a death occurs after a birth).
The list can be sorted by clicking on the column header, in ascending order with one click, or descending order with a second click.
The width of the columns can be adjusted with the mouse.
Selecting an event displays its details on the right hand side, and its associated photos in the photo frame at the top of the editor, and source documents in the source media frame at the bottom left of the editor.
Buttons for creating or selecting events
A set of 10 buttons manage the most common events more efficiently.
- The first 8 buttons from the top are the most common events used in genealogy.
- The first is that of birth. A click on this button creates the birth event if it does not already exist, and selects the birth event otherwise
- The one underneath is that of the occupation. As there can be several occupations for the same individual, a click on the button displays a drop-down menu asking if you want to create an occupation or offers you to select one of the existing occupations. When there are none, it creates it.
- The penultimate button is a button that displays all other possible events in a list. It is up to you to choose the one you want to create
- The last button deletes the selected event. The General event cannot be deleted
Details of an event
For each selected event, the right hand part of the panel allows you to enter the same information, except for the General event which does not need some of it. All this information is aligned to the Gedcom standard tags.
Description of the event
It is a dropdown list of already defined descriptions, in case the description can be reused.
Date and time
See the dates page for more details.
Below the date is displayed the day of the week if it is dated, and the age of the person at the time of the event except for the day of birth.
Place
Notes
It is possible to enter one or more notes, specific or shared. See the difference in the Shared Information page.
Cygnus can recognize, display and edit both shared and specific notes, but will only create shared notes.
The mouse wheel is used to scroll through the note text if it requires more lines than there is room to display. The right scrollbar allows you to do the same. It appears when all the lines cannot be displayed.
By pressing the <Ctrl> key and using the mouse wheel, you can scroll through the notes. The other scrollbar on the right allows you to do the same thing.
Hovering the right scrollbar with the mouse displays the rank of the displayed note in relation to the total number of notes attached to the event.
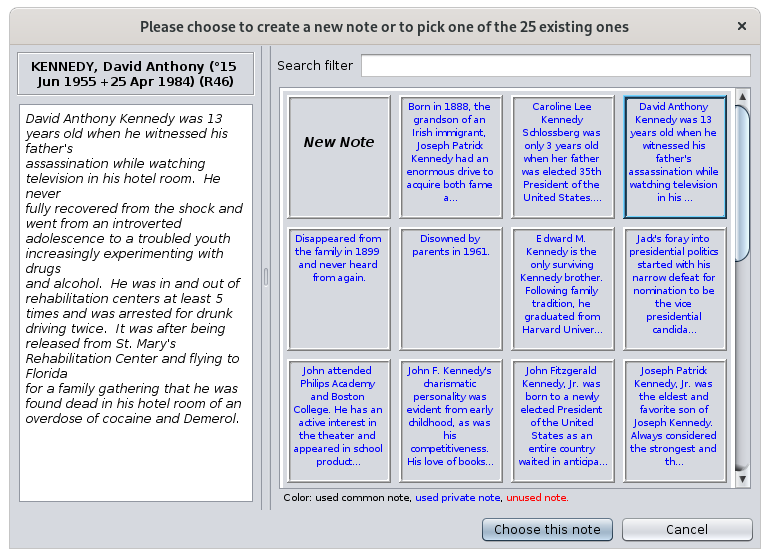
The creation and change of a note opens the note selection window:
The right part lists all the known notes of the genealogy. They are of three origins.
- In black, the notes used in the genealogy and contained in Note Entities (shared notes)
- In blue, the notes used in the genealogy and contained in Notes specific to certain entities.
- In red, unused notes.
Sources
It is possible to enter one or more sources, specific or shared. See the difference in the Shared Information page.
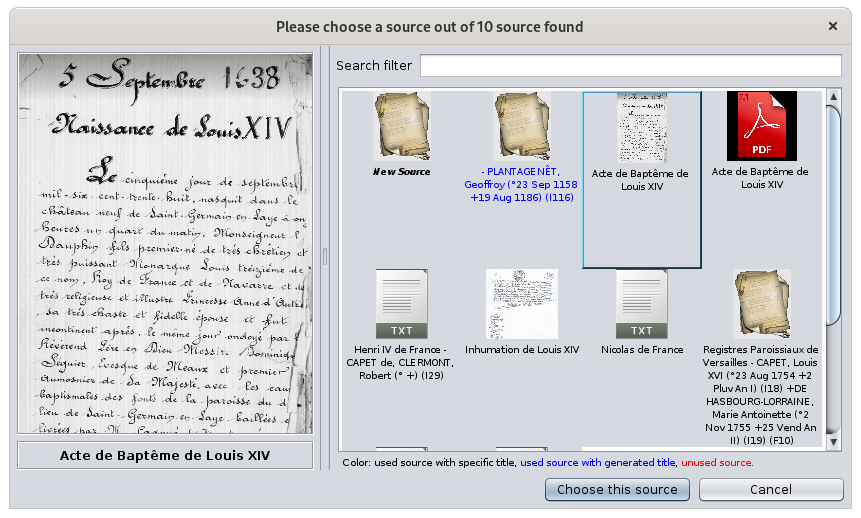
For example, here is a source of the baptismal certificate of Louis XIV.
The information for the sources is as follows:
- The name of the source
- A text that is generally used to present a transcription of the source text. Indeed, it is better to make the effort once to decipher a handwritten text that is difficult to read, rather than to do it every time you need it.
- The name of the repository where the source can be found
- Media associated with the same source (on the left)
Sources work on the same principle as notes in terms of :
The photo frame of the source of an event works on the same principle as the photo frame of the individual.
Clicking on the media displays the source selection window:
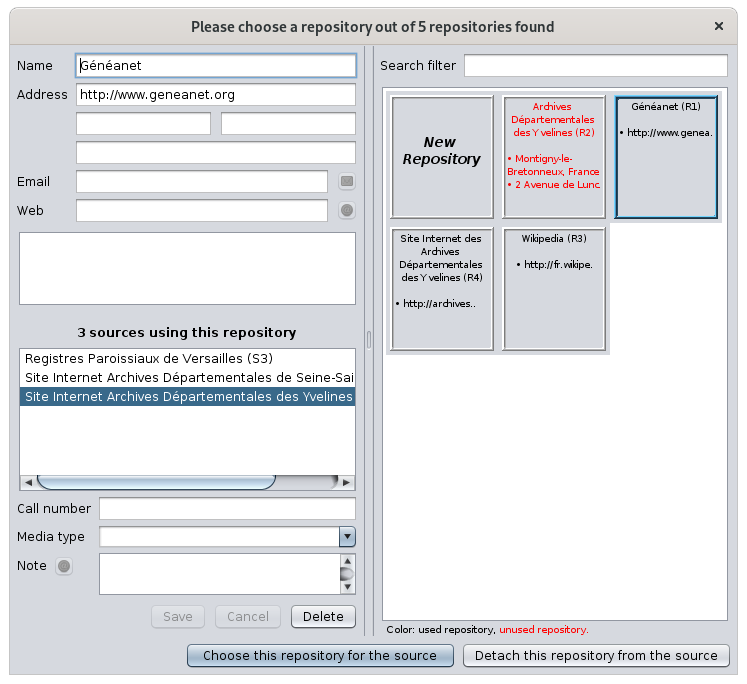
The Repository field allows you to choose the repository from which the source is taken with the button on the right.  .
.
This window contains all the information of the repositories already created or that you would like to create when editing the current individual.
Relations
This is where we enter other individuals in relation to an event, such as witnesses at a wedding or the godparents of a baptized person.
The relationship field is actually a drop-down menu that lists all the relationships currently entered for the selected event.
It is possible to select one of them and then click on the button  to navigate to the corresponding individual.
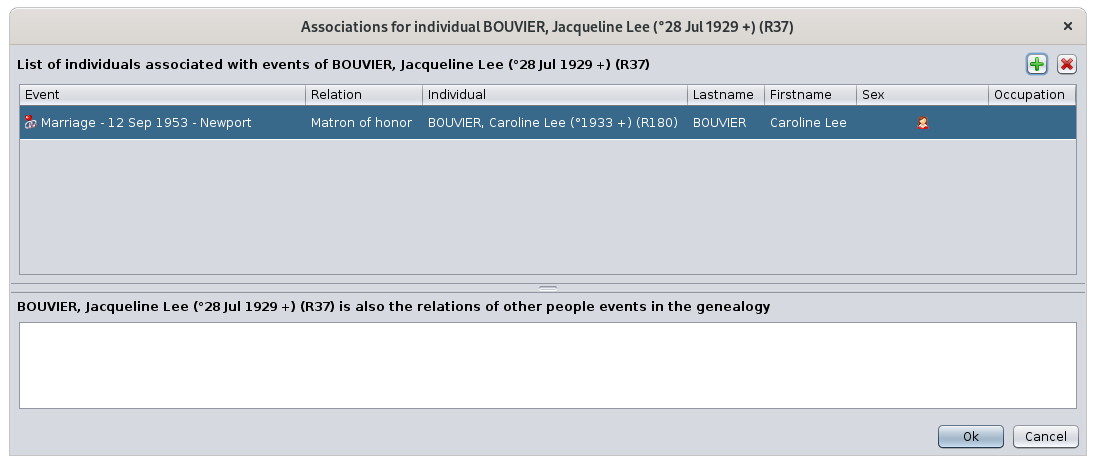
The button  allows you to manage individuals in relation to the selected event. Clicking on this button brings up the following window:
In the upper part, this window allows you to add, modify or delete relationships.
For each relationship in the list of relationships that appears, it is possible to define the event to which you wish to associate a relationship, the type of relationship (witness, declarer, etc.), the name of the relationship, its sex and occupation.
In the lower part, it displays, for information only, the events of other individuals for which the selected individual is himself or herself associated.
Time stamp of last modification of the entity
The last information visible in the Cygnus Editor is the last modification date of the information.
This date is updated automatically at each update.
Synchronization with other views
As we have seen, in Ancestris, at every moment an entity is selected.
When this entity is an individual, this one appears as the main person in the Cygnus editor.
When this entity is not an individual (a family, a note, etc.), the Cygnus Editor displays the individual related to this entity. You can then edit the selected entity as per the various screens described in this page.
The selected entity will be related to the event automatically selected in Cygnus.
Example: if a family is selected in the Entities table, Cygnus will display the husband, select the spouse in the family tree in Cygnus, and select the marriage event.

