Step-by-step installation on MacOS
This page documents a detailed step-by-step installation of Ancestris on a MacOS system.
We will show an example that occurred on January 2021, of the installation of Ancestris version 11 on MacOS Catalina.
These steps include the following:
- Installation of Java which was not already installed on Catalina
- Download of Ancestris version 11 from the secure Ancestris web site
- Confirmation of the security check to allow Ancestris to run even though it comes from an unidentified developer
- Launch of Ancestris
- Creation of a Dock icon of Ancestris
Please note that the screenshots shown here might look different from those of the current Ancestris web site or the current Ancestris software version.
Special note for users of MacOS Big Sur: please follow the steps below and then, please do read this specific section at the bottom of this page.
Installation of Java
1. From the MacOS desktop...
2. Open a terminal and type "java -version"
If Java is not installed, a popup window will suggest to install it. Click "More Info...".
If java is installed, you can directly go to screen 11.

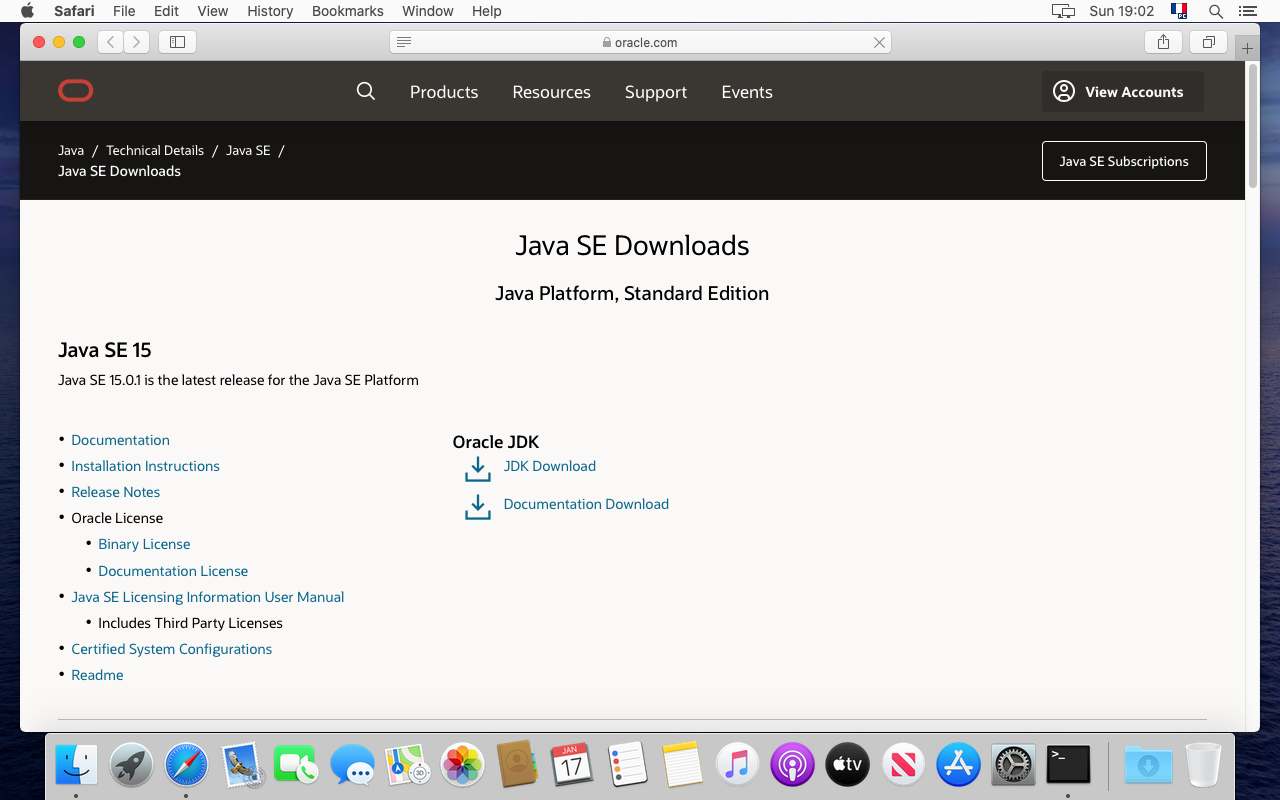
3. You are on the Java web site. Click on "JDK Download"
We can see from the web site that Java 15 was suggested. Let us install that version even though we recommend to use version 8 or 11 which are long terme versions (see required configuration).
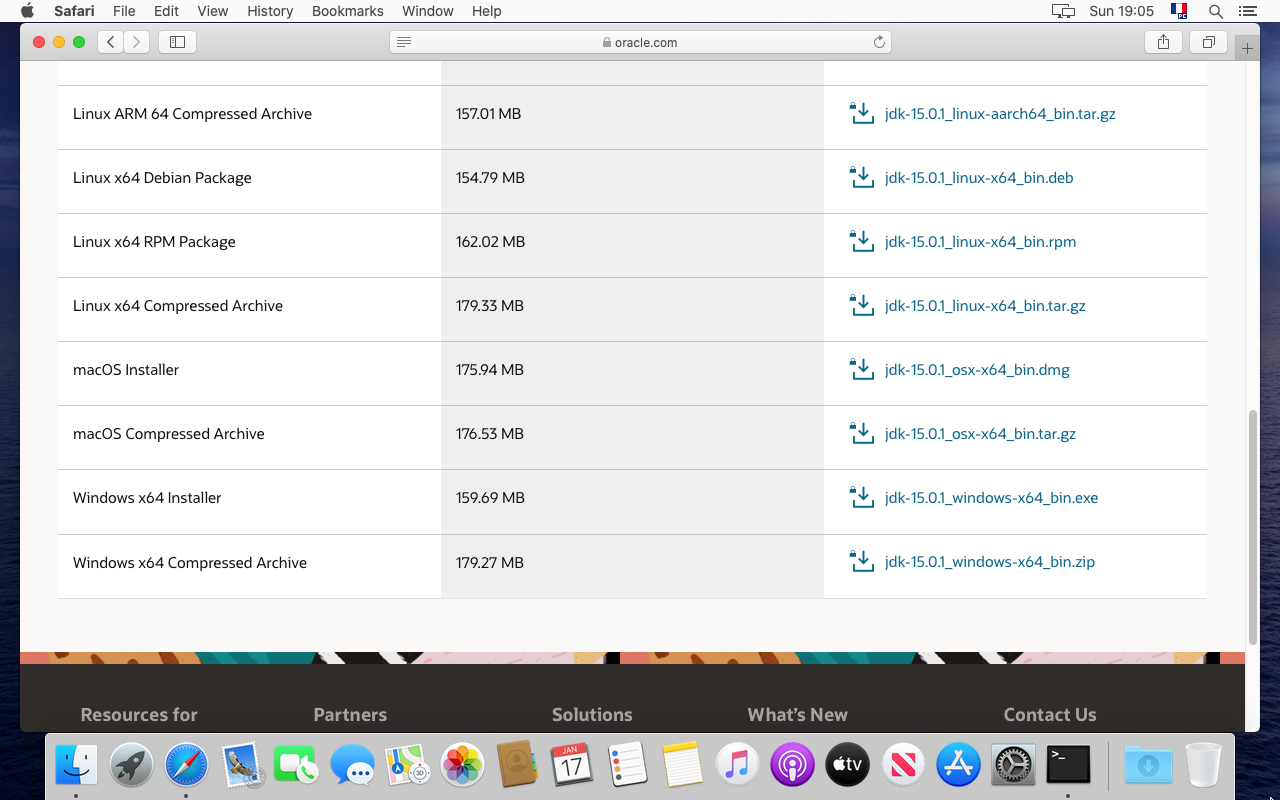
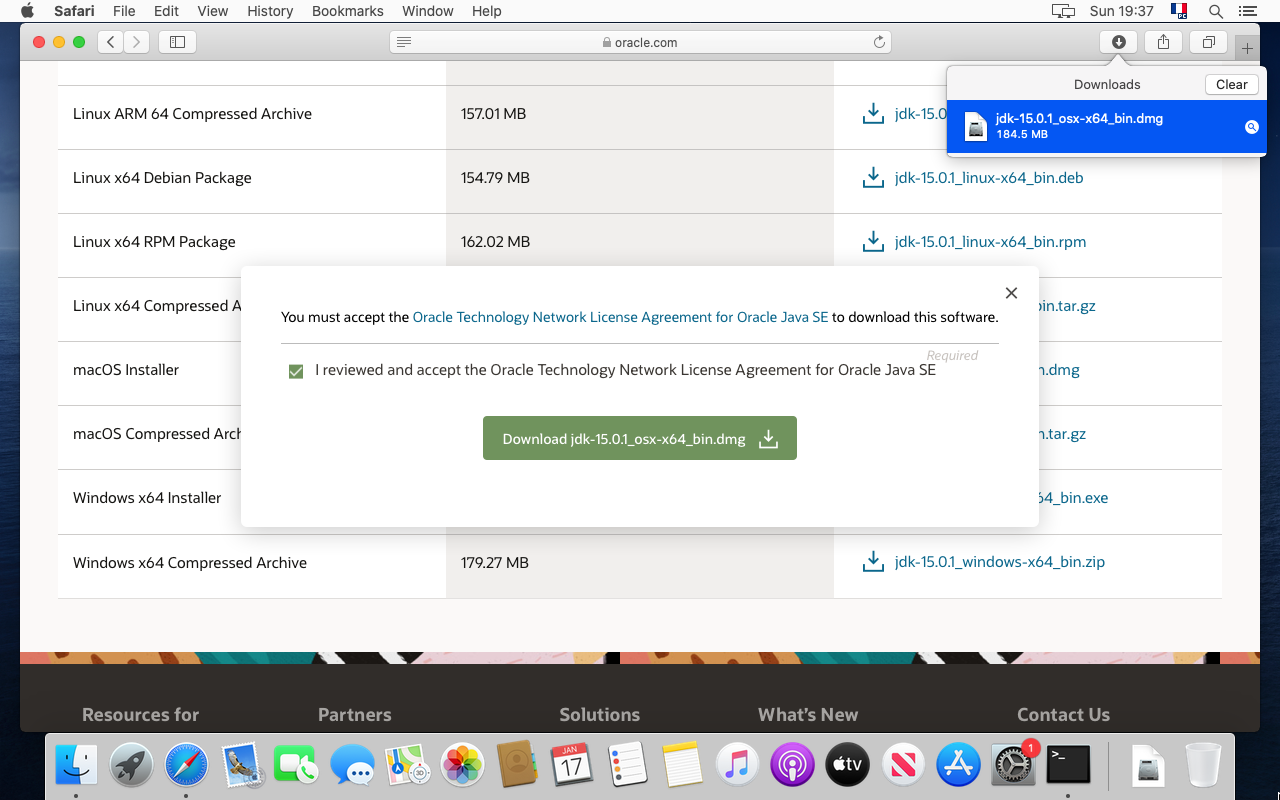
4. Go down to the "macOS Installer" line and click on the ".dmg' file
5. Click on the green download button.

6. Downloading starts... Wait.

7. Downloading is completed. Open the Downloads folder to check out the file.
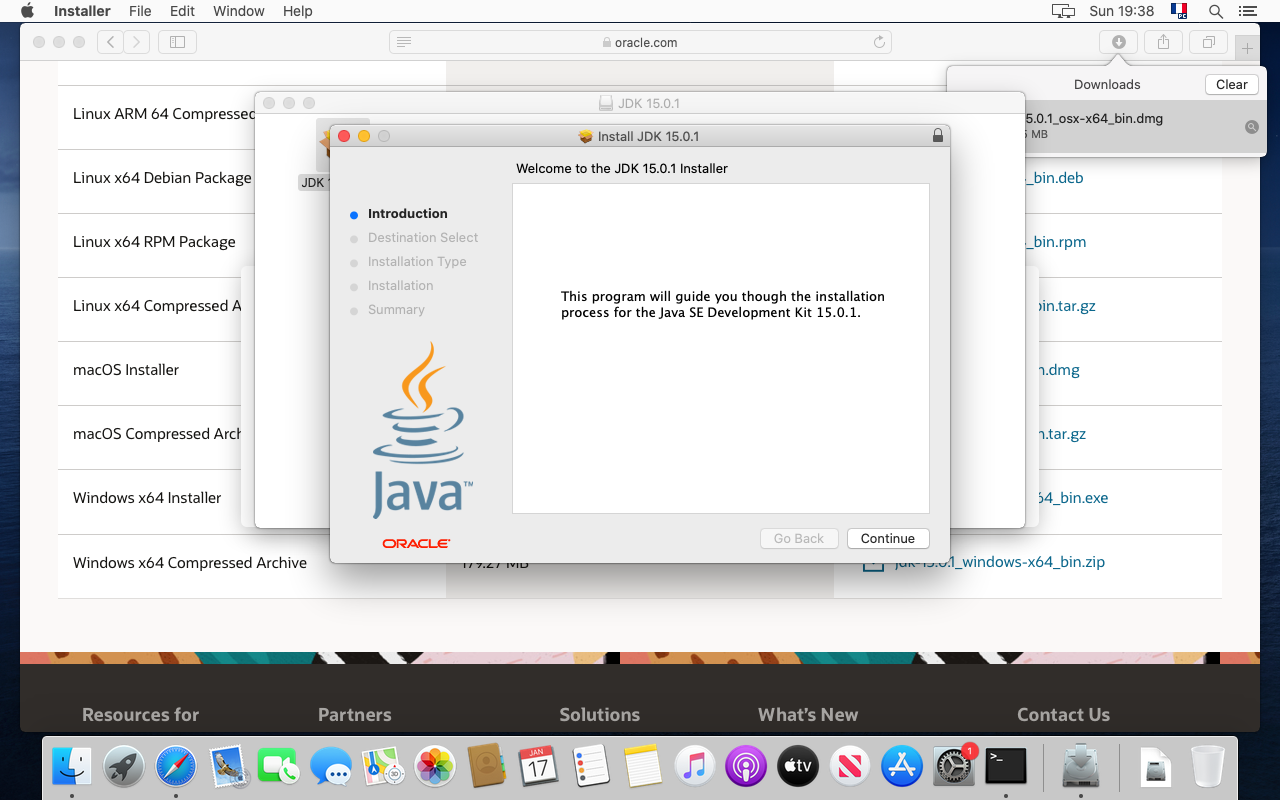
8. Double click on the JDK package.

9. The JDK installer starts. Just follow the steps.
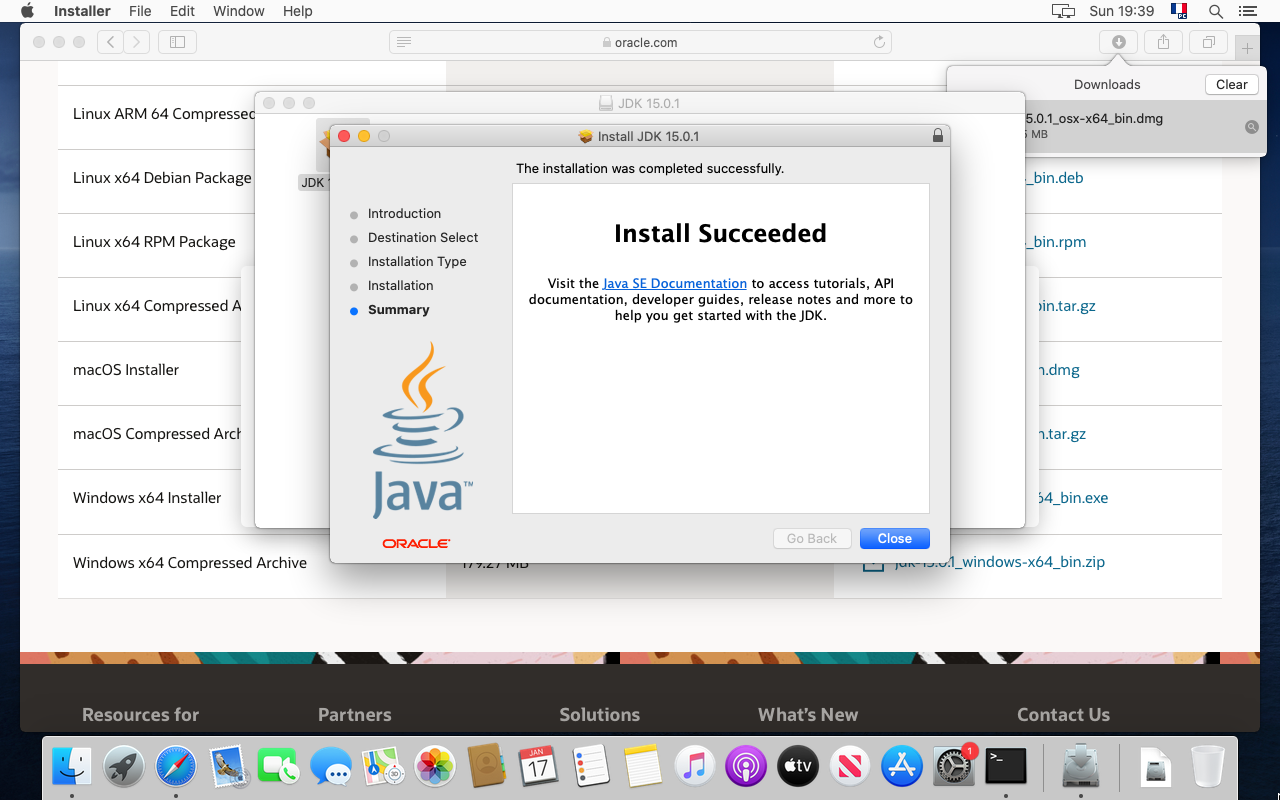
10. The installation should be successful. Close the window.
11. Then type again "java -version" in the terminal.
The following result should appear, indicating Java 15 is installed in our example.

Your are now done with the Java installation. Let's install Ancestris now.
Installation of Ancestris
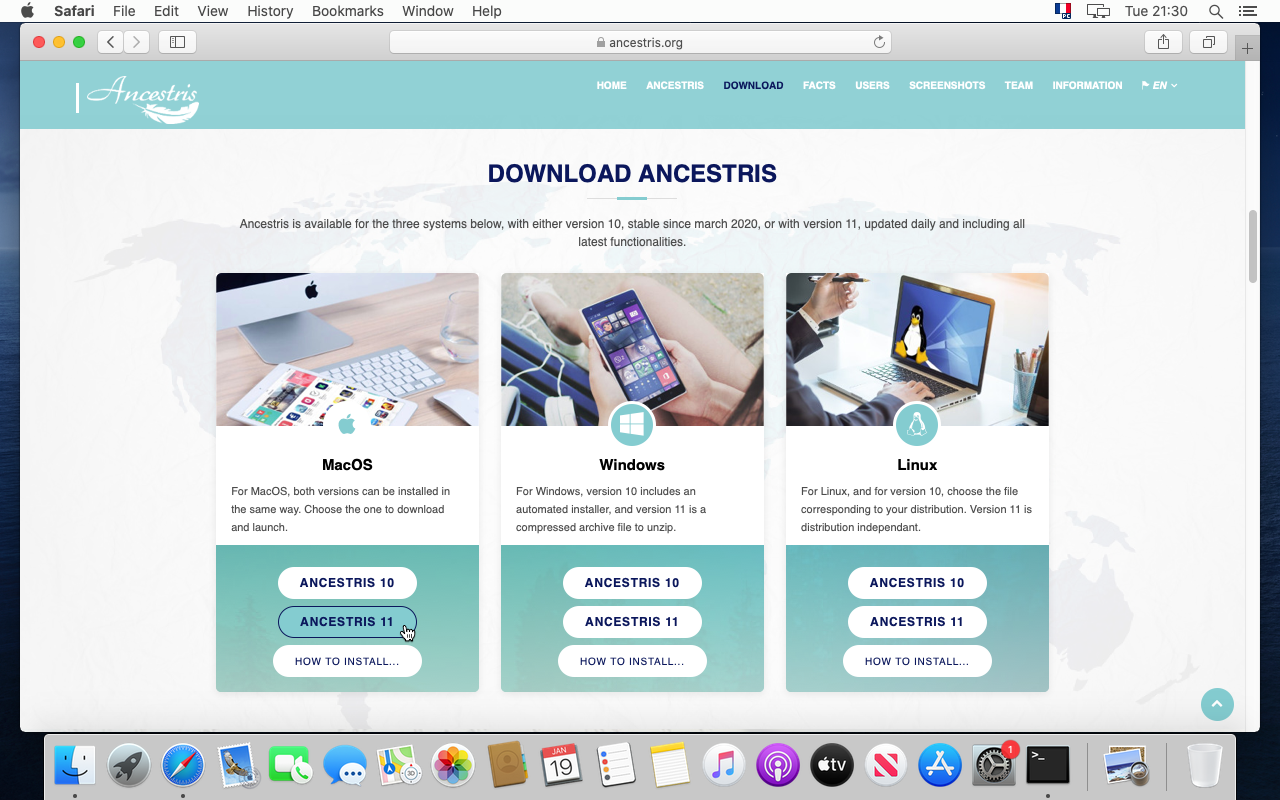
12. Go to the https://www.ancestris.org web site

13. In the menu, click on DOWNLOAD. This will scroll down to the download section.

14. Click on the Ancestris 11 button of the MacOS panel.
15. Allow downloads from the Ancestris web site if this is the first time you do it.

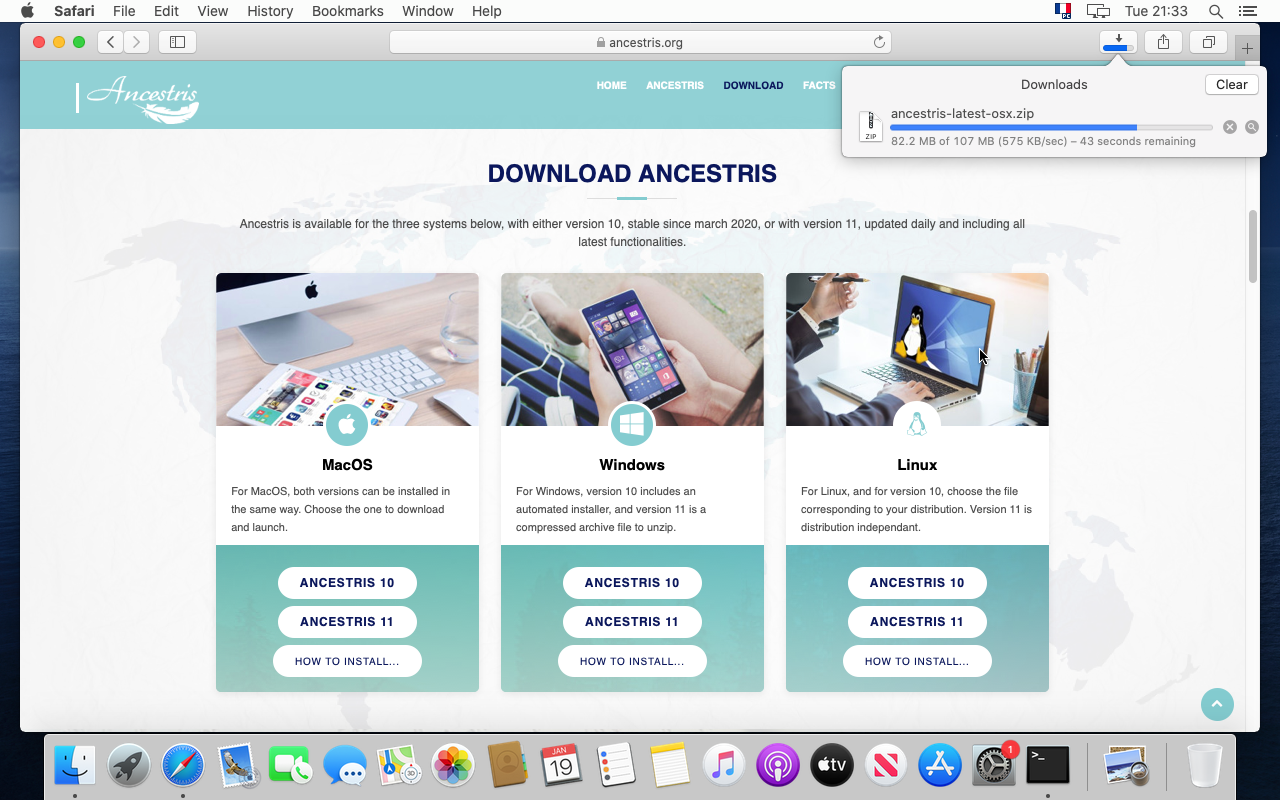
16. Downloading starts. It will take a couple of minutes.
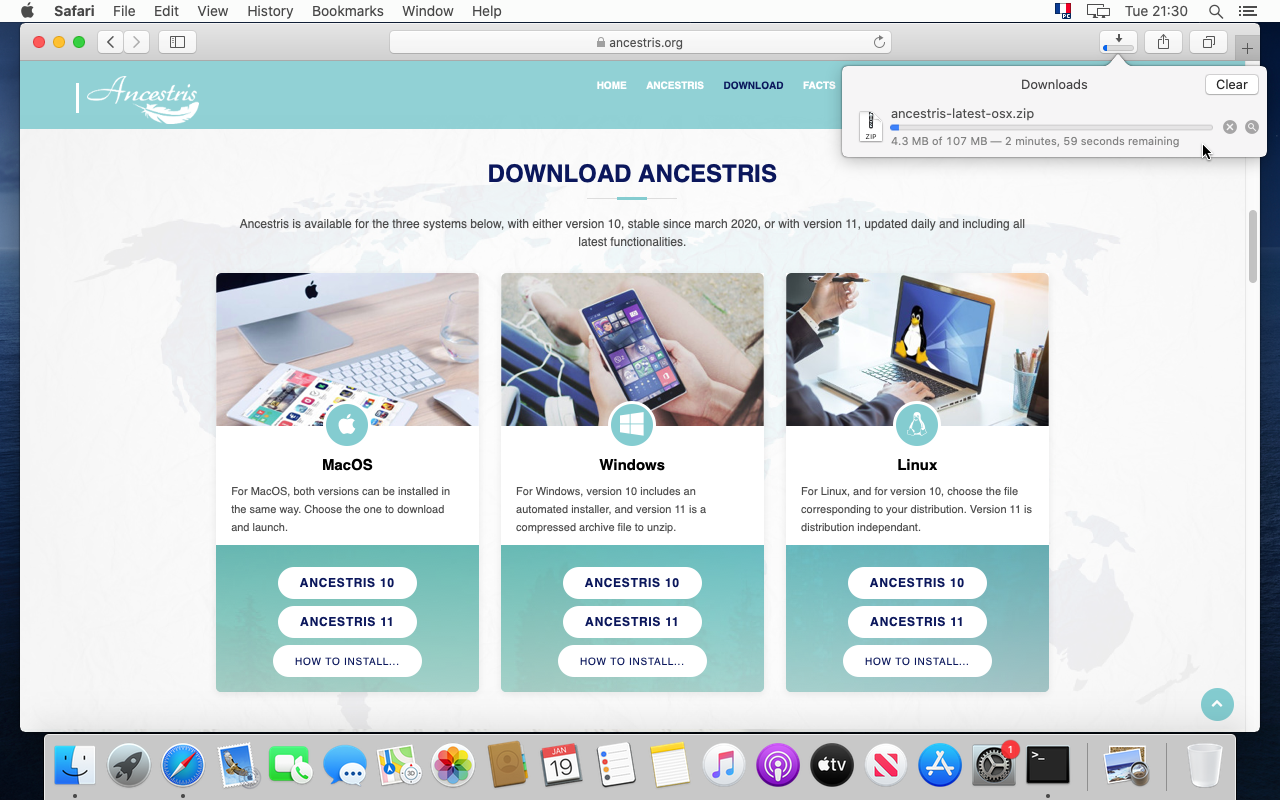
17. Wait a bit more ... we said a couple of minutes !
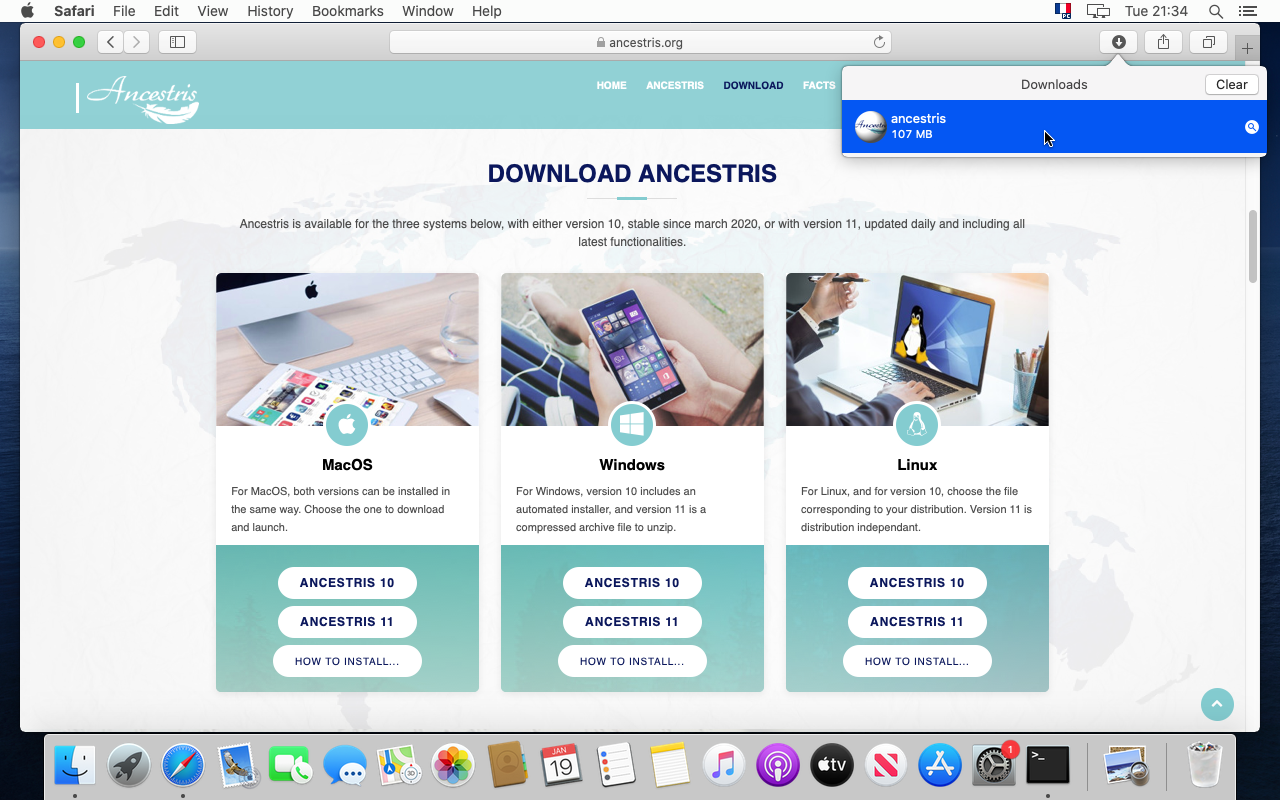
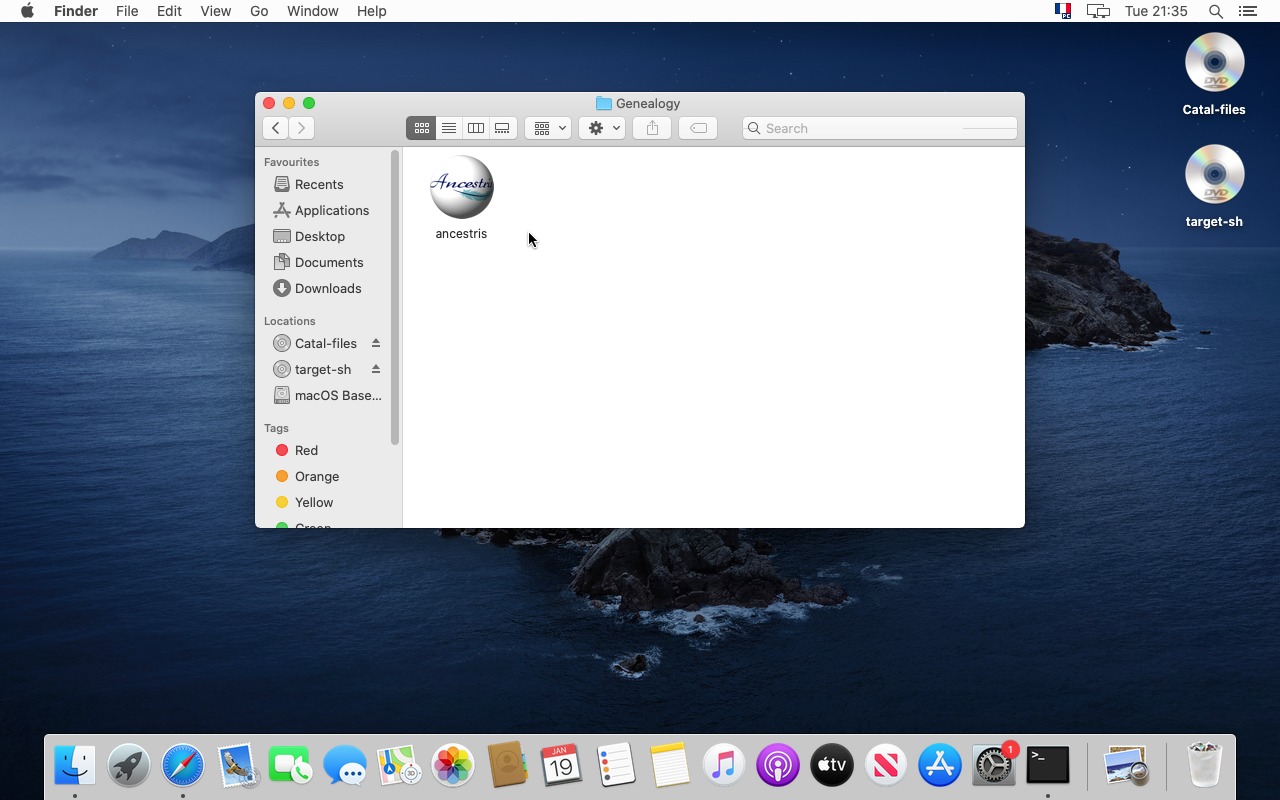
18. Once complete, move the file to your genealogy folder.
19. It is better to place your Ancestris application in a separate folder from your genealogy files.
- You may for instance place Ancestris in a
Documents/Genealogy folder. - And you may place later your genealogy data in a folder such as
{Home}/Public/Genealogy Files/
Do not place your genealogy files in the Documents, Desktop or Downloads folders, or underneath them. MacOS will not let you see them from Ancestris as a security check for non-signed application like Ancestris.
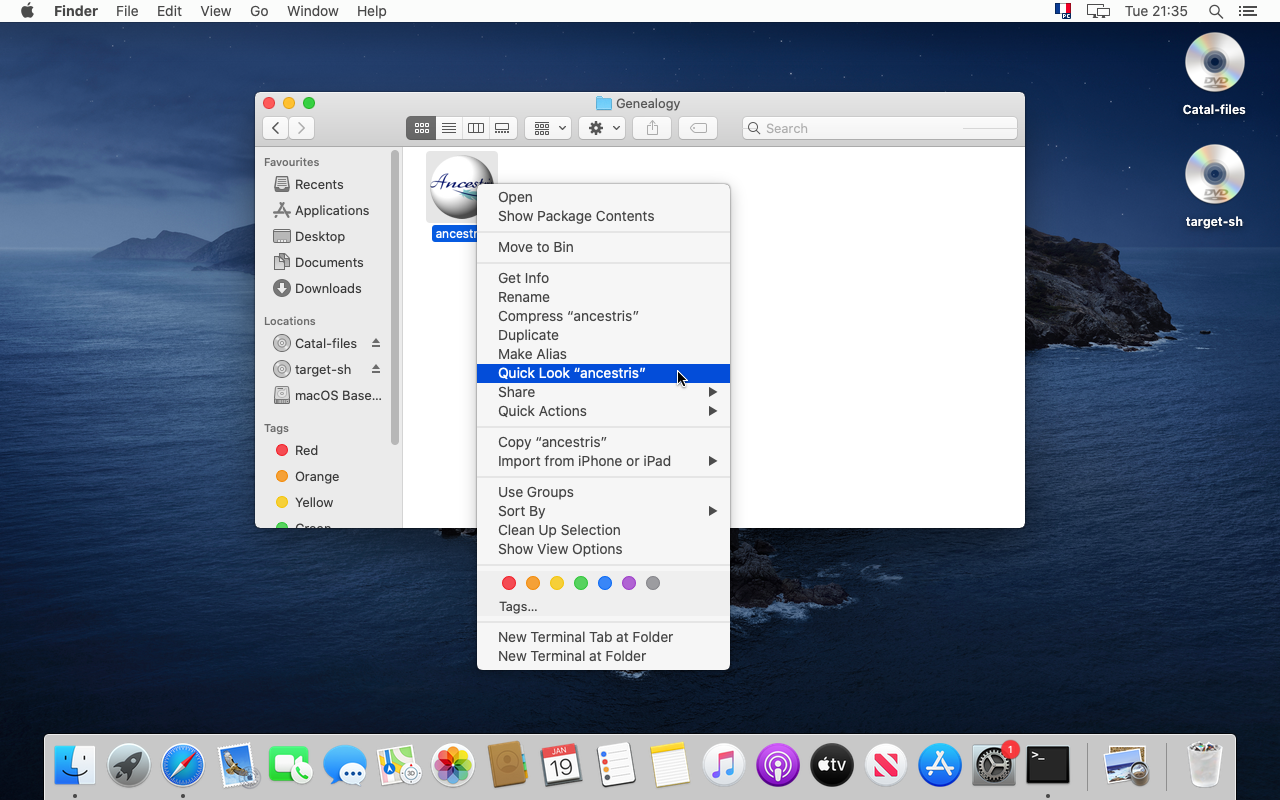
20. To make sure it is the version you expect, click on "Quick Look "Ancestris" from the context menu.
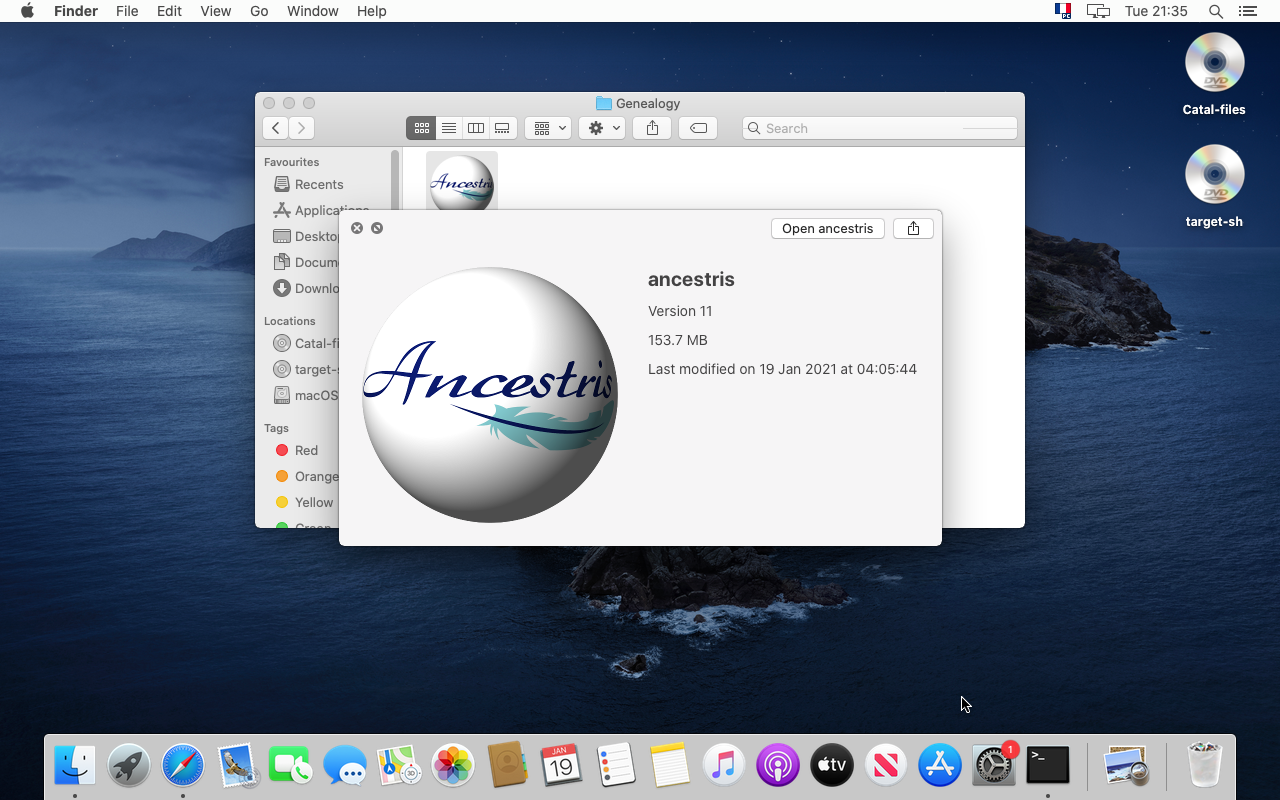
21. The application panel should tell you about the file version and date.
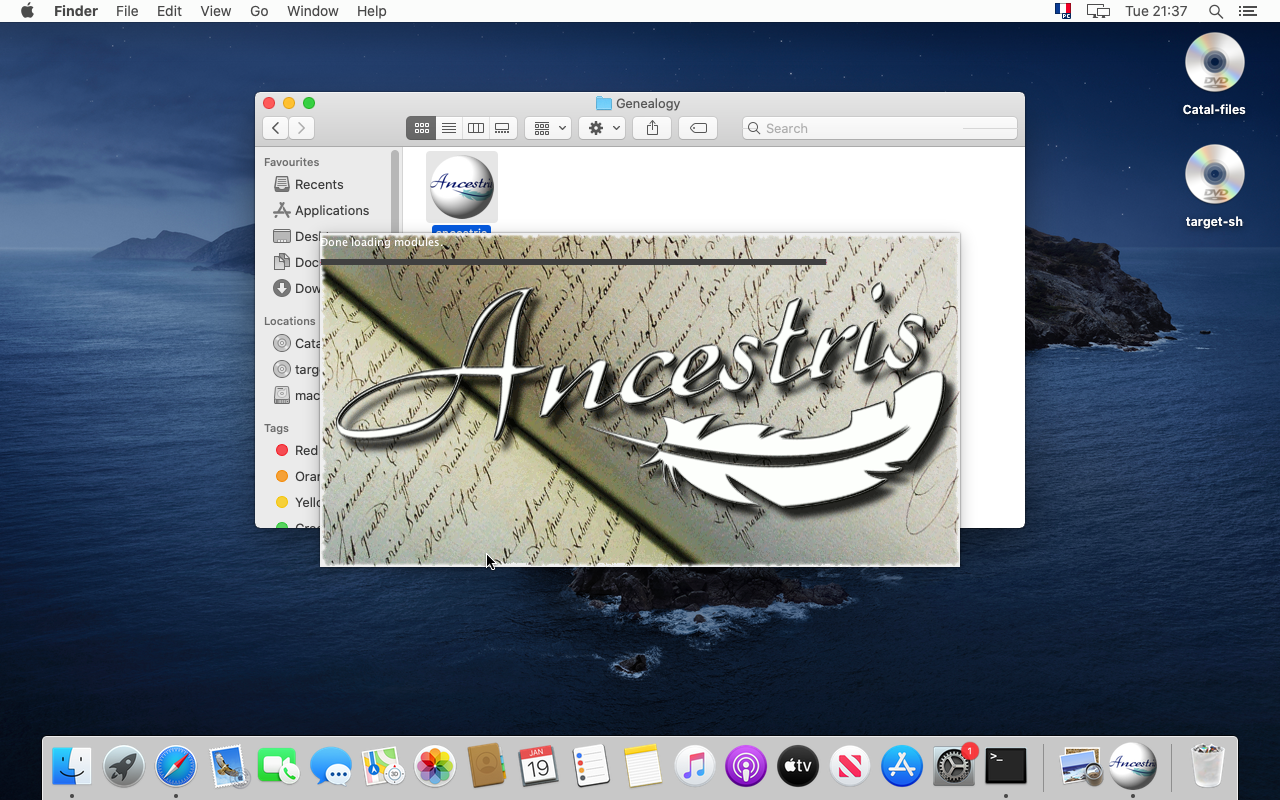
22. Click 'Open ancestris' or go back top your Genealogy folder and click on the icon to launch Ancestris.

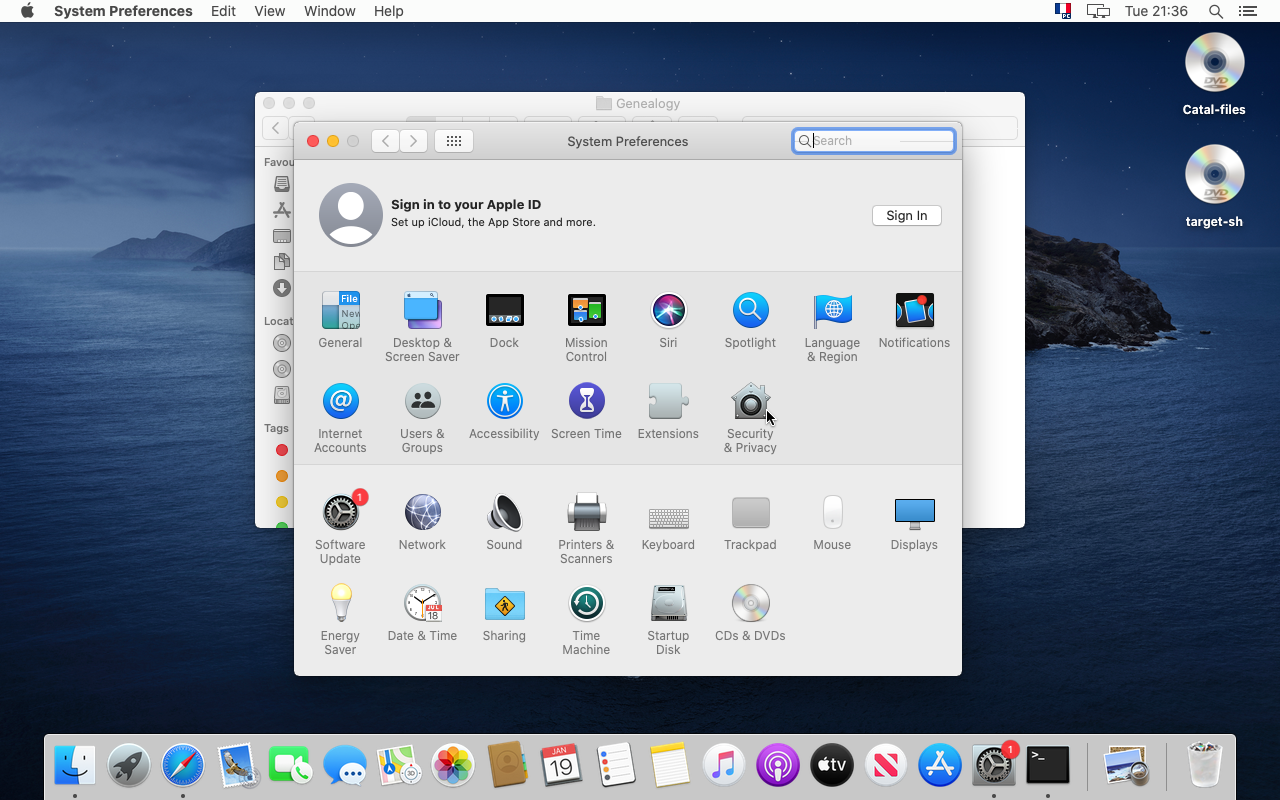
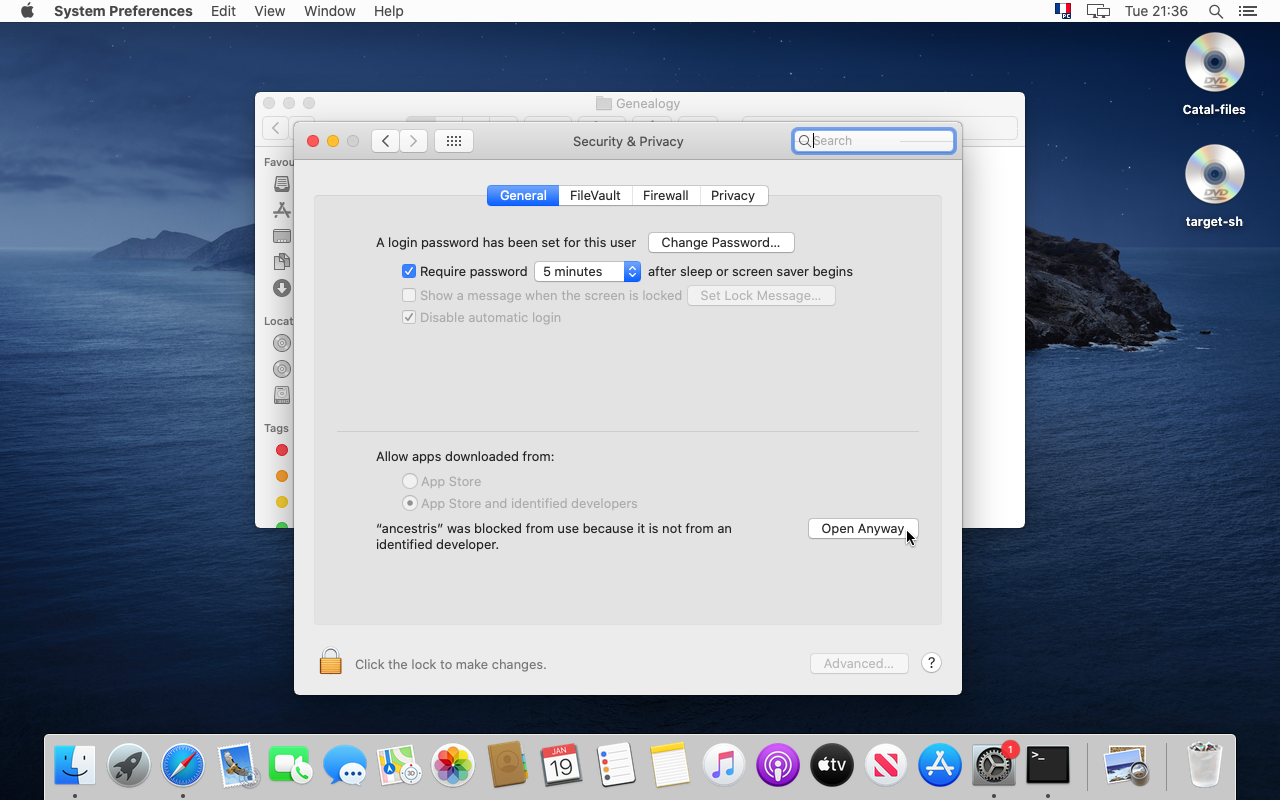
Confirmation of the security check
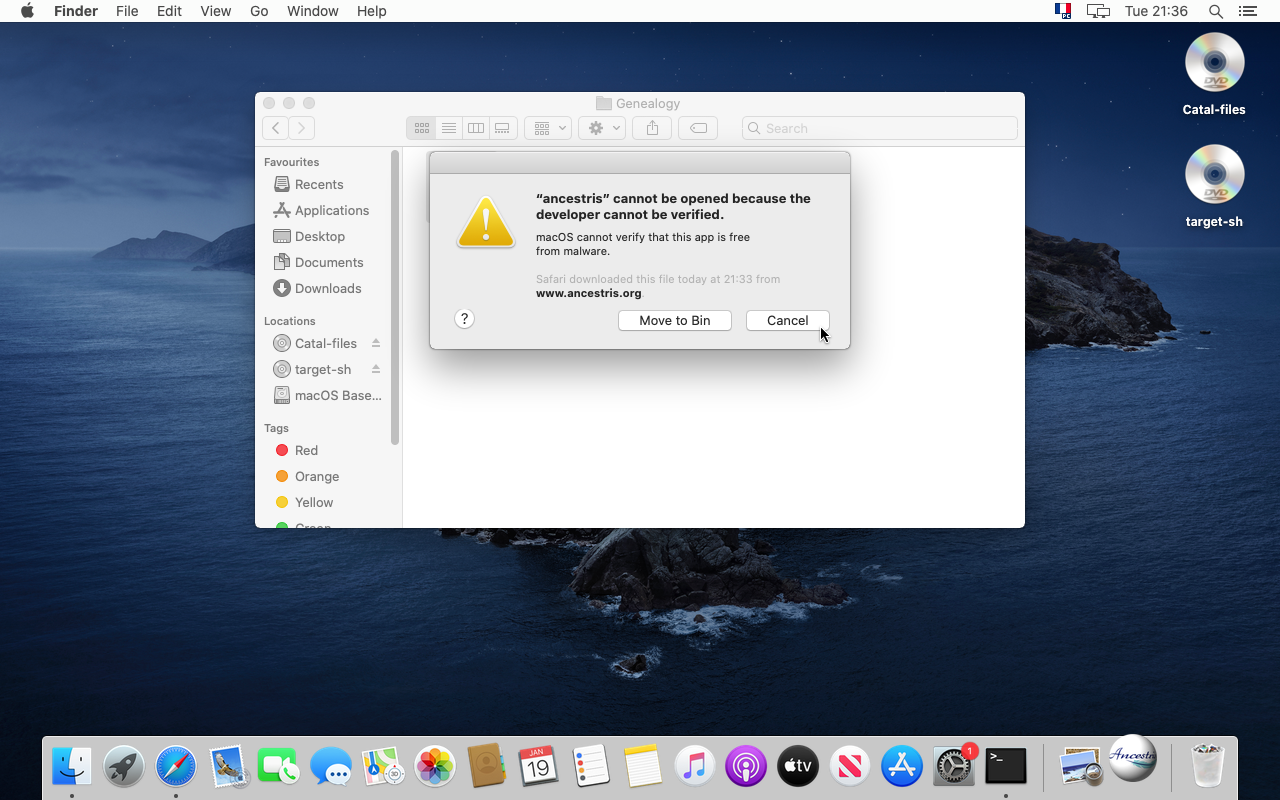
23. Ancestris starts but MacOS tells you it comes from an unverified developer. Not a problem. Ancestris is open source and does not have any malware. Let's authorize it.
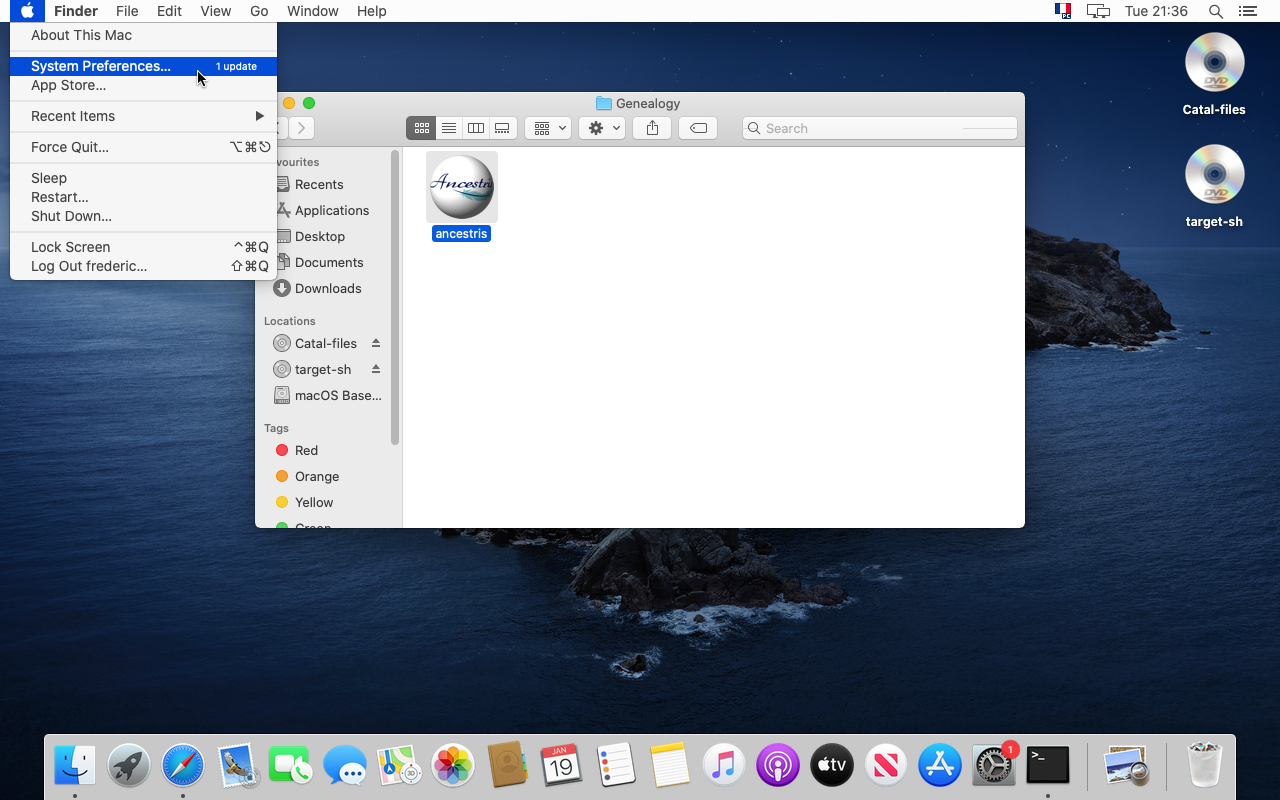
24. For that, go to the System Preferences
25. Click on "Security & Privacy"
26. Click on "Open anyway"
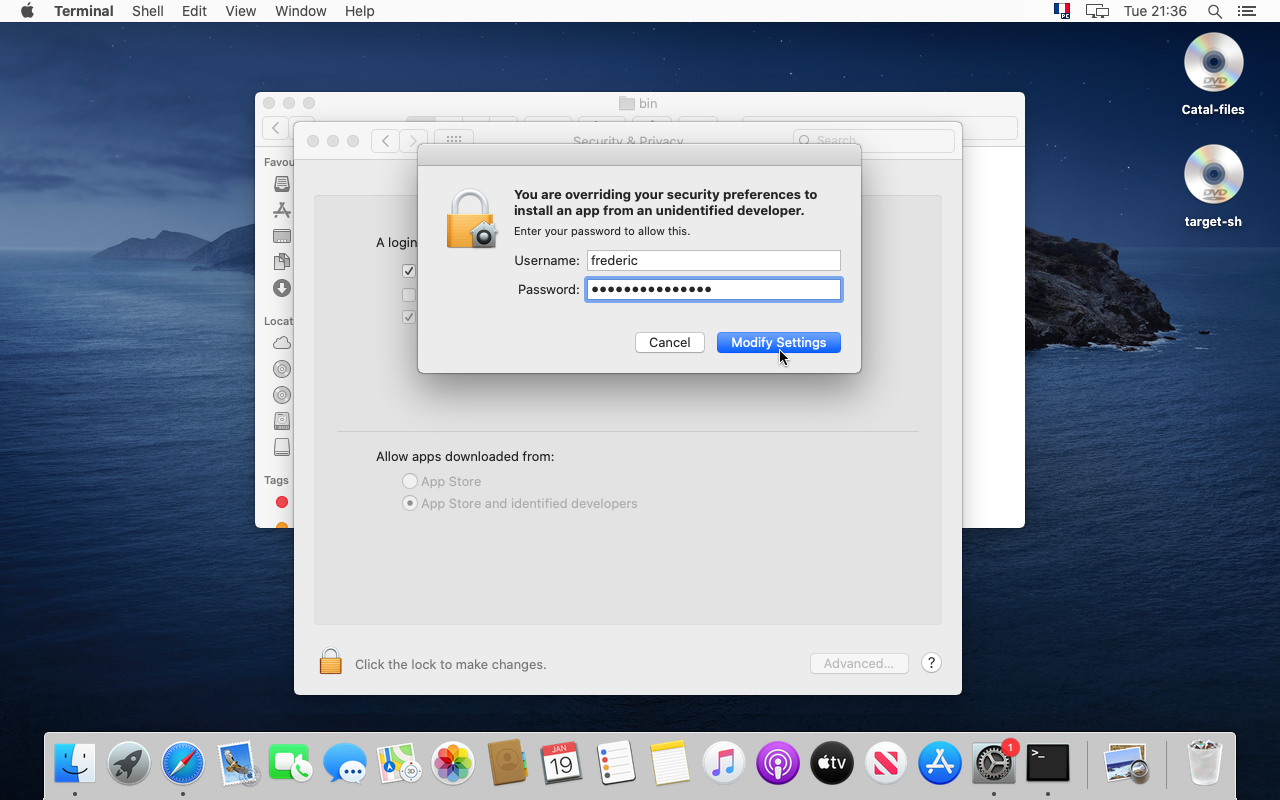
27. If it is the first time you do this, confirm with your password.
28. Yes, you are sure. Click "Open".
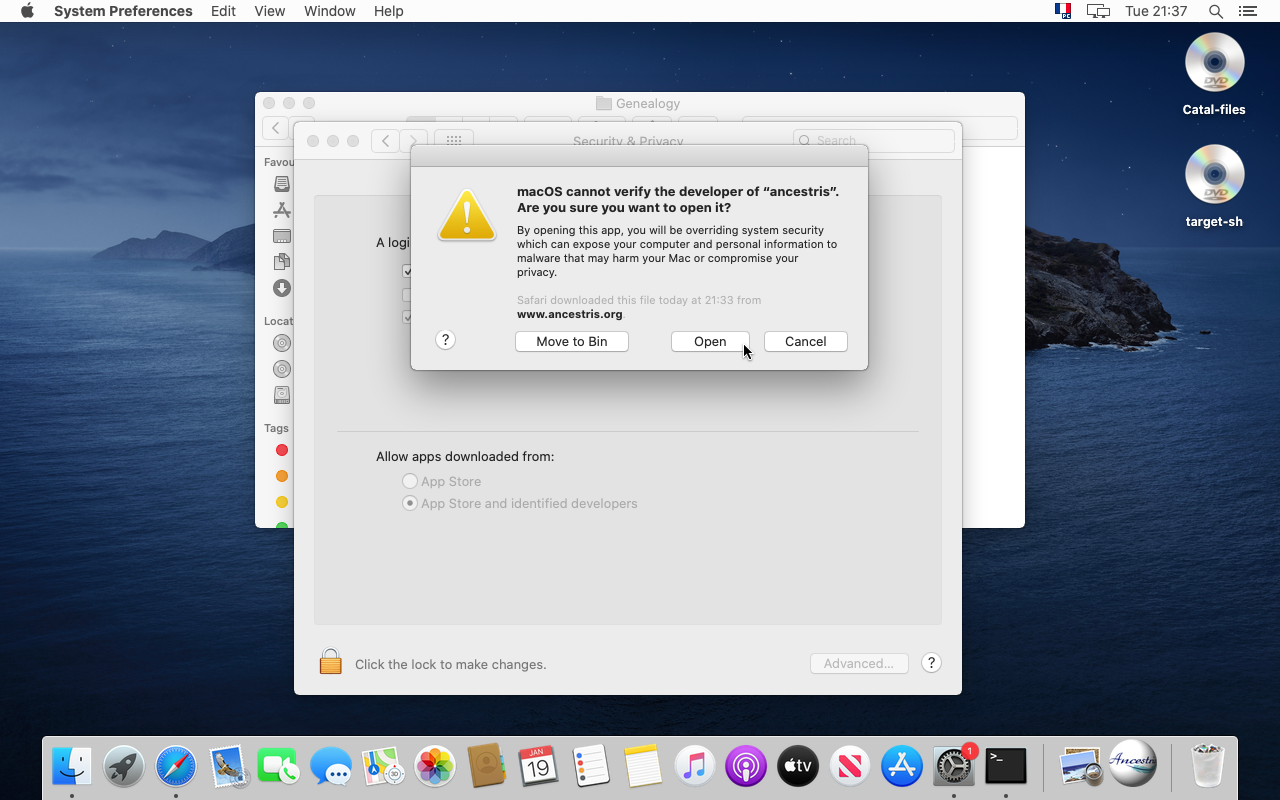
29. Finally, Ancestris starts.
30. You can see the Welcome window.
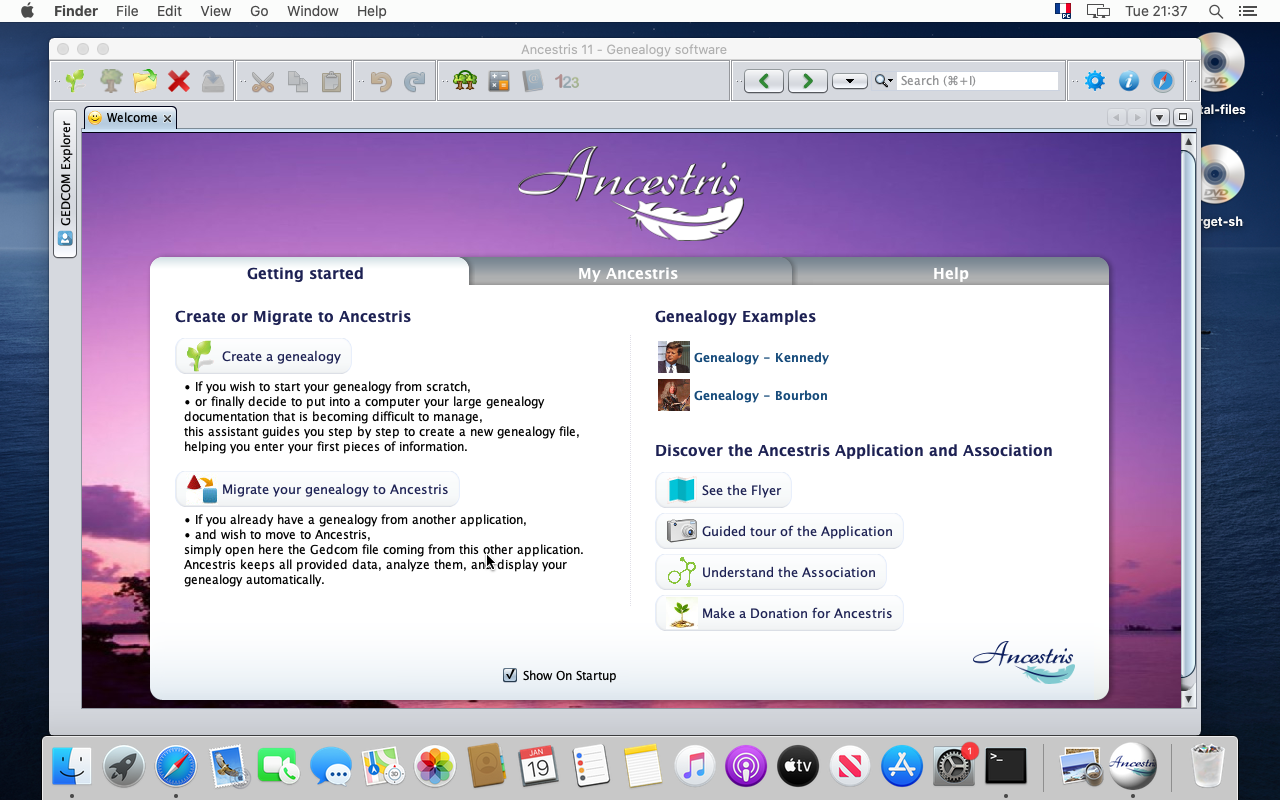
31. Please note that from the application Menu, you can access the Preferences and the "About Ancestris" panel.

Keep in dock
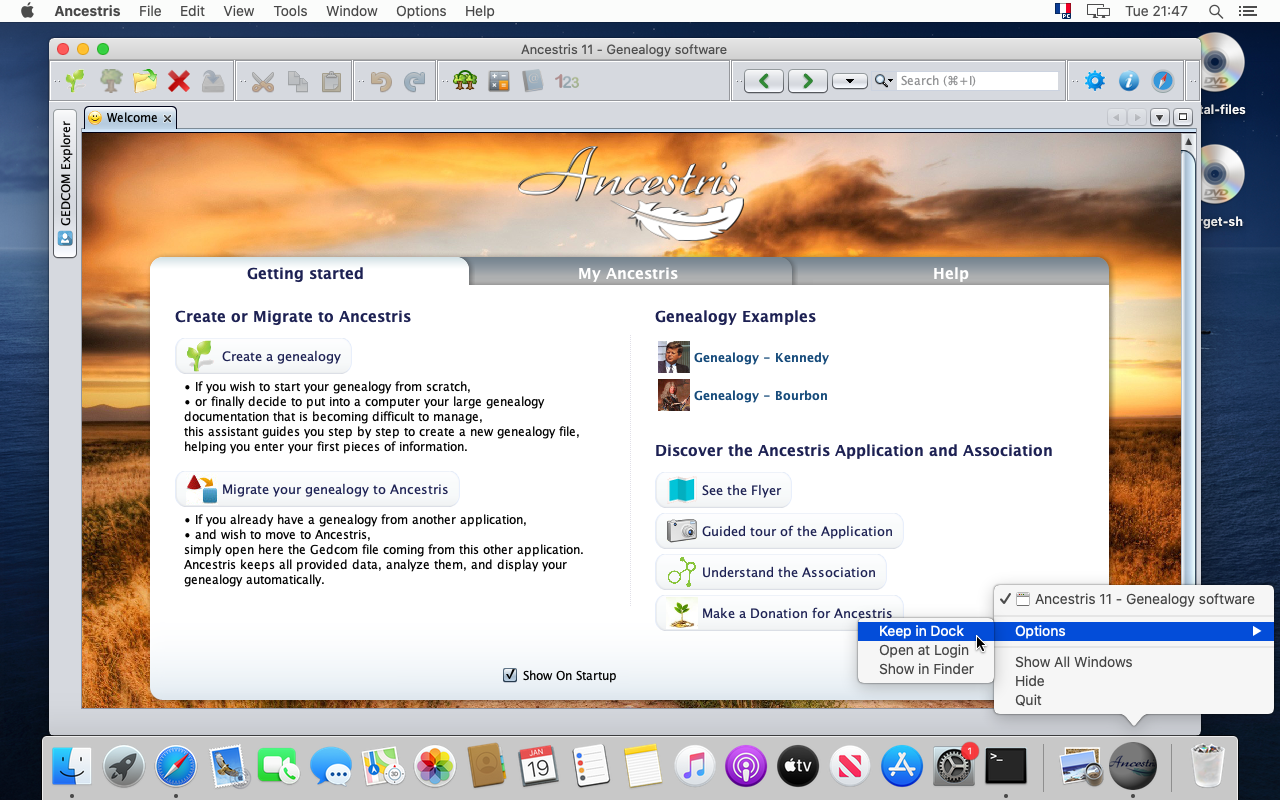
32. Let's keep the application in the Dock by clicking on the Ancestris icon in the dock panel.

33. Choose "Option" and "Keep in Dock".
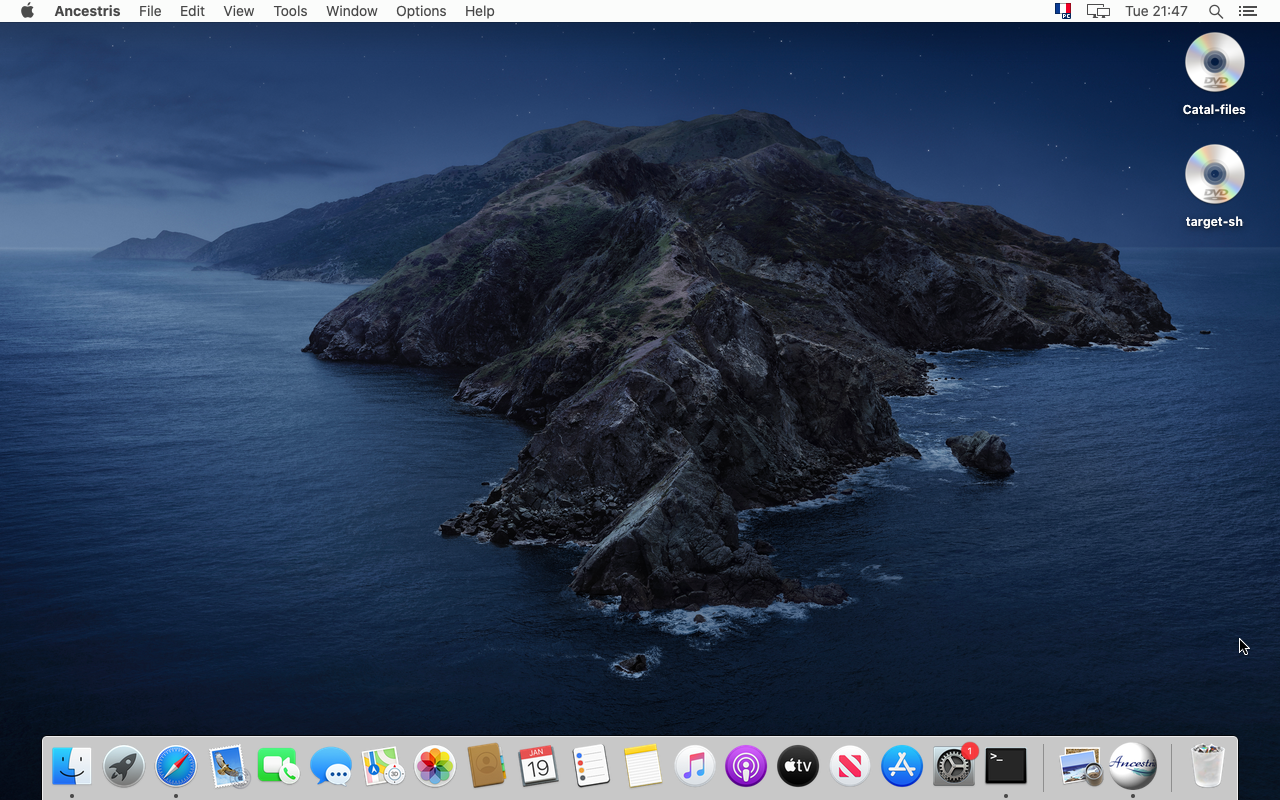
34. This is it. Ancestris is installed and in the Dock. Yessss !
Special note for users of MacOS Big Sur
There are additional steps for MacOS Bug Sur users, in case Ancestris does not start after the installation above:
- It might be necessary to store Gedcom files in another folder than the 'Documents', 'Desktop' and 'Downloads' folders. For instance, you can use the "Public" folder.
- Indeed, for security reasons, MacOS might prevent access to these folders by non-signed applications.
- It can also happen that an error message "Wrong line n° null" is displayed when opening a Gedcom file that is placed under one of these folders.
- It might be also necessary to specify the path to the java version in the ancestris configuration file. This is explained below.
Please follow these additional steps to specify the path to the java version in the ancestris configuration file:
Basic principles:
- The configuration file is here :
${HOME}/Library/Application Support/ancestris/trunk/etc/ancestris.conf - Java's location is given by the following line command :
/usr/libexec/java_home -V
These are the steps.
1. Open a terminal, and check and copy the location of the installed java version
- Type /usr/libexec/java_home -V on ther command line and press Enter
- You shoud see the path of the installed java version.
- Select the line indicating the path, and click on the mouse to copy it in the clipboard. This line could be different in your case.
- Here it is
/Library/Java/JavaVirtualMachines/jdk-15.0.1.jdk/Contents/Home
- Here it is

2. Open the editor on the Ancestris configuration file
- Type the following command:
nano ${HOME}/Library/'Application Support'/ancestris/trunk/etc/ancestris.conf

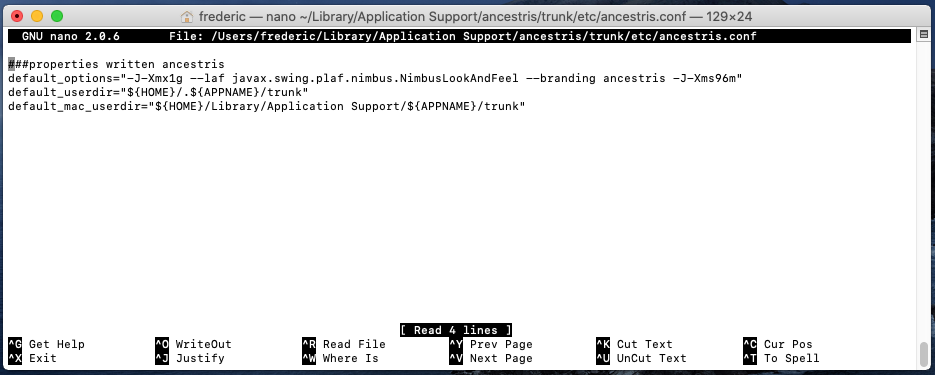
3. The nano editor opens and shows the content of the Ancestris configuration file
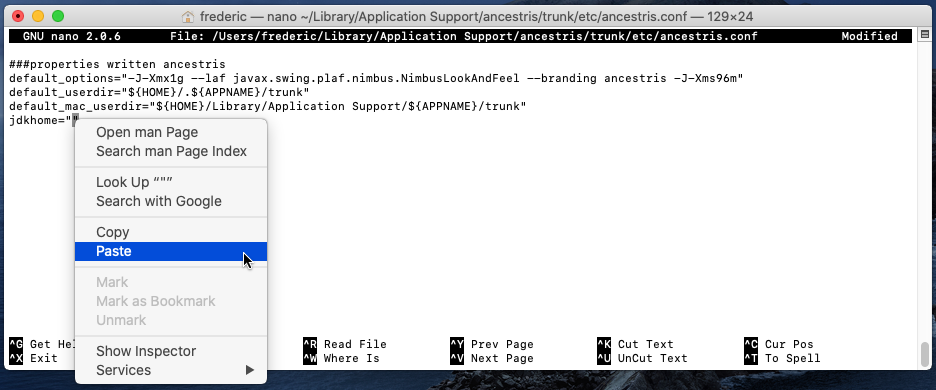
4. Add - or modify - the line that says jdkhome="" and paste the java path between the double quotes
- Add the line if it does not exist
- Or update it otherwise. Make sure in this case that there is no pond sign "#" at the beggining of the line, your change would not be taken into account.
5. Exit and save your change
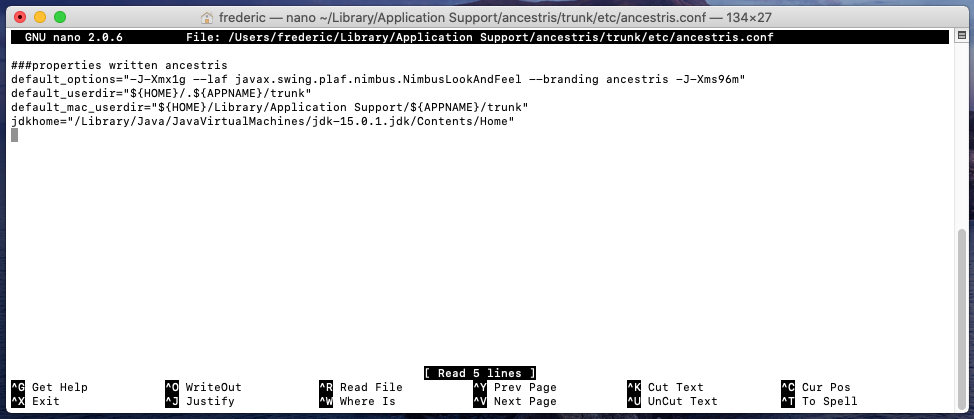
6. Check that the Ancestris configuration file has your change, and start Ancestris.
- Type the command starting with "
cat ${home}/..." below. - The terminal displays the configuration file with the added line.

The configuration file is updated. You can start Ancestris and Ancestris should find java.