Trin-for-trin installation på MacOS
Denne side viser dig detaljeret, hvordan du trin-for-trin installerer Ancestris på din MacOS.
Her kommer et eksempel som forekom i januar 2021, installation af Ancestris version 11 på MacOS Catalina.
Disse trin indeholder følgende:
- Installation af Java som ikke allerede var installeret på Catalina
- Download af Ancestris version 11 fra Ancestris hjemmeside
- Bekræftelse af sikkerhedscheck, der giver Ancestris adgang til at køre, selvom det kommer fra en uidentificeret udbyder
- Start af Ancestris
- Oprettelse af genvej til Ancestris
Skærmbillederne vist undervejs kan se lidt anderledes ud hos dig.
Special bemrækning til brugere af MacOS Big Sur: fælg trinene nedenfor og læs derefter den specifikke sektion i bunden af denne side.
Installation af Java
1. Fra MacOS skrivebord...
2. Åben en terminal og skriv "java -version"
Hvis Java ikke er installeret, vil et popop window foreslå at installere det. Klik "Mere Info...".
Hvis Java er installeret, kan du gå direkte til punkt 11.

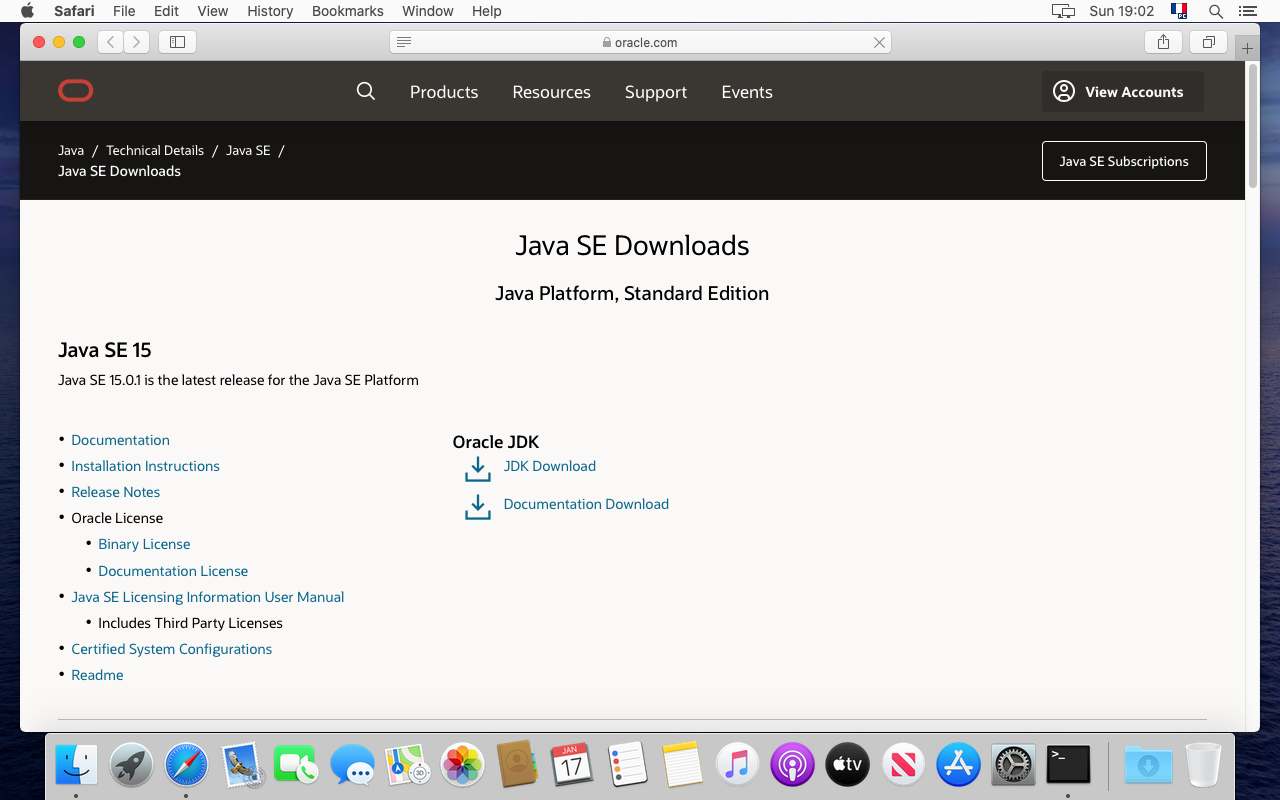
3. Du er på Javas hjemmeside. Klik påon "JDK Download"
Vi kan se, at Java 15 foreslås. Lad os installere denne version, selvom vi anbefaler version 8 eller 11, som er langtidsversioner (se krævet opsætning).
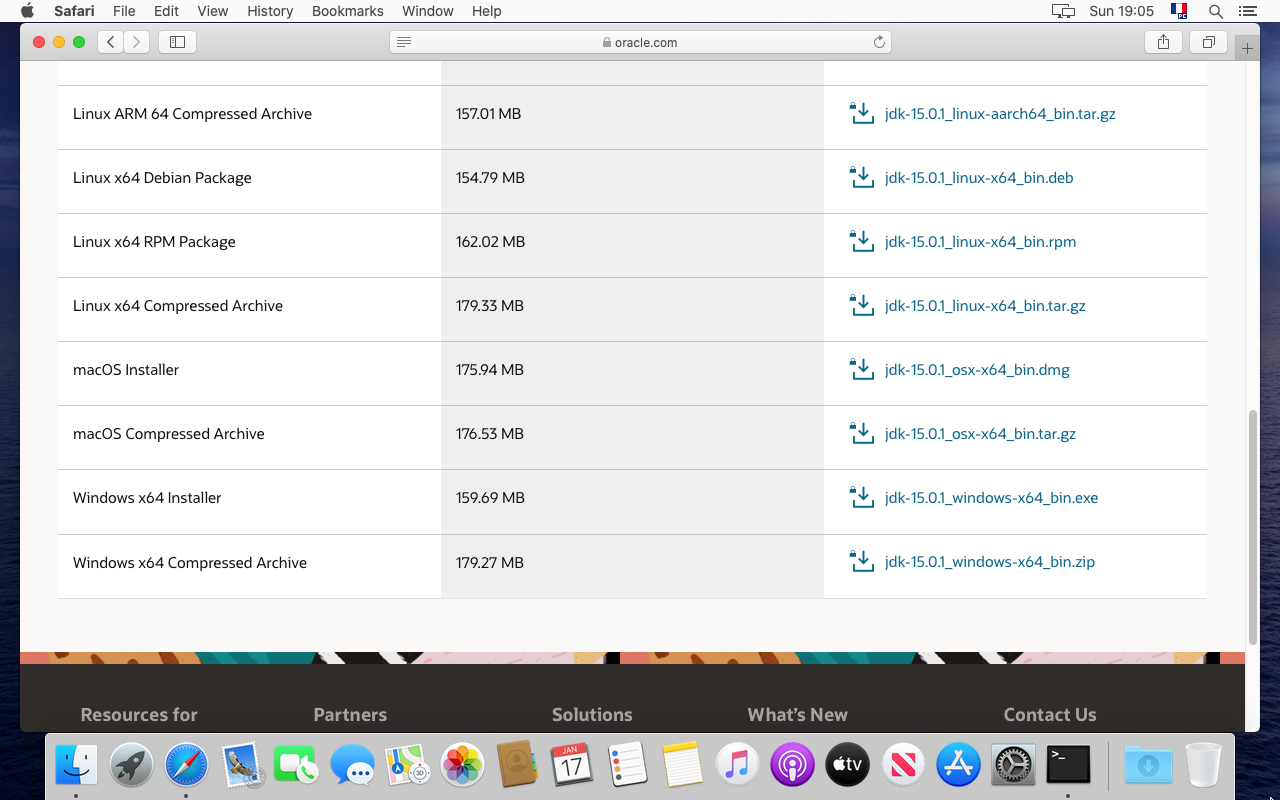
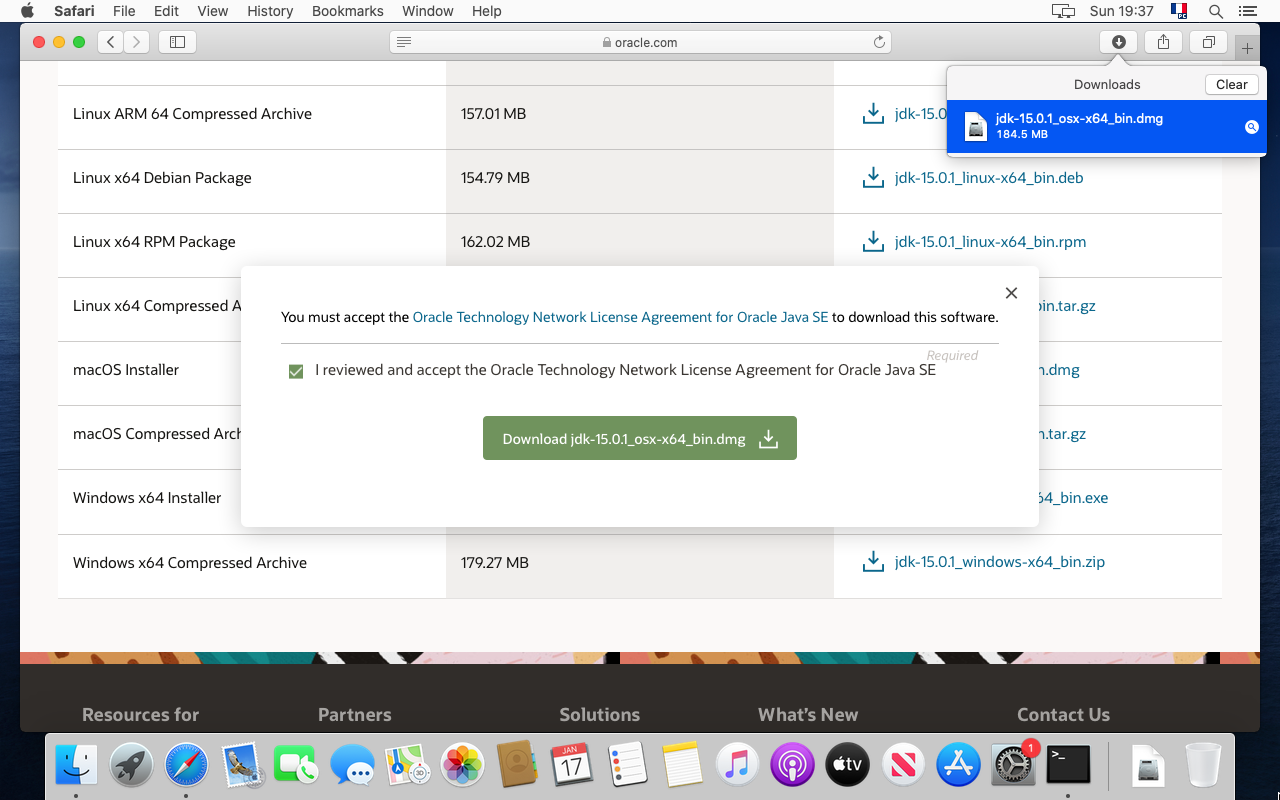
4. Gå ned til "MacOS Installer" linjen og klik på ".dmg' filen
5. Klik på den grønne download knap.

6. Download starter, vent...

7. Download er færdig. Åben Download mappen for at se filen.
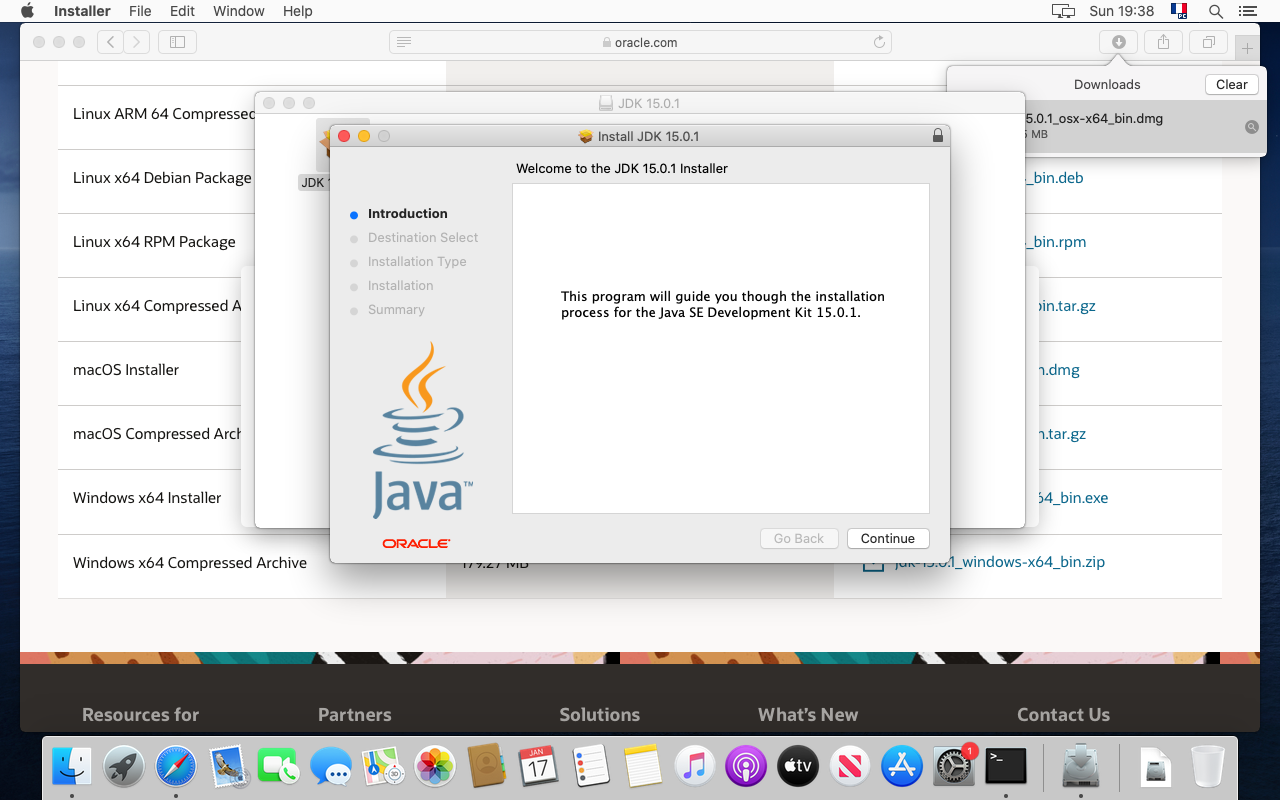
8. Dobbeltklik på JDK pakken.

9. JDK installerer. Følg trinene.
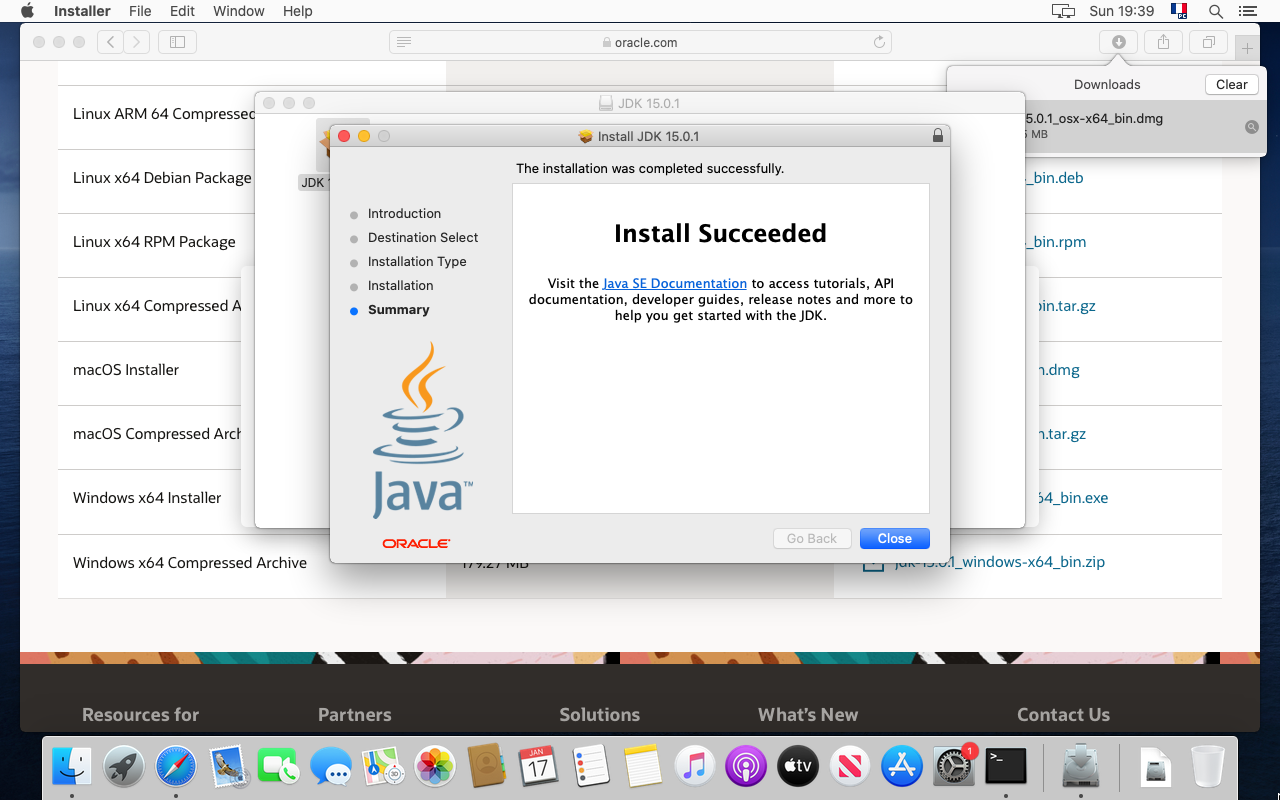
10. Installationen bør være i orden. Luk vinduet.
11. Skriv igen "java -version" i terminalen.
Følgende resultat bør komme frem og indikere, at Java 15 er installeret.

Your are now done with the Java installation. Let's install Ancestris now.
Installation af Ancestris
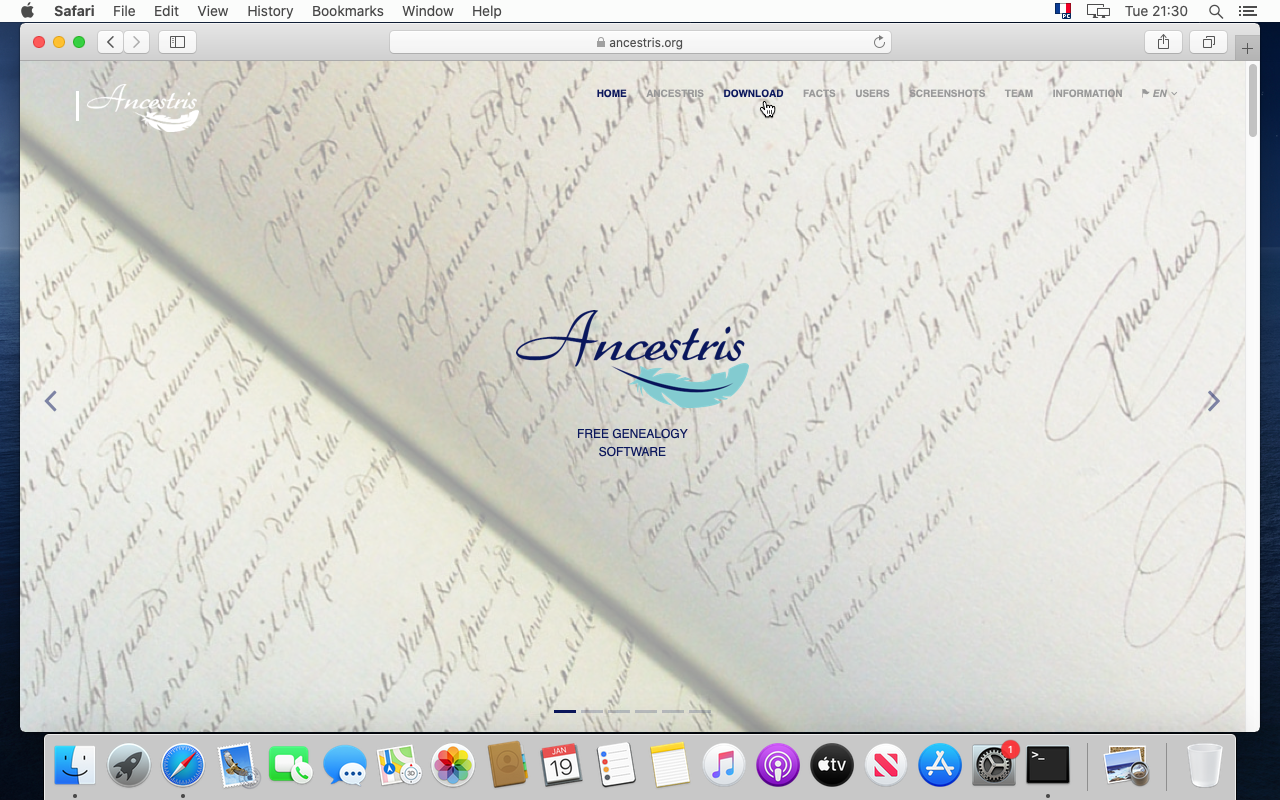
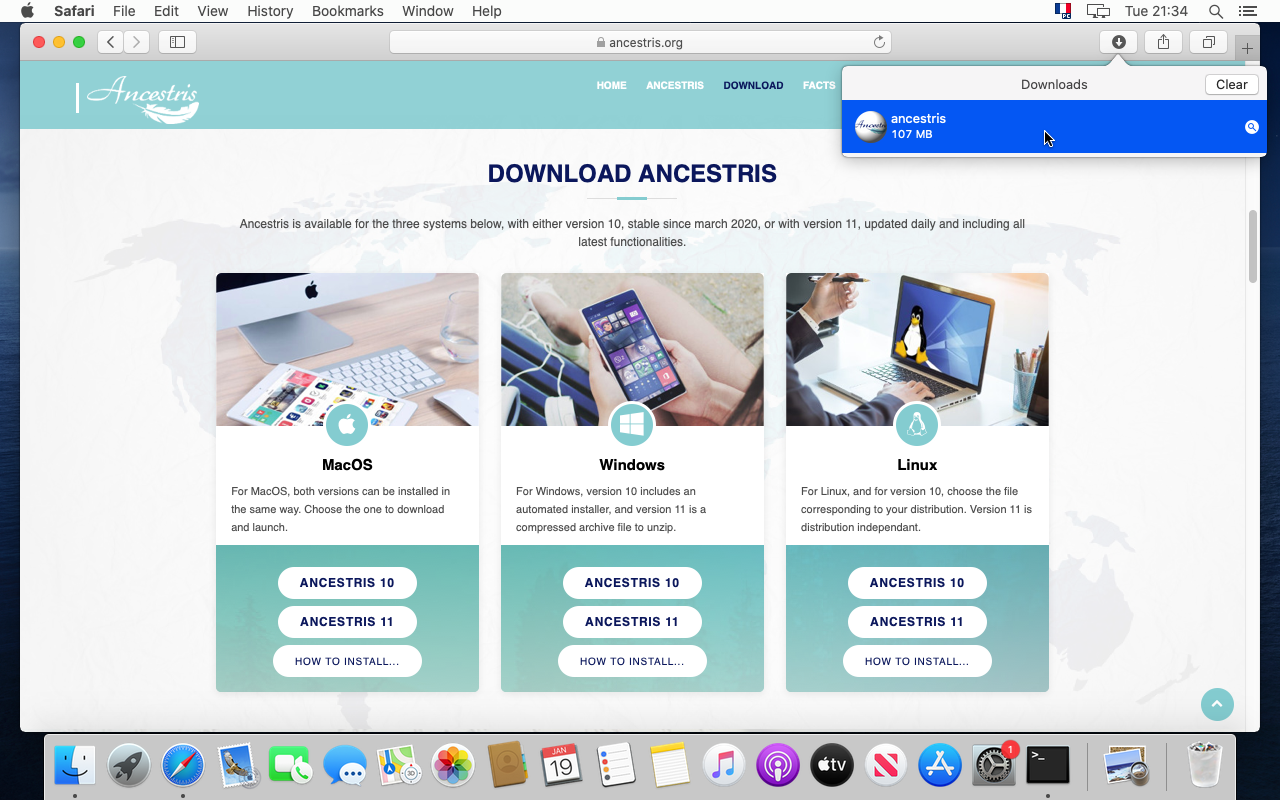
12. Gå til https://www.ancestris.org
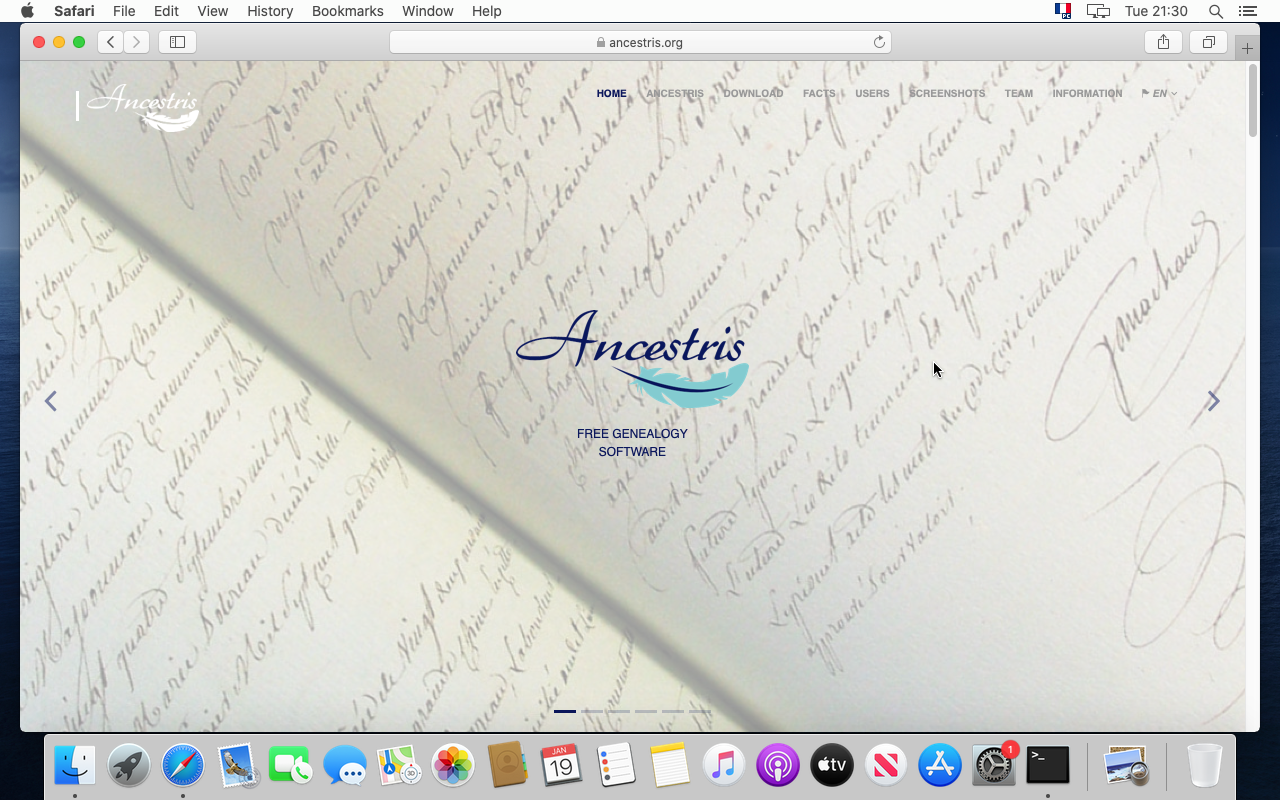
13. Vælg menuen DOWNLOAD
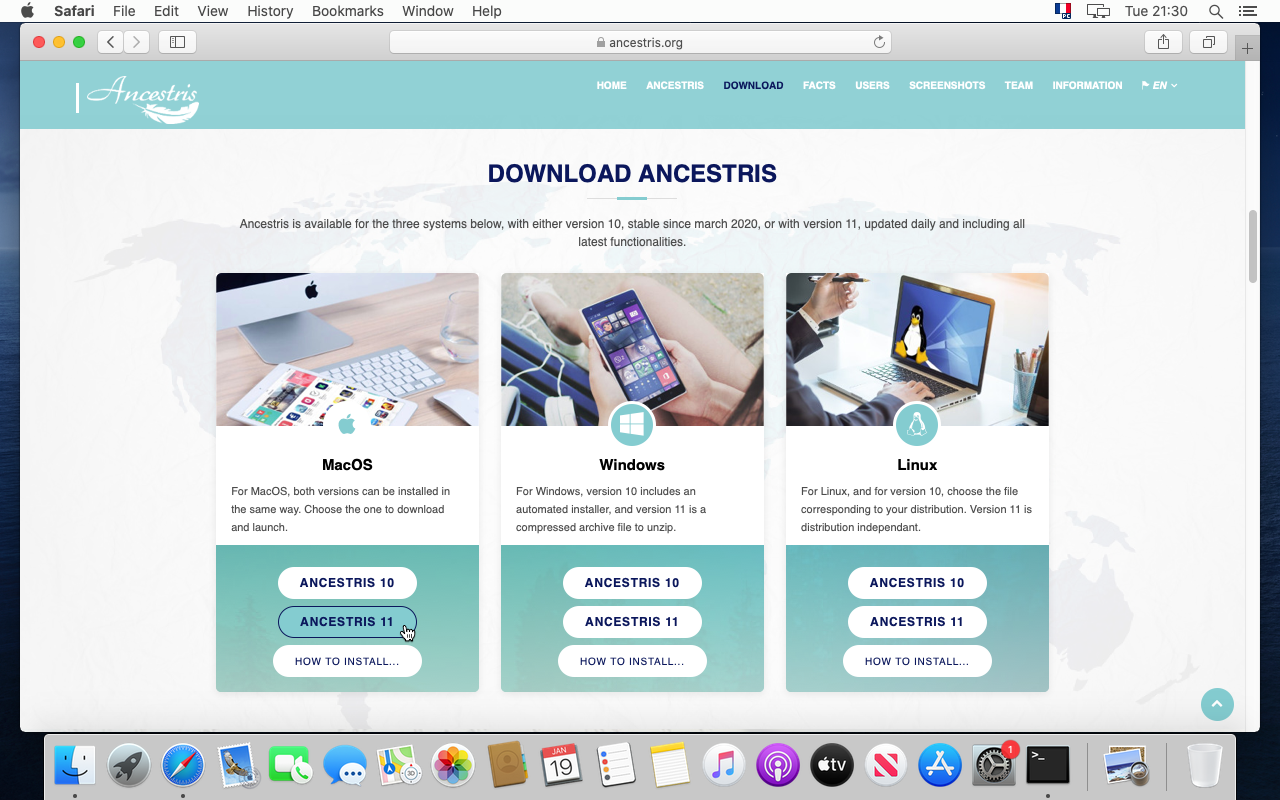
14. Klik på Ancestris 11 knappen under MacOS.
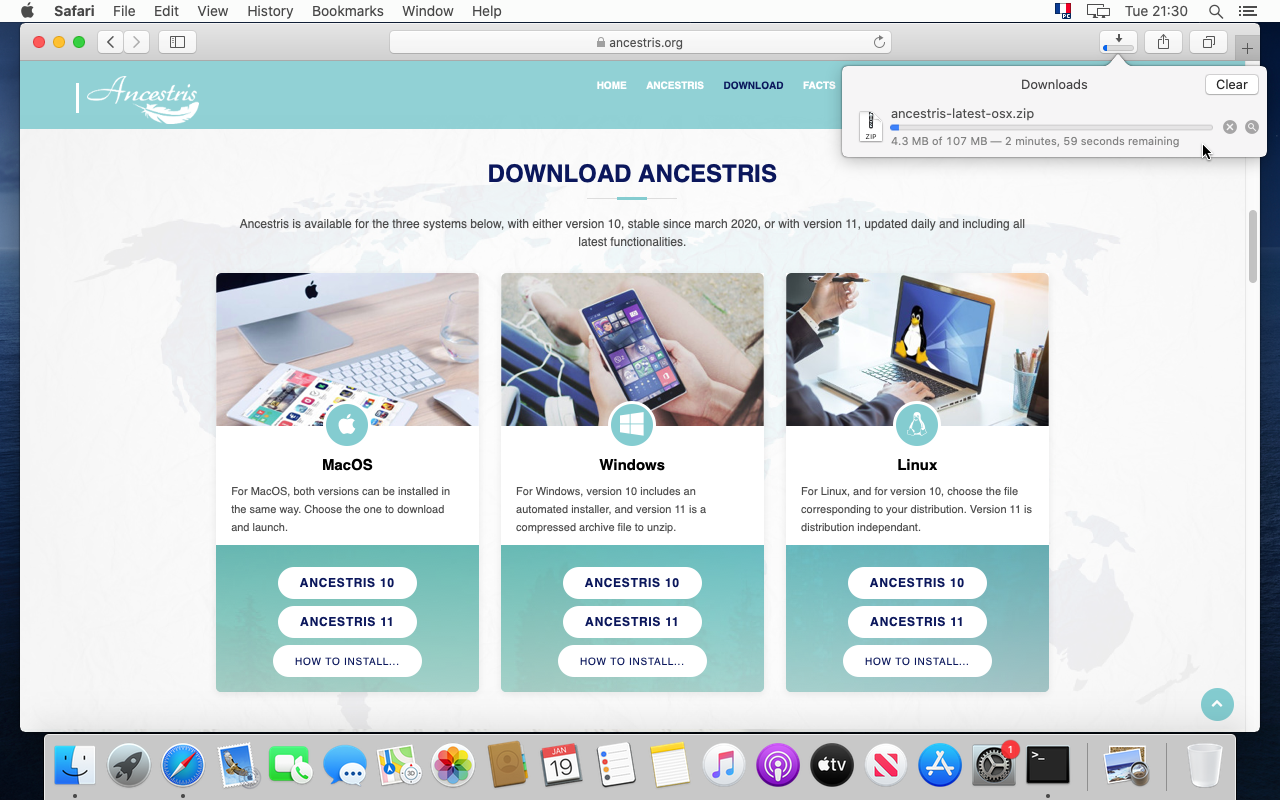
15. Tillad downloads fra Ancestris hjemmesiden, hvis det er første gang du gør det.

16. Download starter. Det tager et par minutter.
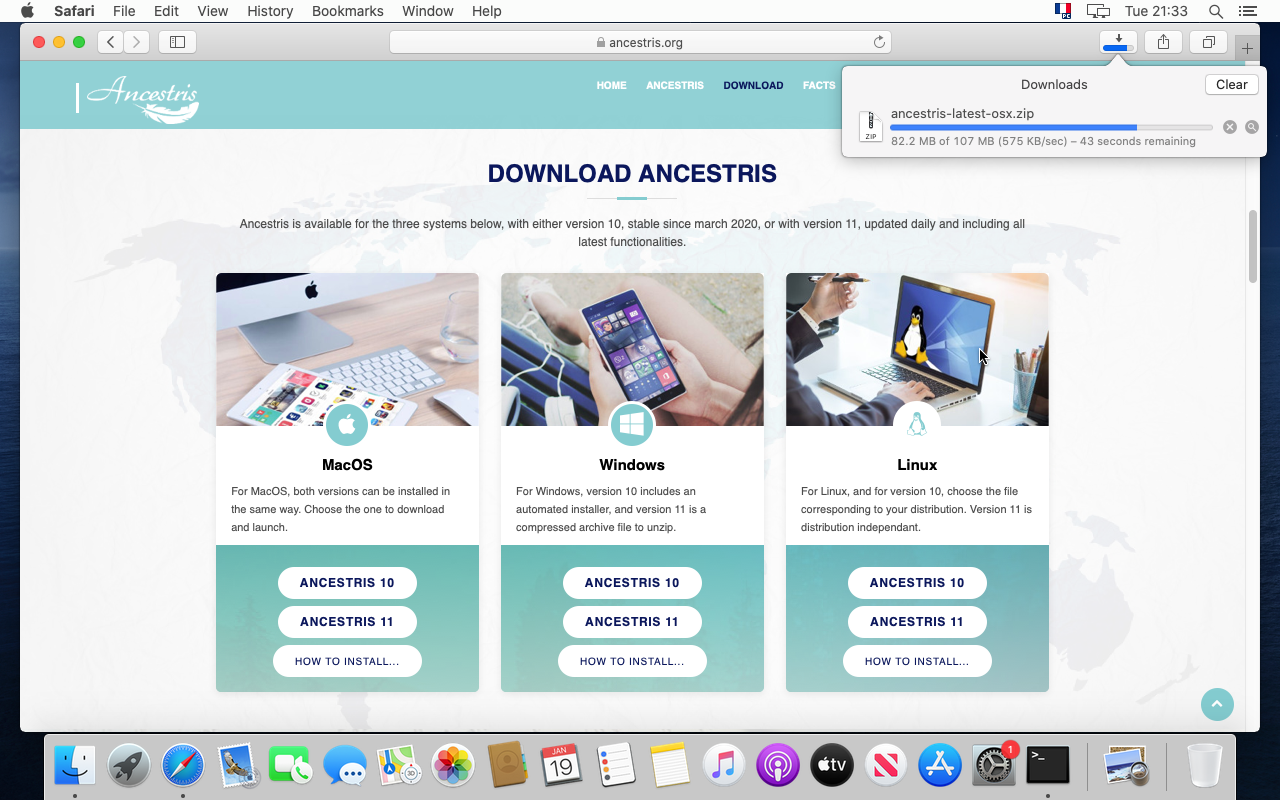
17. Vent lidt længere... vi sagde et par minutter!!
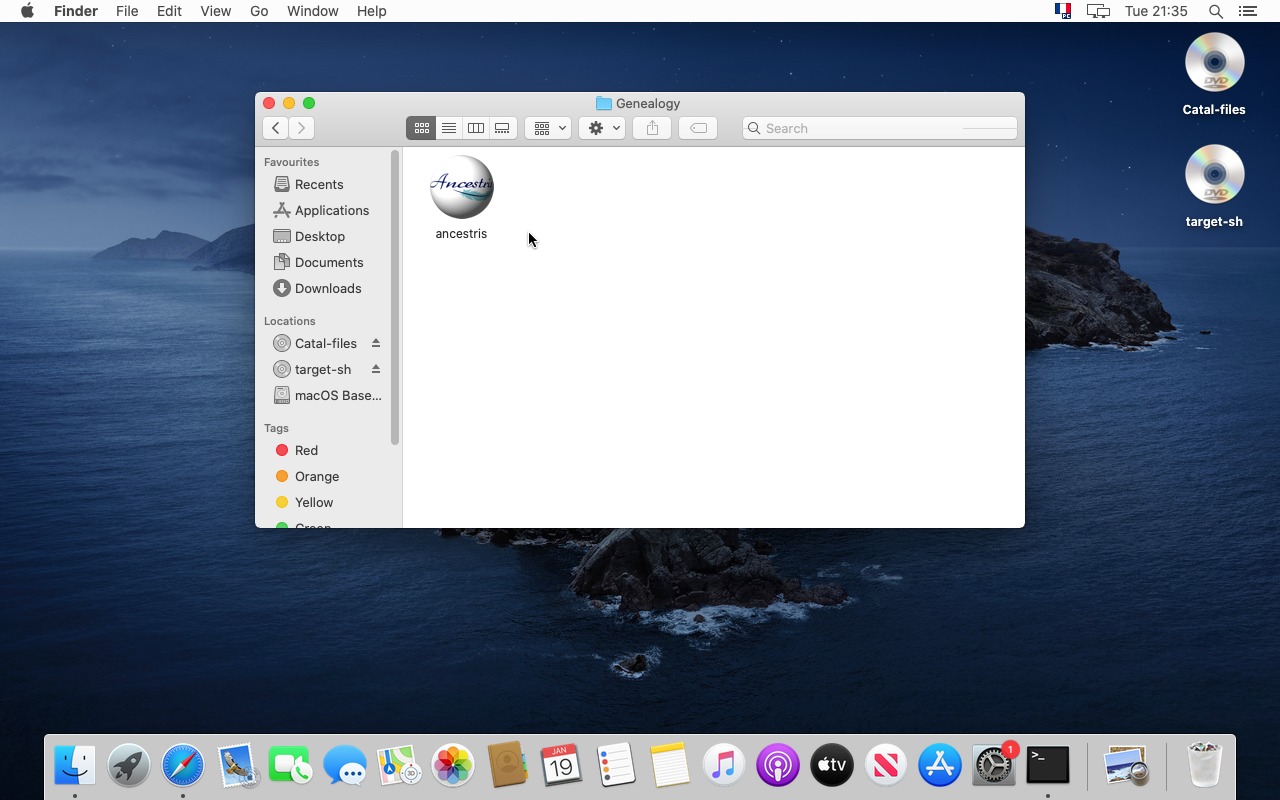
18. Når installationen er færdig, flyt filerne til din slægts-mappe.
19. Det er bedre at placere Ancestris programmet i en separat mappe fra dine slægtsfiler.
- Gem f.eks. Ancestris i mappen Dokumenter/Slægt.
- Og du kan senere lægge dine datafiler i mappen Home/Public/Slægtsfiler
Placér ikke dine slægtsfiler i Dokumenter. Skrivebord eller Downloads mapperne eller i undermapper dertil. MacOS vil ikke lade dig se dem fra Ancestris på grund af et sikkerhedscheck for ikke-autoriserede programmer som Ancestris.
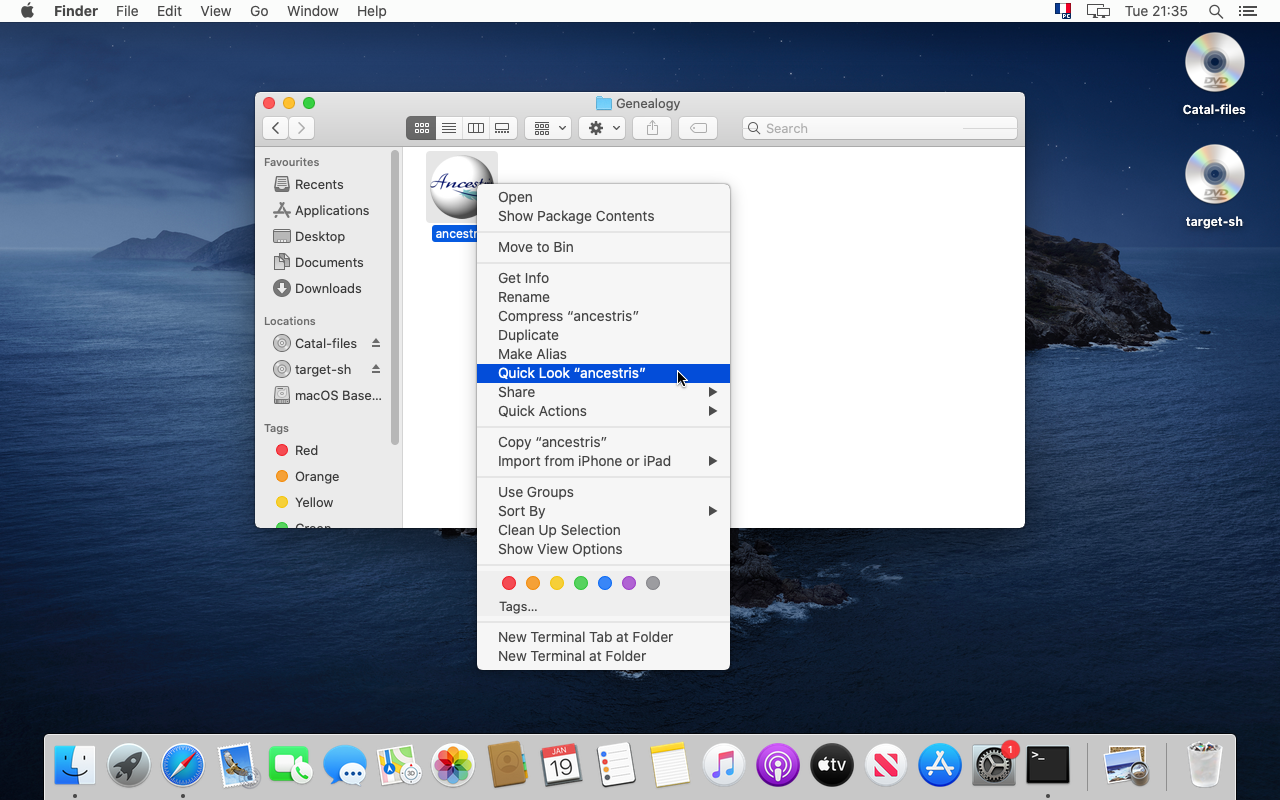
20. Vær sikker på, at du har fået den version, du forventede, klik på "Quick Look "Ancestris" fra contextmenuen.
21. Programpaneletburde fortælle dig version og dato.
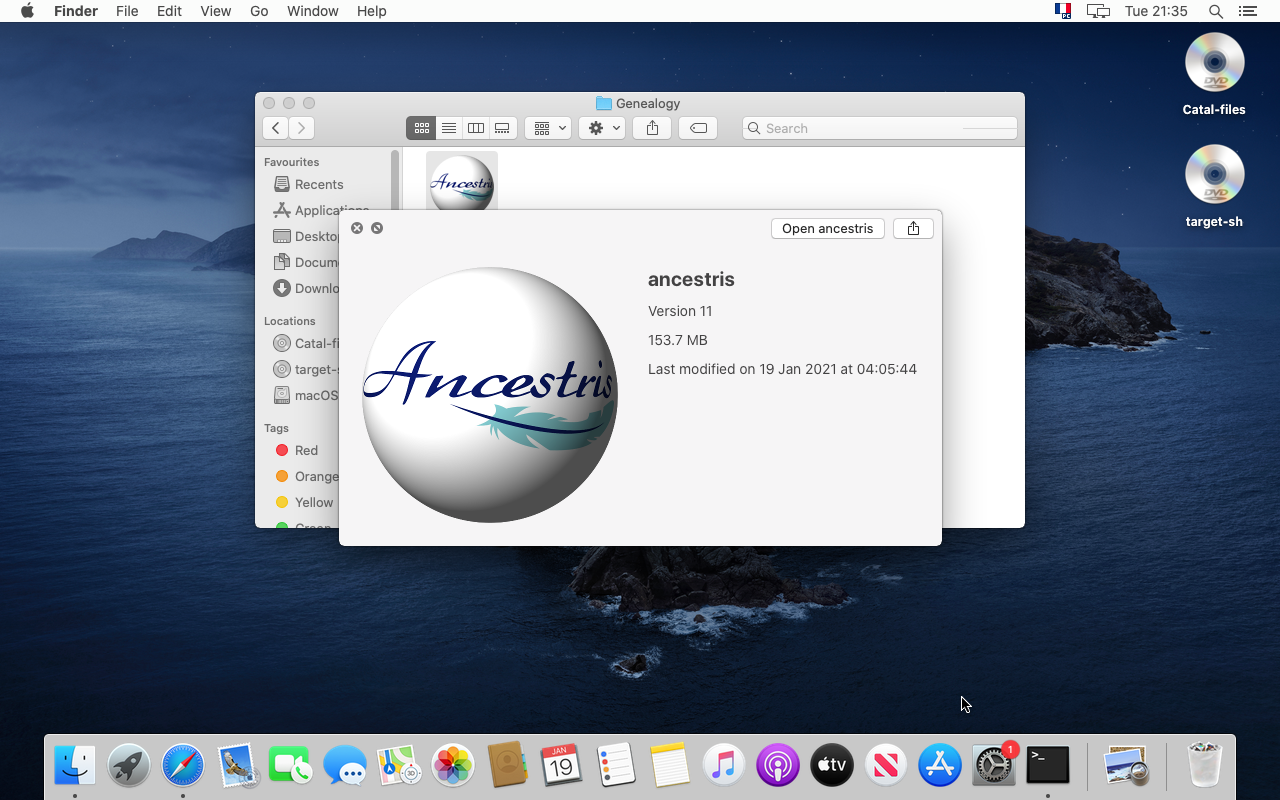
22. Klik på 'Åben ancestris' eller gå tilbage til Slægtsmappen og klik på ikonet for at starte Ancestris.

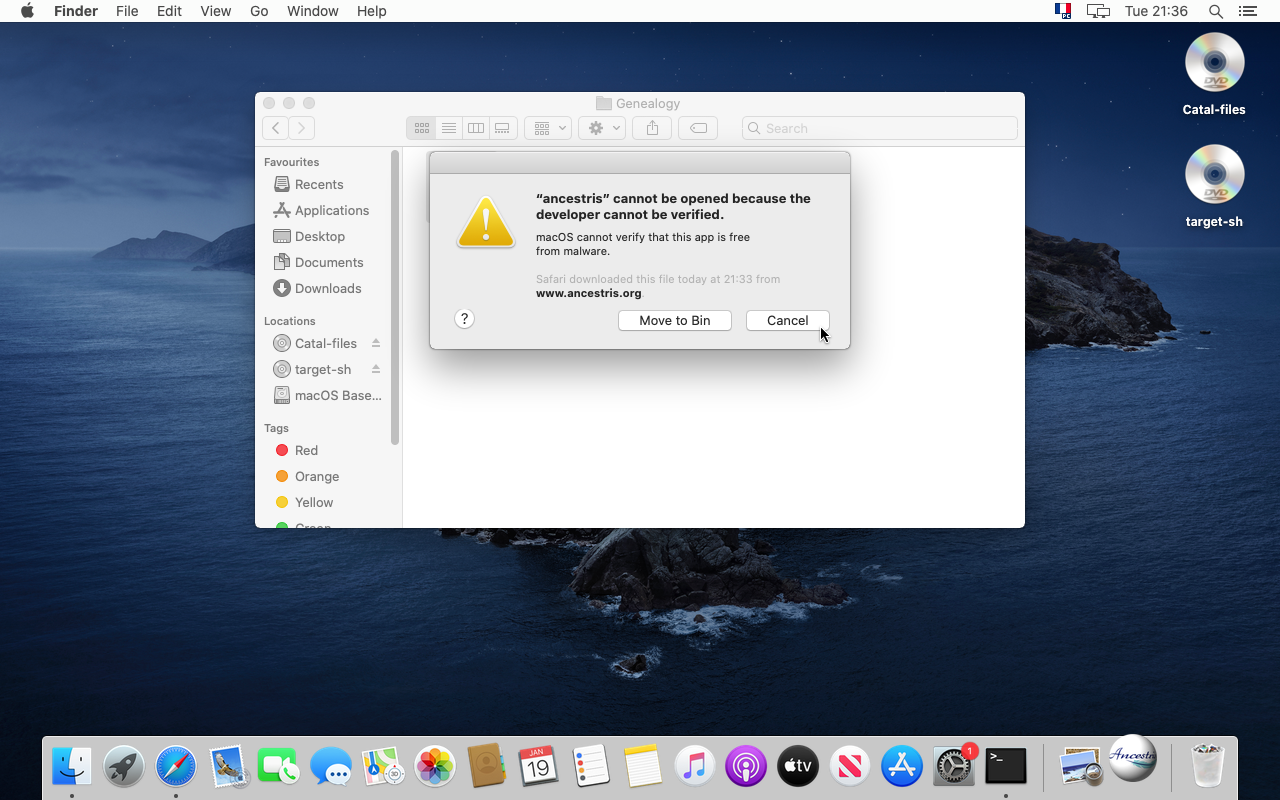
Bekræftelse af sikkerhedscheck
23. Ancestris starter, men MacOS fortæller dig, at programmet kommer fra en uautoriseret udvikler. Ikke noget problem. Ancestris er et open-source-program og har ikke noget 'snavs. Lad os autorisere det.
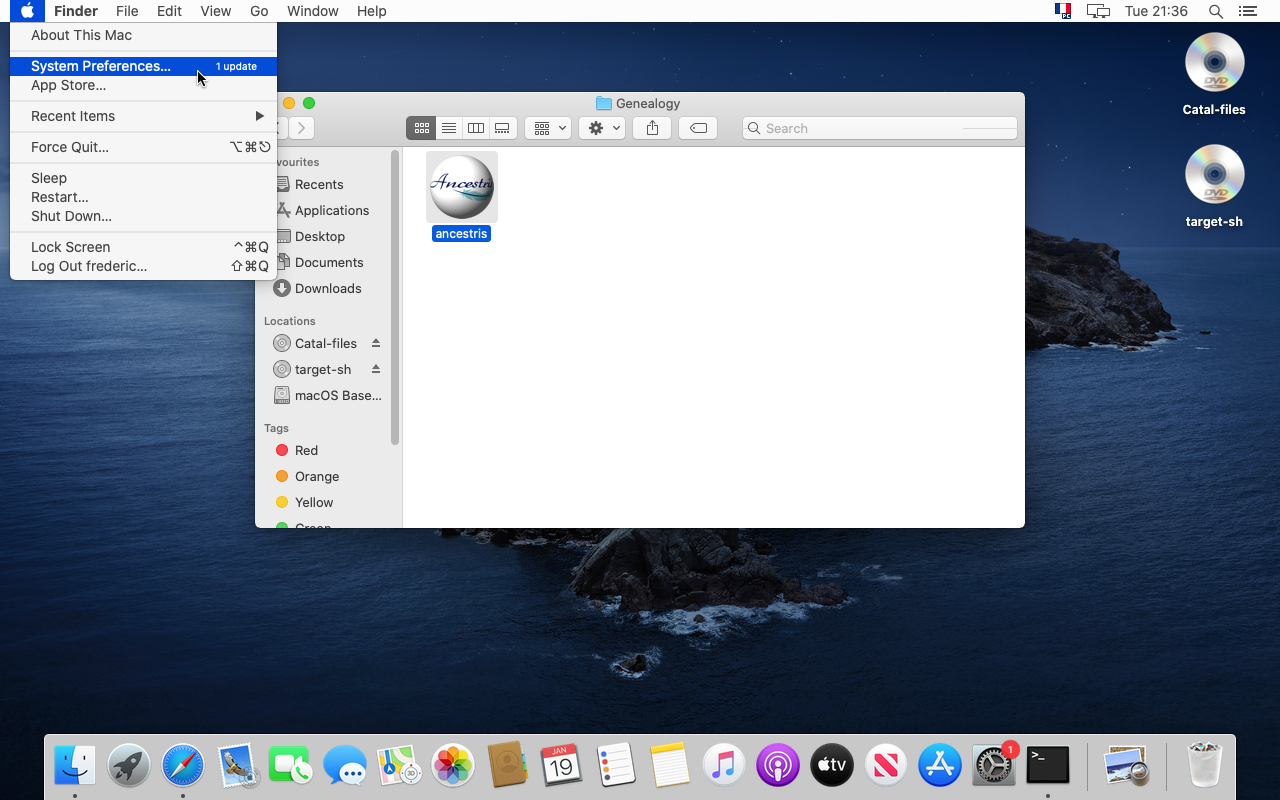
24. Så til System Preferences
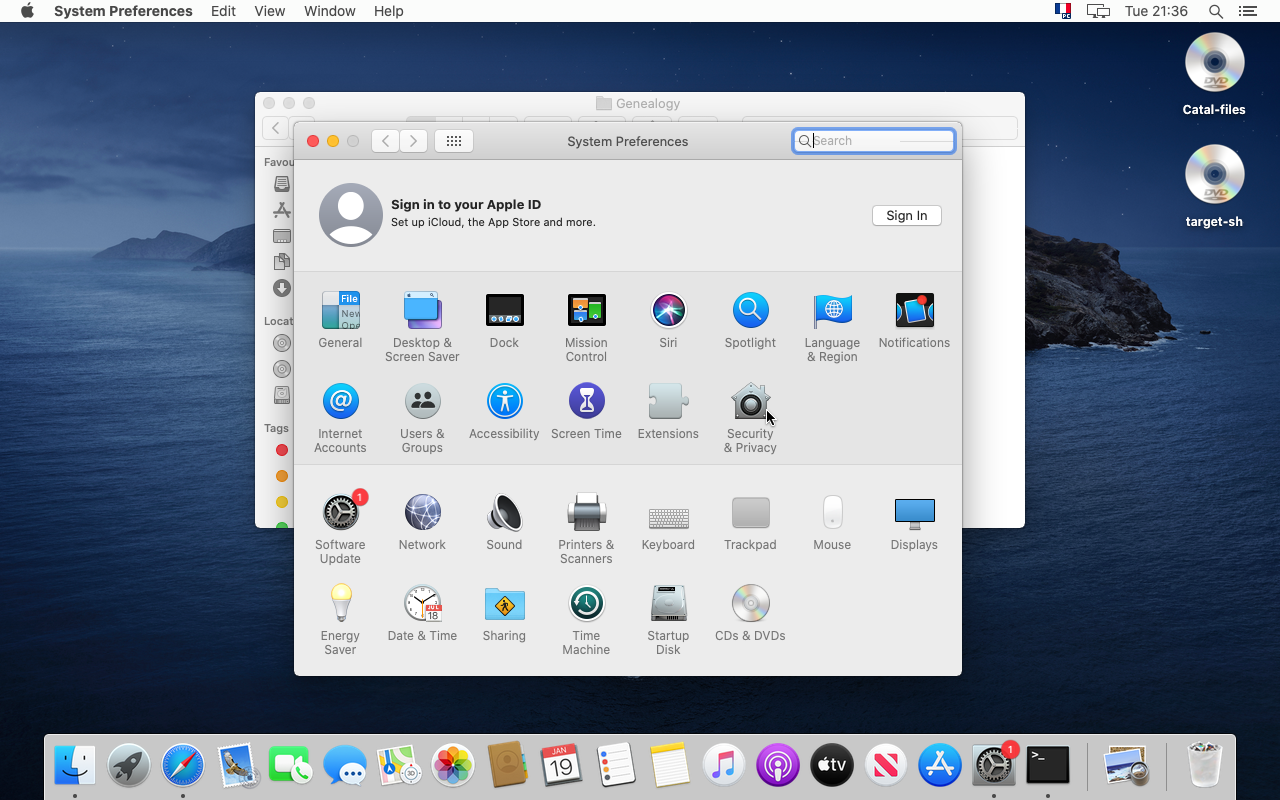
25. Klik på "Security & Privacy"
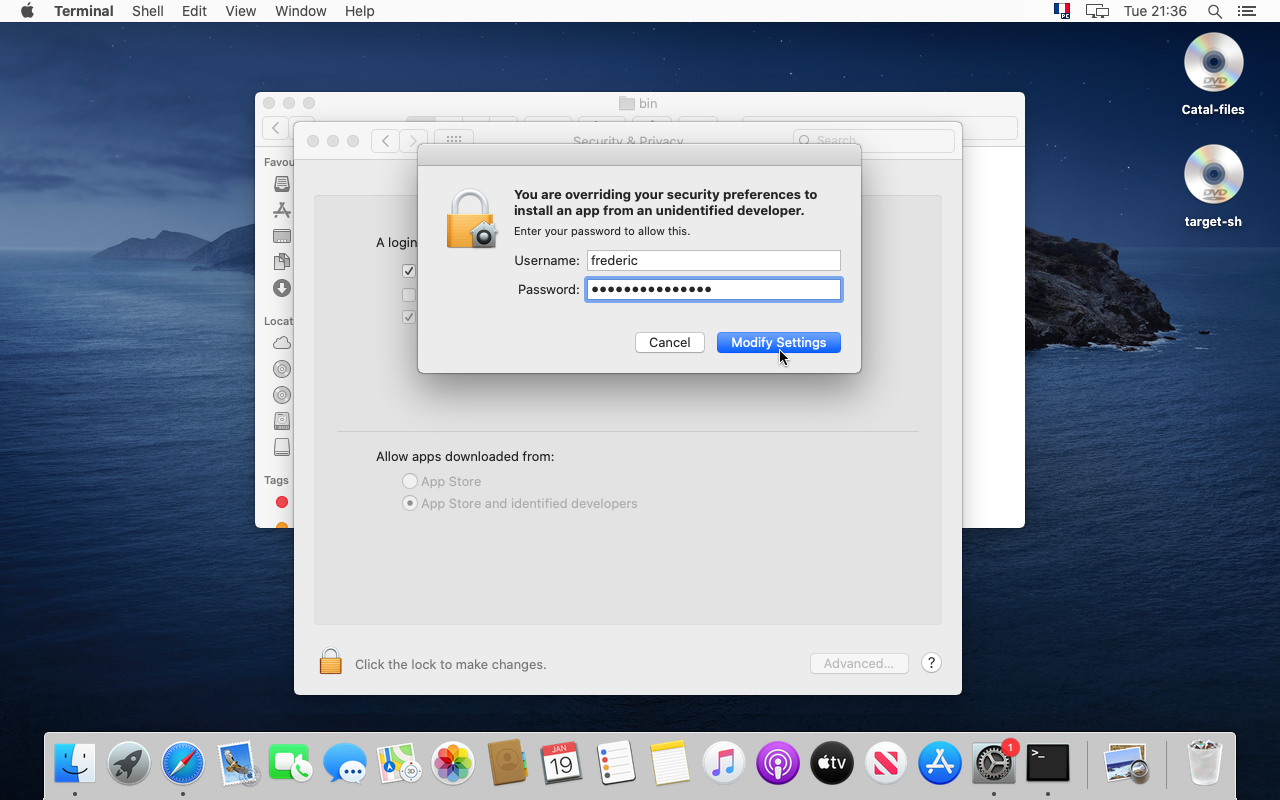
26. Klik på "Åben alligevel"
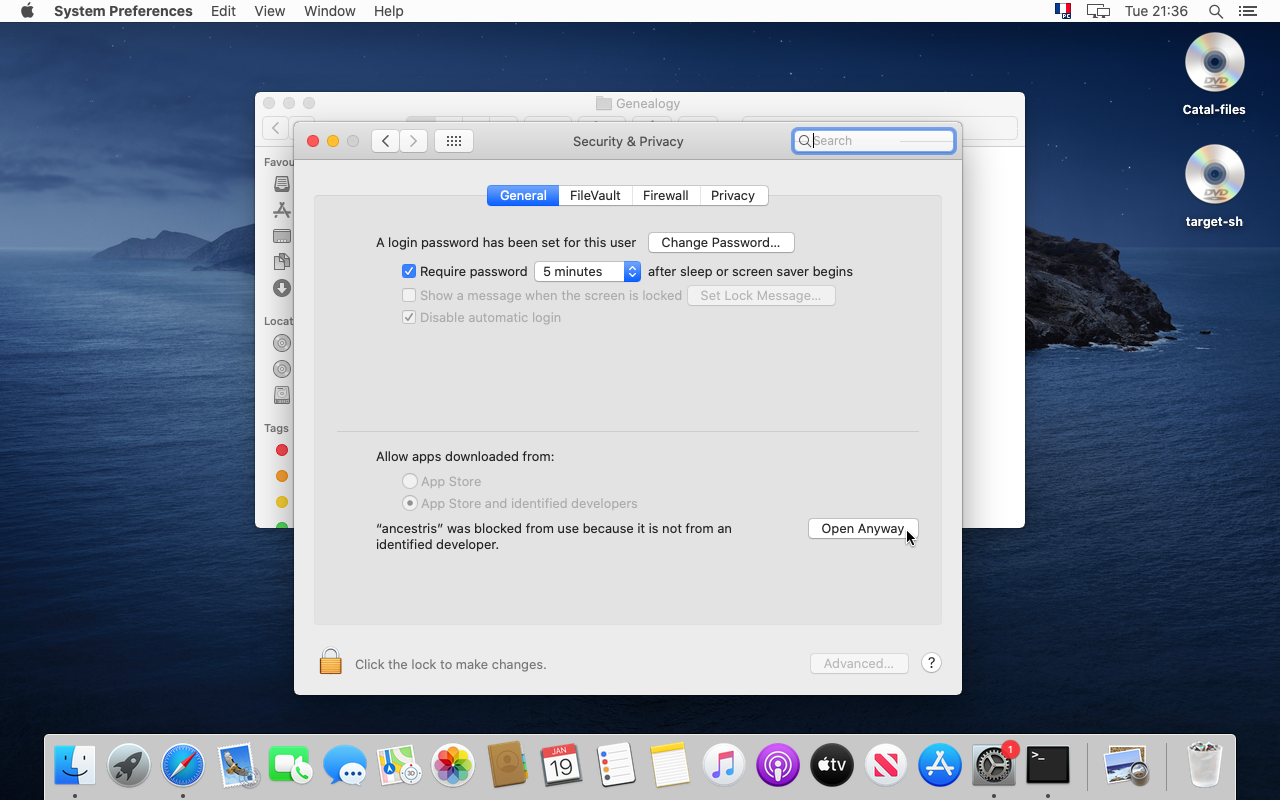
27. Hvis det er første gang du gør dette, bekræft med dit password.
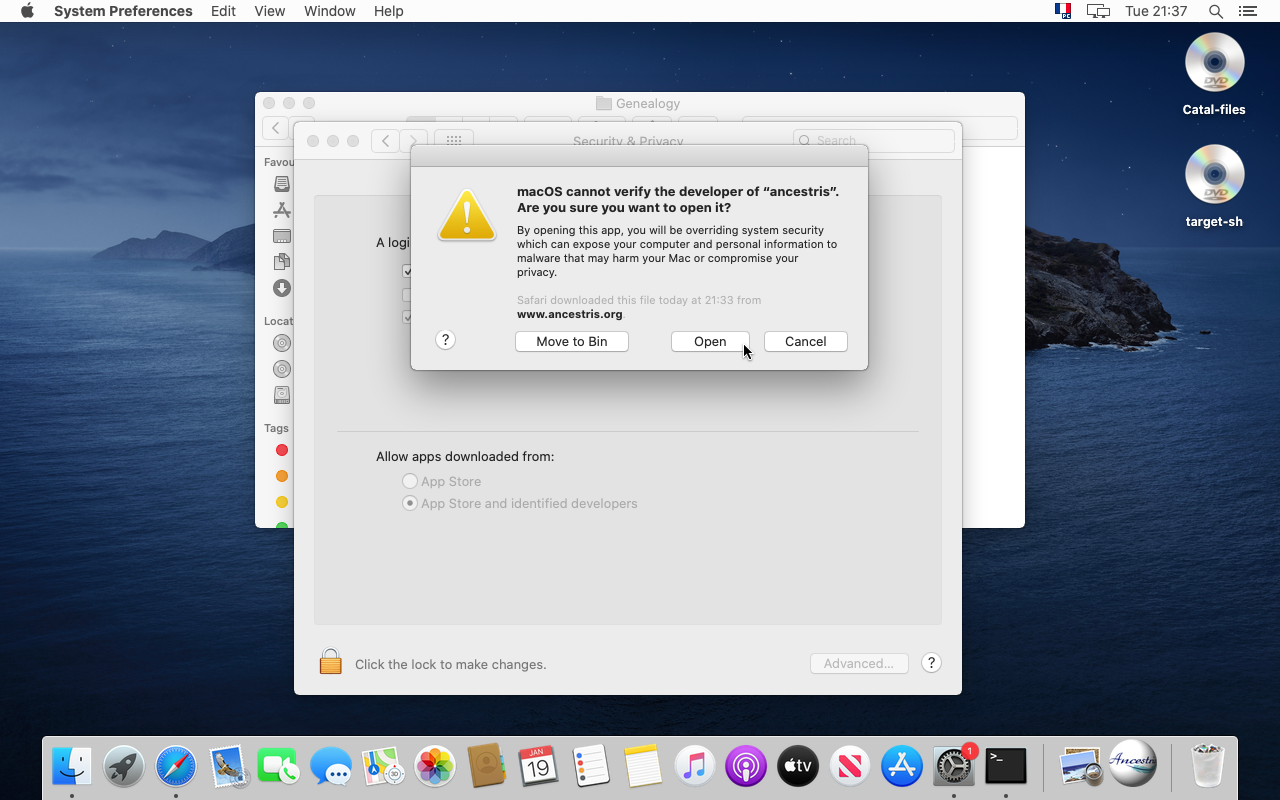
28. Ja, du er sikker, klik på 'Åben'.
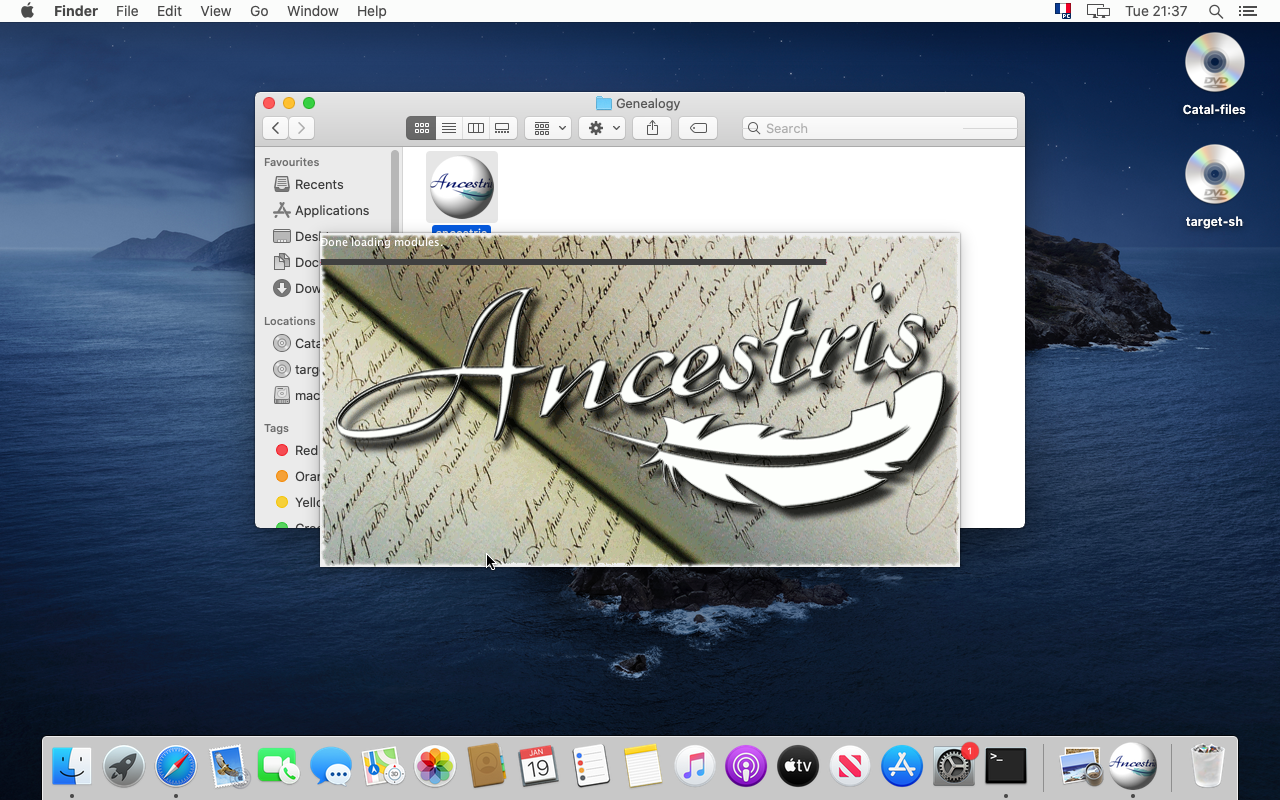
29. Endelig, Ancestris starter.
30. Du kan nu se velkomstvinduet.
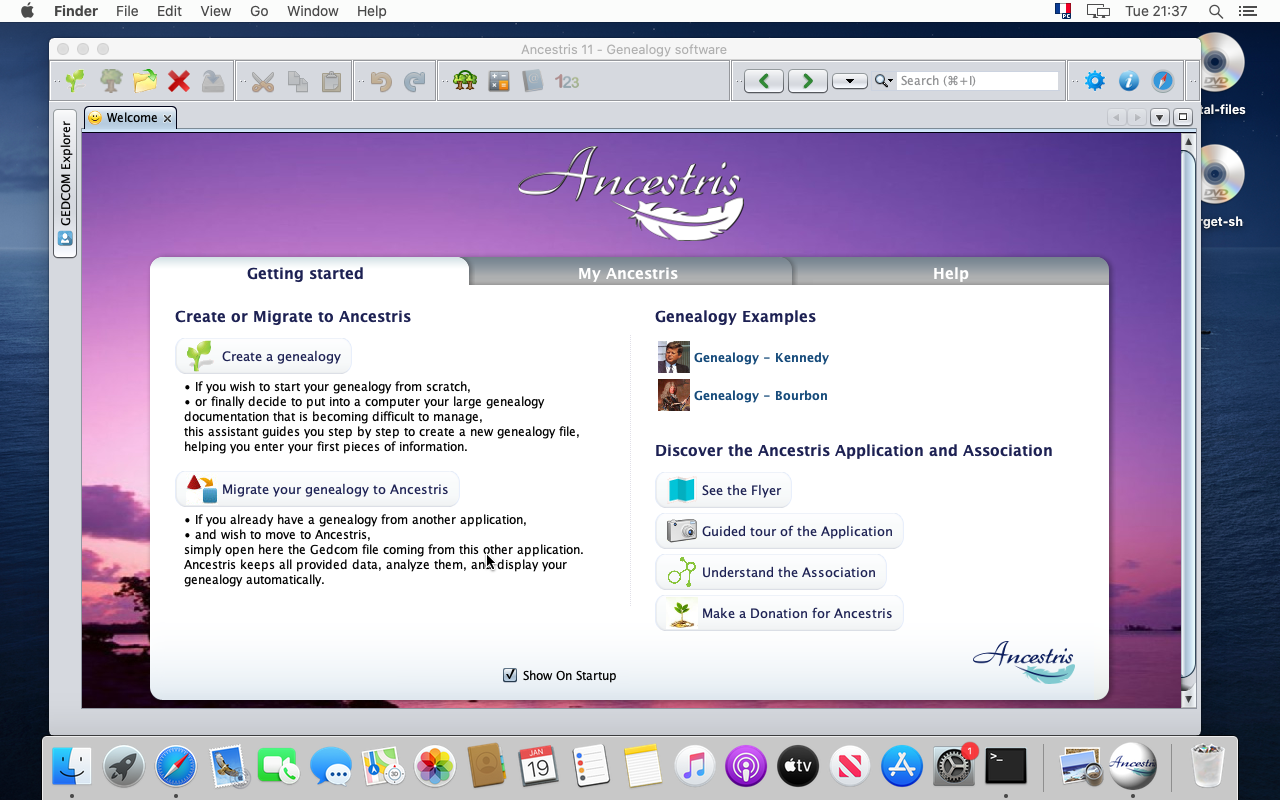
31. Bemærk venligst, at du fra the application Menu kan tilgå opsætning og "Om Ancestris" panelet.

Genvej i dock-linjen
32. Lad os lave en genvej i Dock ved at klikke på Ancestrisikonet idockpanelet.

33. Vælg "Valg" og "Bevar i Dock".
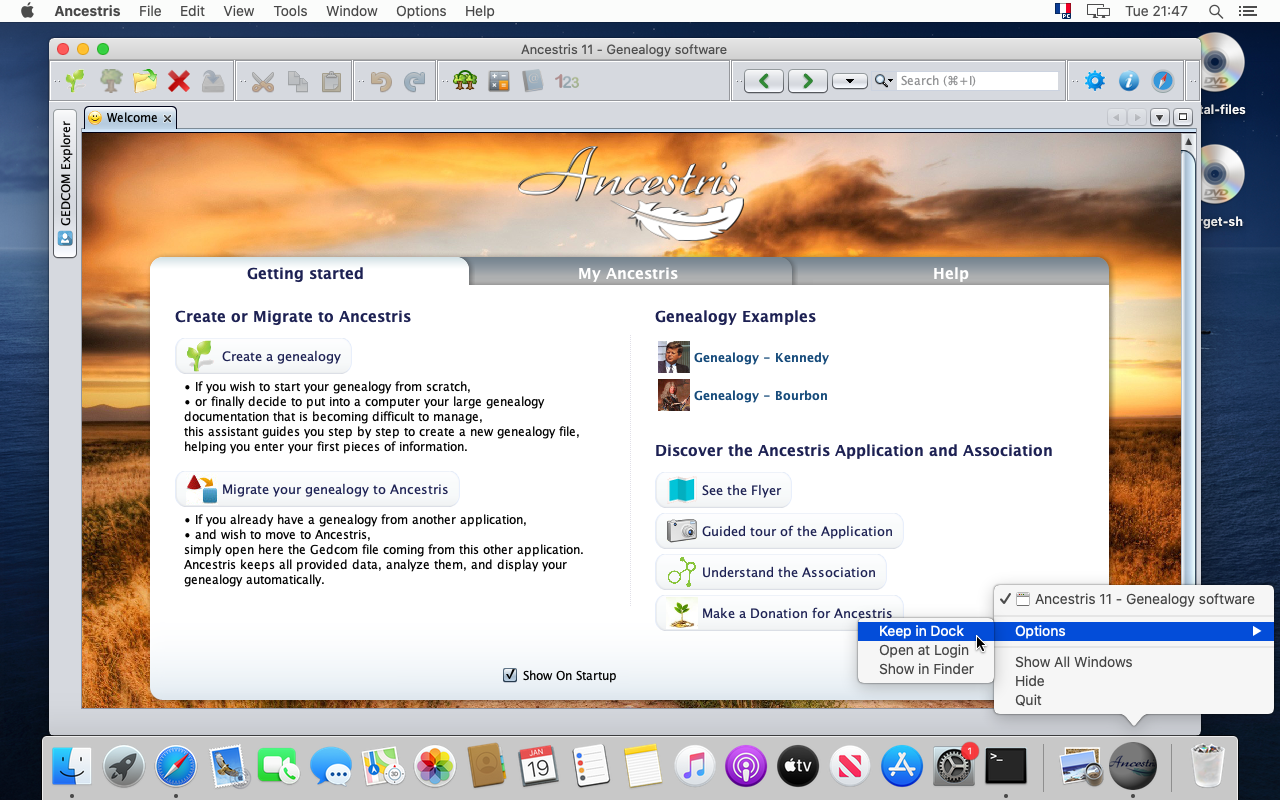
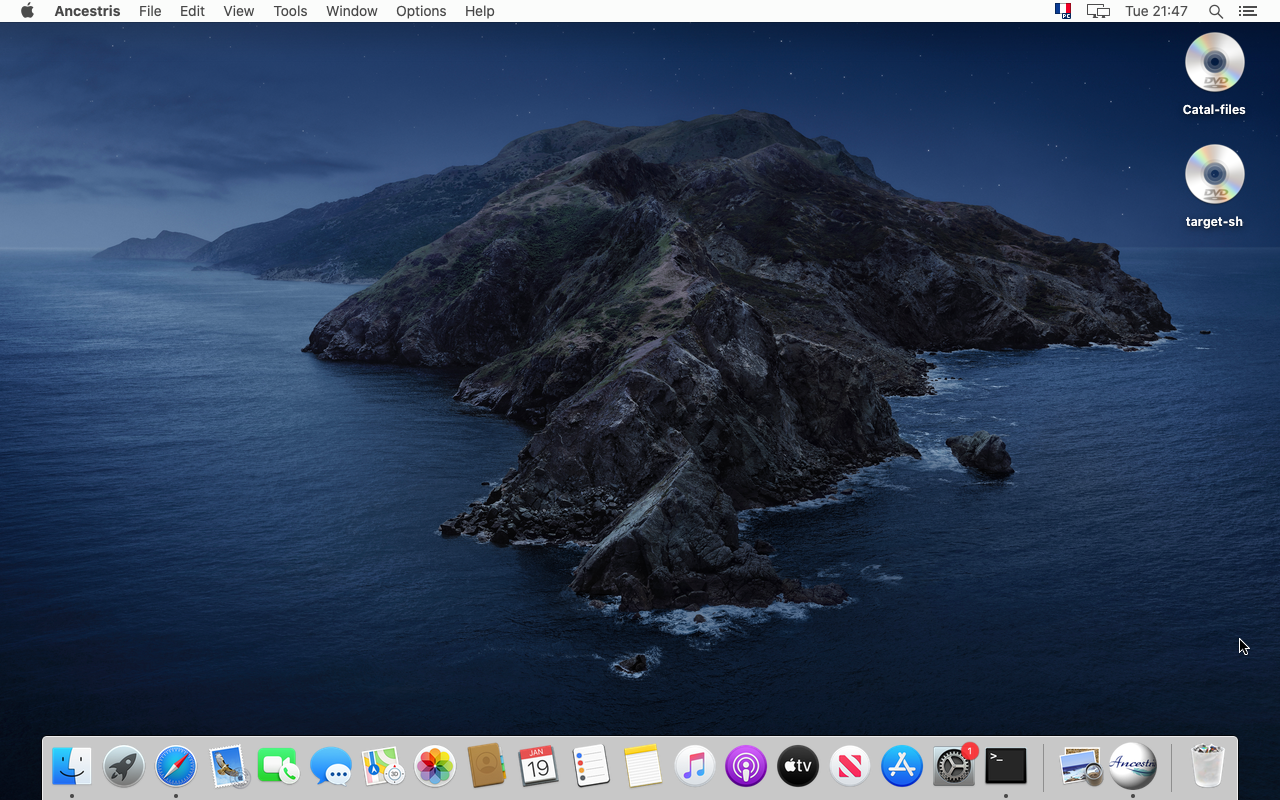
34. Det var det. Ancestris er installeret og i Dock. Yessss!
Special note for brugere af MacOS Big Sur
There are additional steps for MacOS Bug Sur users, in case Ancestris does not start after the installation above:
- It might be necessary to store Gedcom files in another folder than the 'Documents', 'Desktop' and 'Downloads' folders. For instance, you can use the "Public" folder.
- Indeed, for security reasons, MacOS might prevent access to these folders by non-signed applications.
- It can also happen that an error message "Wrong line n° null" is displayed when opening a Gedcom file that is placed under one of these folders.
- It might be also necessary to specify the path to the java version in the ancestris configuration file. This is explained below.
Please follow these additional steps to specify the path to the java version in the ancestris configuration file:
Basic principles:
- The configuration file is here :
${HOME}/Library/Application Support/ancestris/trunk/etc/ancestris.conf - Java's location is given by the following line command :
/usr/libexec/java_home -V
These are the steps.
1. Open a terminal, and check and copy the location of the installed java version
- Type /usr/libexec/java_home -V on ther command line and press Enter
- You shoud see the path of the installed java version.
- Select the line indicating the path, and click on the mouse to copy it in the clipboard. This line could be different in your case.
- Here it is
/Library/Java/JavaVirtualMachines/jdk-15.0.1.jdk/Contents/Home
- Here it is

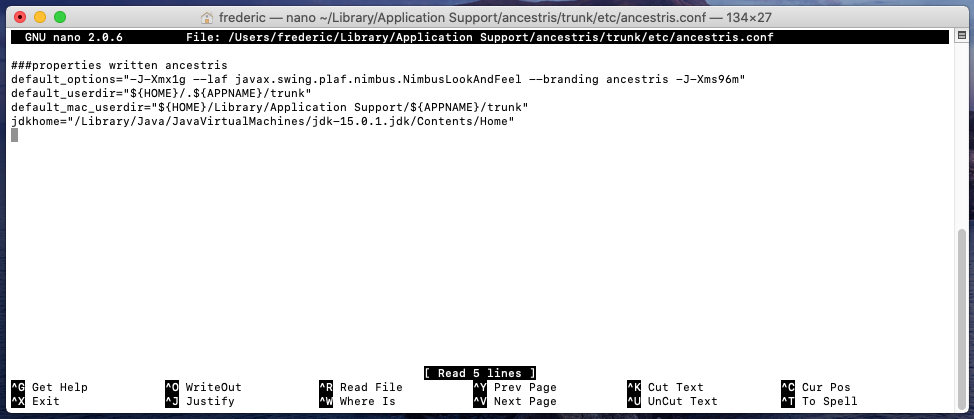
2. Open the editor on the Ancestris configuration file
- Type the following command:
nano ${HOME}/Library/'Application Support'/ancestris/trunk/etc/ancestris.conf

3. The nano editor opens and shows the content of the Ancestris configuration file
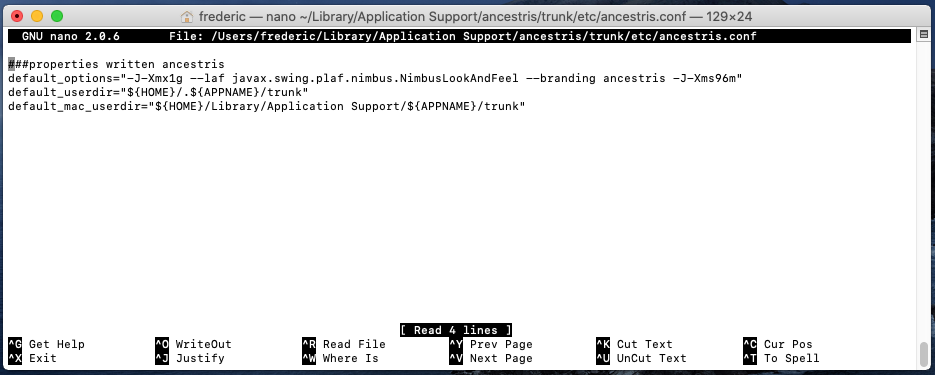
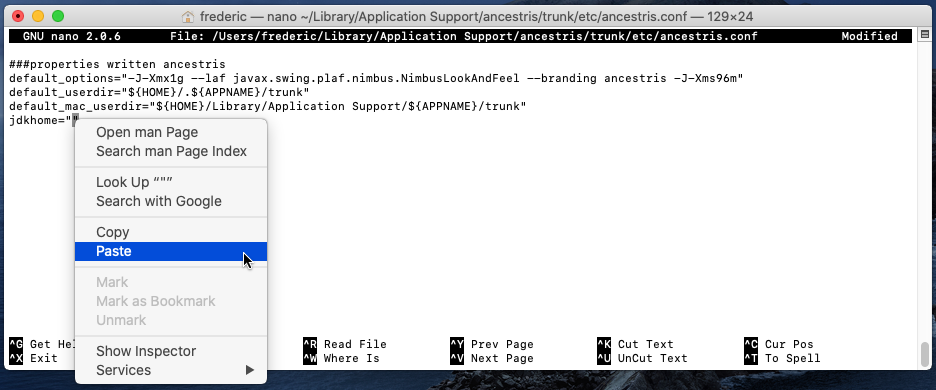
4. Add - or modify - the line that says jdkhome="" and paste the java path between the double quotes
- Add the line if it does not exist
- Or update it otherwise. Make sure in this case that there is no pond sign "#" at the beggining of the line, your change would not be taken into account.
5. Exit and save your change
6. Check that the Ancestris configuration file has your change, and start Ancestris.
- Type the command starting with "
cat ${home}/..." below. - The terminal displays the configuration file with the added line.

The configuration file is updated. You can start Ancestris and Ancestris should find java.