Ancestris installieren
Installieren oder aktualisieren Sie Ancestris unter MacOS, Windows und Linux. Java Voraussetzung. Speicherort der Dateien, Starteinstellungen und Benutzereinstellungen.
- Install and start Ancestris
- Reinstall or upgrade Ancestris
- Update Ancestris
- Step-by-step installation on MacOS
- Step-by-step installation of version 11 on Windows
- Step-by-step installation of version 12 on Windows
- Java installation
- Launch settings
- Software files and User settings files
Install and start Ancestris
Lizenz und Benutzerrechte lesen
Ancestris is free software, licensed under the GNU GENERAL PUBLIC LICENSE V3.
Ancestris is a free genealogy program, for unlimited time usage, and an unlimited number of individuals.
It is made available to you by volunteers.
Überprüfe unsere erforderliche Konfiguration
Ancestris läuft auf allen aktuellen MacOS-, Windows- und Linux-Betriebssystemen.
If Ancestris does not start, or shows the Ancestris splash screen and stops, it is most generally related to an issue with the Java installation.
Um Ancestris benutzen zu können ist folgende Konfiguration erforderlich:
- Java Version 8 oder version 11. Wir können nur LTS Versionen von Java unterstützen, wenn auch Ancestris mit anderen Version richtig funktionieren könnte (12 to 15).
- 2 Gb RAM
- 200 Mb erforderlicher Festplattenspeicher
- Ein ausreichend großer Bildschirm. Als Minimum wird 1920 x 1080 empfohlen.
Java ist Voraussetzung
To use Ancestris, you need to have Java installed on your system.
Most of the Ancestris features are compatible with Java Version 11 and Java Version 8 (aka Version 1.8).
To identify which Java version is installed on your system, other Java versions available, how to swap between Java versions, or the Java technical requirements, check out the Java installation page.
Installation
If you need detailed installation steps, we provide you with a step-by-step guide corresponding to your system :
✔ Step-by-step installation guide for MacOS
✔ Step-by-step installation guide of version 11 for Windows
✔ Step-by-step installation guide of version 12 for Windows
What follows is the general overview of the installation and the links in case of troubles or to change launch settings.
Go to Download on the Ancestris site
Ancestris can be downloaded for free on our page https://www.ancestris.org via the DOWNLOAD option.

Choose your Ancestris version
Two versions are available.
- Choose the stable version 11 if you are aiming for stability and do not need to benefit from the latest developments.
- Choose the daily version 12 if you wish to benefit from the latest functionalities.
All versions work on any device under any operating system that can use Java.
All versions work with all existing translations.
All versions are full versions and allow unlimited usage.
Download Ancestris
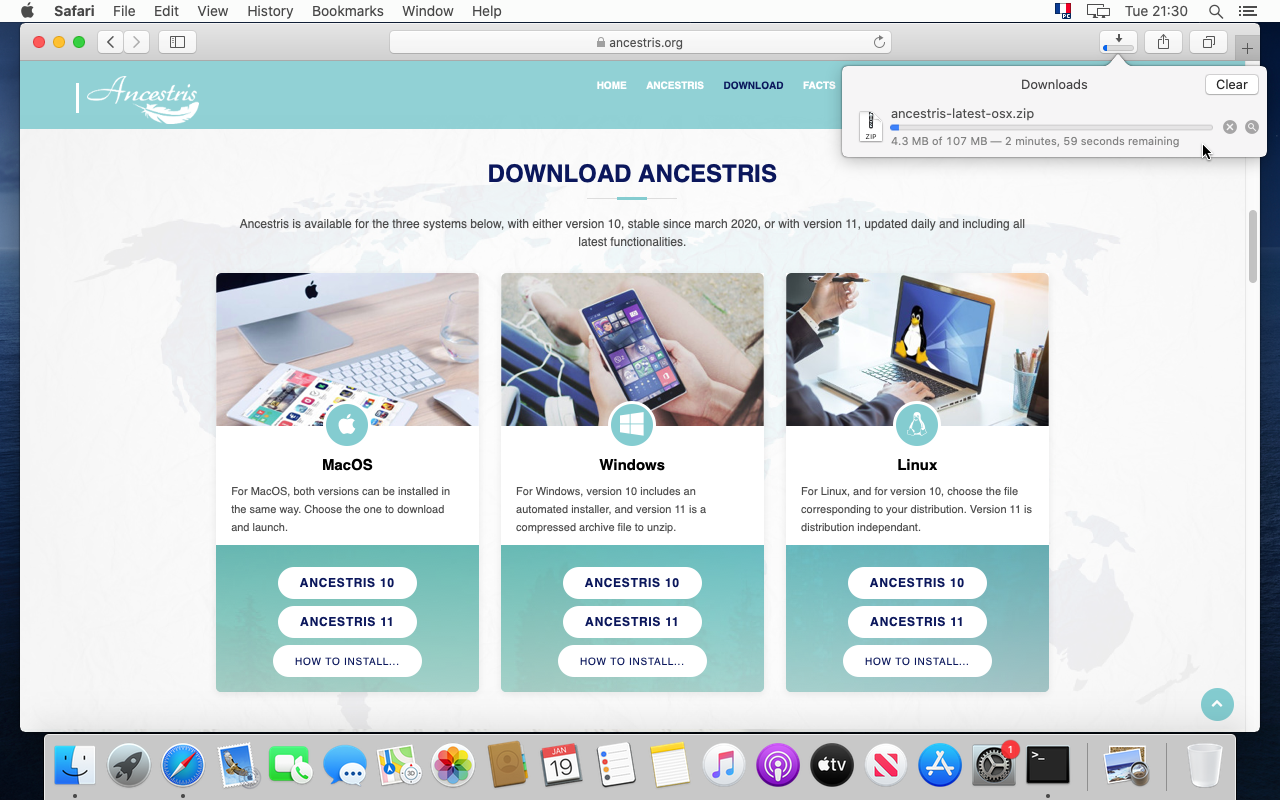
This shows the Download section of the Ancestris site.
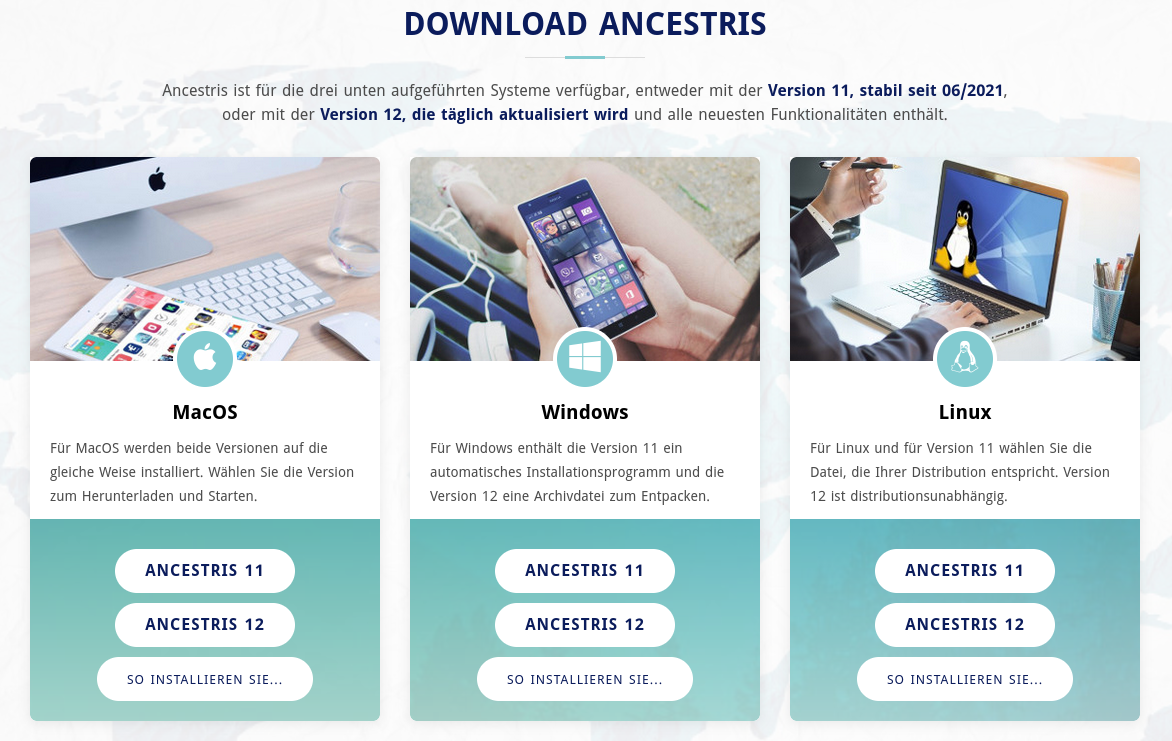
- Click on the Ancestris version button of your operating system
- MacOS
- Windows
- or Linux. Hovering over Ancestris 11, a menu will appear where you can pick one of the following distributions : Fedora, Redhat, Mandriva, Ubuntu, Mint, Debian, or a generic ZIP file.
- The downloaded file will be specific to the operating system you choose
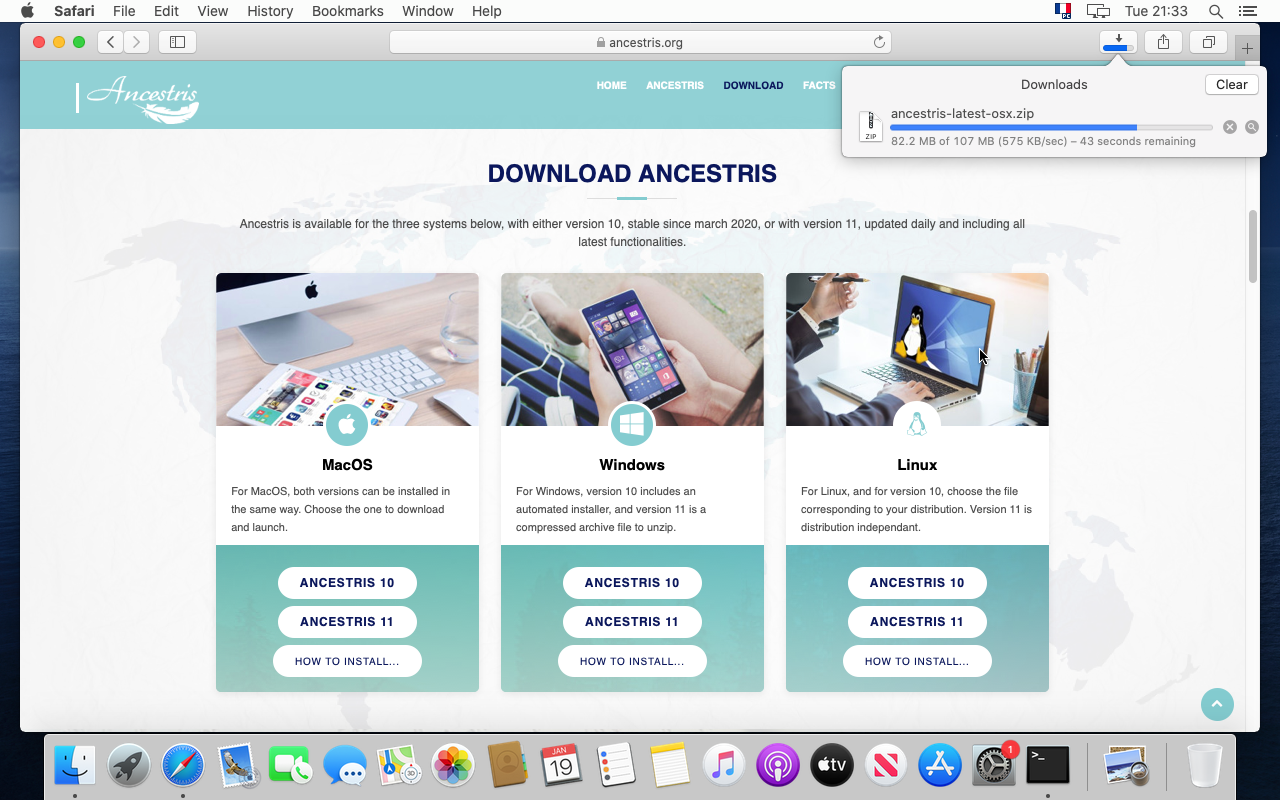
- Follow the steps suggested by your Internet browser and save the file
- The download will take a few minutes and will result in a file of about 86 Mb.
This is an example with Ancestris 11 for Windows.
This is an example with Ancestris 12 for Windows or for Linux.
Choose Ancestris folder
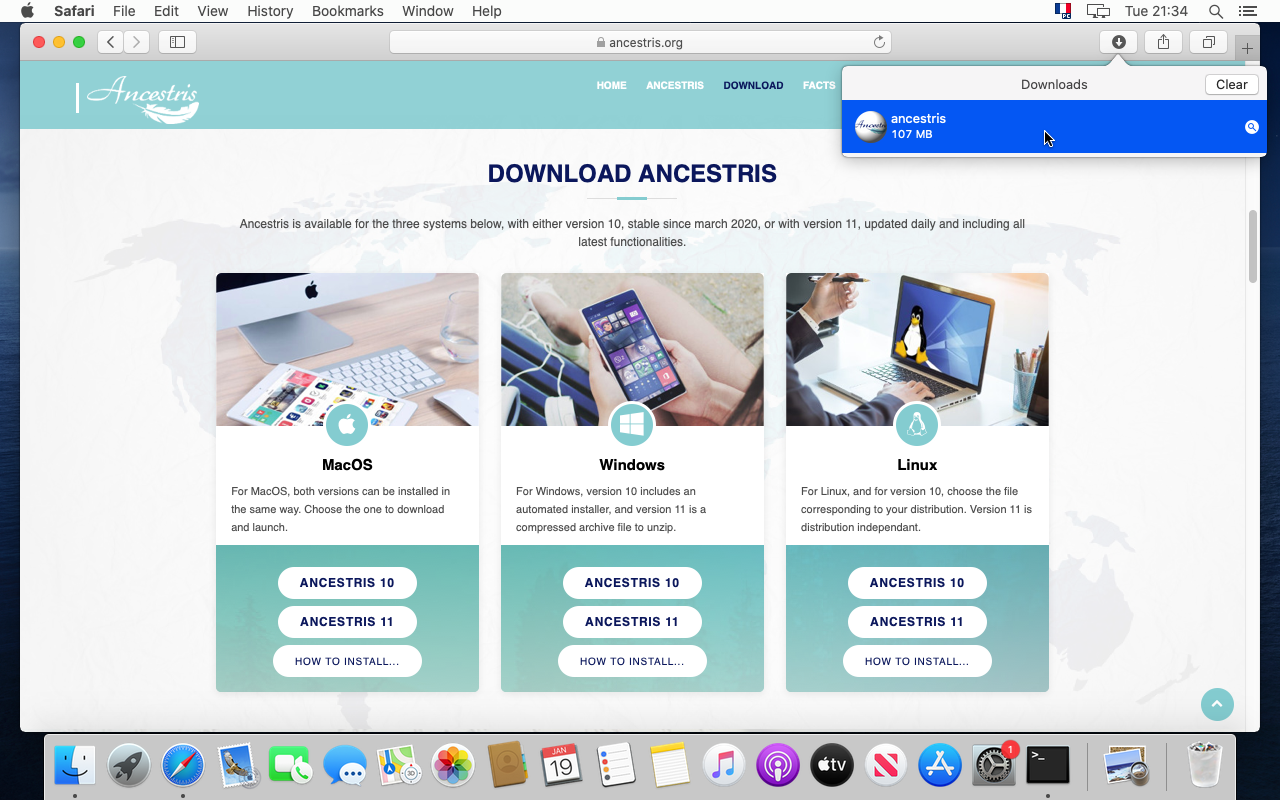
At the end of the download, the file will be placed in your default download folder.
If you don't know what this folder is, check your Internet browser's settings or else click on the downloaded icon of your browser.
From that folder, feel free to move the downloaded file wherever you want on your computer.
Start Ancestris
The way to start Ancestris slightly differs depending on the OS system you have.
Ancestris's files will be inside the resulting ancestris folder. Refer to the Software files page to have the detailed view of the ancestris folder.
To start Ancestris, run the downloaded file or else run the executable in the bin folder that corresponds to the operating system you are using.
- MacOS : just click on the downloaded file and Ancestris will start.
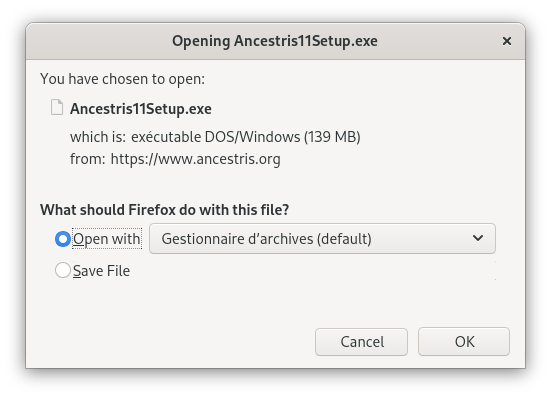
- Windows : for version 11, just double-click on the downloaded exe file
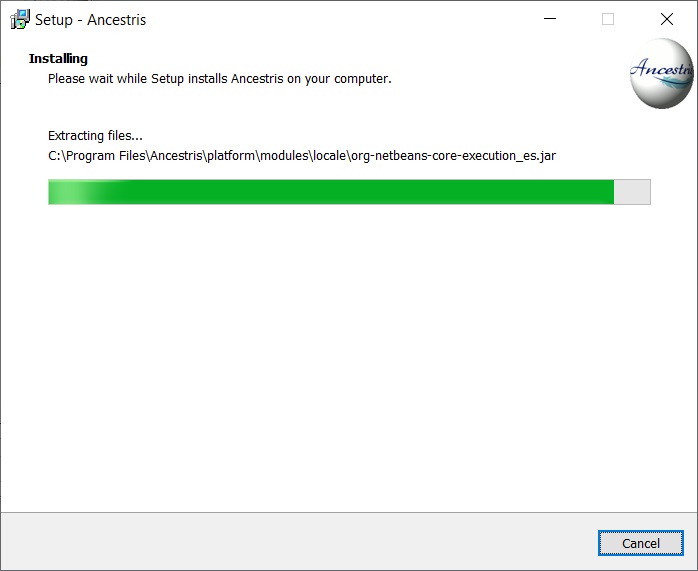
Ancestris11Setup.exe. This installation programme will assist you in the installation of Ancestris and it will also create the launcher icon. For version 12, run the ancestris64.exe file in the bin folder. - Linux : unzip the archive and then double-click on the 'ancestris' file of the bin folder.
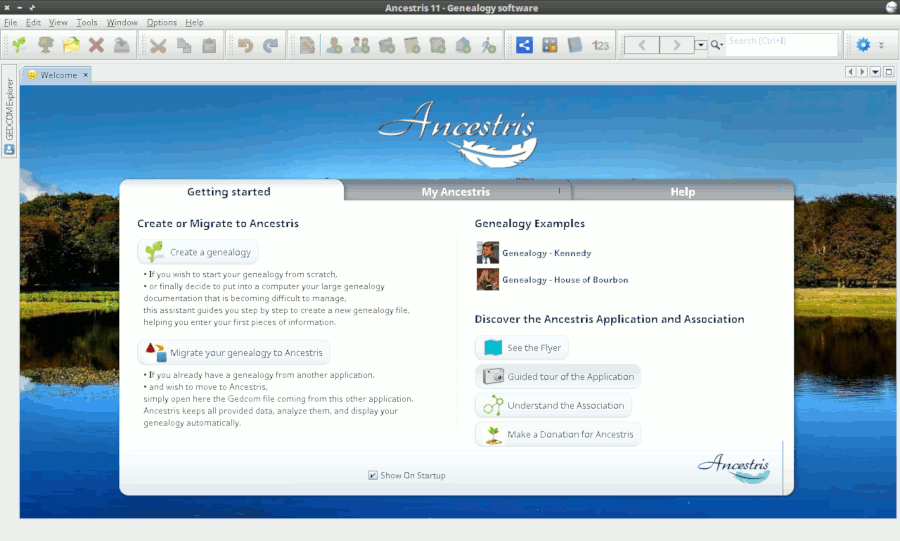
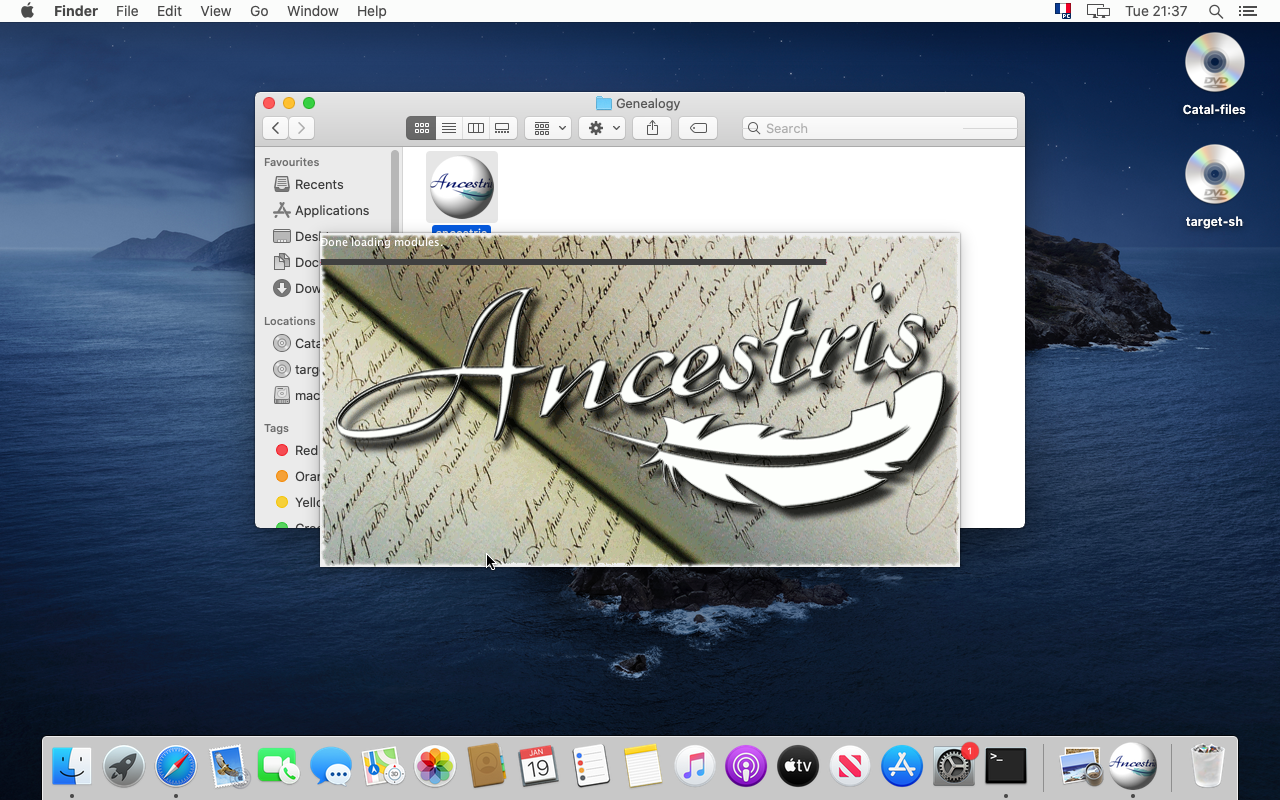
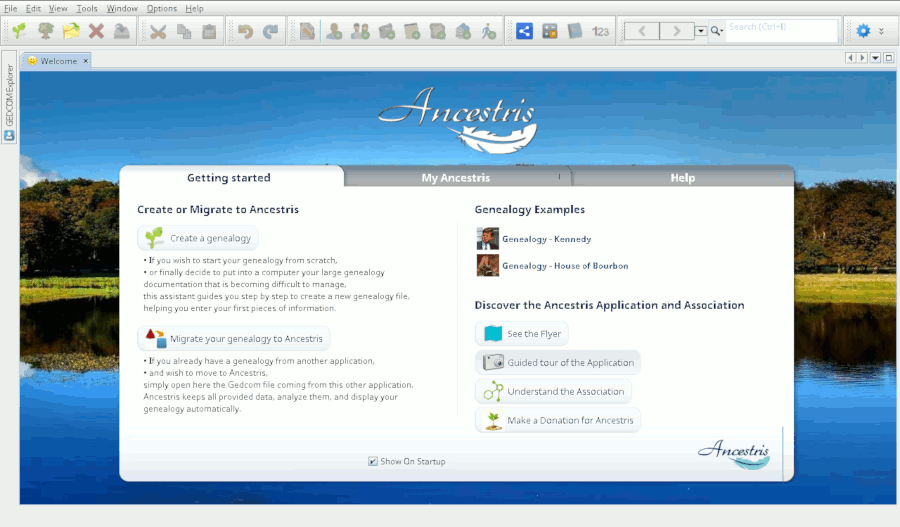
Regardless of the version, here is what you will see when Ancestris is started.
Troubleshooting
If you need detailed installation steps, please read the step-by-step guide below corresponding to your system :
✔ Step-by-step installation guide for MacOS
✔ Step-by-step installation guide of version 11 for Windows
✔ Step-by-step installation guide of version 12 for Windows
If Ancestris does not start, or shows the Ancestris splash screen and stops, it is most generally related to an issue with the Java installation.
Either Java is not installed or Ancestris does not find it or finds an incompatible version or finds a corrupted version.
Please check the Java installation page for help.
Personalisation
Shortcut icon
If you need to customize a shortcut with a nice icon to start Ancestris, please check your operating system's documentation on how to create it, and feel free to use the included image file ancestris.gif provided within the softwares files.
For MacOS, see the step-by-step guide.
For Windows, see the step-by-step guide.
For Linux, there are several of these procedures, and quite different from one system to another.
Launch settings
You can personalise the way Ancestris starts such as the memory allocation for instance. In case you need to personalise the way Ancestris is launched, please refer to the Launch settings page.
User settings
If you are interested in knowing where the user settings files are, please refer to the Software and user settings files page.
Reinstall or upgrade Ancestris
There are several situations where you may need to reinstall Ancestris, but they all end up following the same steps described below.
Situations to justify reinstallation
Reinstalling Ancestris on the same computer
- If a new version of Ancestris is out and you want to benefit from it. For instance, upgrading from version 11 to version 12.
- If there was a major modification of the same version, usually the daily version. For instance, when the Ancestris team makes changes to the Ancestris platform, they will ask you to reinstall. To be notified of such changes, you will need to subscribe to the discussion list.
- If a change has happened to your computer, or if some Ancestris files are lost. In this situation, Ancestris might no longer work properly.
In all those situations, your action will result in reinstalling Ancestris.
When reinstalling Ancestris, you will automatically be able to preserve your customizations.
It is up to you to decide if you want to reinstall Ancestris at the same location on your computer or not.
In either case, we recommend you to get rid of the former Ancestris instance and replace the Software files.
In case you were to keep two different instances of Ancestris on the same computer, Ancestris might get confused as there is only one set of user settings.
Reinstalling Ancestris on a second computer
If you are to install Ancestris on a second computer, just proceed as a regular first-time installation.
If you want to have the same user settings on both computers, you should first copy the user settings folder from one computer to the other one.
Alternatively, you can also use the export button of the Ancestris preferences window.
Reinstalling stable version 11
To reinstall the main version, while preserving your user settings, just proceed as a regular first-time installation.
It should be much quicker as Java should already be installed and your Ancestris launcher is already set.
In practice, it will consist of simply replacing the 5 folders listed in the following steps.
Reinstalling daily version 12
To upgrade from the main version to the daily version, or reinstall the daily version, follow the instructions below.
You have two possibilities:
- Either erase the previous application and re-install the new one (the preferred choice for MacOS).
- Or replace the existing files with the new ones, which lets you keep the launcher that you might have set up (the preferred choice for Linux and Windows).
In the first situation, erase the previous Ancestris application and reinstall the new one.
In the second situation, follow the steps below:
- Quit Ancestris, if it is running
- Download the daily version from the Ancestris web site and install it as per the initial installation.
- In case you need to replace the files manually, go to the
ancestrisfolder of the previous installation and delete the following 5 foldersancestrisbinetcharnessplatform
- Replace them with the recently downloaded corresponding 5 folders included in the package or the compressed archive.
- Restart Ancestris as usual
In case some settings no longer work, or are not compatible with the new version, please refer to the User settings page if you want to manage them yourself.
Update Ancestris
The Ancestris team constantly works on improving the Ancestris software.
All updates we make to the version you have are available to you automatically, and you do not have anything to do, whether you are using the Main version or the Daily version.
Automatic updates
You will receive an automatic notification for updates to the version you currently use, each time you start Ancestris.
When Ancestris starts, a small window will open for a few seconds at the lower right corner, indicating the number of available updates. Just click the link in this window and follow the steps.
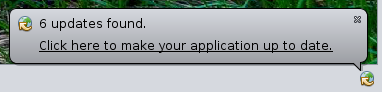
If you miss this window as it only appears for a few seconds, the little icon will remain available for you to click on it. The window above will reappear again.
![]()
If you click to get the updates, you will be asked to confirm to download the updates.
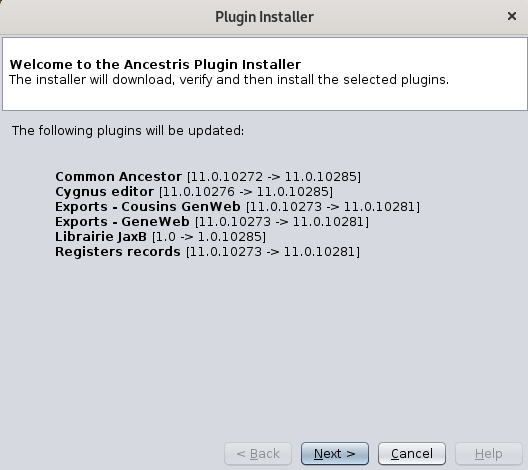
Click Next and Ancestris will download them. A progress bar will appear on the bottom right corner.

Ancestris then asks for your confirmation.
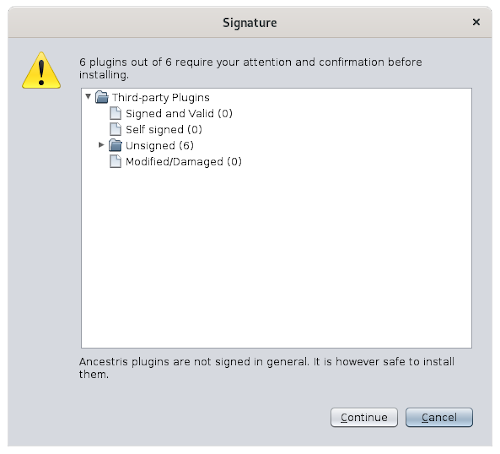
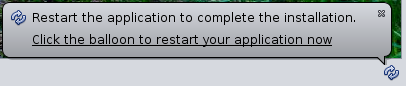
Click Continue and then, Ancestris will offer to restart. Click on the link. Ancestris will close and restart.
Proactive updates
It is also possible to retrieve updates at any time.
Just choose Options / Update Ancestris from the main menu bar.
The same assistant shown above will open.
As explained above, just follow the steps and Ancestris will offer to restart at the end.
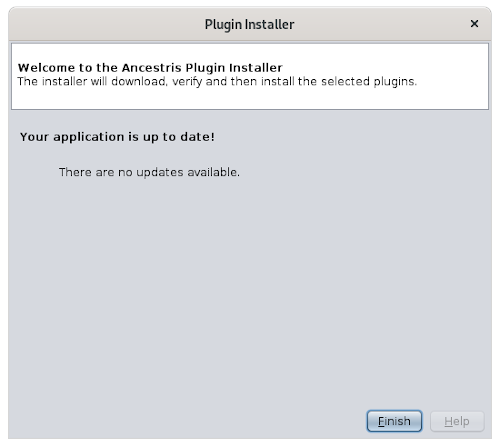
If no updates are available, the following window will appear.
Knowing more about the updates
If you use Stable version 11
When we discover bugs that could impact your use of the Main version, we fix them and the update becomes available to you according to the instructions above.
These updates are very rare.
If you use daily version 12
Regarding the daily version, updates happen almost daily !
Minor updates
Most of the time, these updates are evolutions or new functionality.
These updates are available to you and happen on a regular basis.
You can benefit from them according to the description above.
That's it.
Structural updates
On rare occasions, certain Ancestris updates of daily version 11 happen in the core platform of Ancestris.
These changes can be simple menu translations or something major. For instance when we upgrade the underlying Netbeans platform on which Ancestris sits.
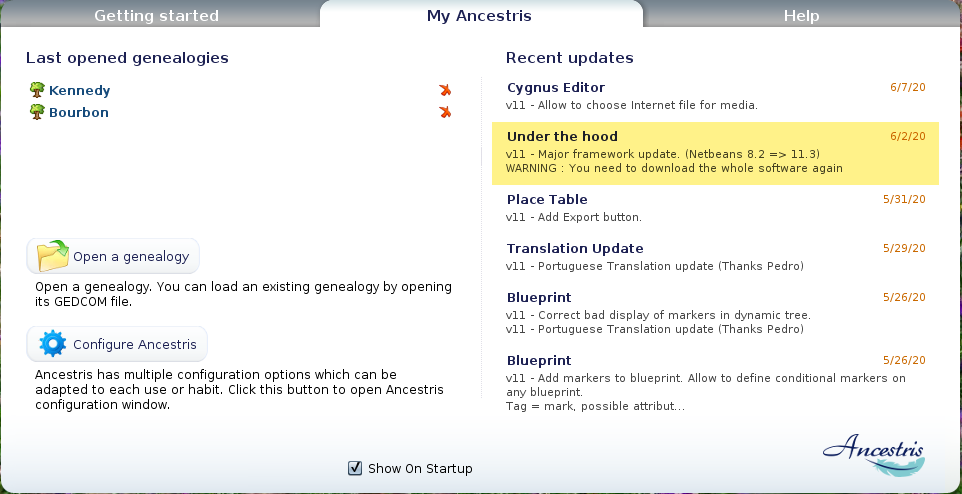
The Ancestris team will know when that happens, and will notify you through the forum or the discussion list and in the Recent updates panel of the Welcome window of Ancestris.
For instance, the image below shows an update of version 11 that occurred on June 2nd, 2020.
As usual, these updates will be available to you through the Automatic updates described above.
However, if you only apply these updates automatically, it will not reinstall the whole software. Therefore, either the new evolution will still not be available to you (e.g. menu translations), or maybe you will experience some major dysfunctions. Ancestris might just not work anymore.
Do not worry, you will notice if it happens and it will not alter your data.
To fully benefit from those changes, you will have to reinstall Ancestris.
Please follow the reinstallation instructions in this case.
Step-by-step installation on MacOS
This page documents a detailed step-by-step installation of Ancestris on a MacOS system.
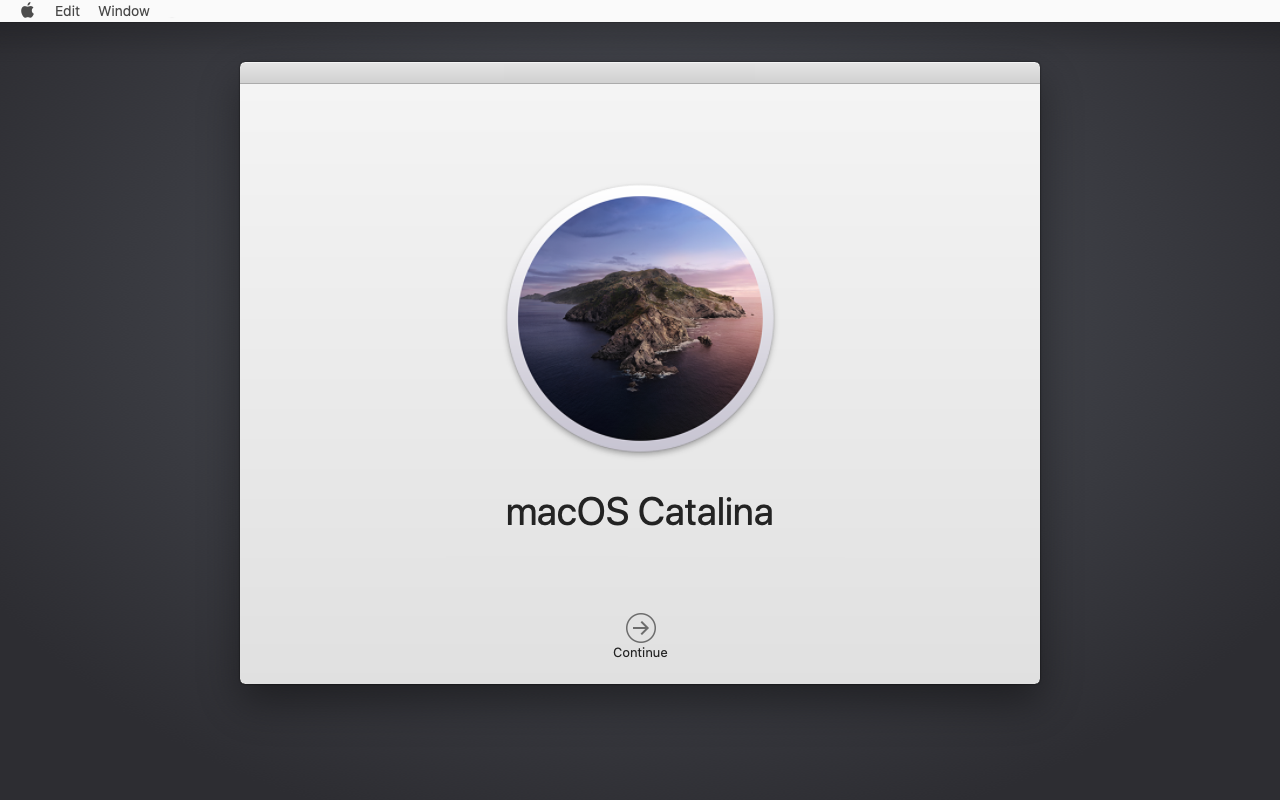
We will show an example that occurred on January 2021, of the installation of Ancestris version 11 on MacOS Catalina.
These steps include the following:
- Installation of Java which was not already installed on Catalina
- Download of Ancestris version 11 from the secure Ancestris web site
- Confirmation of the security check to allow Ancestris to run even though it comes from an unidentified developer
- Launch of Ancestris
- Creation of a Dock icon of Ancestris
Please note that the screenshots shown here might look different from those of the current Ancestris web site or the current Ancestris software version.
Special note for users of MacOS Big Sur: please follow the steps below and then, please do read this specific section at the bottom of this page.
Installation of Java
1. From the MacOS desktop...
2. Open a terminal and type "java -version"
If Java is not installed, a popup window will suggest to install it. Click "More Info...".
If java is installed, you can directly go to screen 11.

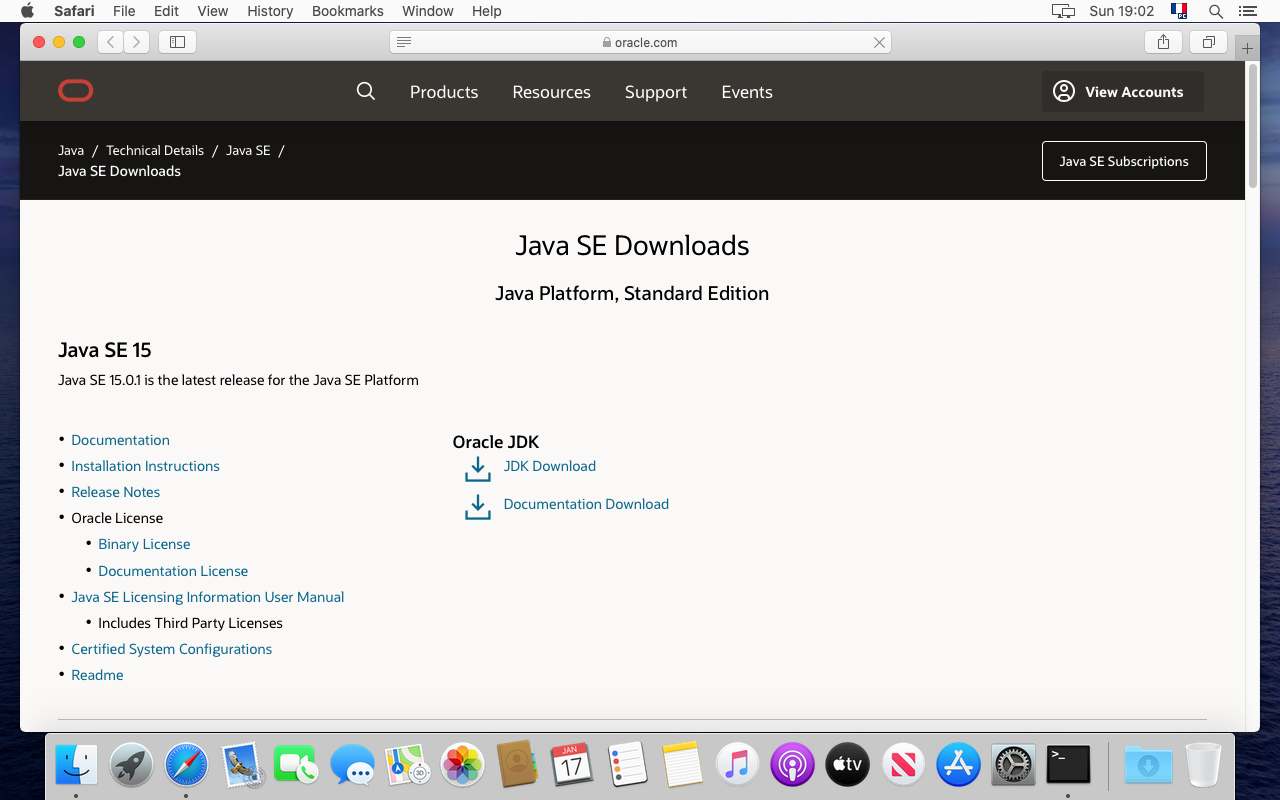
3. You are on the Java web site. Click on "JDK Download"
We can see from the web site that Java 15 was suggested. Let us install that version even though we recommend to use version 8 or 11 which are long terme versions (see required configuration).
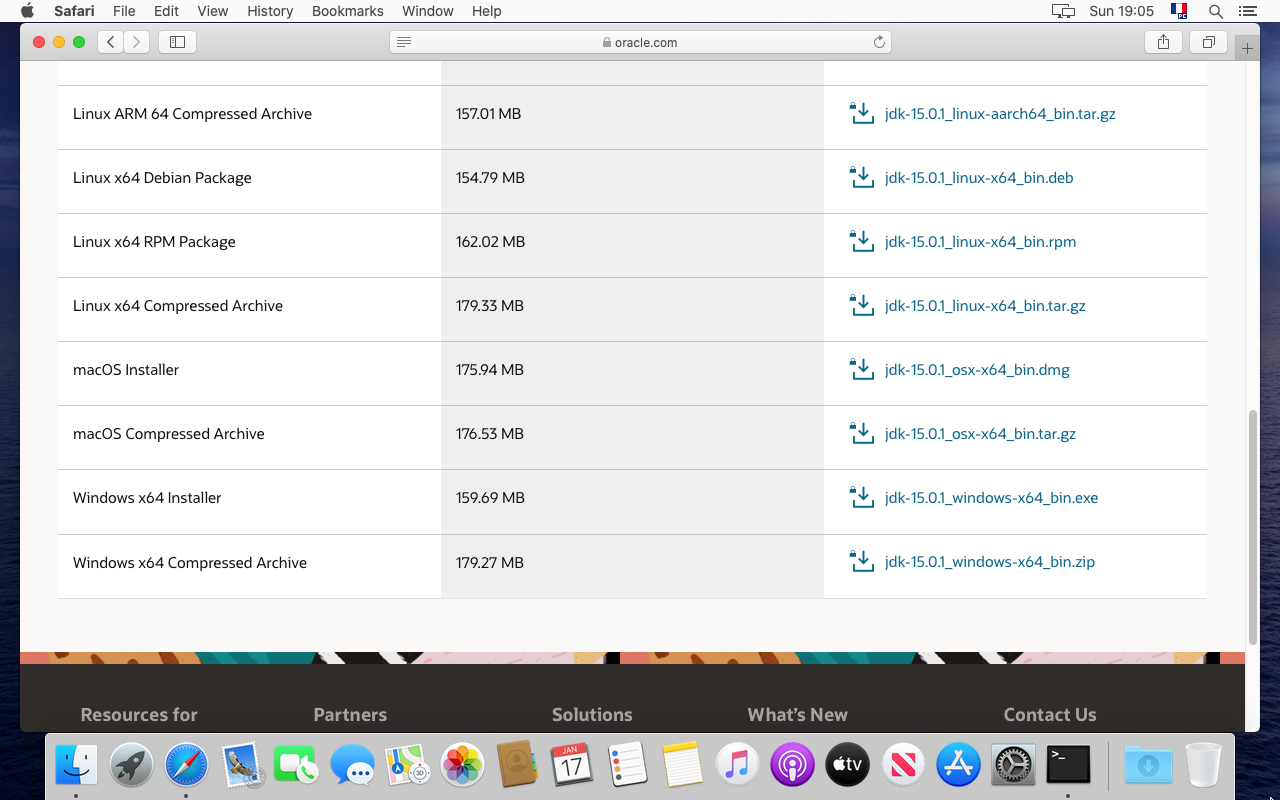
4. Go down to the "macOS Installer" line and click on the ".dmg' file
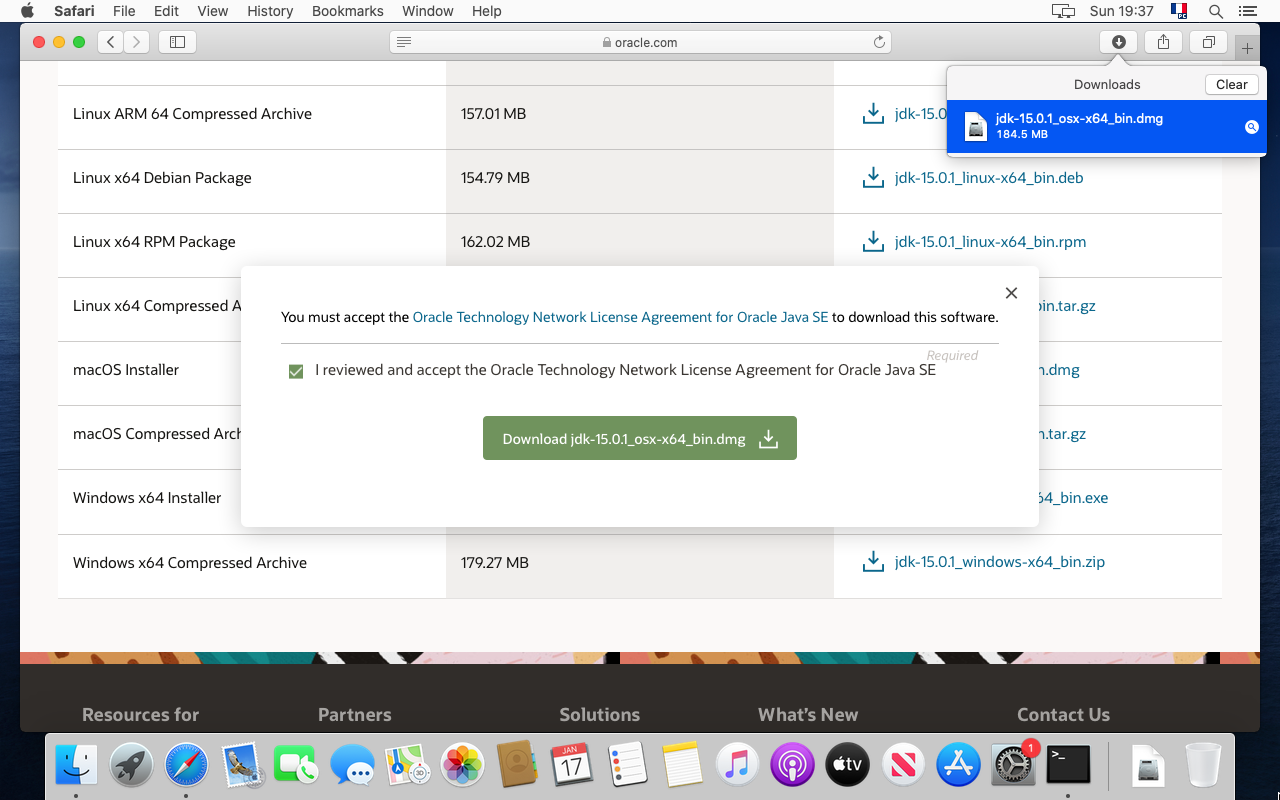
5. Click on the green download button.

6. Downloading starts... Wait.

7. Downloading is completed. Open the Downloads folder to check out the file.
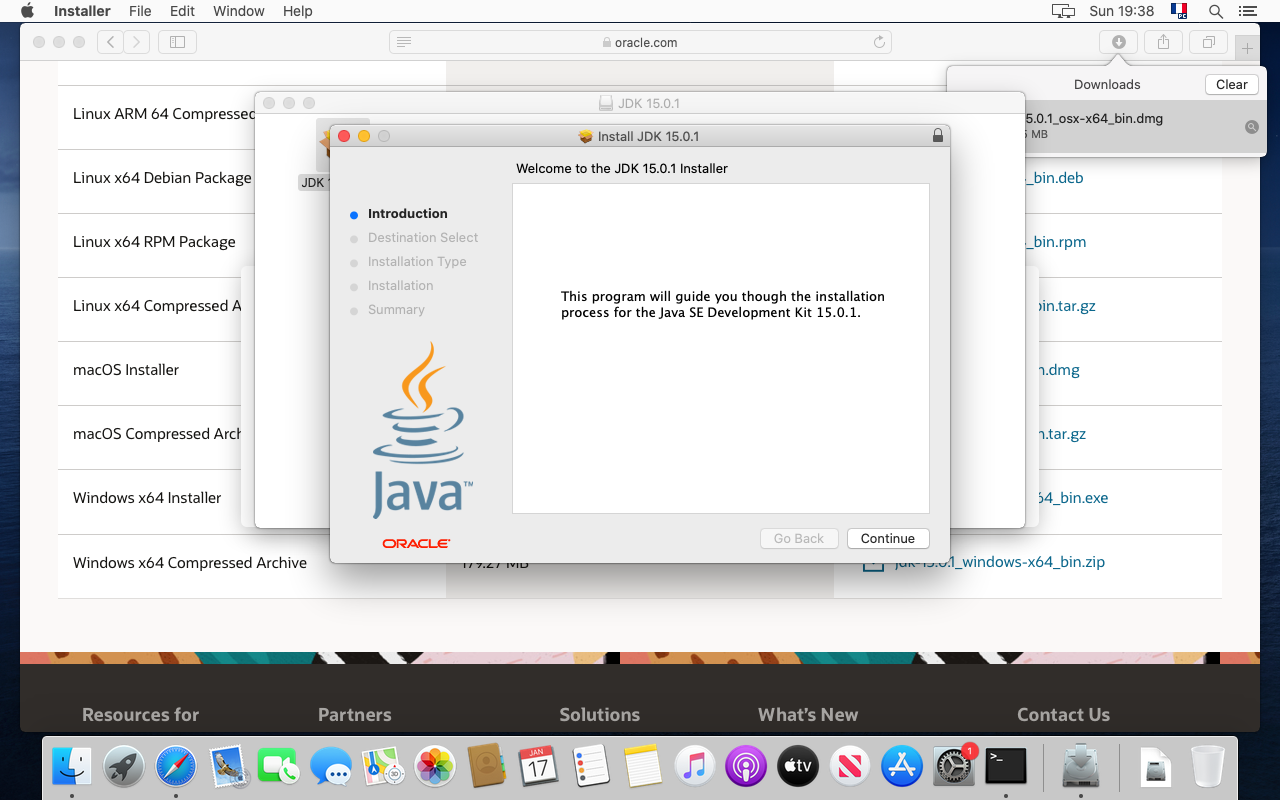
8. Double click on the JDK package.

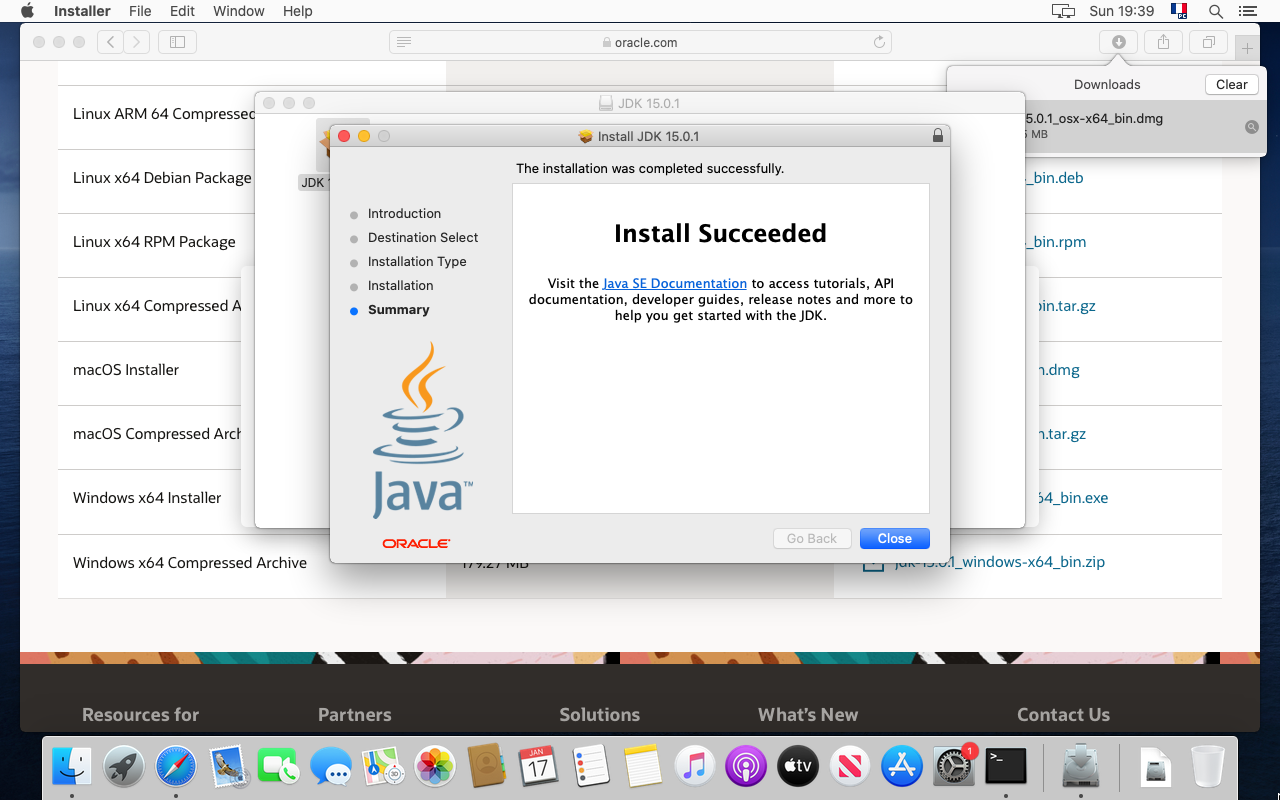
9. The JDK installer starts. Just follow the steps.
10. The installation should be successful. Close the window.
11. Then type again "java -version" in the terminal.
The following result should appear, indicating Java 15 is installed in our example.

Your are now done with the Java installation. Let's install Ancestris now.
Installation of Ancestris
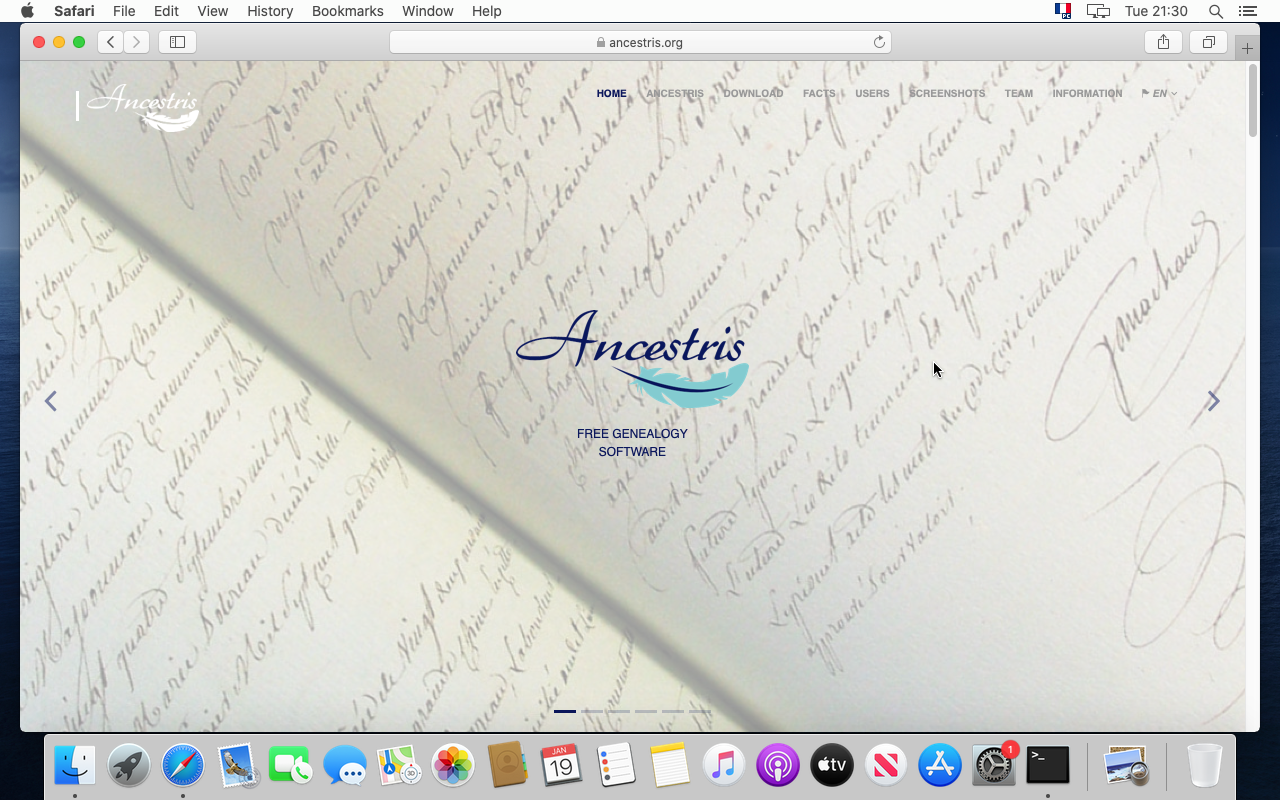
12. Go to the https://www.ancestris.org web site
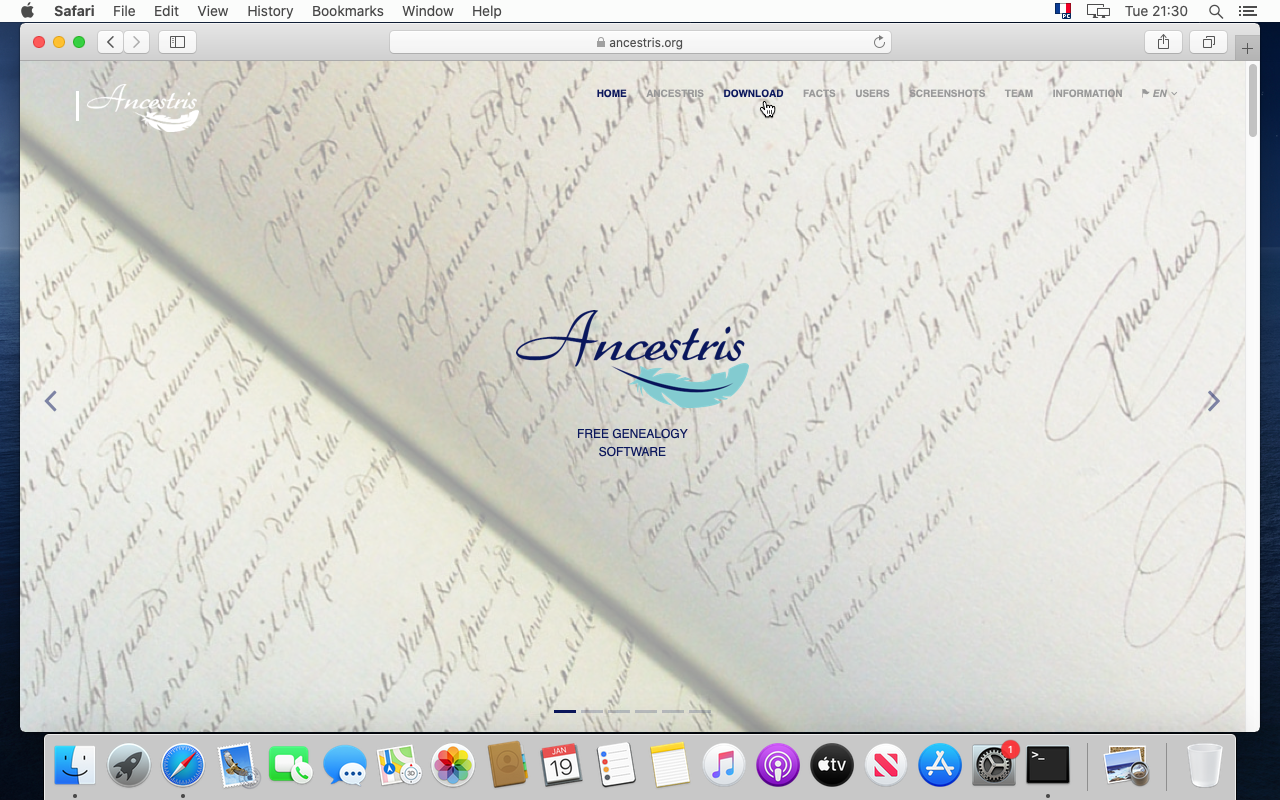
13. In the menu, click on DOWNLOAD. This will scroll down to the download section.
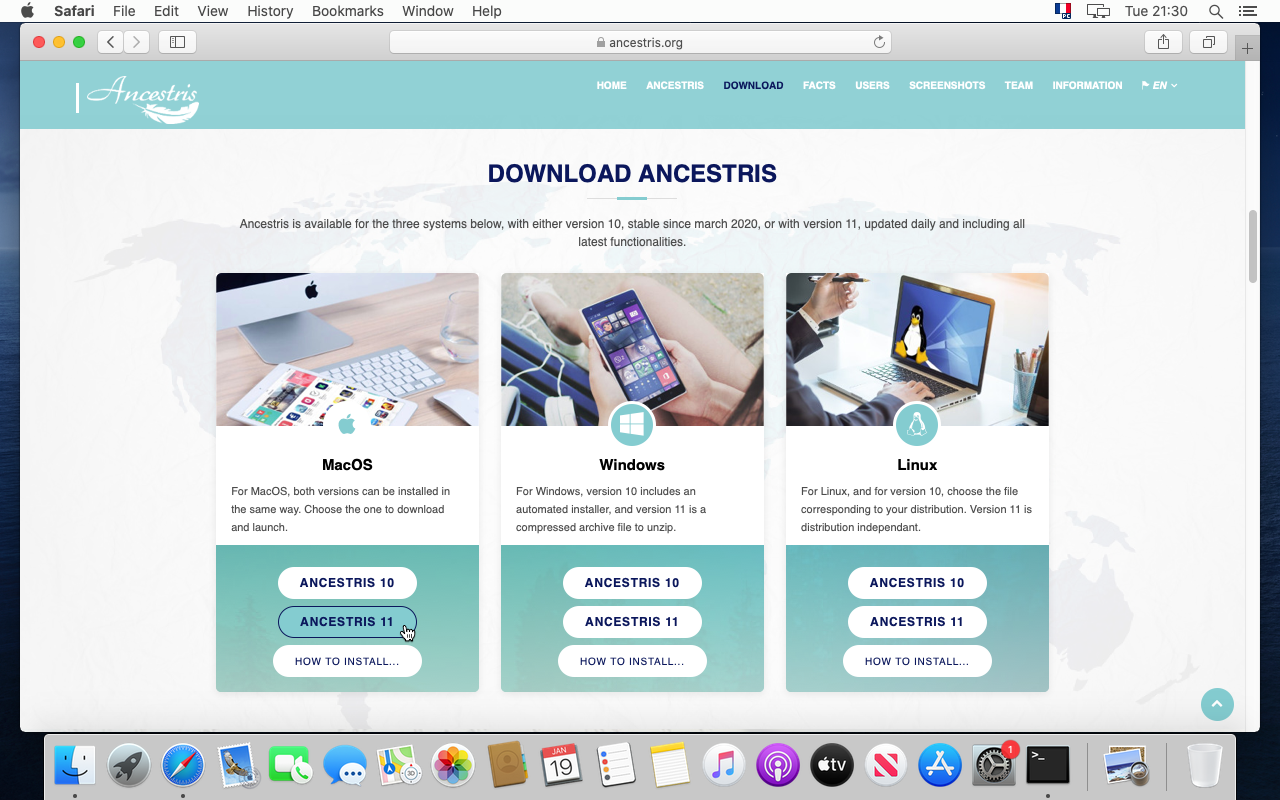
14. Click on the Ancestris 11 button of the MacOS panel.
15. Allow downloads from the Ancestris web site if this is the first time you do it.

16. Downloading starts. It will take a couple of minutes.
17. Wait a bit more ... we said a couple of minutes !
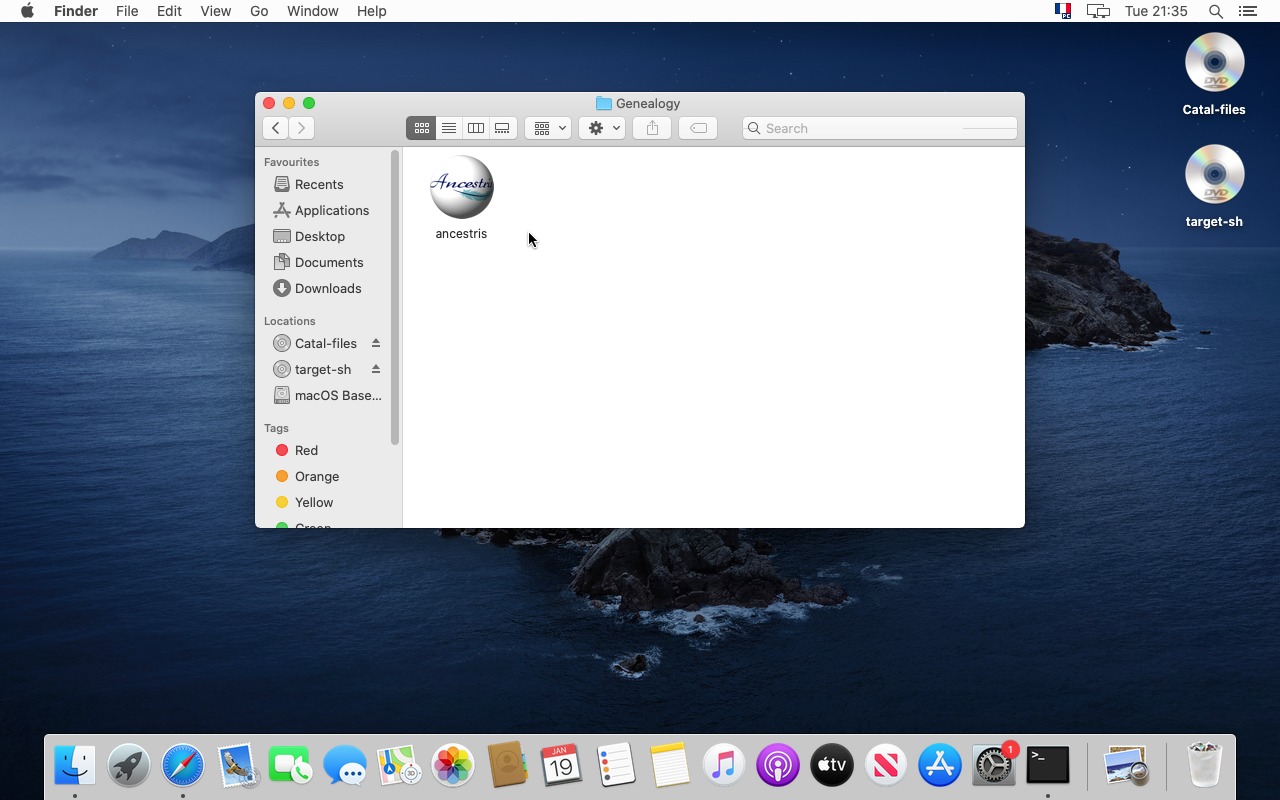
18. Once complete, move the file to your genealogy folder.
19. It is better to place your Ancestris application in a separate folder from your genealogy files.
- You may for instance place Ancestris in a
Documents/Genealogy folder. - And you may place later your genealogy data in a folder such as
{Home}/Public/Genealogy Files/
Do not place your genealogy files in the Documents, Desktop or Downloads folders, or underneath them. MacOS will not let you see them from Ancestris as a security check for non-signed application like Ancestris.
20. To make sure it is the version you expect, click on "Quick Look "Ancestris" from the context menu.
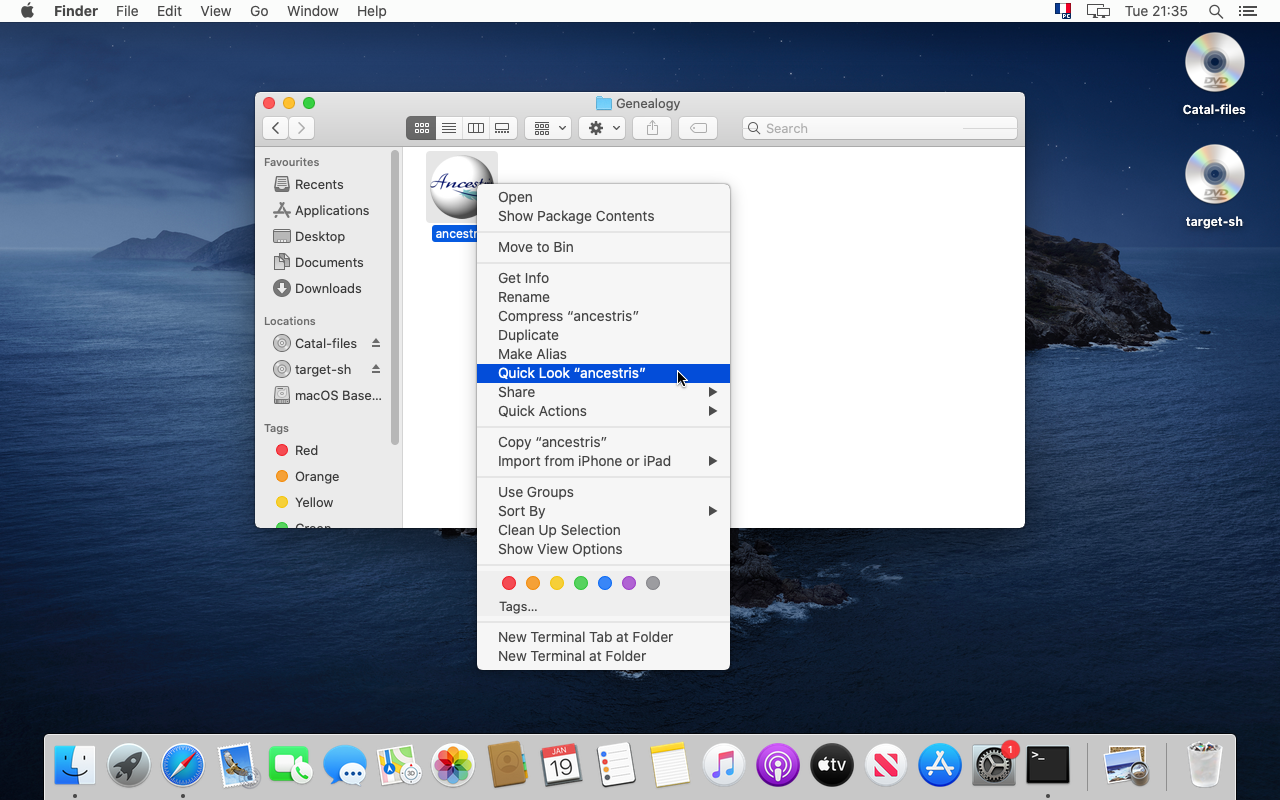
21. The application panel should tell you about the file version and date.
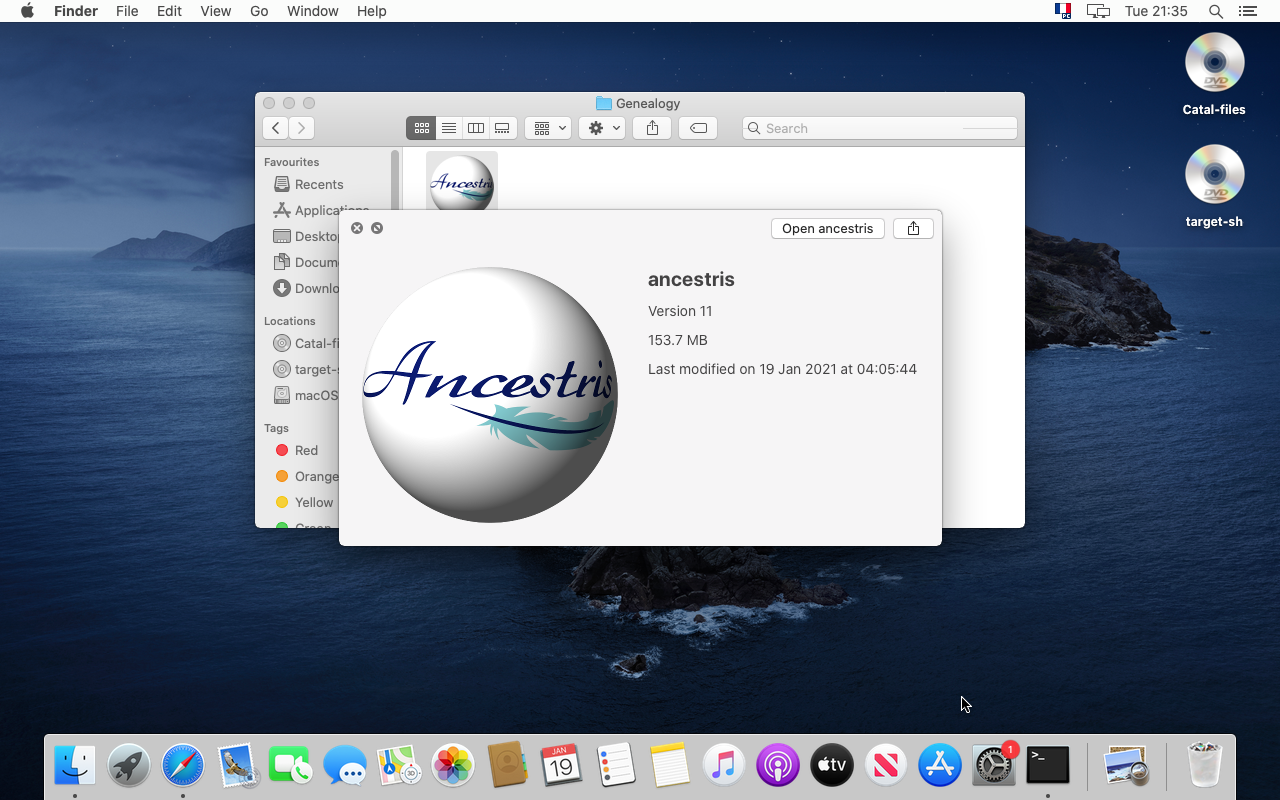
22. Click 'Open ancestris' or go back top your Genealogy folder and click on the icon to launch Ancestris.

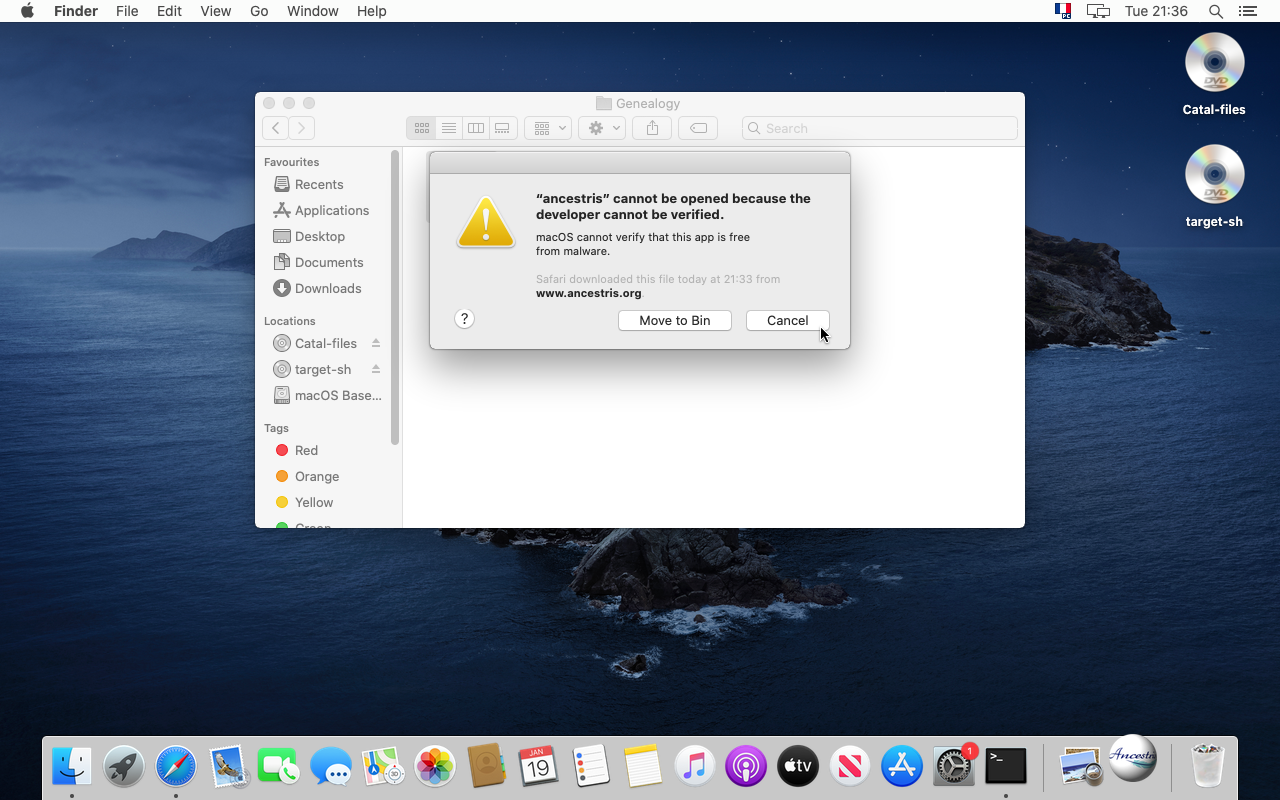
Confirmation of the security check
23. Ancestris starts but MacOS tells you it comes from an unverified developer. Not a problem. Ancestris is open source and does not have any malware. Let's authorize it.
24. For that, go to the System Preferences
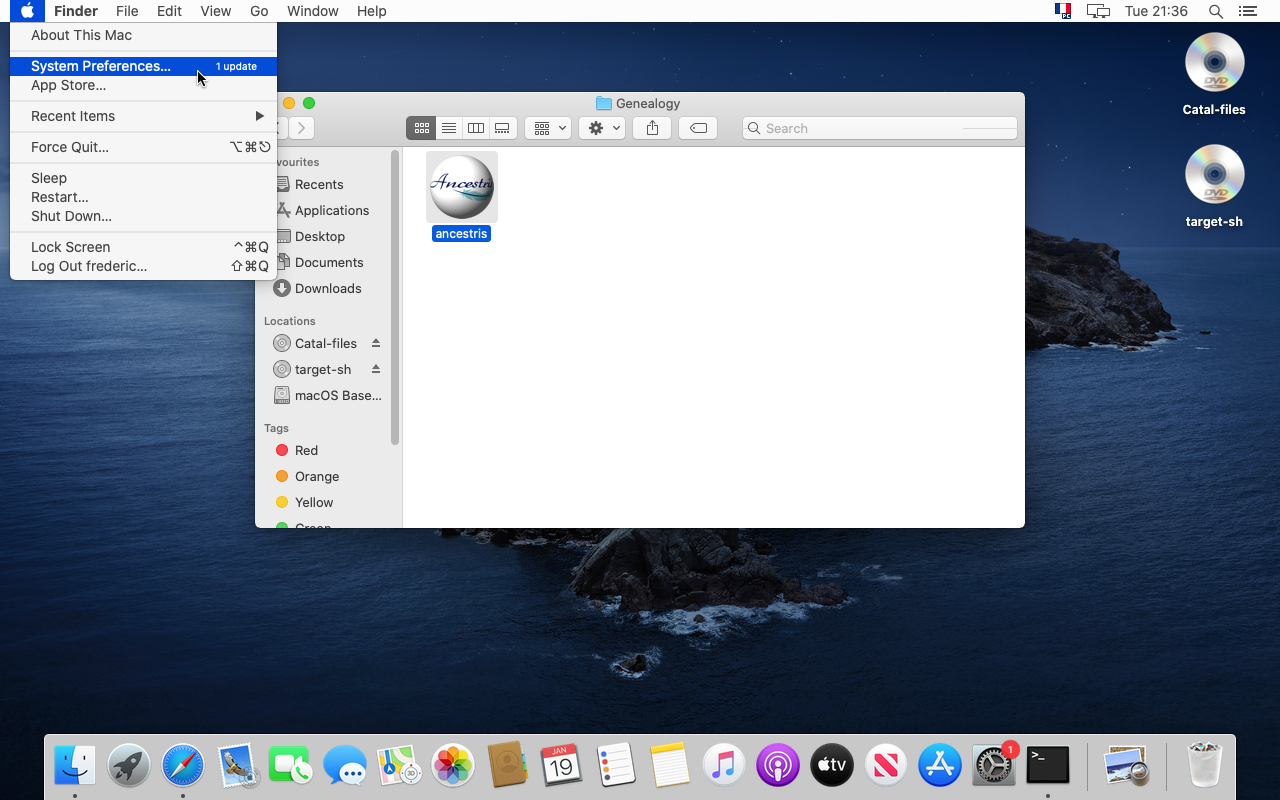
25. Click on "Security & Privacy"
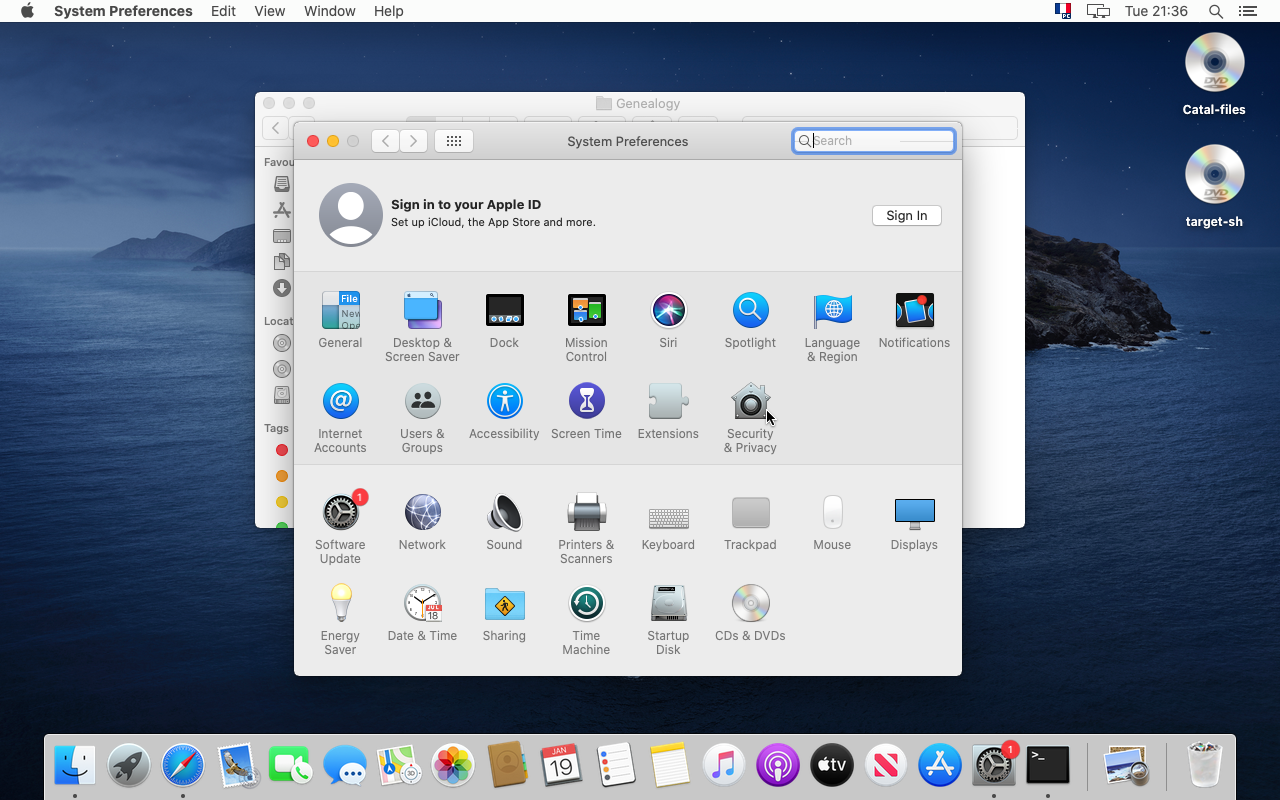
26. Click on "Open anyway"
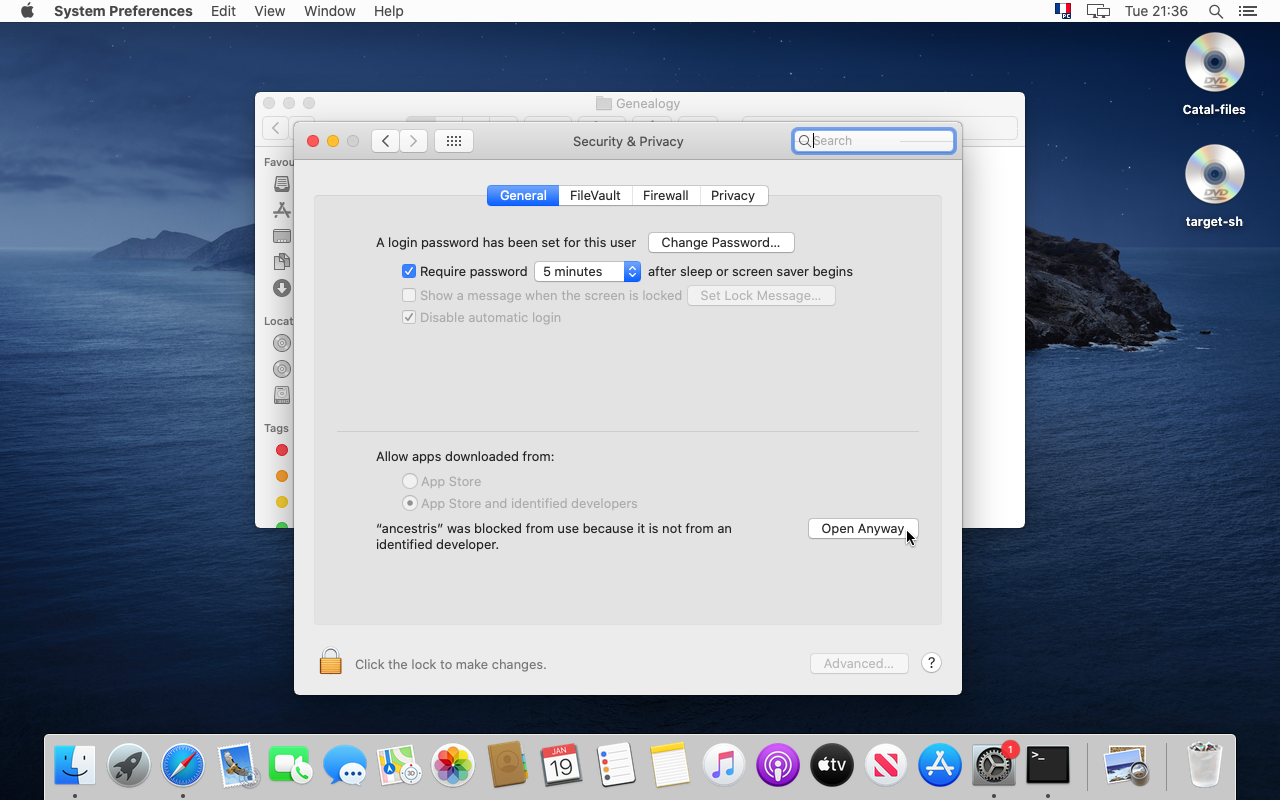
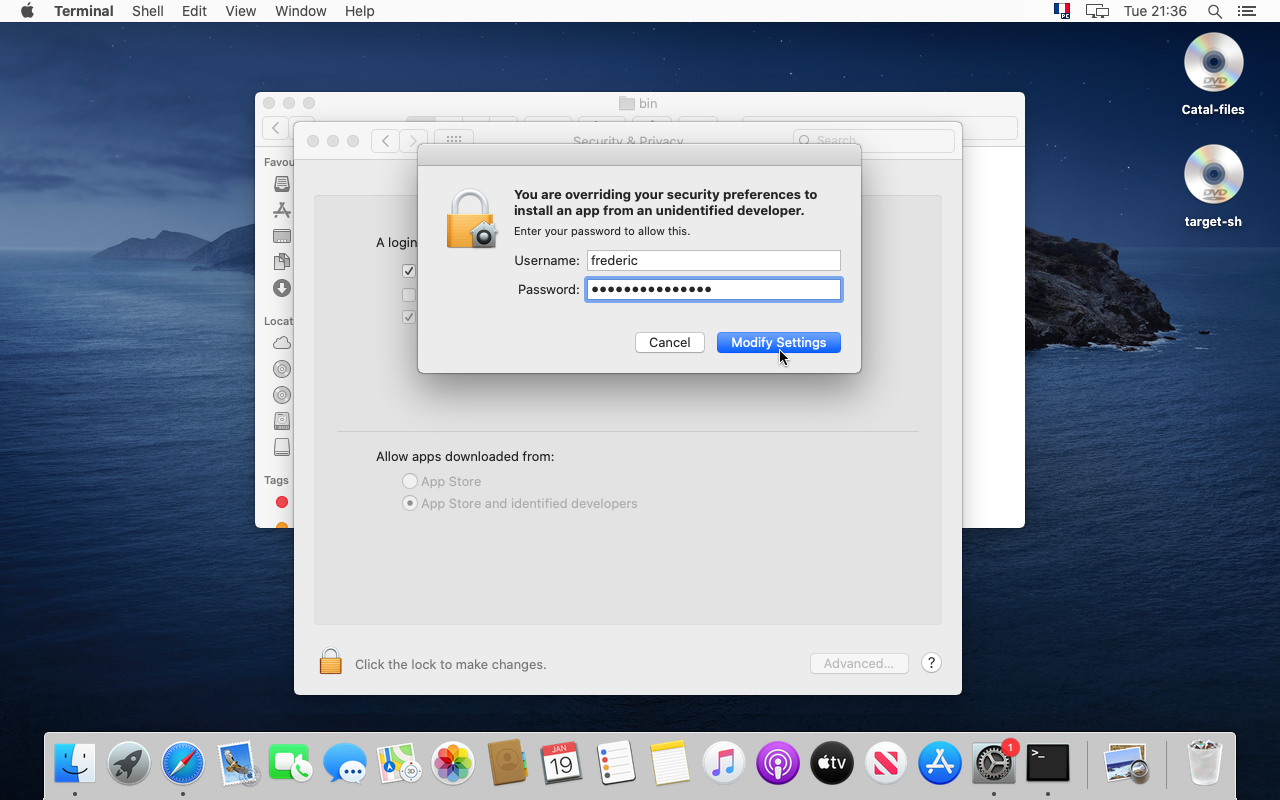
27. If it is the first time you do this, confirm with your password.
28. Yes, you are sure. Click "Open".
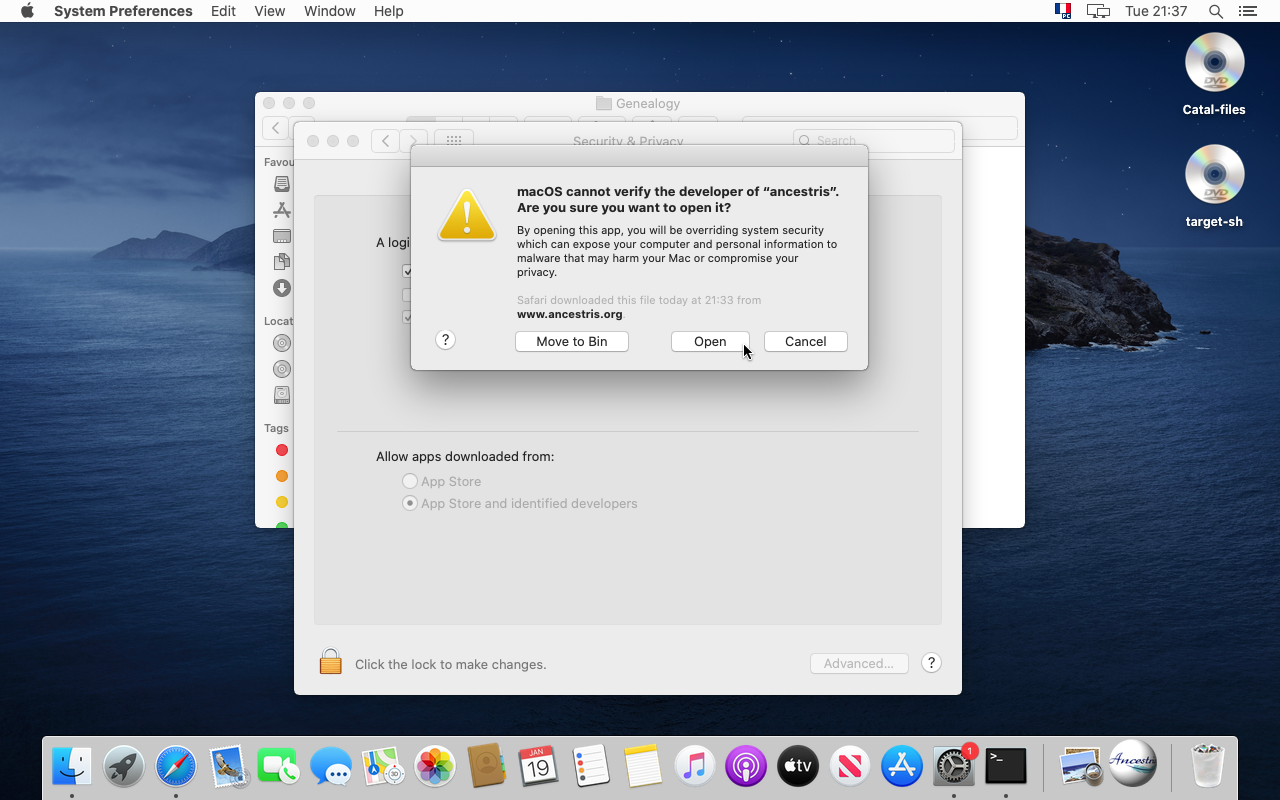
29. Finally, Ancestris starts.
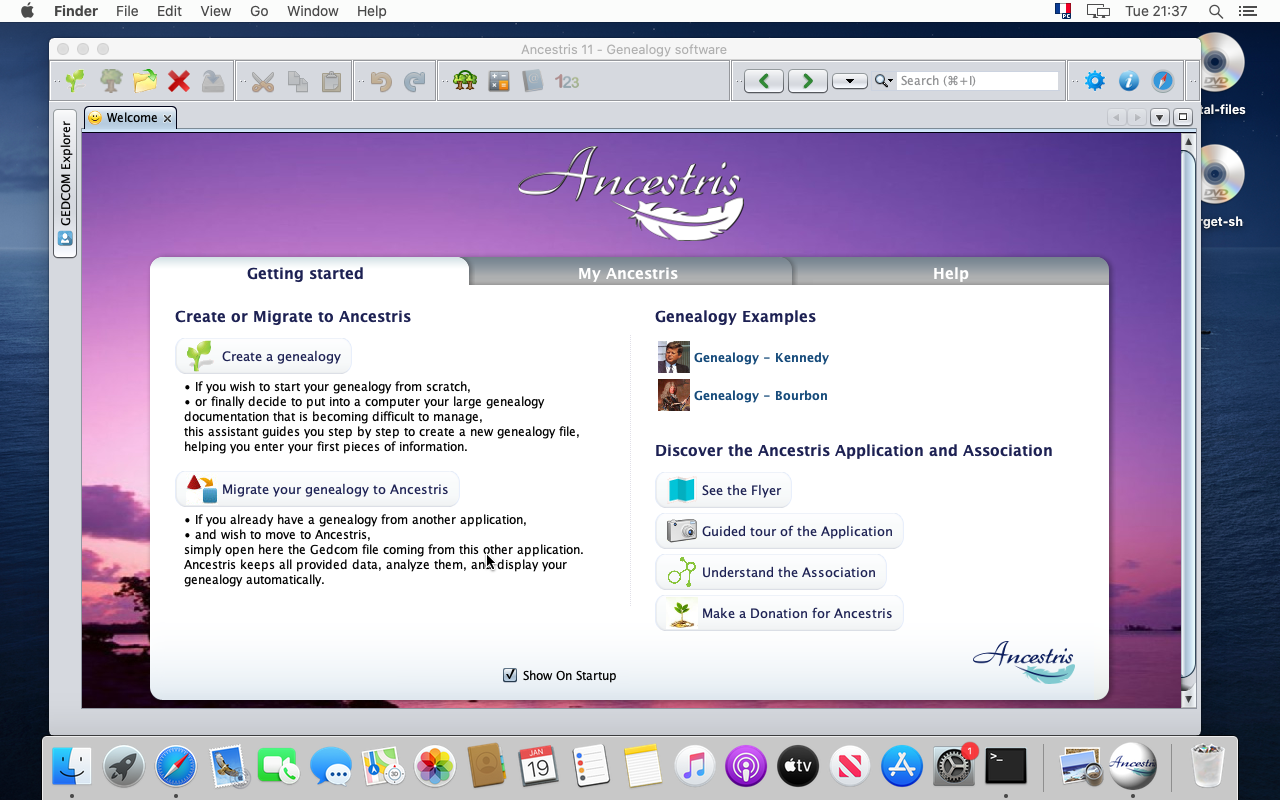
30. You can see the Welcome window.
31. Please note that from the application Menu, you can access the Preferences and the "About Ancestris" panel.

Keep in dock
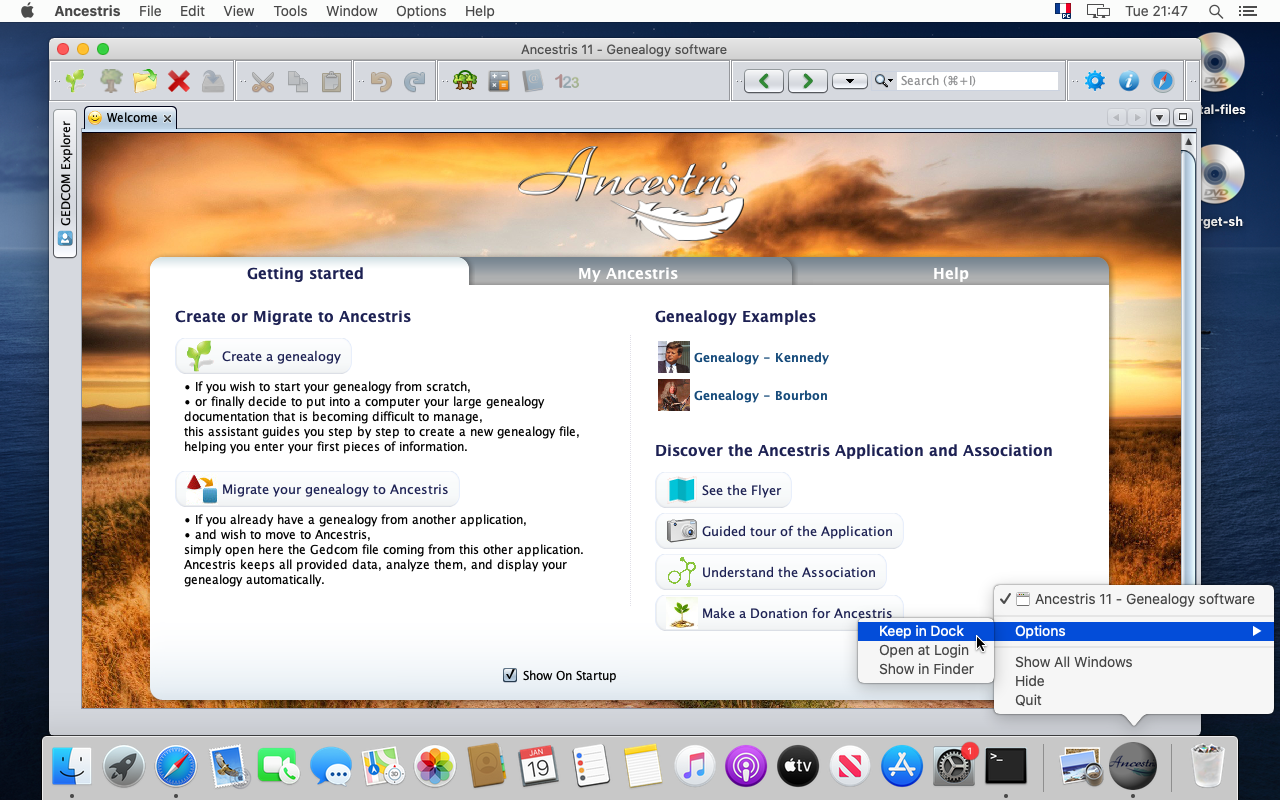
32. Let's keep the application in the Dock by clicking on the Ancestris icon in the dock panel.

33. Choose "Option" and "Keep in Dock".
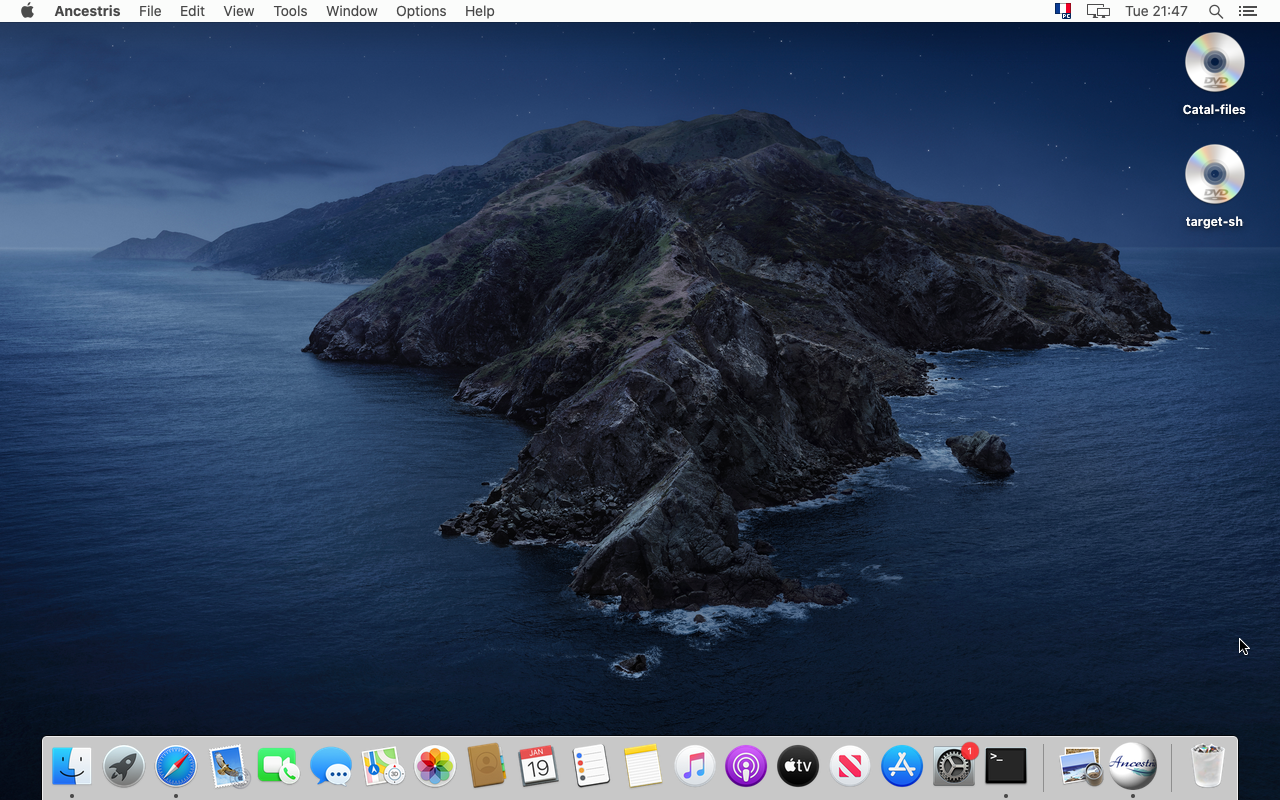
34. This is it. Ancestris is installed and in the Dock. Yessss !
Special note for users of MacOS Big Sur
There are additional steps for MacOS Bug Sur users, in case Ancestris does not start after the installation above:
- It might be necessary to store Gedcom files in another folder than the 'Documents', 'Desktop' and 'Downloads' folders. For instance, you can use the "Public" folder.
- Indeed, for security reasons, MacOS might prevent access to these folders by non-signed applications.
- It can also happen that an error message "Wrong line n° null" is displayed when opening a Gedcom file that is placed under one of these folders.
- It might be also necessary to specify the path to the java version in the ancestris configuration file. This is explained below.
Please follow these additional steps to specify the path to the java version in the ancestris configuration file:
Basic principles:
- The configuration file is here :
${HOME}/Library/Application Support/ancestris/trunk/etc/ancestris.conf - Java's location is given by the following line command :
/usr/libexec/java_home -V
These are the steps.
1. Open a terminal, and check and copy the location of the installed java version
- Type /usr/libexec/java_home -V on ther command line and press Enter
- You shoud see the path of the installed java version.
- Select the line indicating the path, and click on the mouse to copy it in the clipboard. This line could be different in your case.
- Here it is
/Library/Java/JavaVirtualMachines/jdk-15.0.1.jdk/Contents/Home
- Here it is

2. Open the editor on the Ancestris configuration file
- Type the following command:
nano ${HOME}/Library/'Application Support'/ancestris/trunk/etc/ancestris.conf

3. The nano editor opens and shows the content of the Ancestris configuration file
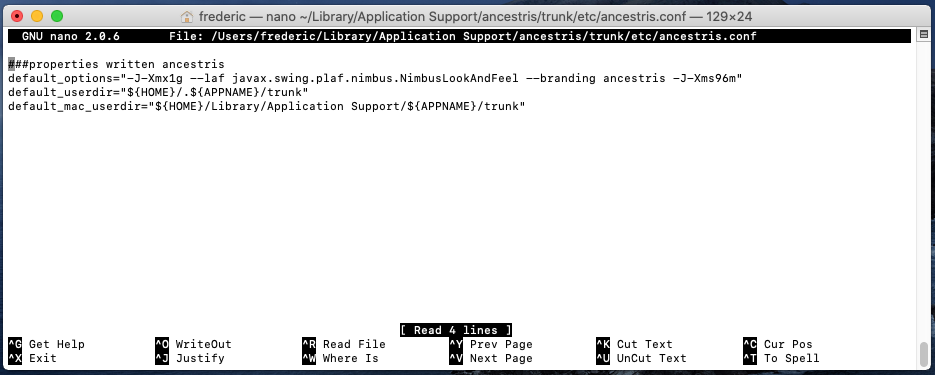
4. Add - or modify - the line that says jdkhome="" and paste the java path between the double quotes
- Add the line if it does not exist
- Or update it otherwise. Make sure in this case that there is no pond sign "#" at the beggining of the line, your change would not be taken into account.
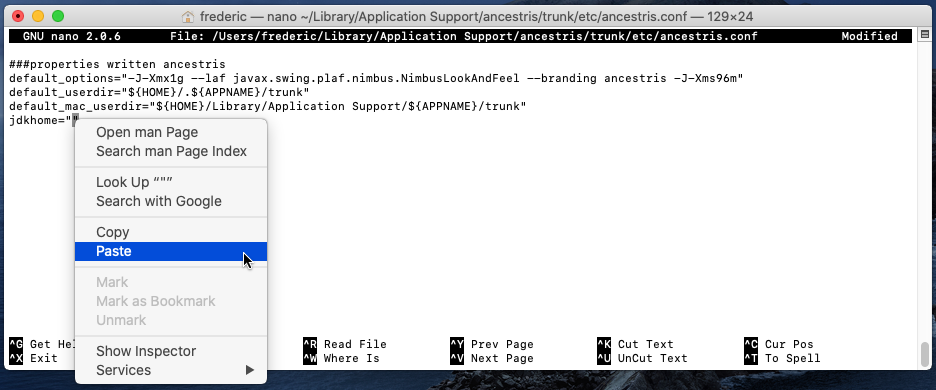
5. Exit and save your change
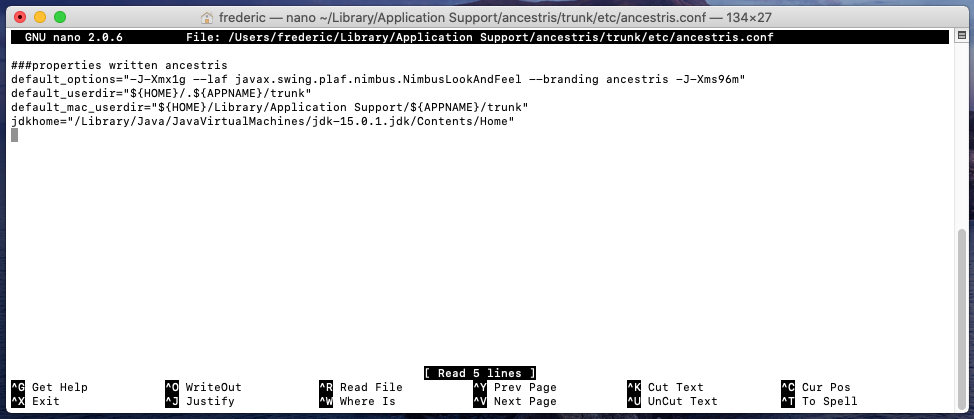
6. Check that the Ancestris configuration file has your change, and start Ancestris.
- Type the command starting with "
cat ${home}/..." below. - The terminal displays the configuration file with the added line.

The configuration file is updated. You can start Ancestris and Ancestris should find java.
Step-by-step installation of version 11 on Windows
This page shows step-by-step how to install Ancestris version 10 on a Windows system.
Install Ancestris version 11
Follow the instructions below.
1/4 - DownloadAncestris
- Go to https://www.ancestris.org
- Click on 'DOWNLOAD' in the menu
- Click on the Ancestris 11 button of the Windows panel.
- Downloading may take 3 to 4 minutes as it is about 139 Mb.
2/4 - Double-click on the downloaded file
- Ancestris 10 has a setup wizard for Windows.
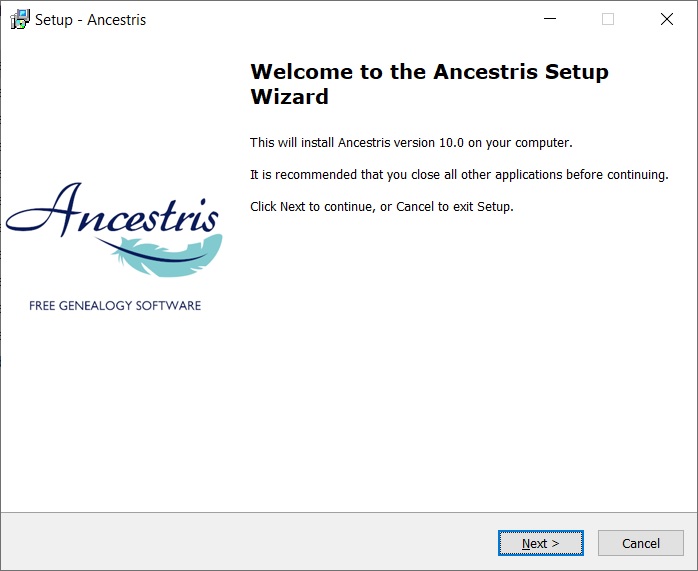
- Click on Next
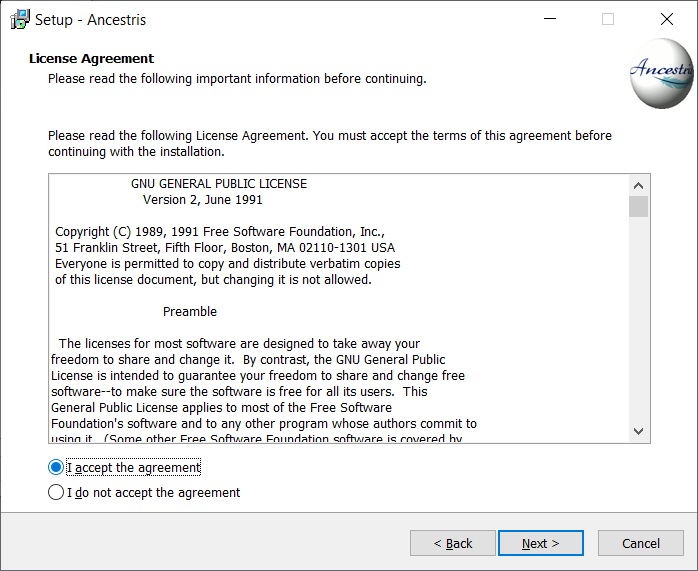
- Accept the agreement then click on Next
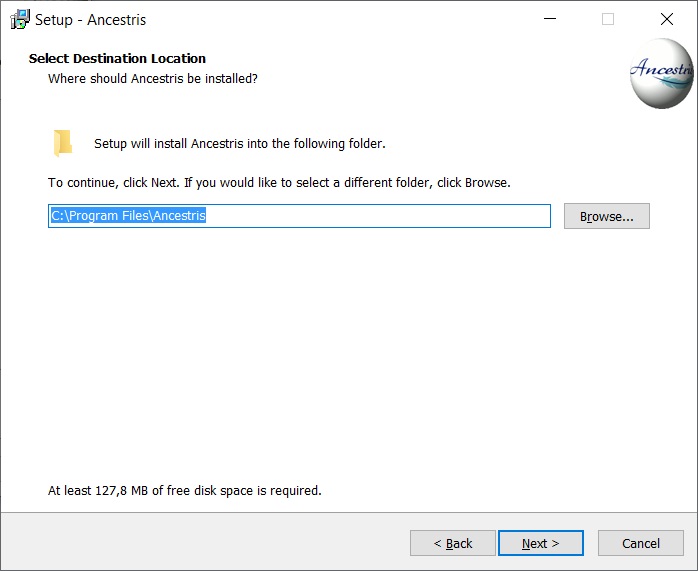
- Choose an install path.
The path shouldn't have any accent not special caracters.
- Then click on Next
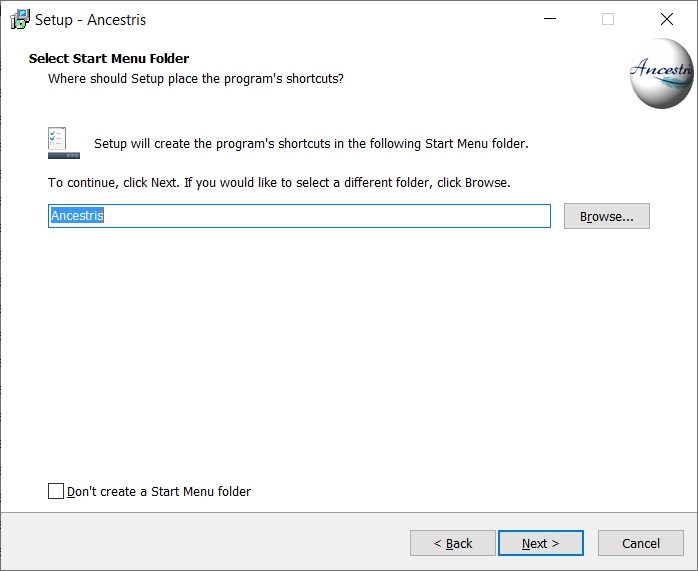
- Define a name for the short-cut in "Start" Menu.
- You can choose not to create any short-cut with the check-box on the bottom of the screen.
- Then click on Next

- Check the box to create a short-cut on the desktop.
- Then click on Next
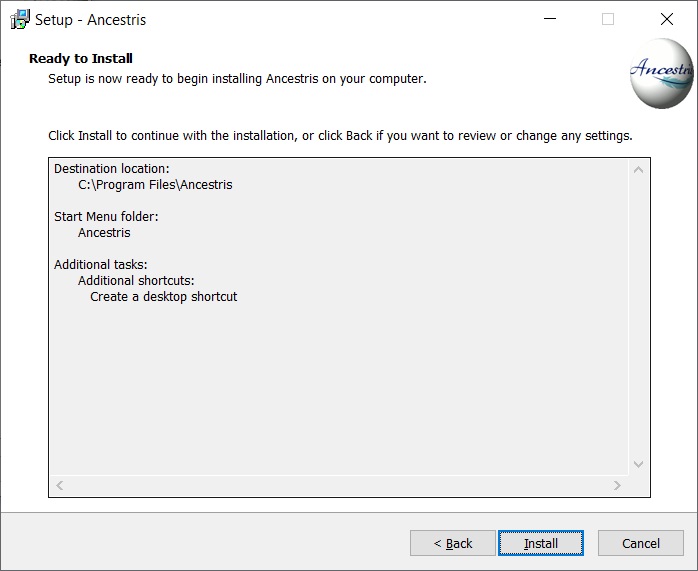
- Click on Install
- The software is installed on your computer.

- You can launch directly the application with the "Launch Ancestris" check-box
3/4 - Click the short-cut and Ancestris then starts.

4/4 -The Welcome page then appears. You are now ready to use Ancestris.
Step-by-step installation of version 12 on Windows
This page shows step-by-step how to install Ancestris 12 on a Windows system.
The sections below are independent and do not all need to be done.
Screens shown might look different from those of the current Ancestris web site or the current Ancestris software version.
Knowing which Java version you use
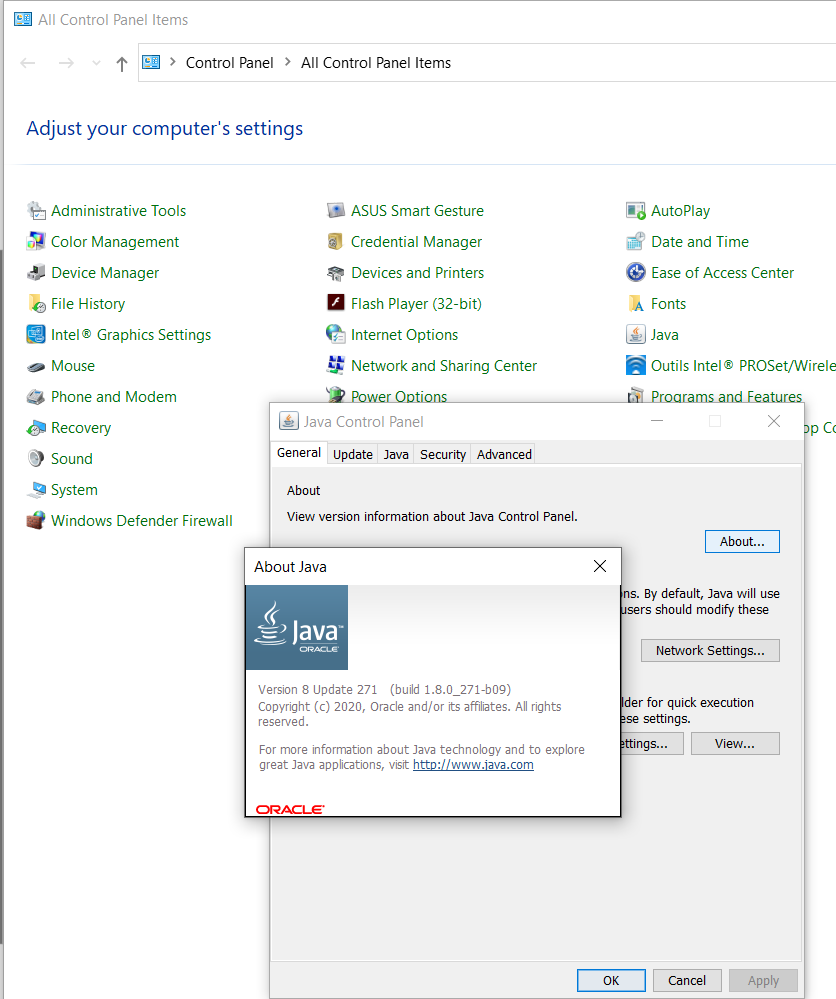
Java Control Panel
Open the Windows Control Panel and then the Java Control Panel.
On its General tab, click 'About' to check the installed Java version.
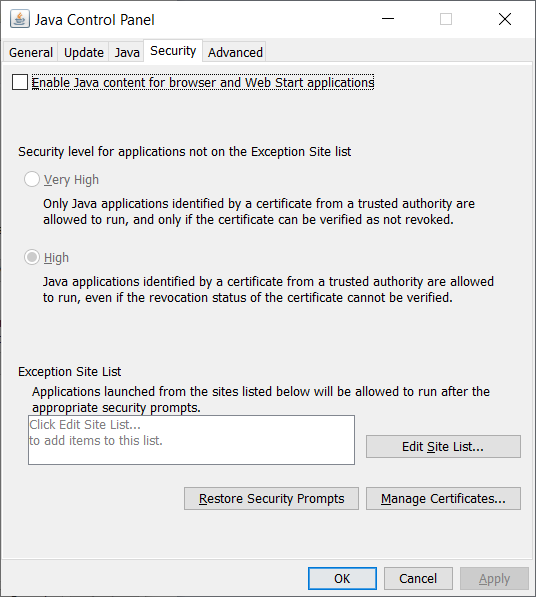
On its Security tab, untick 'Enable Java content for browsers and Web Start applications' to improve security.
Command prompt
Alternatively, these steps let you identify which version of Java is running on your system.
1 - Open a Windows PowerShell window and enter CMD or open a Command Prompt window.
2 - Type java -version at the prompt. You will obtain a display as below, which shows that Java Version 8 (aka 1.8) 64-Bit is installed. Otherwise, it means java is not installed. Follow these instructions to install it.
java version "1.8.0_221"
Java(TM) SE Runtime Environment (build 1.8.0_221-b11)
Java HotSpot(TM) 64-Bit Server VM (build 25.221-b11, mixed mode)If it shows "64 Bit", you have Java 64-Bit installed and you will be able to run ancestris64.exe to launch Ancestris
If it does not show 64-Bit, you have installed Java 32-Bit and you will not be able to launch Ancestris with ancestris64.exe. It will not find Java. You will need to launch Ancestris with ancestris.exe.
3 - Type exit once or twice to close the command window.
Install Ancestris version 12
Follow the instructions below from your Windows system.
1/6 - Download Ancestris
- Go to https://www.ancestris.org
- Click on 'DOWNLOAD' in the Menu
- Then click on the ANCESTRIS 12 button of the Windows panel.
- Downloading may take 2 to 3 minutes
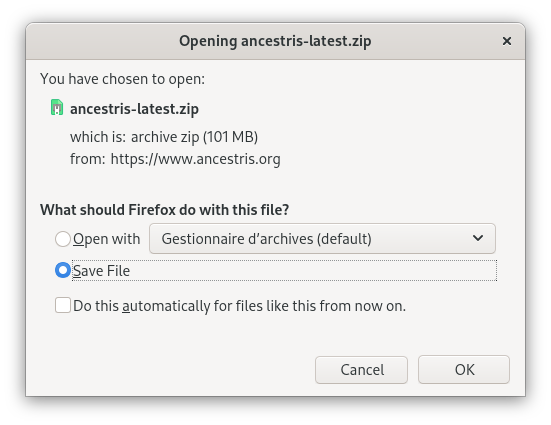
2/6 - Extract the Ancestris file
- Ancestris does not need to be installed as it runs directly from its
.exefile. - So right-click the downloaded
ancestris-latest.zipfile, choose 'Extract All' and select a destination folder where the.exefile can run. - On Windows 7, unzip into the
C:\Program Filesfolder otherwise Ancestris won't run.

3/6 - Check the Ancestris file to run
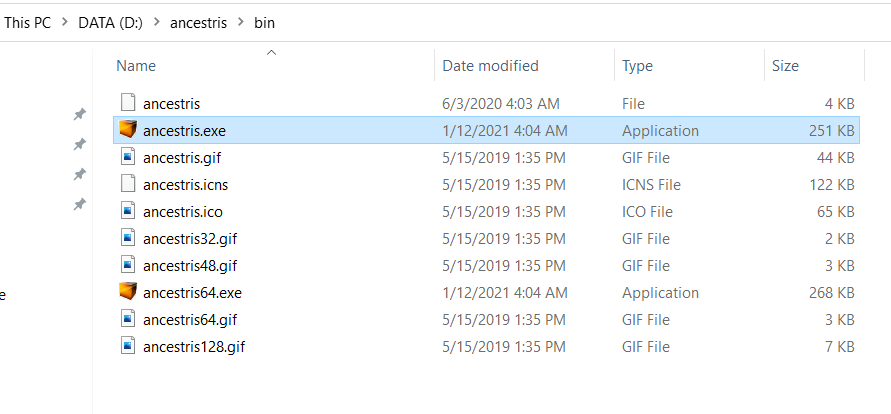
- In the destination folder, open the
ancestrisfolder and then thebinfolder; there theancestris64.exefile will run Ancestris on a 64-bit system, while theancestris.exefile will run it on a 32-bit system.
4/6 - Add an Ancestris shortcut
- Right-click on the
ancestris64.exeorancestris.exefile and choose 'Pin to Start' or 'Pin to taskbar' to add a shortcut to the Start menu or the Taskbar.
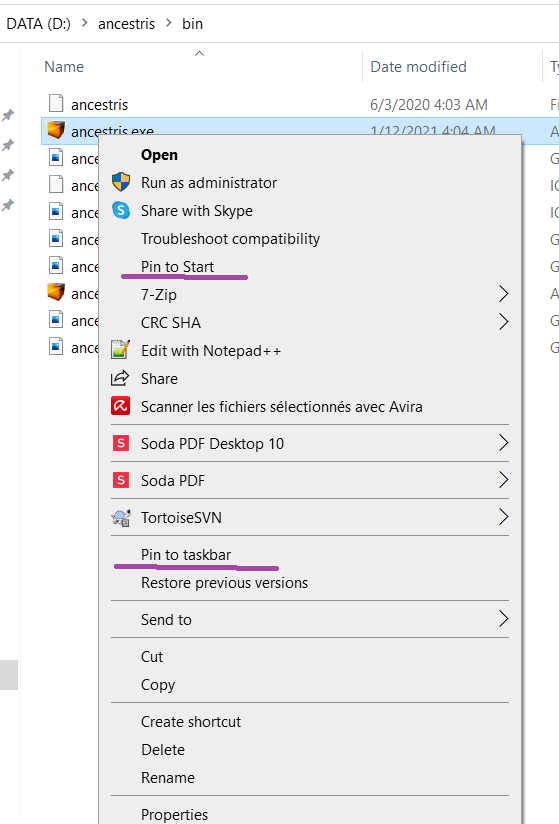
- Then set the icon of the resulting Ancestris shortcut. For that, you need to right-click on the shortcut and replace the icon with the
ancestris.giffile.
5/6 - Click the shortcut and Ancestris then starts
6/6 - The Welcome page then appears. You are now ready to use Ancestris.
If Ancestris does not start, it might be related to a Java version issue. You may have to swap the Java version.
Please follow these instructions.
Java installation
Ancestris needs Java and is compatible with Java 8 (also called 1.8) and Java 11. We recommend you use Java 8.
If Ancestris does not start, or shows the Ancestris splash screen and stops, it is most generally related to an issue with the Java installation. Either Java is not installed or Ancestris does not find it or finds an incompatible version or finds a corrupted version.
The following sections offer a step-by-step check to ensure Ancestris is using a valid Java 8 version.
General principle
- You need a Java Runtime Environment (JRE). The JDK (Java Development Kit) is not required, but since the JDK includes a JRE, a JDK alone is also sufficient.
- Ancestris works with Java versions 8 and higher. It is developed in version 8 for better compatibility with the most users. It has been tested and works on Java 11 and Java 14, which are LTS (Long Term Support) versions. We do not check on Short Term versions which are obsolete and cannot be downloaded after 18 months.
- You can install a JRE from any vendor: Oracle, OpenJdk or AdoptOpenJdk or one that you compiled yourself.
- The Oracle JRE installation is recognized by all systems and programs.
- Only the Oracle version is recognized directly by the programs and does not require any additional configuration.
- If you install Oracle version, only JRE 8 does not require any registration with Oracle.
- On Windows, there is not only a JAVA_HOME variable or the PATH variable, there is also a registry key
- If you opt for a free distribution, you will have to tell Ancestris where your installation is. In this case, as indicated below, uncomment the
jdkhomeline in theancestis.confconfiguration file located in the "etc" directory of your Ancestris installation and set the appropriate path.
Identify which Java version is set by default
If you don't know if Java is installed or which version is installed, please visit the official detailed explanation page or directly open a command line terminal and type on the command line:
java -versionThere are alternative methods for MacOS and Windows.
- for MacOS systems, check the step-by-step instructions.
- for Windows systems, check the step-by-step instructions.
- If you see an error message in the terminal, then Java is not installed on your system. Ancestris cannot run. Please follow the Install section below to install Java 1.8 and then start Ancestris.
- If you see something like this where Java 1.8 is displayed, it means you have the proper version installed and set by default.
java version "1.8.0_251"
Java(TM) SE Runtime Environment (build 1.8.0_251-b08)
Java HotSpot(TM) 64-Bit Server VM (build 25.251-b08, mixed mode)According to the display above, we can see that the installed Java version set by default is version 1.8, aka version 8.
If Ancestris does not start, either Ancestris does not find it or finds an incompatible version or finds a corrupted version. Please follow the instructions to identify which Java version Ancestris finds.
- If you see a different Java version from 1.8 or 11, it means you have another Java version by default.
java version "10.0.1" 2018-04-17
Java(TM) SE Runtime Environment 18.3 (build 10.0.1+10)
Java HotSpot(TM) 64-Bit Server VM 18.3 (build 10.0.1+10, mixed mode)According to the display above, we can see that the installed Java version set by default is version 10. Ancestris will not run. Please follow the Install section below to install Java 8.
Once done, you will then have several Java versions installed on your system.
If you are happy to set Java 8 as the default version, please follow the instructions to set the default java version on your system and then start Ancestris.
If you would rather keep the Java version set as it is, then you need to tell Ancestris to not use the default Java version. Please follow the instructions to force Ancestris to use a specific java version and then start Ancestris.
Identify which Java version Ancestris finds
To know which Java version Ancestris finds, you will need to check the Ancestris configuration file.
1. Check the line defining default_options
This line should look like this:
default_options="--branding ancestris -J-Xms96m -J-Xmx1g --laf javax.swing.plaf.nimbus.NimbusLookAndFeel"
If one of the options in this line includes --jdkhome="/path/to/java, make sure the path specified in this option is the path to Java version 1.8. Otherwise, edit the configuration file and change it. Then launch Ancestris.
If this line does not include a java path, follow the instructions below.
2. Check the line defining jdkhome
If the line looks like jdkhome="/path/to/java", then make sure the path specified in this option is the path to Java version 8. Otherwise, edit the configuration file and change it. Then launch Ancestris.
If the line starts with "#", or if the line does not exist, then it means the line is not used by Ancestris and that Ancestris uses the default Java version set on your system.
If the default version checked above was Java 8, it means your installed Java 8 version might be corrupted. Try reinstalling it using the Install instructions and restart Ancestris.
Install Java
To install version Java 8 on your system, you can get it from the Oracle's main page, or more precisely, directly from the download page.
- If you need to know if your device can run Java, go to this configuration page to learn the minimum needed configuration.
- If you want to choose from all the available Oracle Java versions, check this available versions page.
- Java Version 8 is recommended as it supports all Ancestris features.
- For full details on how to install version 8
- For MacOS, see JRE 8 Installation for MacOS.
- For Windows, see JRE Installation for Windows.
- For Linux, see JRE Installation for Linux.
- For full details on how to install version 8
- Java Version 8 is recommended as it supports all Ancestris features.
-
- Java Version 11 support most Ancestris features.
- Download and install Java Development Kit (JDK) Version 11
- For MacOS, choose the .dmg file.
- For full details on how to install version 11
- For MacOS, see Installation of the JDK for MacOS.
- For windows, see Installation of the JDK for Windows.
- For Linux, see Installation of the JDK on Linux.
- Download and install Java Development Kit (JDK) Version 11
- Java Version 11 support most Ancestris features.
- If you prefer an Open Source Java version, it is possible to use OpenJDK and you can also install Java from the free AdoptopenJDK solution.
Set the default Java version
The procedures depend on your operative system.
Set default version for MacOS
The version of Java running on your system may be incompatible with Ancestris, so it will not run.
If you want to keep your current Java version and, for instance, run Java Version 8 (aka 1.8) at the same time, you need to swap Java versions.
To swap between different Java versions, open a Terminal window and follow the steps below.
In the following example, the instructions let you set Version 8 (aka 1.8) by default, without removing Java Version 10:
1/6 - Check which version of Java is set by default
java -version
echo $jdkhomeYou can see the java version you are running.
2/6 - Get a list of all installed versions on your system and check Version 8 or 11 is among them
/usr/libexec/java_home -VIf the version you want is not in the list, then install it as explained in this section.
If it is in the list, but not the one you had above, force the path to the java version with the following step.
3/6 - Type in the following 2 lines in the Terminal
echo 'export JAVA_HOME=`/usr/libexec/java_home -v 1.8`' >>~/.bash_profile
echo 'export jdkhome==`/usr/libexec/java_home -v 1.8`' >>~/.bash_profileThese two lines will add the command to set your default Java version in your personal profile. Here, we force version 1.8 (or 8). Replace with your java version.
The first line defines the default Java version for all programs (JAVA_HOME, in uppercase).
The second line defines the default Java version to use for Ancestris (jdkhome, lowercase).
4/6 - Close the Terminal
exit5/6 - Reopen a Terminal and check that the running Java is now the one you want (version 8 in our example)
java -version
echo $jdkhomeYou can now start Ancestris.
6/6 - Start Ancestris
When Ancestris starts, a Terminal window opens at the same time.
You can see in the title bar that version 8 of Java is being used by Ancestris.
Set default version for Windows
You have to create a BAT file per Java version you wish to keep.
Use your favourite text editor to create those files, using the code below, and place them in a folder available from your PATH.
JAVA8.BAT
@echo off
echo Setting JAVA_HOME
set JAVA_HOME=C:\Program Files\Java\jdk1.8.0_12
echo setting PATH
set PATH=C:\Program Files\Java\jdk1.8.0_12\bin;%PATH%
echo Display java version
java -versionJAVA11.BAT
@echo off
echo Setting JAVA_HOME
set JAVA_HOME=C:\Program Files\Java\jdk1.11.0_11
echo setting PATH
set PATH=C:\Program Files\Java\jdk1.11.0_11\bin;%PATH%
echo Display java version
java -versionWhile creating these files, make sure you specify the correct name for the Java files for the lines JAVA_HOME, depending on your Java installation
When you decide to change the Java version, just run the corresponding BAT file: JAVA8 for version 1.8, or JAVA11 for version 11. The Java version at use will be shown on the terminal.
To check if the change is really in effect, type java -version on a console or check this page.
If you wish to keep your latest Java version and force the use of another version of Java for Ancestris, you have to change the configuration file, line jdkhome="C:\path\to\java"
Set default version for Linux
Type the following on a console :
sudo update-alternatives --config java

Select from the list the version needed.
If you wish to keep your latest Java version and force the use of another version of Java for Ancestris, you have to change the configuration file, line jdkhome="/path/to/java"
To get help using this tool :
sudo update-alternatives -l
Force Ancestris to use a specific Java version
Whatever your operating system is, if the default active Java version is different from the one to be used with Ancestris, you have to modify Ancestris's configuration file like this:
jdkhome="/path/to/java"Note: you have to exclude /bin/java in the path description.
For example: if java executable is /usr/java/jdk1.8.0_291-amd64/bin/java, then you should indicate
jdkhome="/usr/java/jdk1.8.0_291-amd64/"Reversely, if this line is not commented out, that is if it does not start with the "#" character, Ancestris will take it into account first and the path indicated to the Java version must exist and correspond to a functional version of Java. Otherwise Ancestris will not look for other locations for a better Java version and Ancestris will not start.
Launch settings
It is possible to personalise the launch settings of Ancestris.
In general, you should not need to set or modify them.
However, in some specific circumstances, you may want to tweak them a bit.
It is as simple as editing the line in the Ancestris configuration file. Please refer to the location of the configuration file page to know where it is located.
Set memory size for large genealogies
Ancestris works perfectly fine with genealogies of several dozens or thousands of individuals.
You can get Ancestris to work with several genealogies at the same time.
We recommend a 4 GB memory for very large genealogies.
Ancestris can open and manage a simple genealogy of 600,000 individuals.
For very large genealogies, we recommend that you change Ancestris's startup parameters to increase maximum memory size for Java.
- Parameter to change:
-J-Xmxto 8GB for instance.
default_options="-J-Xmx8g --laf Nimbus --branding ancestris --locale fr -J-Xms96m"We also recommend, if needed, to reboot your device and to only start Ancestris and nothing else, so that all memory available will be allocated to Ancestris.
Set default language
The default language can be set in Ancestris preferences.
It can also be initialised to a language of your choice using the launch setting.
- Parameter to change:
--localeto the 2-digit-language code. Example : "en".
default_options="-J-Xmx1g --laf Nimbus --branding ancestris --locale en -J-Xms96m"
Set default look and feel
The default look and feel can be set in Ancestris preferences.
It can also be initialised to a look and feel of your choice using the launch setting.
- Parameter to change:
--lafto the look-and-feel name provided in Ancestris preferences.
default_options="-J-Xmx1g --laf Nimbus --branding ancestris --locale en -J-Xms96m"For the standard look and feel, remove the parameter from the line.
Set default icon size
In very rare circumstances, if you modify the default size of the fonts and icons on your computer or use a very large screen, Ancestris might display its icons in too small a size.
It is possible to increase the aspects of the icons with Ancestris using the following method but only with Java 11.
- Parameter to change:
-J-Dsun.java2d.uiScale=1.5
default_options="-J-Xmx1g --laf Nimbus --branding ancestris --locale en -J-Xms96m -J-Dsun.java2d.uiScale=1.5"
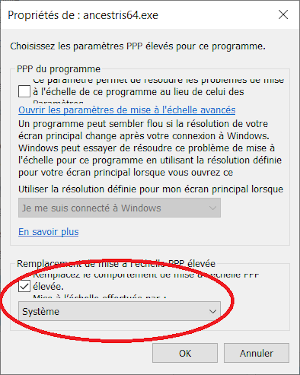
Windows specific instructions
Another way to force icon size on Windows with Java version 8 is the following.
ancesris.exe or ancestris64.exe, select Properties and choose the Compatibility tab.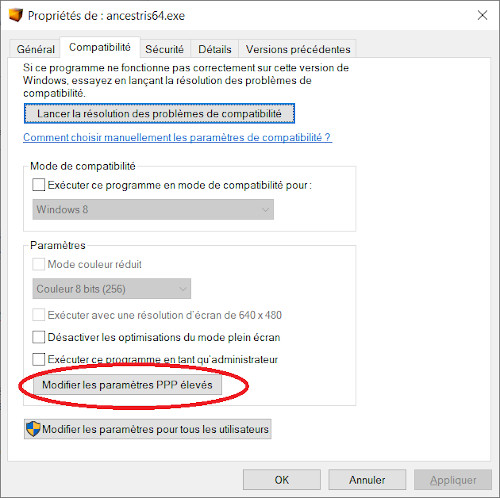
Software files and User settings files
There are two groups of files for running Ancestris.
- The software files run the application,
- The user settings files store user preferences.
You may lose the software files because you can always get them from the Ancestris website;
but you should backup you user settings files as they are specific to you.
Software files
Ancestris software files will be inside the ancestris folder used during the installation.
You can type whereis ancestris on a terminal to find out what that folder is (not in Windows).
This ancestris folder contains the following sub-folders.
ancestrisbinancestris: executable file to start Ancestris under MacOS and Linuxancestris.exe: executable file to start Ancestris under Windowsancestris64.exe: executable file to start Ancestris under Windows with Java 64-bit architecture (recommended)ancestris.gif: Ancestris icon to use when creating an application launcher shortcut- other Ancestris icons
etc- ancestris.conf : application configuration file
- ancestris.conf : application configuration file
harnessplatform
When you reinstall Ancestris, you simply replace those software files.
User settings files
The user directory
Ancestris user settings files are in the user directory.
You can see the location of the user directory on the About dialogue.
This dialogue can be accessed from the main menu / Help / About Ancestris or else by clicking on the About button  .
.
Example :
This user directory depends on your operating system.
- Windows :
C:\Users\[your name]\.ancestris\<version> - MacOS :
${HOME}/Library/Application Support/ancestris/<version> - Linux :
~/.ancestris/<version>
Where <version> is the installed version number.
11: in this case, the main version 11trunk: in this case, the daily version 12
The configuration file and the log file
There are two especially important files in the user's folder for startup and diagnostic of eventual bugs.
- The configuration file :
<user's folder>/etc/ancestris.confdefines the launch settings. - The log file :
<user's folder>/ancestris/ancestris.logstores all warnings and error messages occurring while you use Ancestris.
Here are also located your preferences and customised templates.
- Your preferences :
<user's folder>/ancestris/config - Your personal templates :
<user's folder>/ancestris/blueprints - Your almanacs :
<user's folder>/ancestris/almanac - Your individual and family record templates :
<user's folder>/ancestris/gedart - Your history of modifications :
<user's folder>/var/cache/ModificationsHistory
Please check the user guide to learn what these templates are for.
Detailed description
| ~/.ancestris/trunk |
User directory |
|
|
|
|
|
|
|
|
|
|
|
|
|
|
|
|
|
|
|
|
|
|
|
|
|
|
|
|
|
|
|
|
|
|
|
|
|
|
|
|
When you reinstall Ancestris, user settings files are not modified and you should be able to run the updated version with all your previous settings.
However, there could be some changes in the way the new version uses some of the settings.
- If this is the case, we recommend you to only keep the ancestris, config, etc and ModificationsHistory folders.
- If you have trouble with the windows, we recommend you to remove the Windows2Local folder.
Uninstall Ancestris
To uninstall Ancestris, just delete the 2 folders of the software files and the user settings files.