Step-by-step installation on MacOS
This page documents a detailed step-by-step installation of Ancestris on a MacOS system.
We will show an example that occurred on January 2021, of the installation of Ancestris version 11 on MacOS Catalina.
These steps include the following:
- Installation of Java 15 which was not already installed on Catalina
- Download of Ancestris version 11 from the secure Ancestris web site
- Confirmation of the security check to allow Ancestris to run even though it comes from an unidentified developer
- Launch of Ancestris
- Creation of a Dock icon of Ancestris
Please note that the screenshots shown here might look different from those of the current Ancestris web site or the current Ancestris software version.
Special note for MacOS Big Sur:
- From this MacOS version, it might be necessary to specify the path to the java version in the ancestris configuration file (see the corresponding section in this documentation)
- For security reasons, it might be necessary to store Gedcom files in another folder than the 'Documents' folder
Installation of Java
1. From the MacOS desktop...
2. Open a terminal and type "java -version"
If Java is not installed, a popup window will suggest to install it. Click "More Info...".
If java is installed, you can directly go to screen 11.

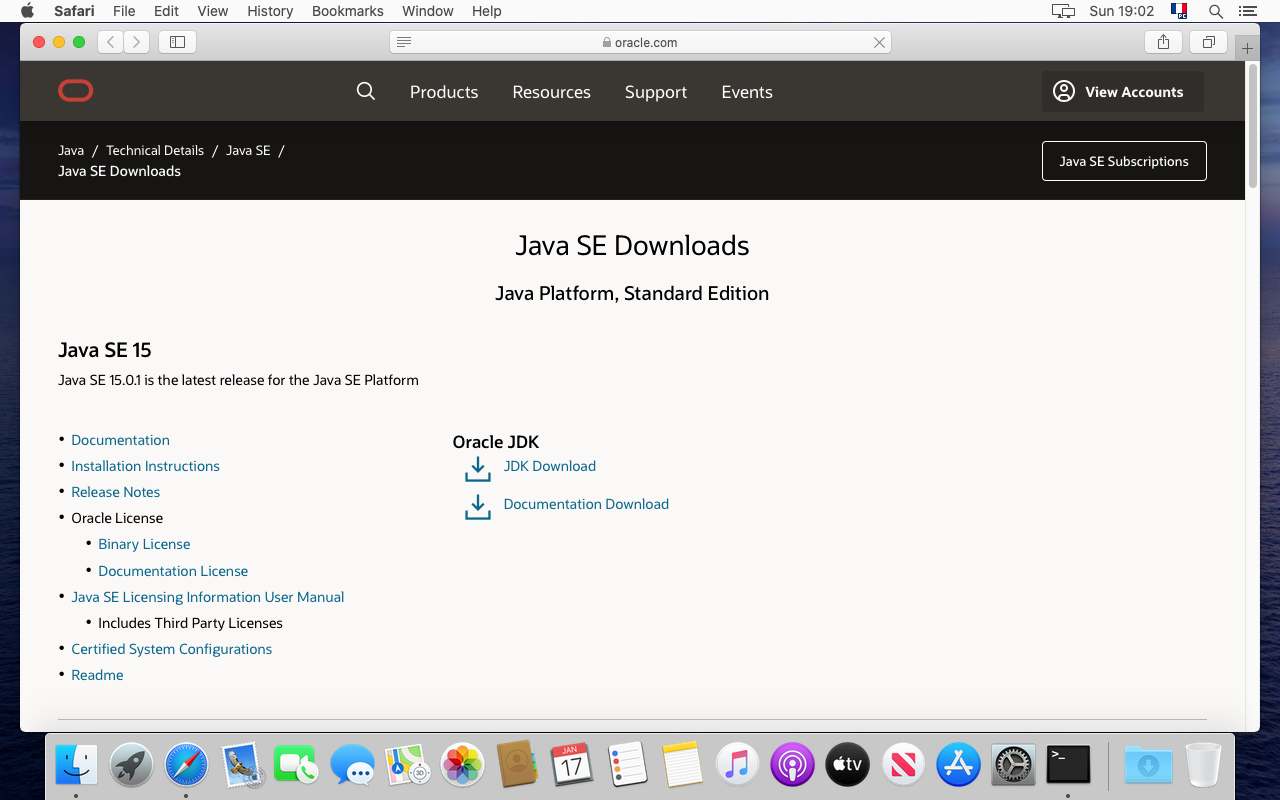
3. You are on the Java web site. Click on "JDK Download"
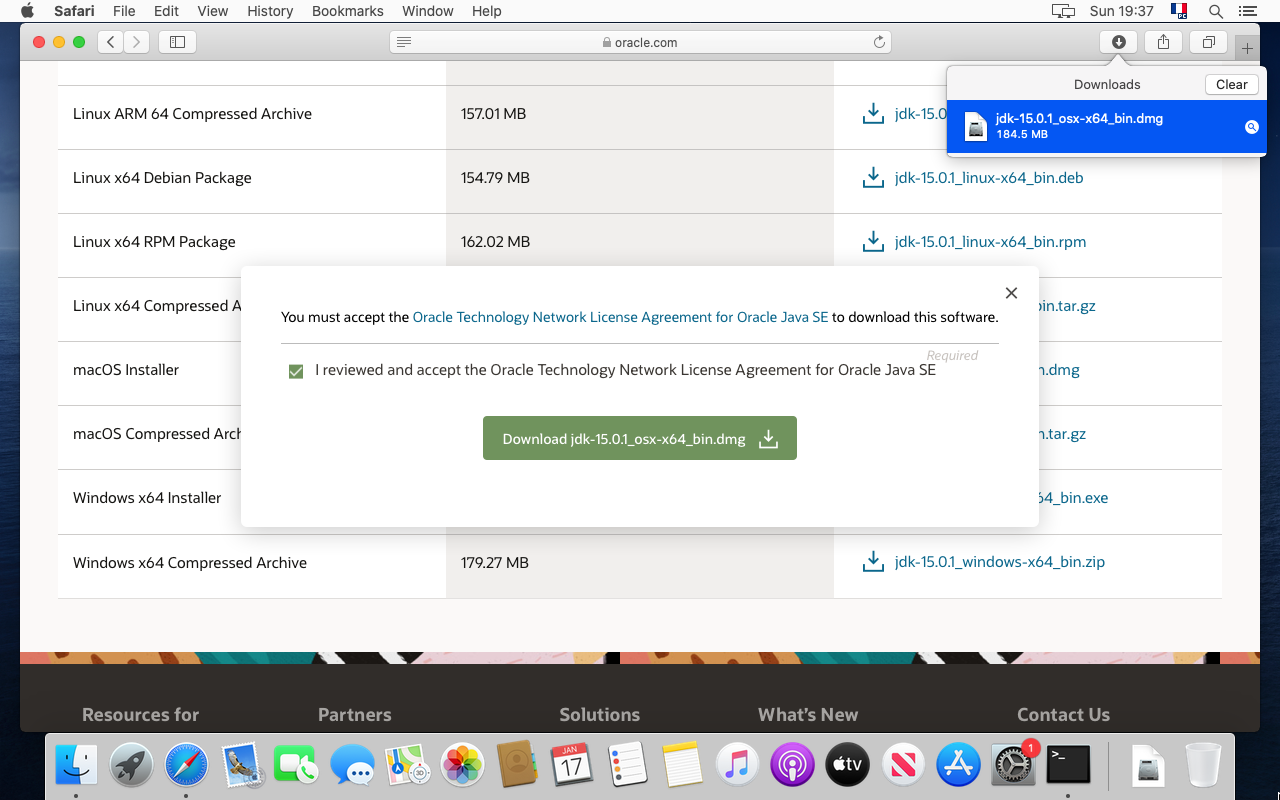
4. Go down to the "macOS Installer" line and click on the ".dmg' file

5. Click on the green download button.

6. Downloading starts... Wait.

7. Downloading is completed. Open the Downloads folder to check out the file.
8. Double click on the JDK package.

9. The JDK installer starts. Just follow the steps.

10. The installation should be successful. Close the window.
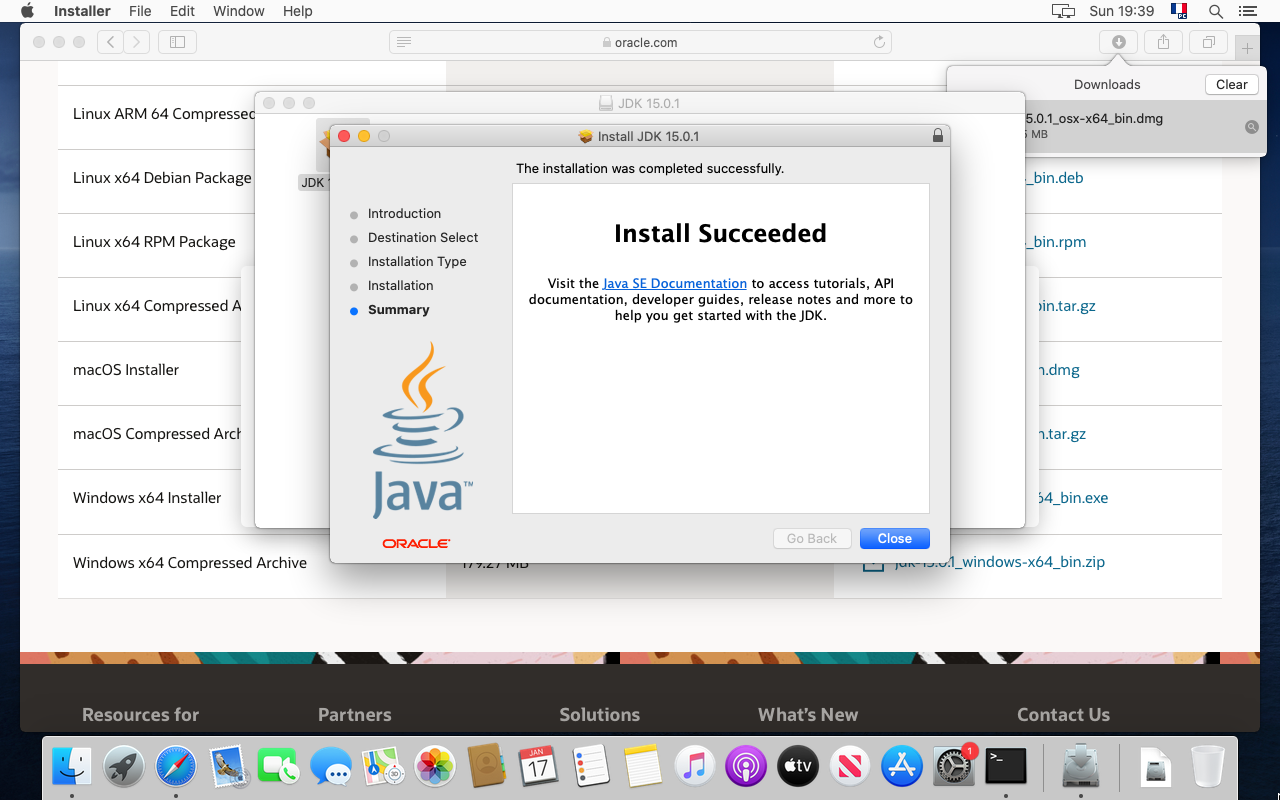
11. Then type again "java -version" in the terminal.
The following result should appear, indicating Java 15 is installed in our example.

Your are now done with the Java installation. Let's install Ancestris now.
Installation of Ancestris
12. Go to the https://www.ancestris.org web site

13. In the menu, click on DOWNLOAD. This will scroll down to the download section.

14. Click on the Ancestris 11 button of the MacOS panel.

15. Allow downloads from the Ancestris web site if this is the first time you do it.

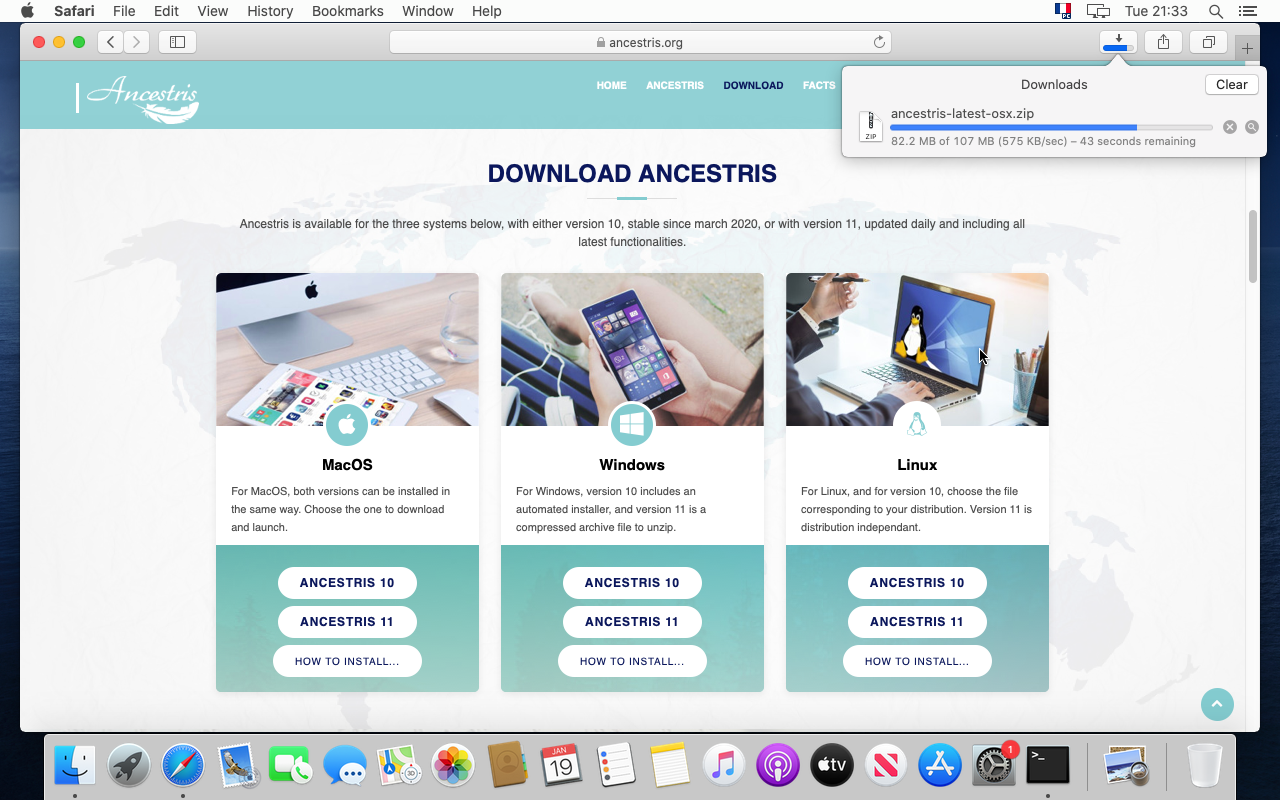
16. Downloading starts. It will take a couple of minutes.
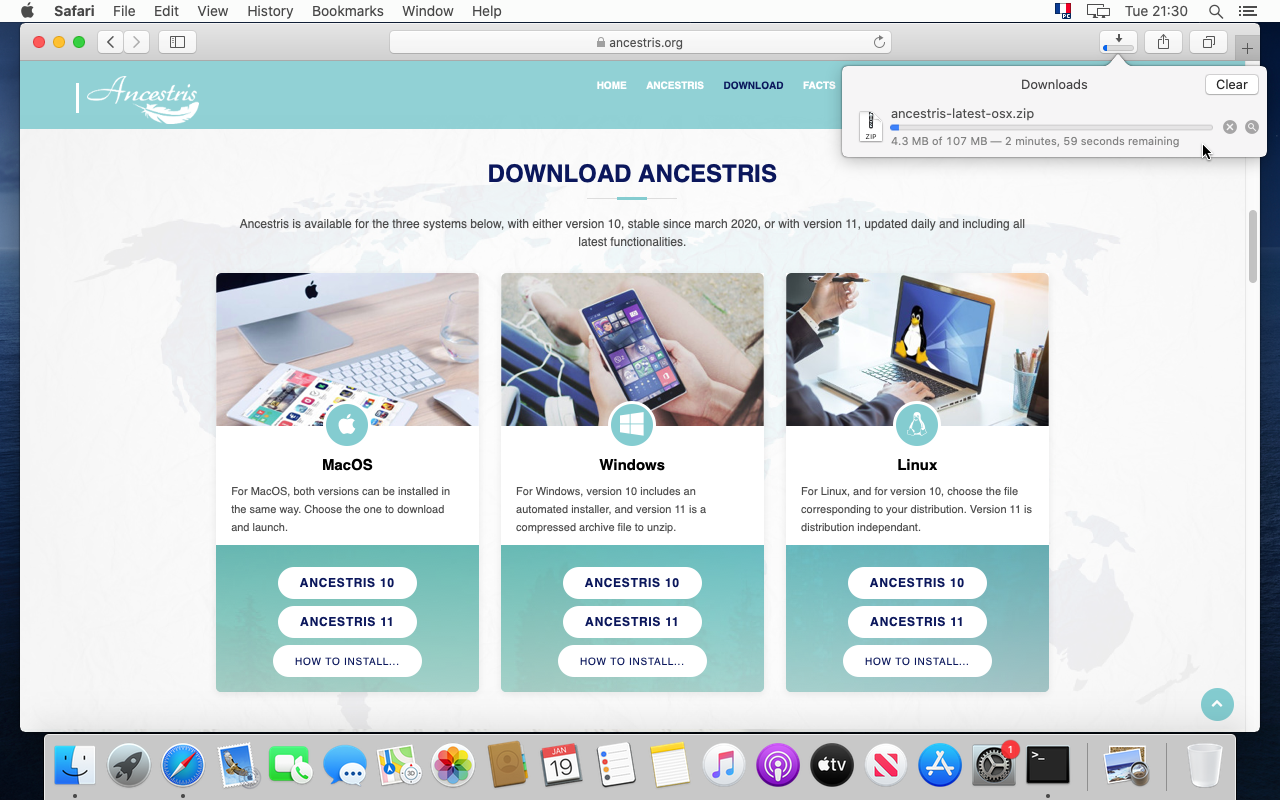
17. Wait a bit more ... we said a couple of minutes !
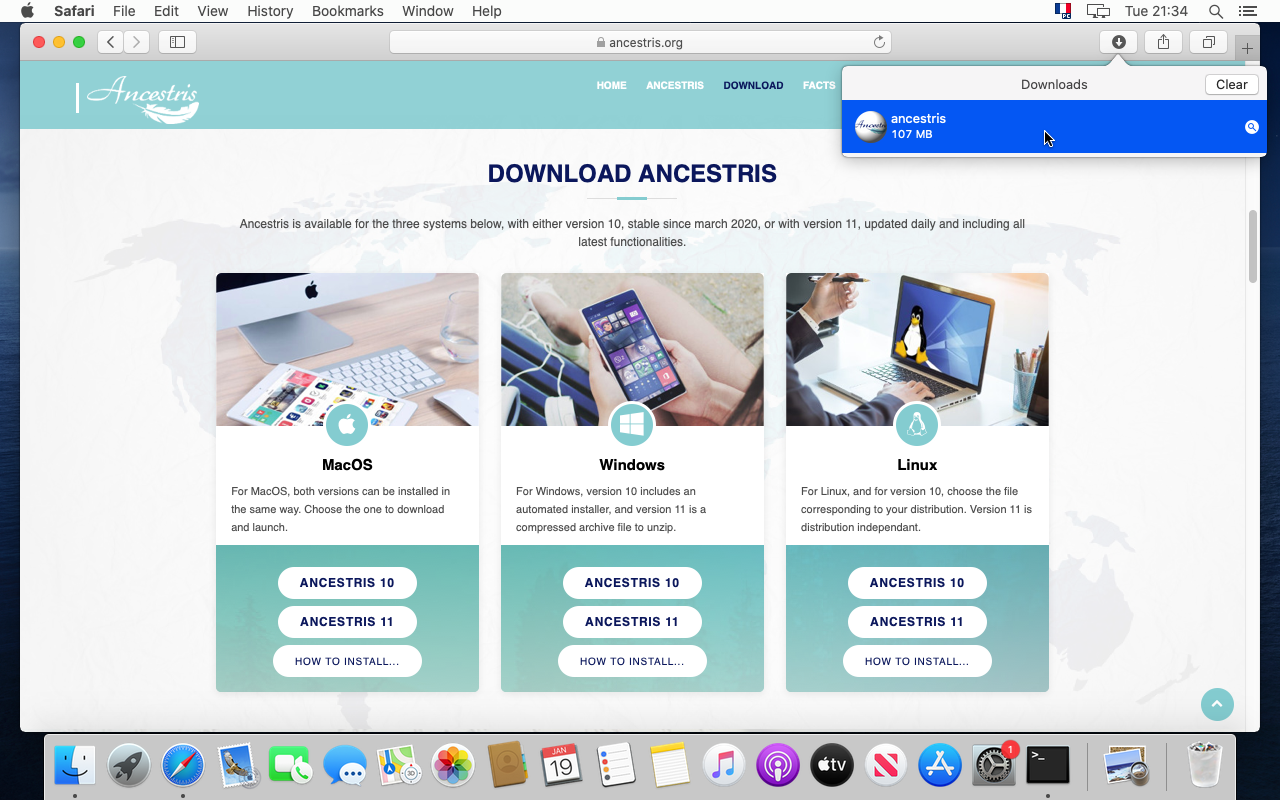
18. Once complete, move the file to your genealogy folder.
19. It is better to place your Ancestris application in a separate folder from your genealogy data.

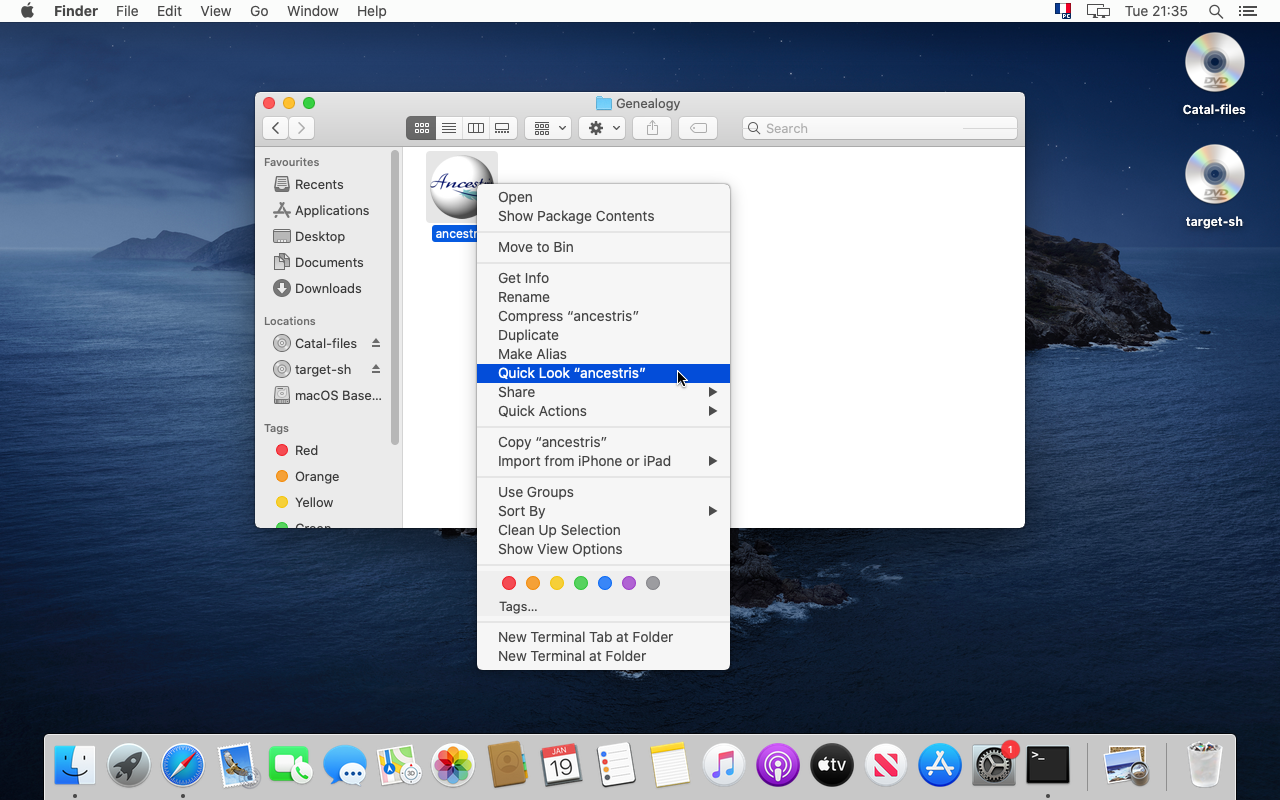
20. To make sure it is the version you expect, click on "Quick Look "Ancestris" from the context menu.
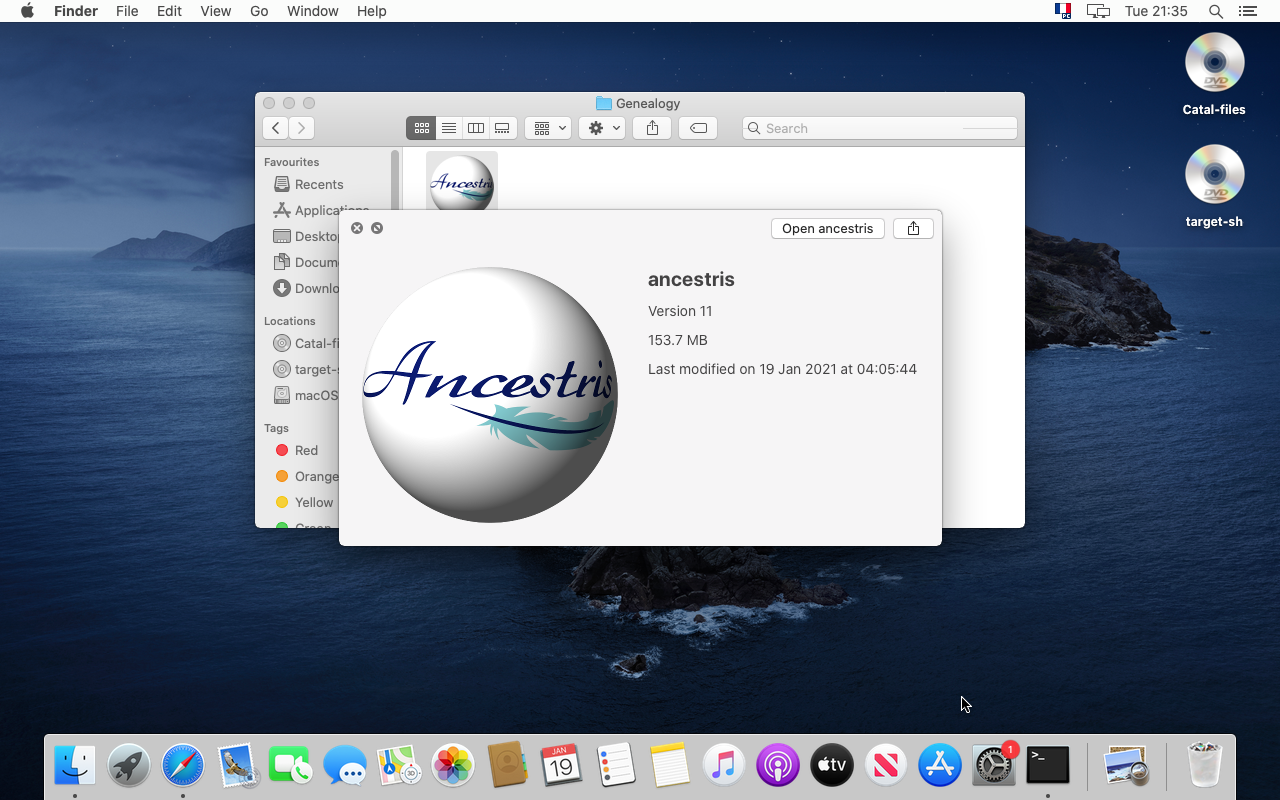
21. The application panel should tell you about the file version and date.
22. Click 'Open ancestris' or go back top your Genealogy folder and click on the icon to launch Ancestris.

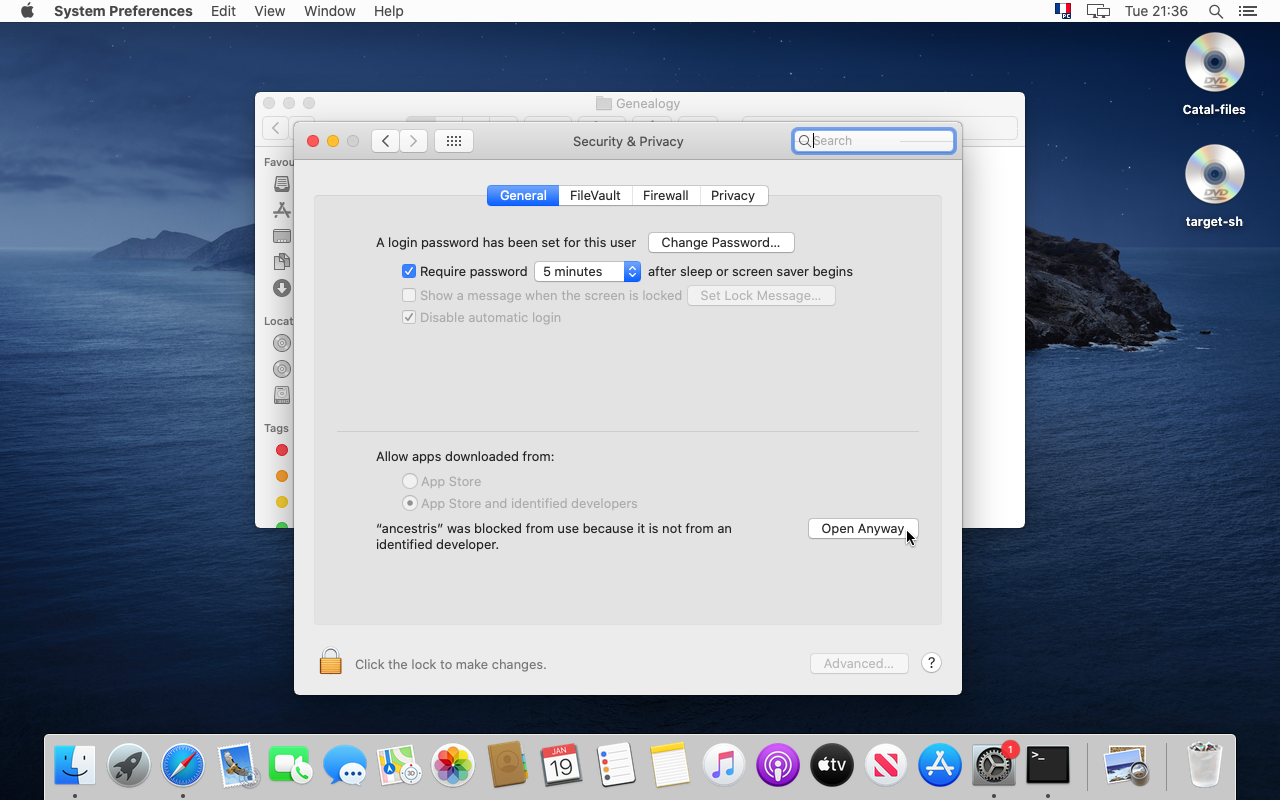
Confirmation of the security check
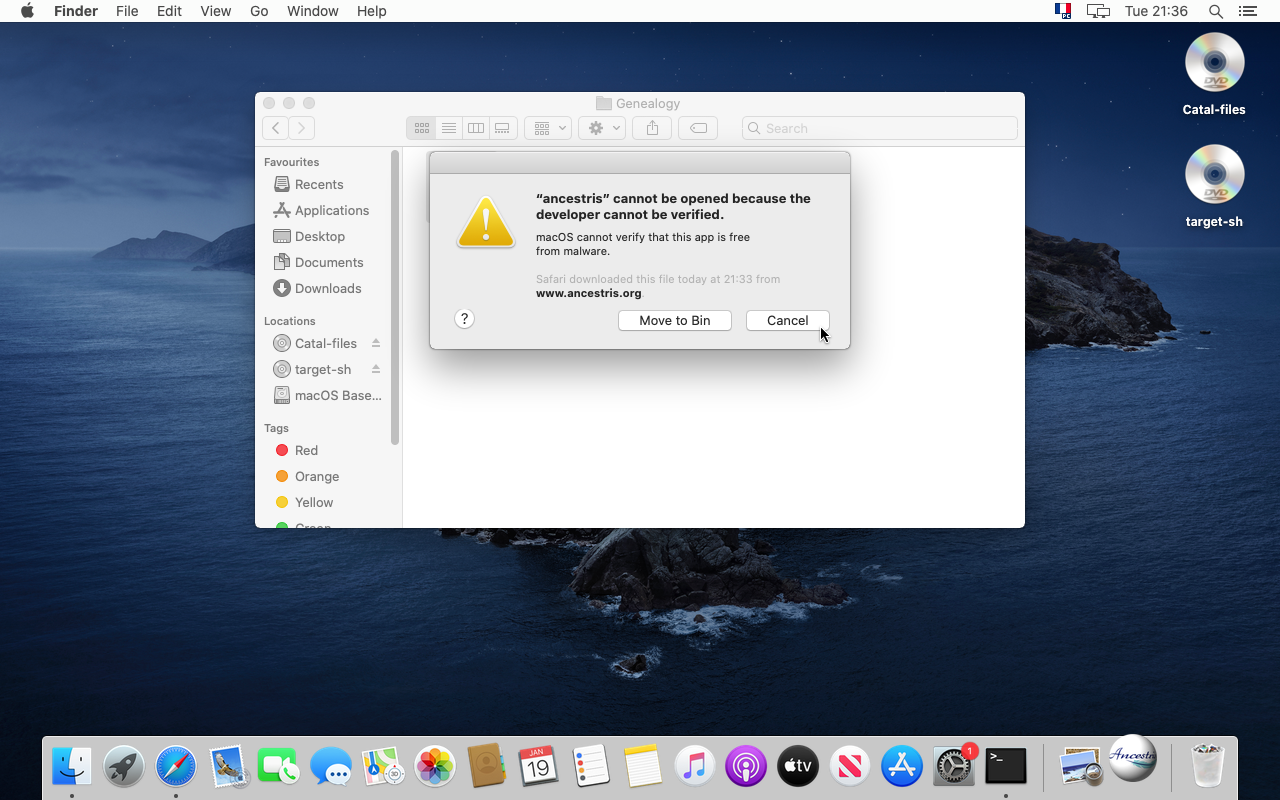
23. Ancestris starts but MacOS tells you it comes from an unverified developer. Not a problem. Ancestris is open source and does not have any malware. Let's authorize it.
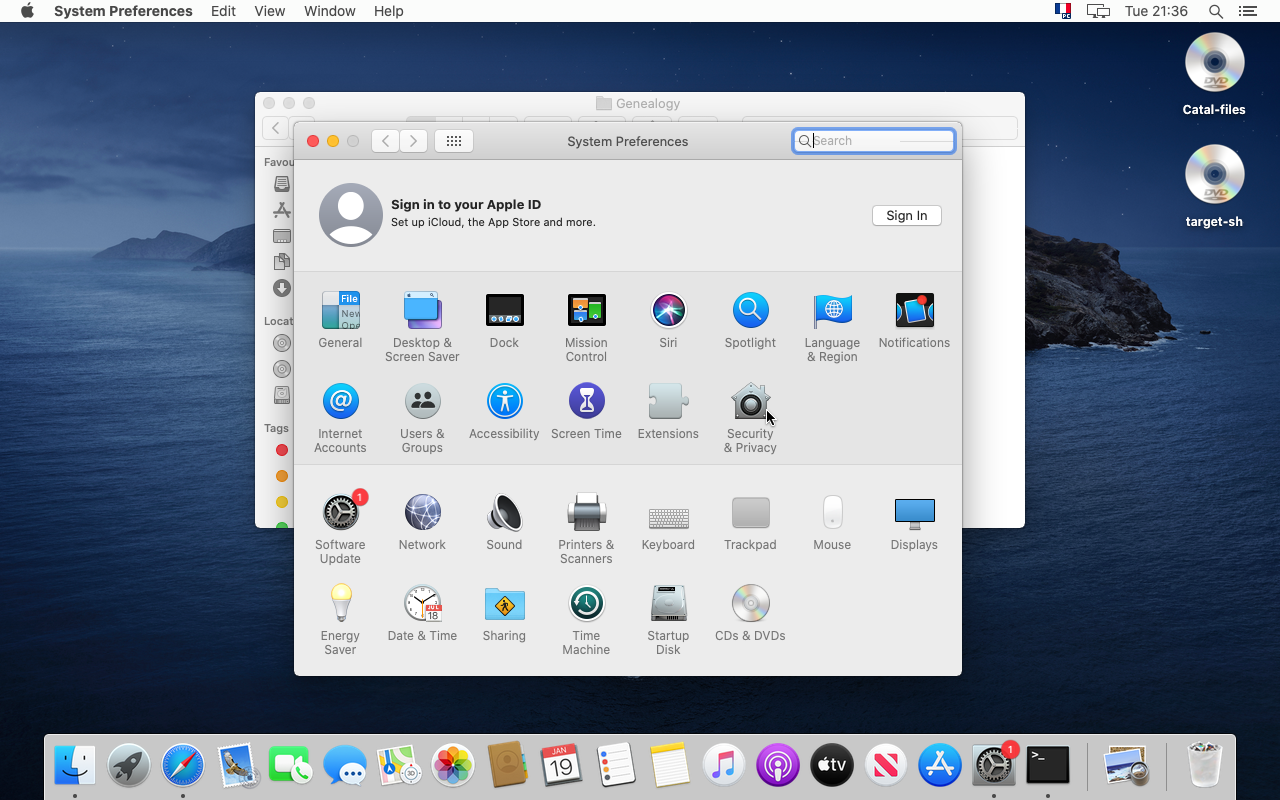
24. For that, go to the System Preferences

25. Click on "Security & Privacy"
26. Click on "Open anyway"
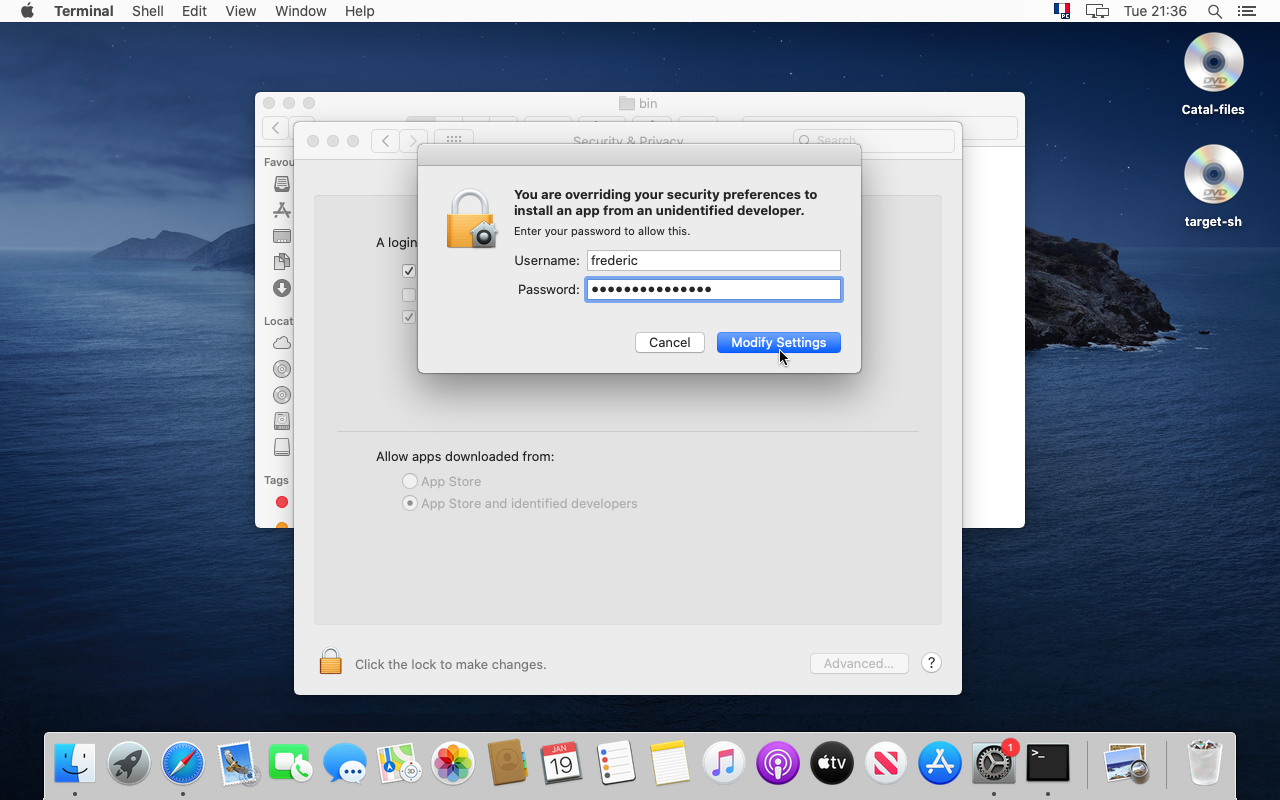
27. If it is the first time you do this, confirm with your password.
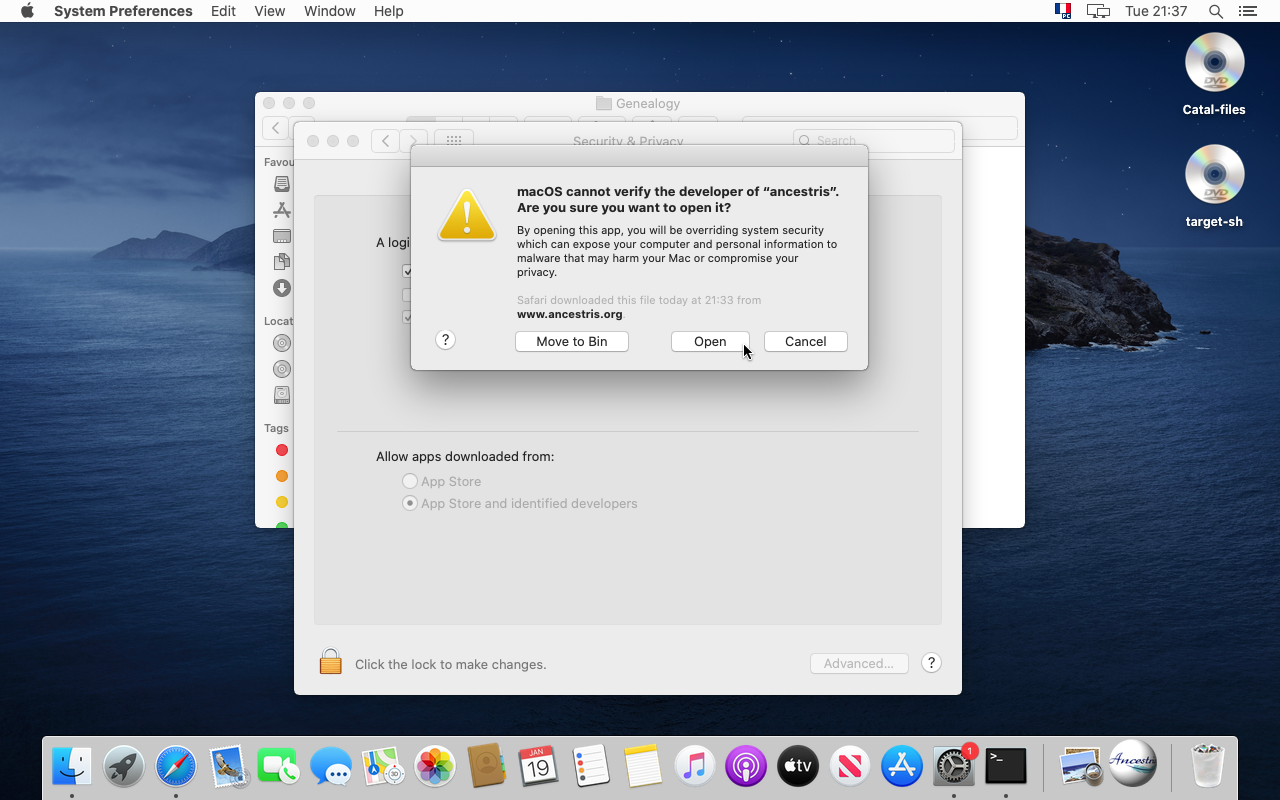
28. Yes, you are sure. Click "Open".
29. Finally, Ancestris starts.

30. You can see the Welcome window.
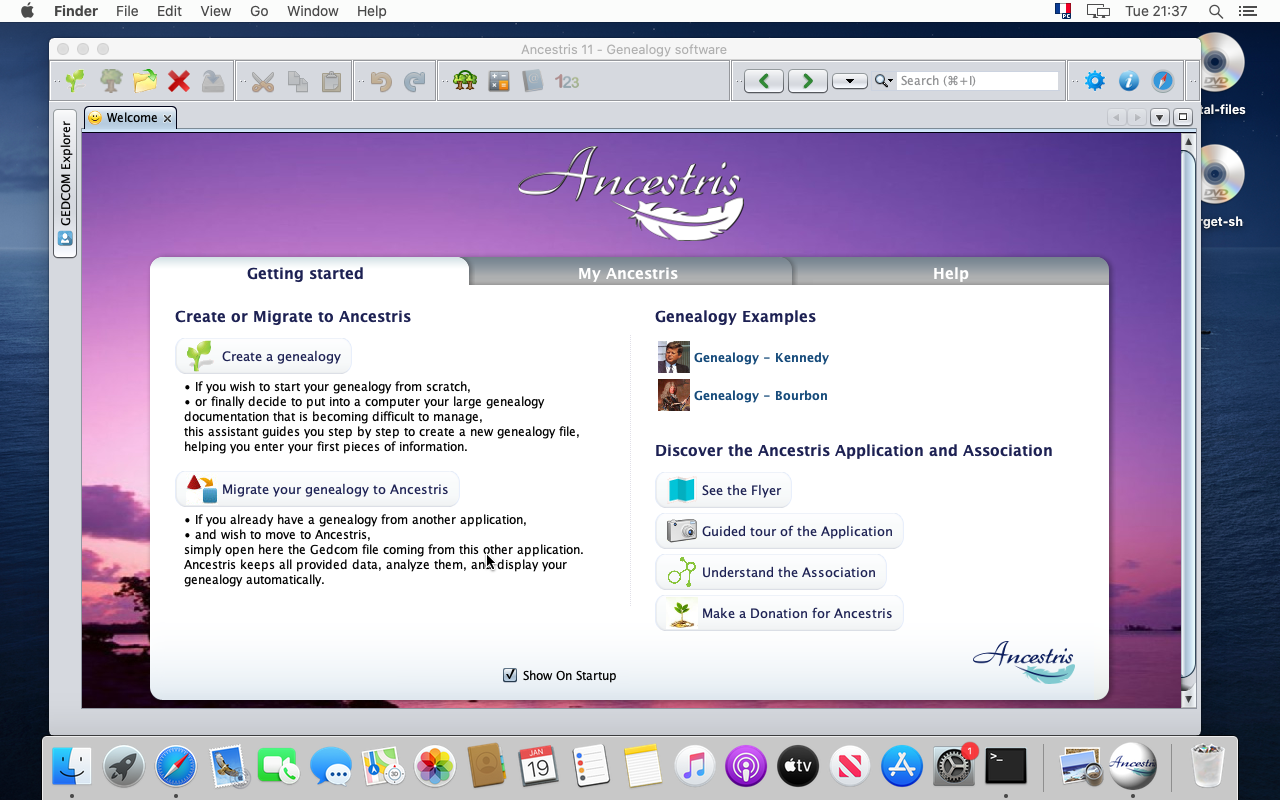
31. Please note that from the application Menu, you can access the Preferences and the "About Ancestris" panel.

Keep in dock
32. Let's keep the application in the Dock by clicking on the Ancestris icon in the dock panel.

33. Choose "Option" and "Keep in Dock".
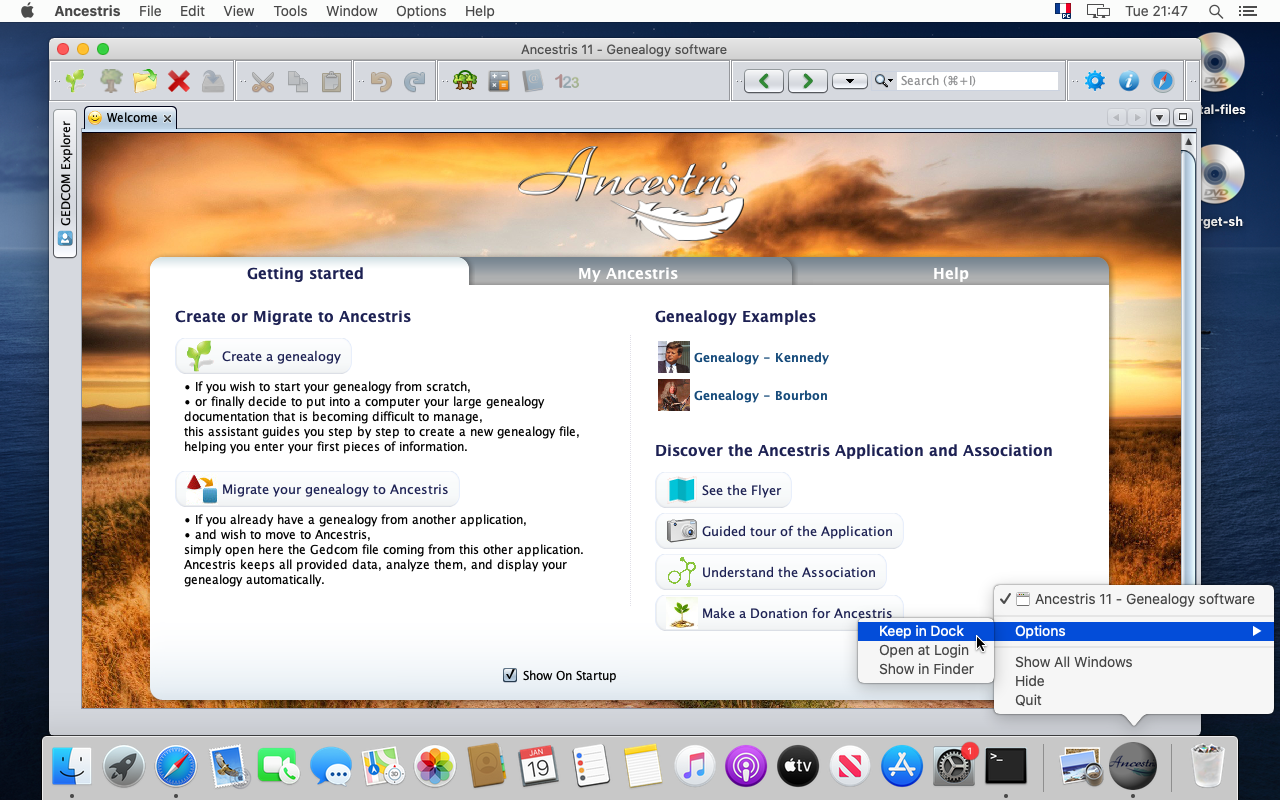
34. This is it. Ancestris is installed and in the Dock. Yessss !
