Genealogy compare
The Genealogy compare tool compares genealogies to find common geographical areas, with similar cities and lastnames, and similar events.
It can as easily compare genealogies that you have or that are help by other Ancestris users, with no need to share any sensitive information to anybody.
To compare with other Ancestris users, you simply need to let Ancestris share basic information. Your genealogy is never transferred to a server or to anybody and private information can remain confidential. If a match is found, you can contact the corresponding Ancestris user by email.
An Ancestris innovation
The idea behind this innovation is to exploit the data of the Ancestris user community without having to give the data away nor to upload it on a server.
The objective of this tool is to find connections between genealogies, which will then help you develop your own genealogy.
This tool is very easy to use and gives you in just a few mouse clicks a quick overview showing whether two genealogies have anything in common.
A genealogy can be compared with several other genealogies at the same time.
These other genealogies can be made of local gedcom files open in your Ancestris application, or they can be genealogies of other users using Ancestris at the same time as you.
When comparing genealogies across different users, your data remains protected and you keep control of your data. This is a key principle of the Ancestris community we are part of.
You can compare genealogies and find connections between you and other users' genealogies in two ways:
- In a proactive way, to identify the users likely to have ancestors common with yours,
- In a listening way, to identify these same users when they do proactive search themselves.
Either you find them or they find you. Either way, you will benefit.
Once users have found possible common ancestors, they can contact each other to find out more. They are free to establish the contact or not.
Common ancestors are only possible if they both share an event in the same space-time !
Area-period, a "space-time" concept
In order to easily compare genealogies, we have defined area-periods.
We have divided the physical word space into areas. These areas follow the definition of the Geonames database. An area is approximately a county in the US, a district in England or a department in France. In this tool, an area is made of 3 elements separated by a dot : the country, the first level of Geonames jurisdiction, and the second level.
- For instance, "US.NY.119" would be the county number "119", which is the Westchester county of the New York state of the United States.
We have divided the time space into periods. We have defined period of 10 years to match with the decennial tables that may exist in the official genealogical repositories.
Each located and dated event of a genealogy can therefore be located in an area-period. An area-period can include several events.
- For instance, the area-period "US.NY.119 [1890-1899]" would include all the events that occurred in the Westchester county of the New York state between 1890 and 1899.
As a result, two genealogies have something in common if at least an event of each genealogy took place in the same area-period.
Data Privacy
When comparing genealogies across different users, information sharing is carried out in complete confidentiality and following a deliberate choice from you to "share" some basic information about your genealogy.
The basic information shared is the "flash list report of events" of your genealogy. It is made of city names, lastnames, and dates of events. None of this information is sent to a server. It is merely exchanged through temporary messages.
- Only users who agree to share their data can compare their genealogies with others.
- Private data can be hidden from the comparison
- Users can only see from your genealogy the events that they also have on their own genealogy.
In other words, only common data can be seen by each user.
Users do not have access to your computer. The data exchange works like a phone call. Your Ancestris application chats with the other person's Ancestris application and only when common information is detected can you see the corresponding overlaps and events if they exist.
Pre-requisites
There are 2 pre-requisites to use all possibilities of this tool.
In order to compare genealogies, you must locate and date as many events as possible, and you must specify the locations of your genealogy using the places editor. If you did not use this editor to structure your places descriptions, Ancestris will try to find these places directly in the geonames database and make the best of it.
Dates can be approximated or use date ranges.
Events that are neither dated nor located cannot be compared for obvious reasons.
In order to compare genealogies with other users, you must fill in your user profile with a username, a picture and an valid email.
Description
The Genealogy compare tool handles local genealogies and 'connected' genealogies.
Local genealogies are Gedcom files that you have on your computer.
Connected genealogies are the Gedcom files held by other Ancestris users who have decided to share their genealogy for comparison.
The tool compares one main local genealogy with all the other ones, local or connected.
You decide which one of the local genealogies will be the main genealogy to compare with all others.
Only the main genealogy of each user can be shared at a given time with the other users.
Each genealogy is represented by a little window and placed into the display area of the workspace.
The rest of the tool is made of a window title and a main menu bar.
The comparison area
The central part of the window shows 3 types of windows :
- local genealogy windows, the main genealogy and the other ones
- connected genealogy windows
- comparison windows
Local Genealogies
Each open genealogy in Ancestris appears and is represented by a little window.
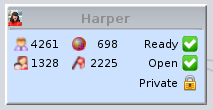
- The main genealogy to compare is represented by default at the top left corner and is a blue window
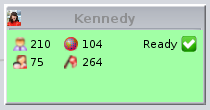
- The other local genealogies are represented by green windows. There are placed along the right hand side of the display area, around the main genealogy.
These windows look like this:
Meaning of Icons and checkboxes
The title of this window is the name of the genealogy.
A icon is displayed at the left hand side of the window title:
- The tree icon
 appears when you are not sharing your main genealogy for comparison with other users, and only comparing local files
 - Your profile photo
 appears when you are sharing your main genealogy with other users
In the window are displayed four numbers:
 Number of individuals in the genealogy. This number is updated automatically if the genealogy is modified.
 Number of families in the genealogy. This number is updated automatically if the genealogy is modified.
 Number of area-periods in the genealogy. See above what an area-period is. This number is *not* updated automatically if the genealogy is modified. Because it can be a long calculation, it is calculated on demand when you decide using the context menu of these windows. See below for the context menu.
 Number of events in the genealogy. This number is *not* updated automatically if the genealogy is modified. It is updated when the area-periods are recalculated as described above.
Three check boxes on the right hand side have the following purpose :
 or
or  Ready: if selected, the area-periods have been calculated and the comparison becomes possible. To force a recalculation, use the context menu below.
 or
or  Open: only applies to the main genealogy. If selected, the main genealogy can be compared by other users. It is automatically selected and unselected when you turn the sharing mode on and off.
 or
or  Private: only applies to the main genealogy. If selected, the private information of the main genealogy *cannot* be compared nor seen by other users. By default, is it selected when the sharing mode is turned on. You have to select or unselect this feature.
Context menu of a local genealogy
A right-click on the window displays a context menu:
 Show user profile displays your profile. See below.
 Refresh locations and events forces a recalculation of the are-periods and events in case you have modified your genealogy locations since you last clicked the Ready checkbox.
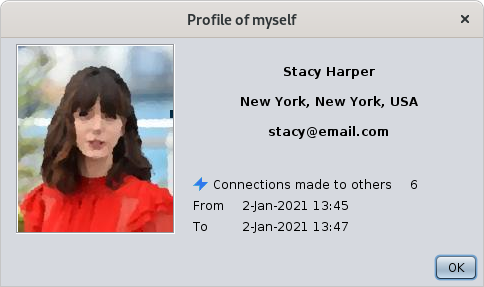
Your profile
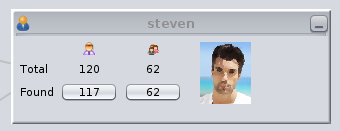
When you display you profile you should see the following window:
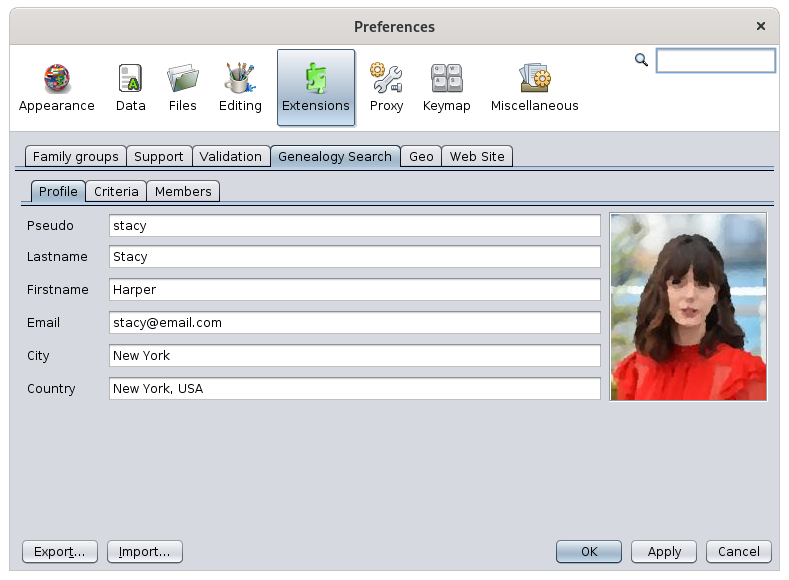
Your profile displays the information you specified in the preferences of the Genealogy compare tool. See the corresponding section below.
In addition, it displays the number of connections you made to other users and the period of time during which you made them.
Connected genealogies
The main local genealogy of another Ancestris user becomes a connected genealogy for you once they have decided to share it for comparison.
- Connected genealogies are represented by little windows below the local genealogies on the right hand side of the display area
A connected genealogy can be active or inactive.
It is active when the user is currently sharing its main genealogy. It becomes inactive when the user is no longer sharing it.
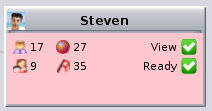
- Active connected genealogies are represented in red
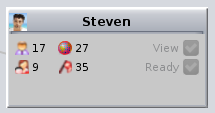
- Inactive connected genealogies are represented in grey
Connected genealogies look like this:
Meaning of Icons and checkboxes
The title of this window is the name of the user.
A icon is displayed at the left hand side of the window title:
- The generic person icon
 appears when the user profile is not yet known by you.
 - The user profile photo
 appears when the user profile is known.
In the window are displayed four numbers:
 Number of individuals in the user genealogy. This number is updated automatically if it changes and the usere remains connected.
 Number of families in the user genealogy. This number is updated automatically if it changes and the usere remains connected.
 Number of area-periods in the user genealogy. See above what an area-period is. This number is updated each time you compare the connected genealogy. You compare a genealogy using the 'Ready' checkbox described below.
 Number of events in the user genealogy. This number is updated each time you analyse the connected genealogy. You analyse a genealogy using the 'Ready' checkbox described below.
Two check boxes on the right hand side have the following purpose :
 or
or  View: if clicked, the user genealogy is scanned to detect a potential overlap between your main genealogy and the user's main genealogy. It can only be performed if the sharing mode is on. Once the user genealogy is successfully scanned, the checkbox remains selected and you need to use the context menu below to reset it. Otherwise it is unselected.
 or
or  Ready: if clicked, the user genealogy is compared to your main genealogy. It can only be performed if the View checkbox described above is selected. Once the user genealogy is successfully compared, the checkbox remains selected and you need to use the context menu below to reset it. Otherwise it is unselected.
Context menu of a connected genealogy
A right-click on the window displays a context menu:
 Show user profile displays the user profile. See below.
 Contact user helps you contact the user by opening up your client mail and preparing a mail to their attention.
 Reset flags resets the View and Ready checkboxes. You can then scan again and compare again the other user genealogy. This can be useful is the user makes changes to its genealogy that affects the comparison.
 Hide user hides the user window. This can be useful if you have too many users displayed and you want to remove users with whom no overlap has been detected.
User profile
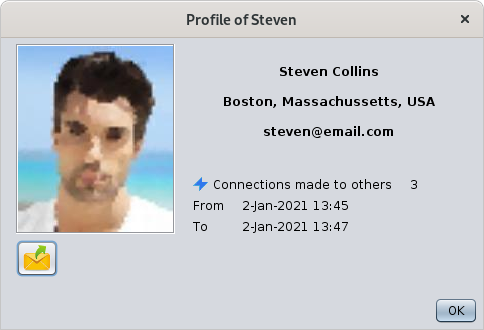
When you display a user profile you should see the following window:
A user profile displays the information specified in the preferences of the Genealogy compare tool for the other user.
In addition, it displays the number of connections they made to you and the period of time during which they made them.
Also, an email button  helps you contact the user by opening up your client mail and preparing a mail to their attention.
Comparison
For each comparison between the main genealogy and another one, local or connected, a comparison window is shown.
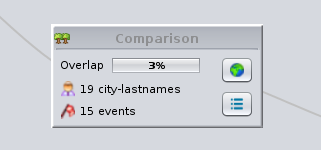
- A comparison window is represented by a little grey window and is placed by default between the compared genealogies and linked to them on both sides by a string
Meaning of Icons and buttons
The title of this window is 'Comparison' and an double compared tree  appears at the left hand side of the window title.
In the window are displayed two numbers:
 Number of city-lastnames that are identical lastnames in identical cities between the two genealogies compared.
  Number of events that are identical between the two genealogies compared.
 Comparison map: displays a comparison map view of the compared genealogies and the common areas. See description below.
 Comparison list: displays the list of common city-lastnames and events between the two genealogies compared. See description below.
Comparison map
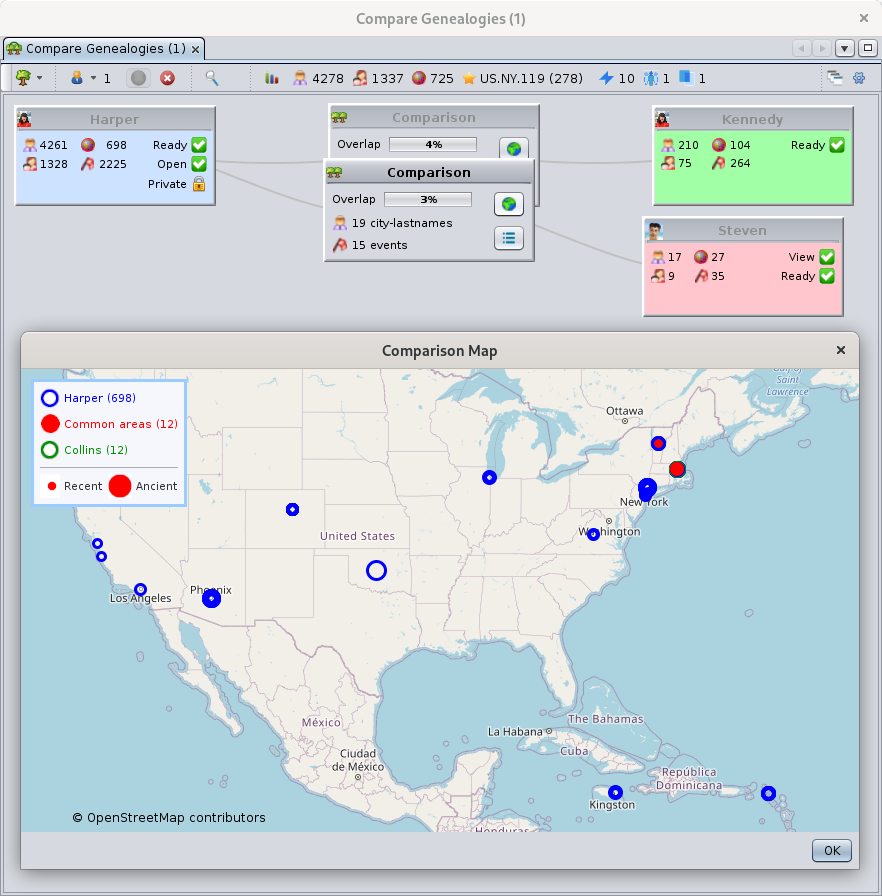
The Comparison map is the following window:
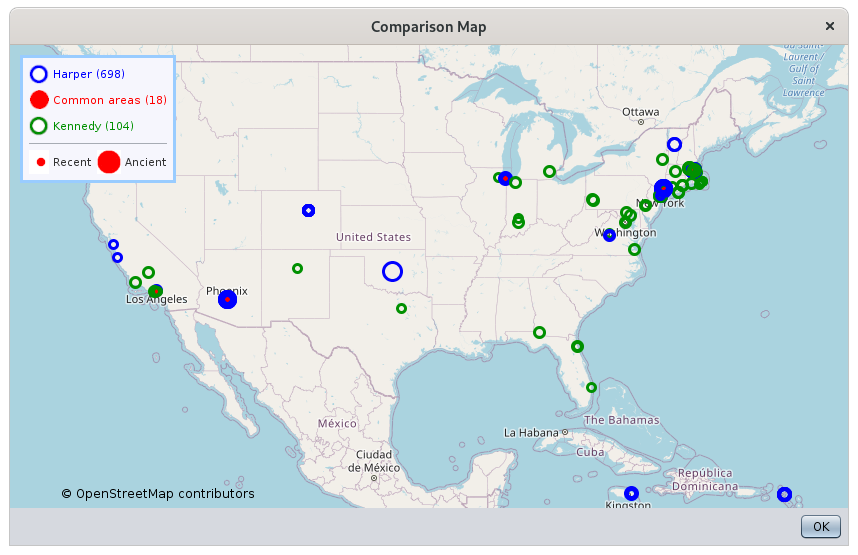
This window displays your genealogy in blue circles and the compared genealogy, local or connected, in green circles.
Each circle represent an area-period. See definition above. The larger the circle, the more ancient the period is.
Common area-periods are displayed in red. Here we can see 18 area-periods in common between your genealogy and the Kennedy genealogy located at Los Angeles, Phoenix, Chicago and New York. Several periods can exist for a given location.
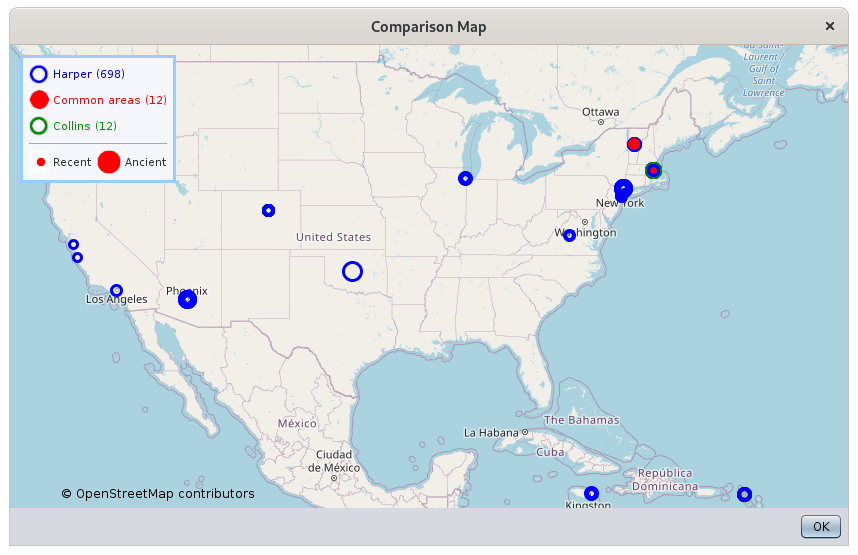
For a comparison map with a connected genealogy, only the common areas of the connected user are displayed. In the example below, we only see 12 area-periods of Steven's main genealogy, called 'Collins'. These are areas in Boston and Vermont.
As you can also see, the blue circles are the same as they represent the same area-periods of the my genealogy, the 'Harper' genealogy.
Comparison list
The Comparison list is the following window:
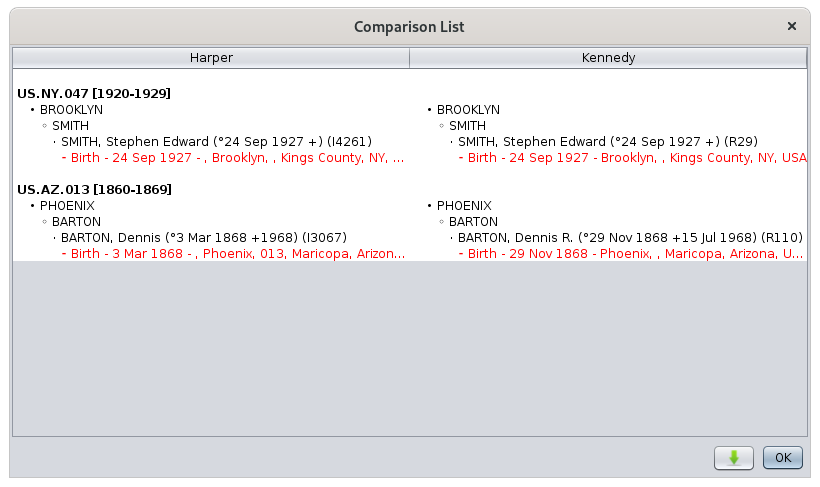
This list displays the common lastnames found in cities within the common areas.
A common area-period does not necessarily mean there will be a common lastname in the same city as the other genealogy.
Above is the example of the common elements between the Harper genealogy and the Kennedy genealogy. While 18 area-periods were common between these two genealogies, only 2 of them have actually common events.
Each match is displayed on 5 lines :
- the area-period in bold,
- then the city,
- then the lastname,
- then the full name of the person,
- then the event displayed in red, with the date and the location.
In this list, a click on the red event line displays the corresponding event in the Ancestris editors. Obviously, this is not possible when the genealogy is a connected genealogy because the Gedcom file has not been copied across to your Ancestris application.
Window title
The title of the window indicates in brackets the number of users, other than you, currently connected to the Genealogy search and therefore available for a search.
In fact, searching is only possible between active searchers and active listeners.
Toolbar
The toolbar looks like this during use:
Local genealogies Button
This button displays the number of current connected Ancestris users. Clicking on the button brings up a drop-down menu listing their nickname.
Connected Users Button
Your nickname is displayed in bold.
The check boxes allow you to authorize or temporarily block your Gedcom search files from the users.
Start / Stop buttons
These two push buttons go together. The green button opens the sharing mode. The red button stops the sharing mode.
These buttons do not perform a proactive search, they are intended to put you on active listening and to declare you as a searcher. Your nickname then appears in the "Genealogical search" windows of other researchers, at the level of the Users button described above.
Search Button
The search may take some time and as results appear, Friend and Match boxes will appear as the search is successful.
Connection Statistics Button
This button displays other users results statistics on your data.
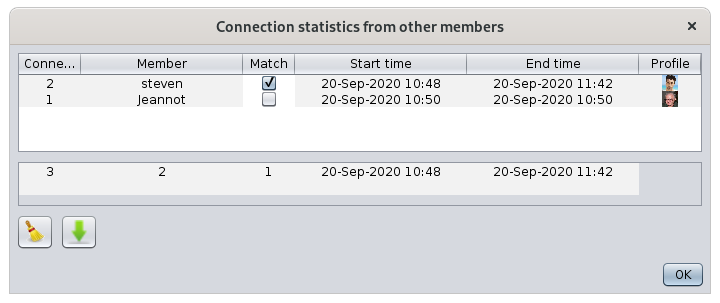
The 3 indicators on the right indicate respectively the number of search attempts you have had during active listening, the number of different users this represents, and the number of positive results found by these users.
In the example above, during the listening mode, I was searched 3 times by 2 users, who found one positive result.
Arrange Window Button
This button realigns the boxes in column, the Gedcom files on the left, the Friends on the right and the Matches correctly arranged in between.
This can be useful after you have moved or minimized the different boxes on the main space, so that you can re-display everything neatly.
Configure view Button
This button customizes your profile and search settings.
See the Customization section below for more details.
Usage
The purpose of the search is to find Friends among Ancestris users or to be found by them, Friends being those who will have information in common with your Gedcom files they share with you.
Verify that other users are connected
The first thing to do is to check that other users are connected.
- You can see this with the Users button on the toolbar.
- Also check that their box is checked. Unchecking a user prevents them from searching with you, but it also prevents you from searching with them.
Turn on sharing mode
- Open one or more Gedcom Files
- Make sure that their "Gedcom Open" checkbox is checked for each
- Make sure the "Private hidden" checkbox is checked if you want to hide your private data. In this case, you will not be able to find matches with other users regarding this private data. You can also do it globally with the padlock on the toolbar.
- If necessary, set the clock to the maximum duration of the listening mode. By default, this will be set to 12 hours
- Then press the green button .
Now, if people from the Ancestris community are looking for matches, their Ancestris application will be able to search your flash list data : lastnames, firstnames, places, date range.
If you have not filled in your profile or if no other users are connected, a click on the green button will give you a message: either fill in your profile or wait for users to connect.
Start the search
- If you do not need any previous results anymore, first click on the broom button to clear them out.
- Then click on the Search button
The search begins. You can see the little wheel turning and the nickname of each user whose flash list is being probed.
Wait for results
The matches found are displayed as the users flash lists are successively probed. When Ancestris has finished scanning all users, the search stops and the last results are displayed.
If no results are displayed, it means that there was no match, or that the search criterion set in the parameters was too demanding, or that the number of sharing users was too small.
If a positive result is displayed, you see one or more friends with data potentially in common with yours.
For example, this one:
Check results
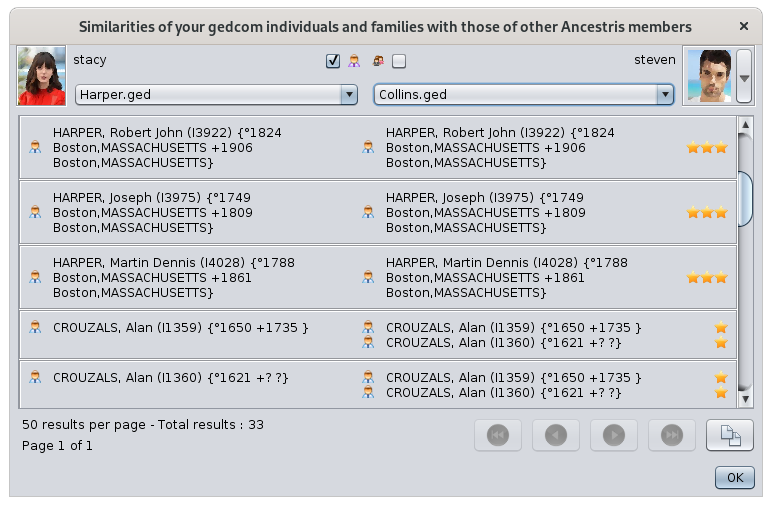
By clicking on one of the two buttons of the found entities, the following result window is displayed:
In this window, you are on the left, and the friend is on the right.
Matches are listed below.
Each match is listed indicating whether it is an individual or a family, and whether the match is exact (3 stars), probable (2 stars), or approximate (1 star).
Change in the scope of analysis
Clicking on the friend's photo brings up a drop-down menu listing the other Friends with whom matches have been found.
If another Friend is selected, the list of matches with this Friend will be displayed instead.
When opened, the window is initialized with the results corresponding to the clicked button. Here, the individual is checked, for the Friend Steven and with the Gedcom Harper.ged for you and Collins.ged for Steven.
By selecting other Gedcom files in the drop-down menu, other Friends in the Friends drop-down menu, and all or some of their Gedcom files, you can vary the scope of comparison and display the corresponding results in this window.
You could also have opened the results window from a Gedcom file or a link, this would have had the same effect. Well almost, since the choice of your Friend's Gedcom file is only possible from the results window.
Contact a user
After analyzing these results, you may decide to contact one of the Friends discovered by Ancestris.
To do so, click on the friend's photo. Their profile will appear, just as you filled in yours.
All you have to do is complete the email and send it.
Check the existence of "Finders".
Whether or not you have had results from your search, you can also check whether other searchers have found matches with you. They are then "finders".
If finders have found matches with you, then you have matches with them!
It is indeed possible that while you were away, searches were performed on your flash list data, with Ancestris users who have since logged out, or rather, stopped sharing.
Nothing is lost, you will be able to find them again. When you come back, you have traces of their search, even if they are no longer connected. These are the connection statistics.
To check if "finders" exist, then check the statistics. The 3 indicators will allow you to know if there have been connection attempts, for how many searchers, and how many finders.
Description of the statistics window
This window lists the different researchers who have attempted to search your flash list data. There are two in the example.
The first column shows the number of search attemps they did. There was 2 for the first researcher, 1 for the second.
The second column shows the nicknames of the researchers.
The third column shows which researchers found something. The first one is a finder because the Match checkbox is checked.
The next two columns indicate the period during which the searches took place.
The last column shows the profile picture of the researcher.
The bottom row shows the overall statistics, which are displayed on the toolbar button.
Contact a User
Using the previous window, you will be able to get in touch with the finder and any other researchers.
To do so, click on the picture. The profile will appear, just as you filled in yours.
All you have to do is complete the email and send it.
Customization
It is possible to customize your profile, adjust the quality of searches, and manage the list of Known Friends.
Ancestris Profile
It is in this window that you enter your profile. This is intended to serve two purposes.
- To inspire confidence and thus to be able to carry out research with other researchers and Friends.
- To be able to be contacted if one of them wishes it
Of course, you can indicate anything and put the picture of Zorro if you like. But as with social networks, you will sooner or later get banned and no one will want to let you look at their data anymore.
Moreover, your IP address is visible to others (see below), no matter what information you enter here. So it's easy to be recognized if you change your nickname.
So it is in your best interest to give the right information if you want to benefit from this search feature.

