Crea la teva genealogia
Veureu el senzill que és crear una genealogia des de zero amb Ancestris. Creeu un primer individu, els pares i la família propera, tenint així el vostre primer arbre genealògic amb una o dues generacions.
La creació d’una genealogia sol començar per dibuixar una primera persona i especificar informació com la data i lloc de naixement, per exemple. Després dibuixa altres persones, els pares, i vincula-les amb la primera persona. Després, els avis, etc. Bé, amb Ancestris, podeu fer exactament el mateix.
Creeu el primer individu
DuringDurant thela guidedvisita tourguiada, wehem usedutilitzat thela Bourbongenealogia genealogy,borbònica, fitxer Bourbon. file.Aquest Thisés isun anexemple examplede ofgenealogia asubministrada genealogy supplied withamb Ancestris.
Tanquem-lo i en creem un de nou. Per tancar Bourbon,Borbon, només cal que feu clic a la creu vermella de la barra d’eines quan s’activi una de les finestres dels Borbons. I ara, creem la vostra pròpia genealogia.
FromDes thede la Welcomepàgina pagede Benvinguda, clickfeu theclic buttonal botó CreateCrea auna genealogygenealogia oro clickfeu clic 
on the toolbar.
The creation wizard will start. Follow the steps until you get the dynamic tree view of a tree with yourself right at the center of it !
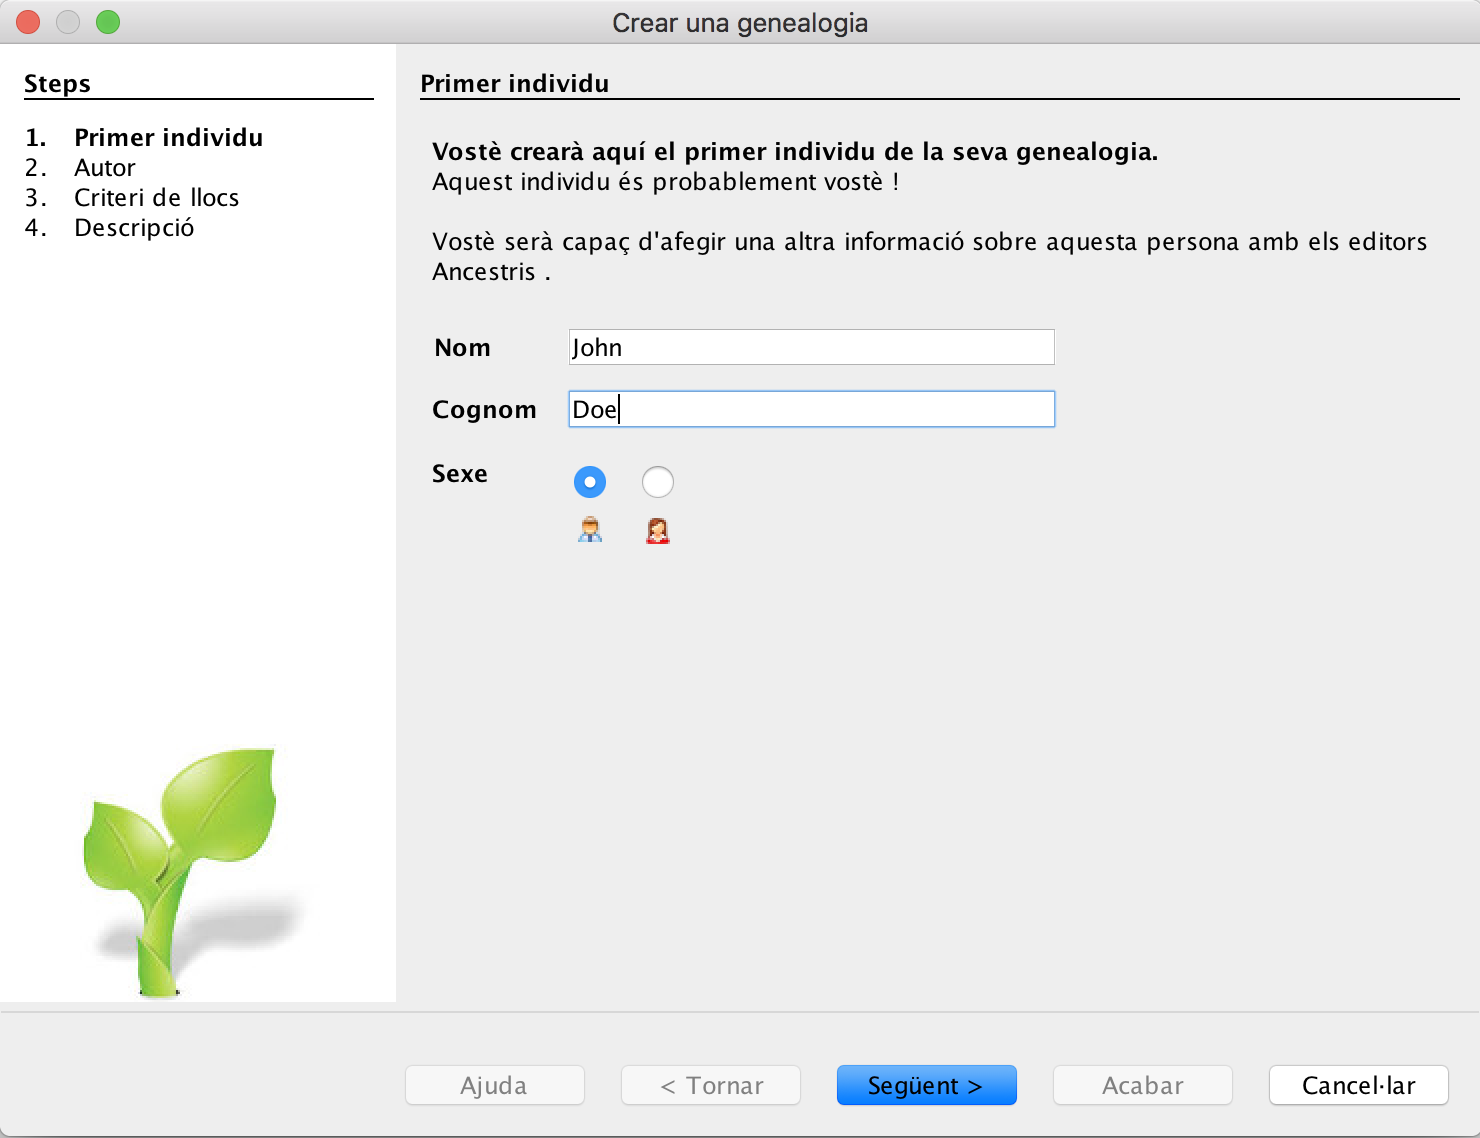
On the first screen of the wizard, enter your name and sex, then clickla Nextbarra d'eines.
S'iniciarà l'assistent de creació. Seguiu els passos fins que obtingueu la 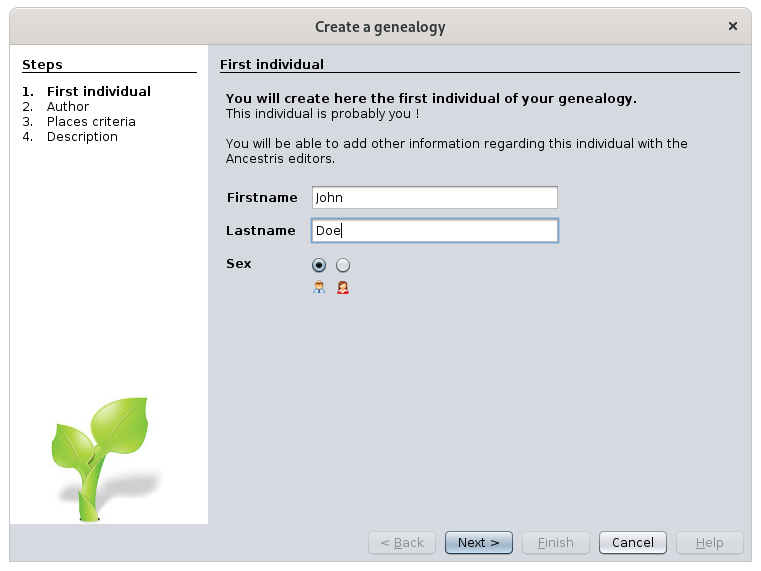
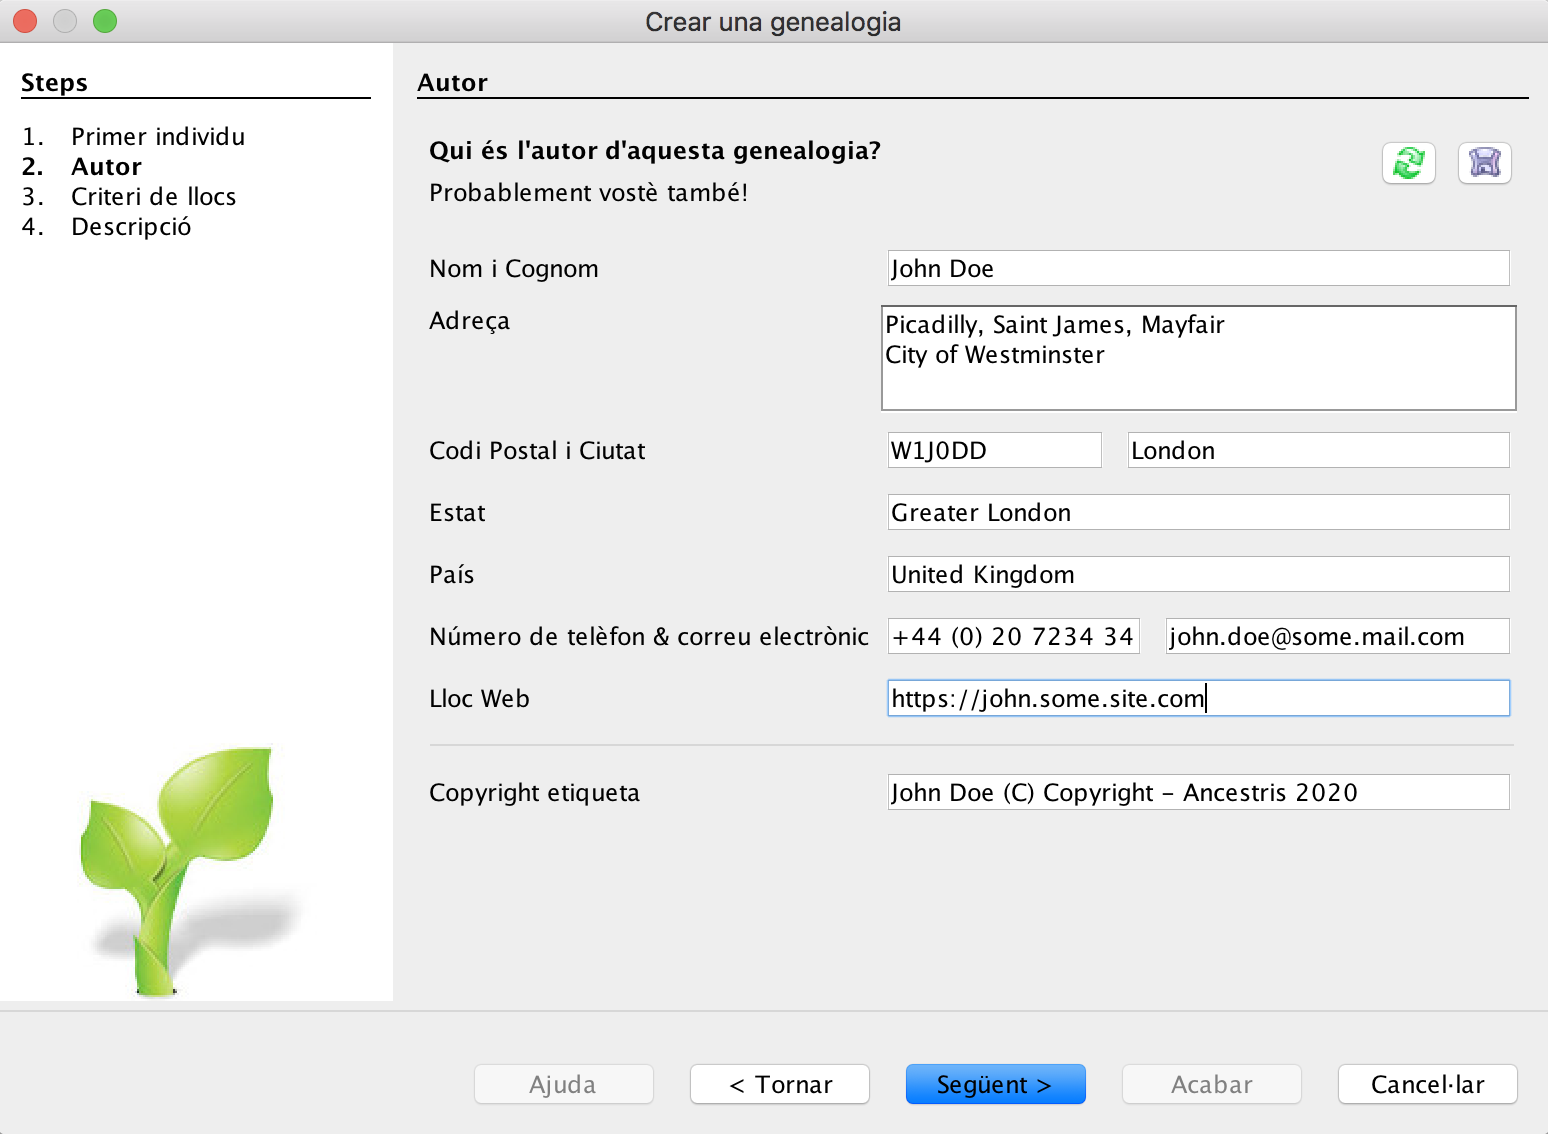
ThenA enterla theprimera informationpantalla regardingde thel'assistent, authorintroduïu ofel thisvostre newnom genealogy,i probablyel you.vostre Clicksexe i feu clic a NextSegüent.

DefineA thecontinuació, placesintroduïu formatla toinformació usesobre acrossl'autor yourd'aquesta entirenova genealogy.genealogia, Belowprobablement isvostè. theFeu standardclic format. If you don't know now what it should be, clicka Next. It can be changed later.
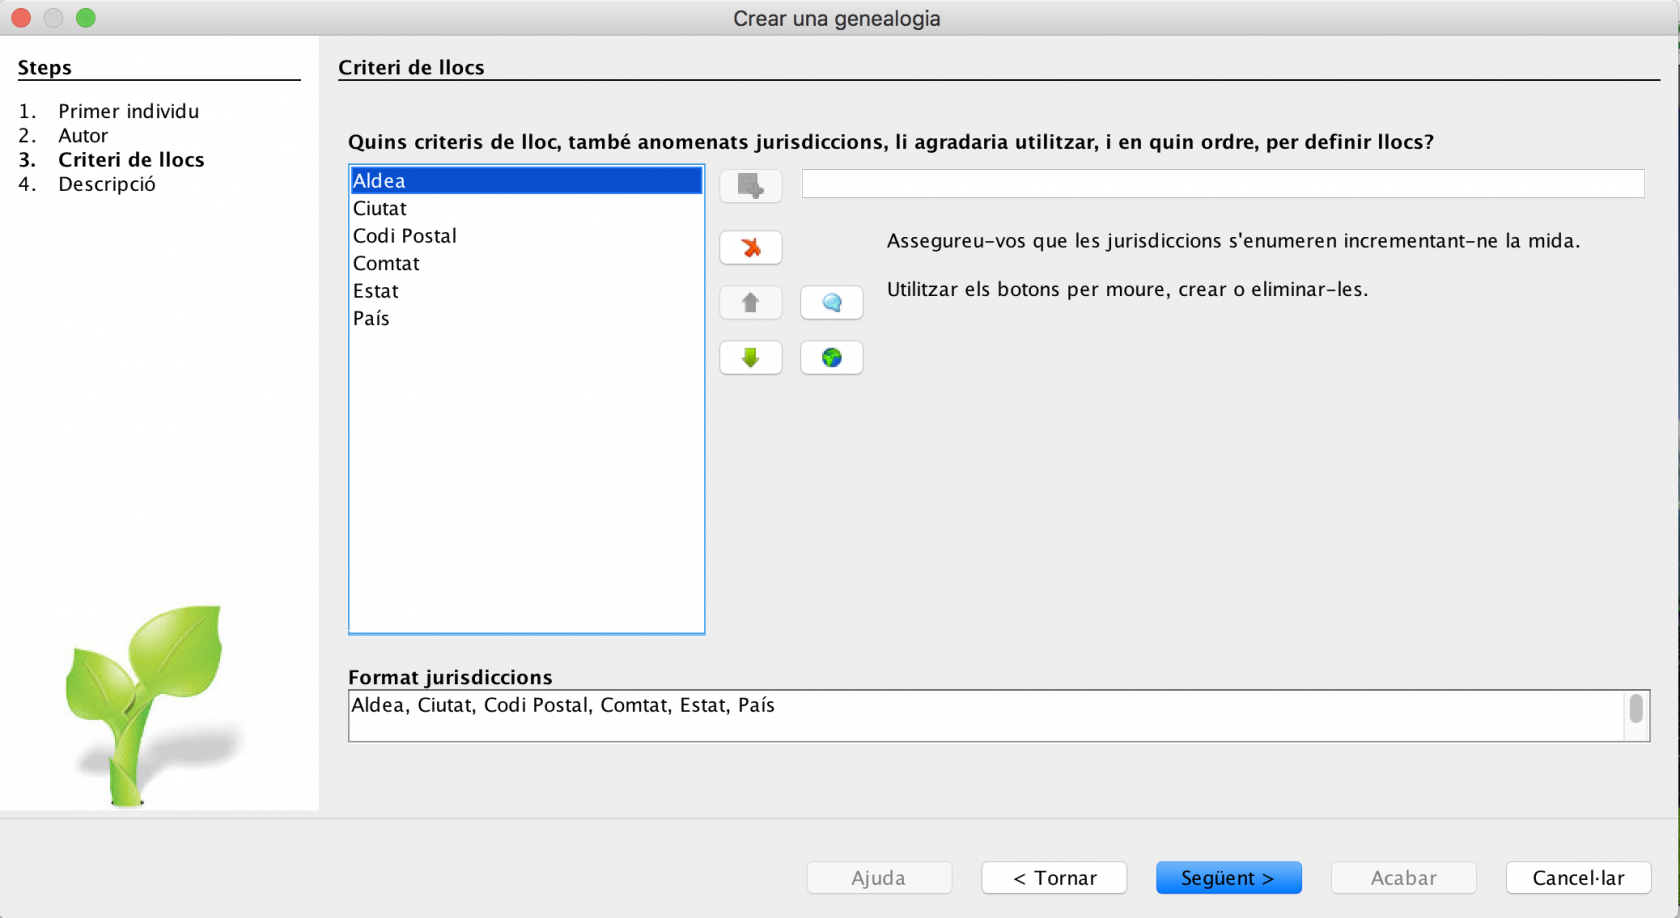
Else, use the available buttons to add, change or delete place criteria, also called jurisdictions. Then click NextSegüent.
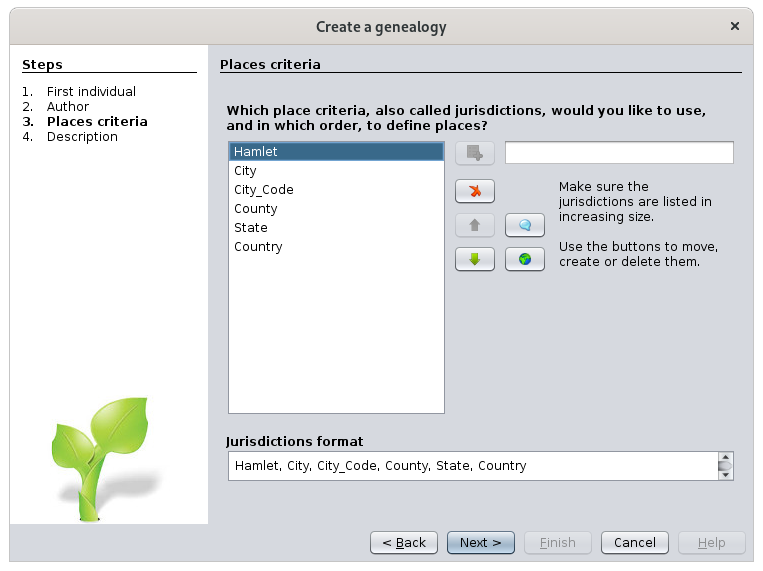
EnterDefiniu el format de llocs que cal utilitzar a descriptiontota forla yourgenealogia. newA genealogycontinuació andes clickmostra el format estàndard. Si ara no sabeu què ha de ser, feu clic a FinishSegüent. Es pot canviar més endavant.
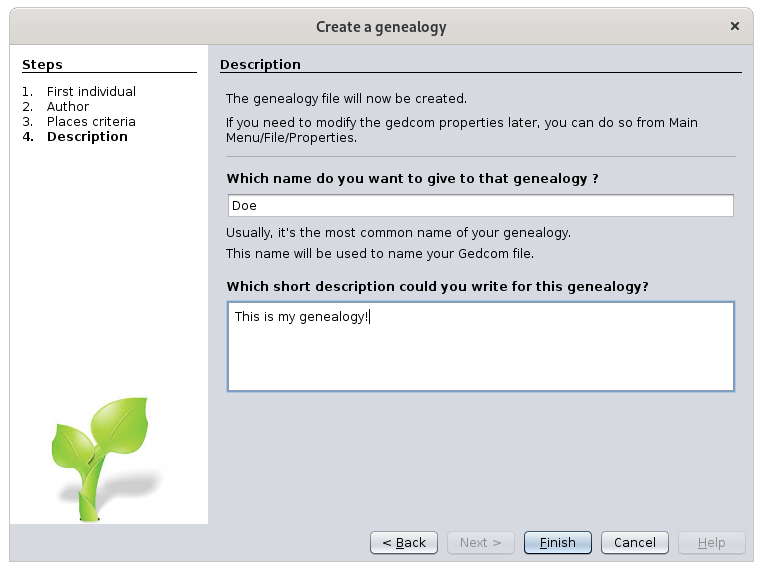
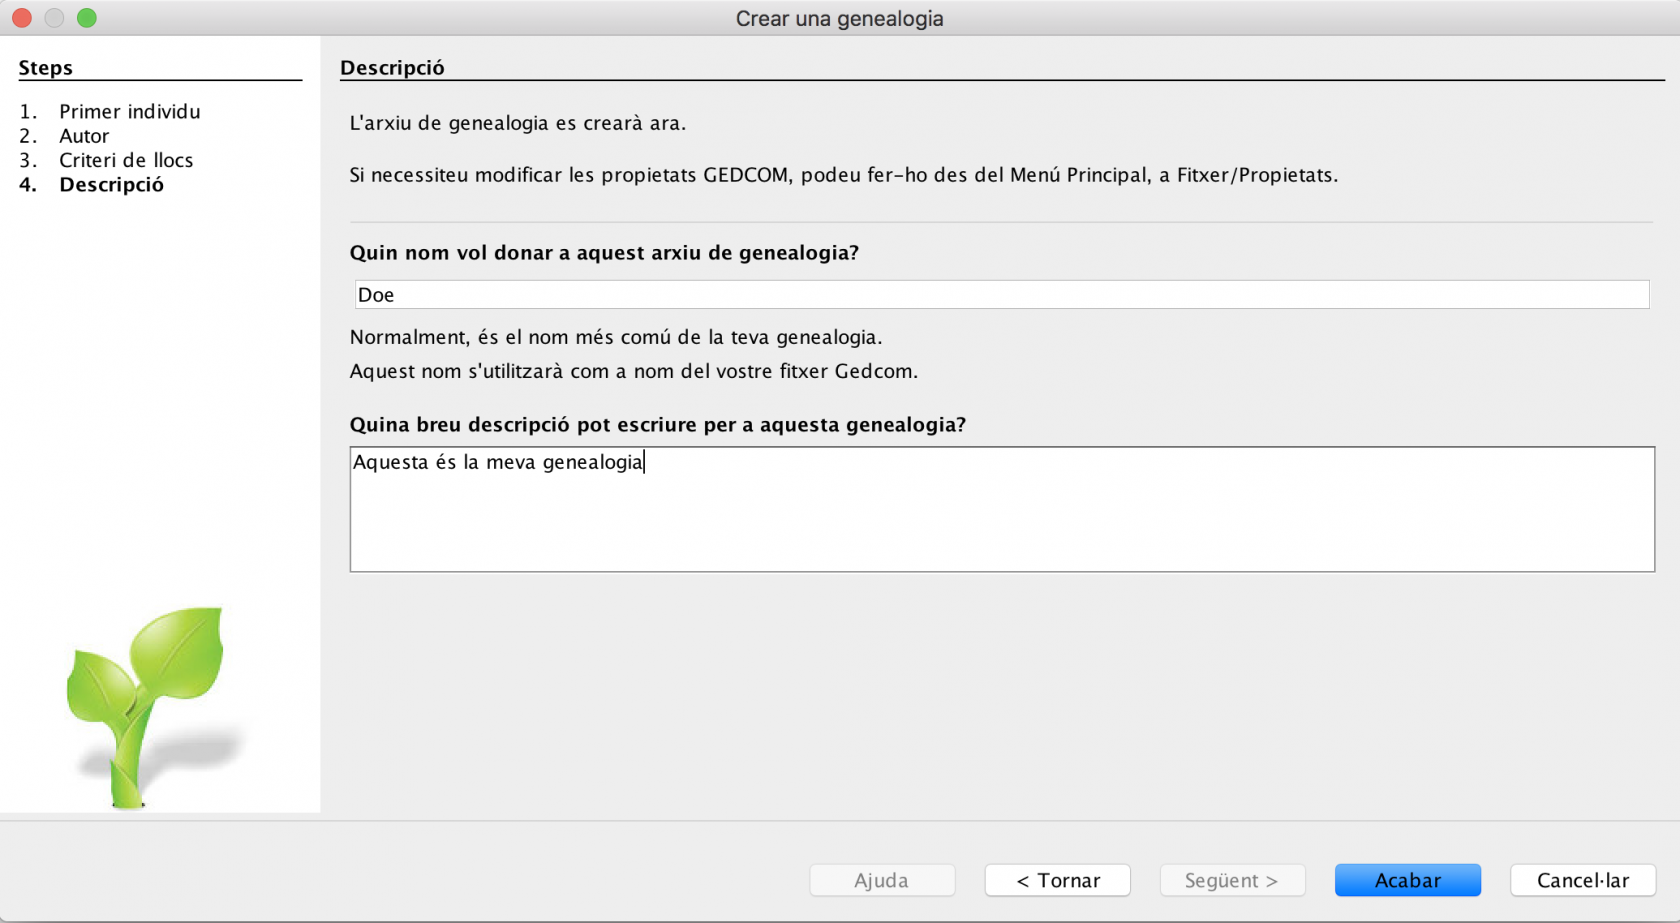
Introduïu una descripció de la vostra nova genealogia i feu clic a Acabar.
Ancestris willus thendemanarà askla youubicació fori theel locationnom anddel filefitxer nameper todesar savela yourinformació genealogy information.genealògica.
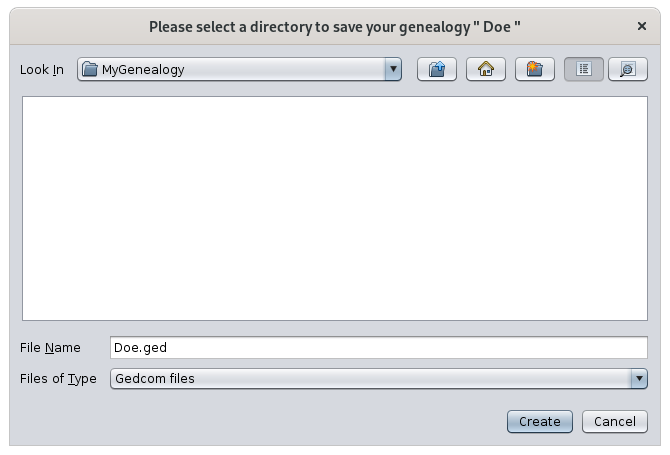
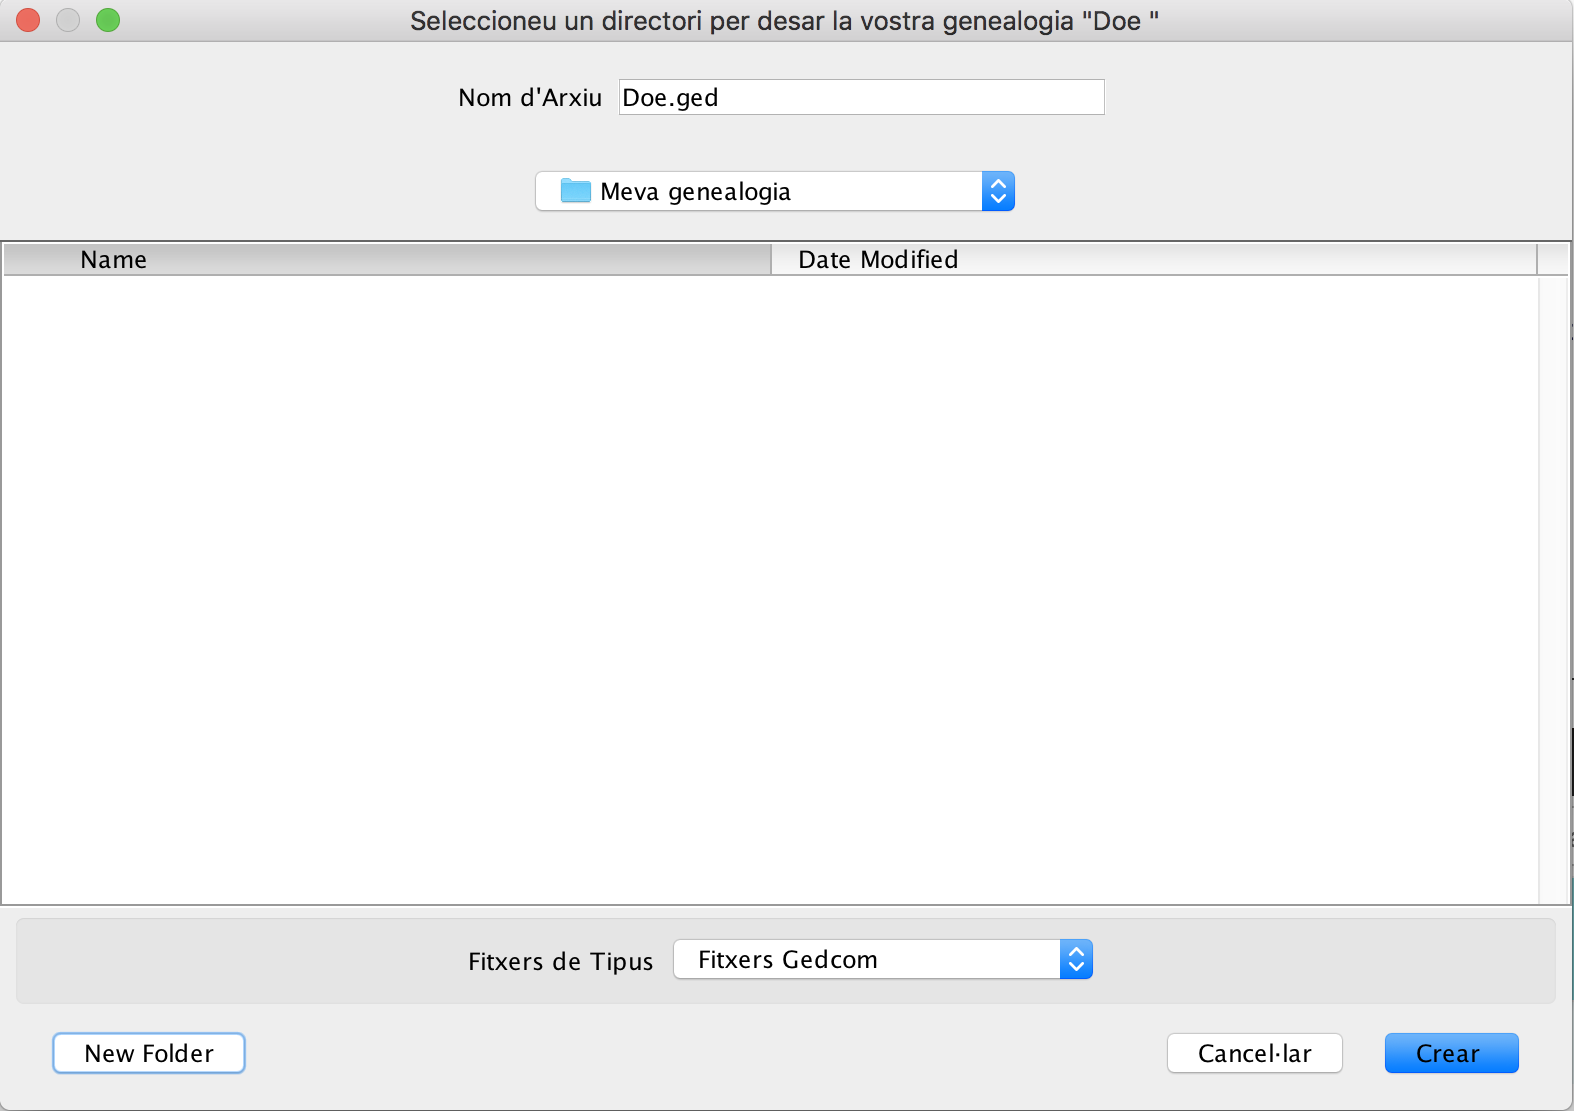
AsCom youpodeu canveure, see,la theinformació informationes isdesa directlydirectament saved ascom a fitxer Gedcom. file.Els fitxers Gedcom filestenen have the extensionl'extensió ".ged".
PressPremeu CreateCrea toper save.desar. That'Això és it.tot.
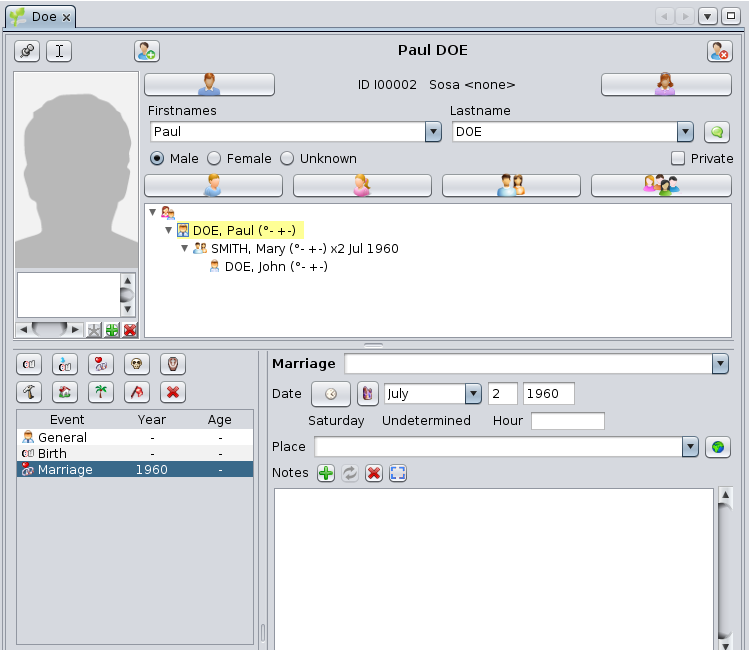
Ancestris willmostrarà nowara showun arbre de genealogia a genealogy tree in thela dynamicVista treed'arbre viewdinàmic. ThisAquest treearbre isestà madeformat upnomés ofper oneuna personpersona: only: you.vostè.
OnA thela rightpart handdreta, side,també thes’obre l'editor Cygnus. editorMostra isels alsodetalls opened. It shows thed'informació individual informationde detailsla ofpersona theseleccionada personactualment currentlya selected in the tree.l'arbre.
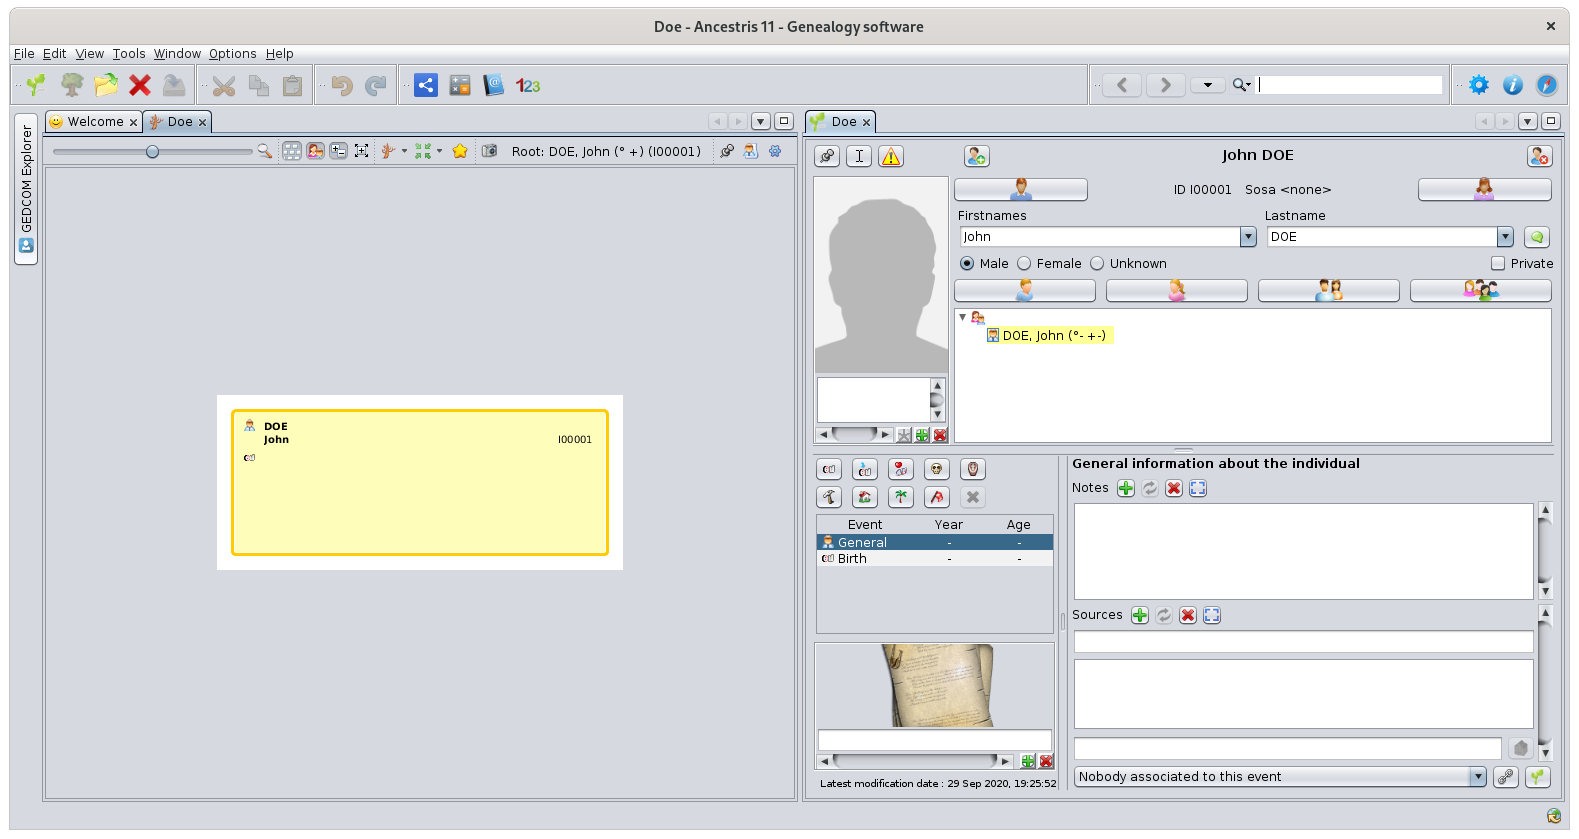

UsingAmb thel’editor CygnusCygnus, editor,ara youpodeu cancompletar nowla completeinformació theque missingfalta, information,per e.g.exemple yourla birthdata datei andel placelloc forde instance.naixement.
AddAfegiu una fotografia vostra fent clic a photographla ofzona yourself by clicking in the respective area.respectiva.
AddAfegiu otheraltres namesnoms ifsi necessary.cal.
WhenQuan finished,hàgiu inacabat, orderper todesar saveels thecanvis changesrealitzats, made,feu clickclic onal thebotó OKD'acord buttonque thatapareixerà willa appearl'extrem atinferior thedret, bottomtan rightbon corner,punt ascanvieu soonles asdades youa change your data in the l'editor.
AdoptAdopteu bestles practices
millors pràctiques
IfSi youcontinueu keepafegint onpersones, addingben people,aviat veryarribareu soona youcentenars willde reachregistres: hundredspersones, of records: individuals, families,famílies, etc.
WeUs recommendrecomanem youque toadopteu immediatelyimmediatament adoptuna aforma consistentcoherent andi harmonisedharmonitzada wayper toescriure writela theinformació frequentlyque useds’utilitza information,amb suchfreqüència, as:com ara:
surnamescognoms (1st1aletterlletrauppercasemajúsculaoronot)no)occupationdescripcionsdescriptionsd'ocupaciówitnesses (usetestimonishusband'(utilitzen l’oncle del marit mésunclequeratherl’onclethandePeter'sPeter)uncle)pertoevitaravoidrepetirrepeating namesnomsplacenomsnamesde lloc (oldortografiaspellingantigaoronewortografiaspelling ?nova?)- etc.
Also,A ifmés, yousi have your birth certificate at hand, document it now asteniu a source,mà andel ascertificat comprehensivelyde asnaixement, documenteu-lo ara com a font i el més exhaustivament possible. Ancestris isés verymolt goodbo atper keepingmantenir alltota detailedla information.informació detallada.
CreateCrea yourels parents
teus pares
CreatingLa parentcreació cand'un bepare donees eitherpot fromfer thedes de la dynamicvisualització treede viewl'arbre dinàmic oro fromdes thede l'editor Cygnus editor.
FromA thel'arbre, tree,feu rightclic clickamb theel desiredbotó individual.dret del ratolí sobre la persona desitjada.
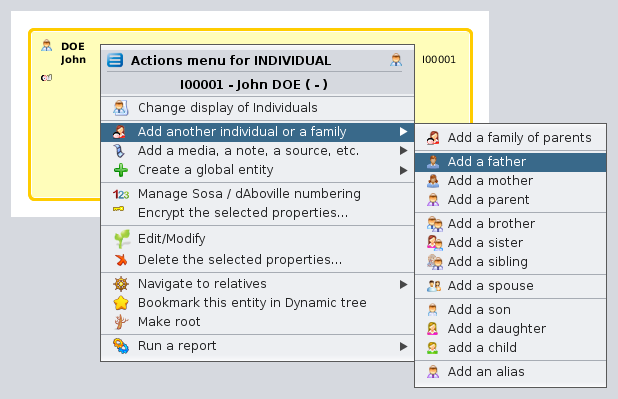
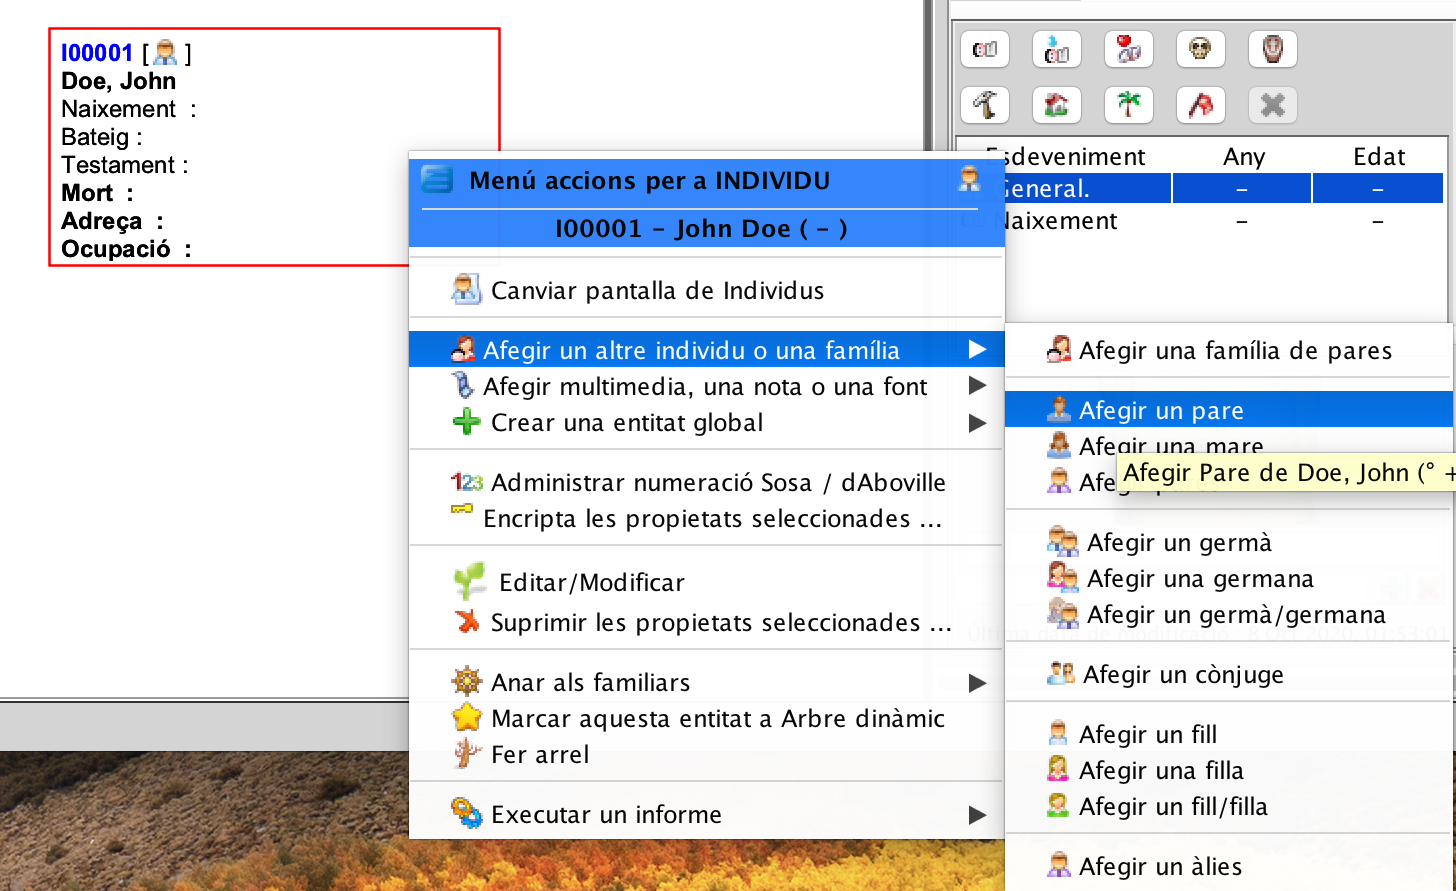
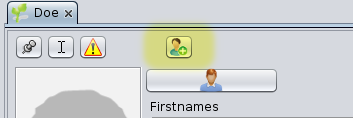
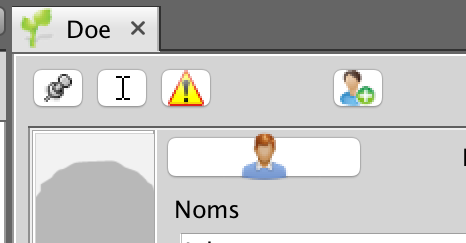
FromDes de Cygnus, wefem useservir theels buttonsbotons forper newals parents.pares Thisnous. isAquest és un mètode més ràpid. El botó "Pare" es troba a fasterla method.part Thesuperior "Father"esquerra buttonde isl'editor atde the top left on the Cygnus editor.Cygnus.
In either case, you get two more boxes on the tree, above your own: your parents. Your father is created, but only a placeholder is visible for your mother. The entity corresponding to her is not yet created.
Ancestris default settings create only one parent at a time. It could be interesting to try and create both. To do so, go to preferences, using the main menu Options / Preferences / Editing, or click on  at the top right of the main window.
In the preferences, select the Editing panel, and check the option Automatically create both spouses when adding a parent.
On the father's box, the family name is automatically derived from the individual from which the father was created.
On the Cygnus editor, enter your father's information (name, date and place of birth, etc.). Click the OK button once done, to save the data.
To create the mother, whether right click on the individual and choose Add a spouse or click the corresponding button on the Cygnus editor, or right click your own box and choose Add a mother.
Create your close relatives
Next you can create your brothers and sisters, your wife and children, etc. in the same manner.
If you make a mistake, it is always possible to correct the information directly or simply undo the creation of the new individual by clicking on Undo button on the toolbar and start over.
Once you have created all the individuals of your close family, just click on your box to return to yourself.
Add information about your family
Let's suppose you want to enter your parents wedding date.
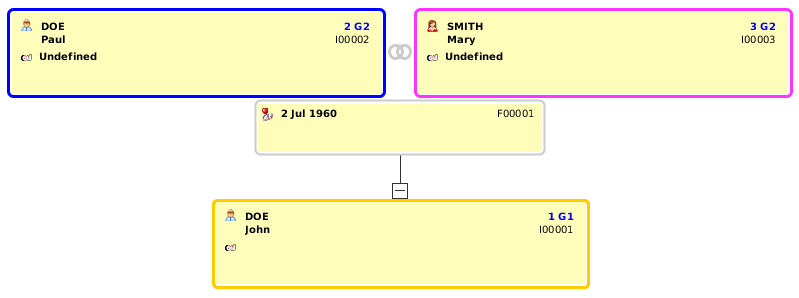
Click on the family box, the one between yours and your parents's. It is box number F00001 on the Dynamic tree view below.
In Cygnus, you will see your father's information, and Cygnus will select the nuclear family he constitutes with your mother.
From there, click on the "Marriage" button on the Cygnus editor. The marriage event is created. Indicate the type of marriage (for example : Religious), enter the date and place, if known.
Click OK and that's it. Here is the result:
This is the current tree:
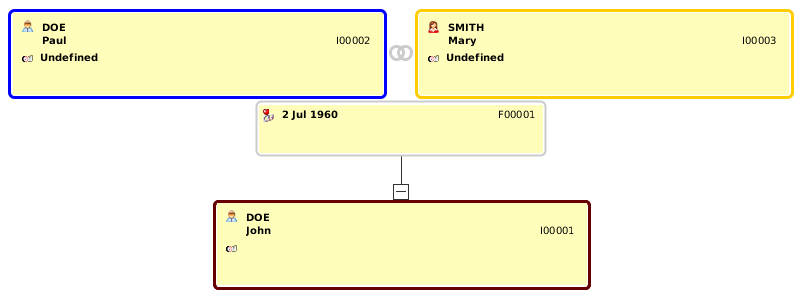
Let's now generate the Sosa numbering for this 3 people family.
Right click on the box representing yourself and choose "Manage Sosa / d'Aboville numbering". A window will open. Just click OK and the Sosa numbering will be created like the following: number 1 for yourself, 2 for your father and 3 for your mother. G1 and G2 codes are the generation numbers.
You should now have something similar to the view below, where the Sosa numbering is visible on every box at the top right corner, above the identification numbers.
This first tree is now finished. Save it on disk by clicking  on the toolbar.
You can now close your genealogy file by clicking the red cross on the toolbar.
If you hadn't saved your data before, a window would have poped-up, asking you to save the file.
We will then see the Welcome page again, since it is now the only one opened.
From there, your genealogy will show on the "My Ancestris" tab of the Welcome panel, and at the top left on the section "Last opened genealogies".
From then on, you will probably adopt the habit of opening your genealogy from the Welcome panel.
You are now ready to take advantage of all the other features of Ancestris. The other chapters of this book will help you do so.
We wish you all the best.