Mapa geográfico
El mapa Geográfico muestra todos los eventos genealógicos en su ubicación en un mapa.

Puede visualizar dónde tuvieron lugar los eventos que le interesan. En particular, puede aplicar filtros para ver solo ciertos eventos y así hacer análisis geográficos de su población.
Descripción
El Mapa
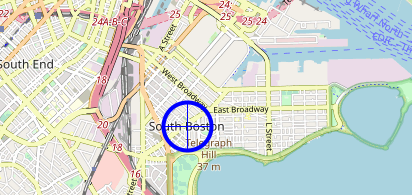
El mapa es un OpenStreetMap sobre el cual Ancestris traza los eventos. Los puntos azules representan lugares donde tuvieron lugar los eventos de su genealogía.
De cerca, un marcador es un círculo con una cruz en el centro. Desde la distancia, se puede reducir a un punto.
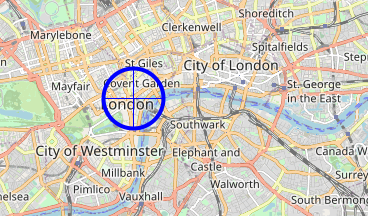
Dos herramientas visuales aparecen en el mapa:
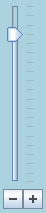
- El control deslizante de zoom en la parte inferior izquierda con botones
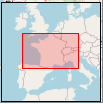
- El mini mapa de ubicación en la parte inferior derecha. El marco rojo representa la parte visible en relación con un área más grande del mapa principal.
Barra de herramientas
Una barra de herramientas en la parte superior le permite modificar la visualización y aplicar filtros.

Botón Mostrar la lista de lugares
Este botón abre la vista Lista de lugares.
Botón Mostrar/Ocultar zoom
Este botón muestra u oculta el control deslizante del zoom.
Botón Mostrar todos los marcadores
Este botón ajusta el nivel de zoom y centra el mapa para que pueda ver todos los marcadores genealógicos.
Botón Mostrar/Ocultar visión general
Este botón muestra u oculta la mini tarjeta.
Botón Mostrar/Ocultar marcadores
Este botón muestra u oculta los marcadores.
Botón Alternar marcadores
Este botón alterna entre dos modos de visualización de marcadores.
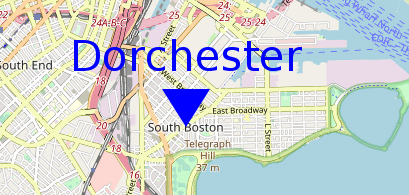
Marcador en forma de círculo con la cruz:
Marcador en forma de etiqueta con el nombre de la ciudad:
Colocar campo de filtro
Este campo de entrada es un filtro de ubicación rápida. Le permite mostrar solo aquellos marcadores cuya ubicación incluye la cadena introducida.
Para usarlo, escriba caracteres y, a continuación, presione la tecla Intro para aplicar el filtro.
Borre los caracteres y pulse Intro de nuevo para eliminar este filtro.
Botón Mostrar/Ocultar lugares no geolocalizados
Un lugar no geolocalizado es un lugar sin coordenadas geográficas conocidas.
Se coloca por defecto frente a la costa de Burdeos en el Océano Atlántico.
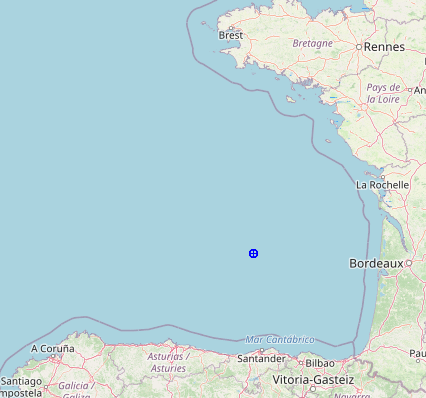
Para alertar al usuario de que los lugares no se pueden localizar, y en lugar de colocarlos en tierra, lo que no los distinguiría de los lugares bien ubicados, ¡elegimos colocarlos en el mar!
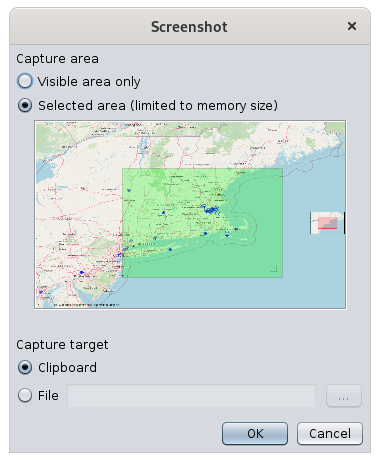
Botón de Captura de Pantalla
Aparece una ventana de captura de pantalla que le permite elegir un área verde para capturar y mantener la imagen en el portapapeles o en un archivo.
Indicador de filtro 

Este símbolo indica si se está aplicando un filtro o no.
Se aplica un filtro cuando no se muestra al menos un marcador.
Al pasar el cursor sobre este símbolo, aparece una información sobre herramientas que indica que filtro está en vigor.
Por ejemplo, aquí un filtro está en efecto para mostrar sólo los marcadores de los eventos de los antepasados de Joseph Kennedy.

Actualizar lugares desde el Botón Internet
Este botón activa la búsqueda de lugares en Internet. Consulte la sección Búsqueda de coordenadas de todas las ubicaciones para obtener más información.
Botón Configurar vista
El mapa geográfico se utiliza para:
Navegar en el mapa
El mapa es móvil y ampliable, y se puede mover arrastrando el ratón con su botón pulsado en cualquier punto del mapa.
Para volver a centrar el mapa, haga doble clic en la ubicación que se colocará en el centro de la ventana.
Se puede aplicar el nivel de zoom
- con la rueda del ratón, si queda por encima del mapa.
- moviendo el cursor deslizante con el ratón,
- paso a paso, haciendo clic en los botones
 junto al control deslizante,
 - o haciendo clic en el control deslizante y usando las teclas del cursor arriba y abajo.

Impacto del cambio de zoom en el centro del mapa:
- Al hacer zoom con la rueda de desplazamiento, el punto geográfico debajo del ratón permanece fijo.
- Al hacer zoom con los botones, el centro del mapa permanece fijo.
Identificar eventos en una ubicación determinada
Desde un lugar marcado por un marcador en el mapa, es posible identificar los eventos que tuvieron lugar allí.
Para hacer esto, simplemente pase el cursor sobre el marcador con el mouse. Una pequeña ventana azul aparece como esta:
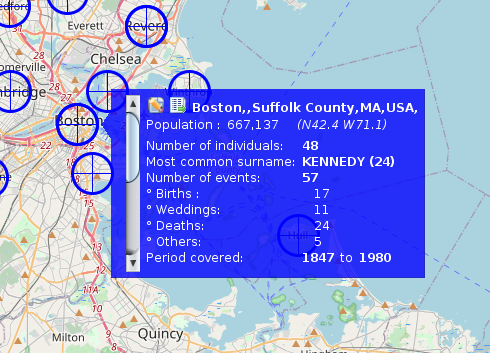
Si hay varias ubicaciones muy cerca, esta ventana contiene una barra de desplazamiento vertical a la izquierda. Al activar esta barra de desplazamiento, puede desplazarse por cada una de las ubicaciones del área.
Esta ventana muestra dos botones en la parte superior seguidos del nombre completo del lugar y la información sobre el lugar:
The window then displays the events that occurred there, a bit like a flash report :
- The number of individuals in relation to this place in your genealogy
- The most frequent lastnames in this place, and the number of times it is mentioned.
- The number of events that took place there, detailed below by type of event: births, marriages, deaths and others.
- The period in years covered by these events.
Update places
It is possible to update places in two complementary ways:
- By right-clicking on a point on the map, to identify surrounding locations or to capture the exact coordinates of a location using a location pop-up menu.
- By editing the place, using the place editor that opens from the blue window button described above.
Place pop-up menu
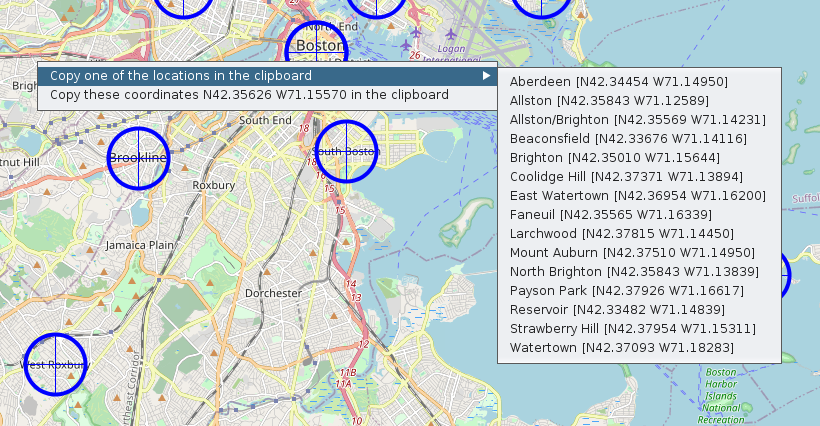
Two actions appear:
- Copy one of the locations to the clipboard: you can retrieve one of the places from the list in order to use it later.
- Copy the coordinates XXXXX YYYYY to the clipboard: this retrieves the exact coordinates of the place to use it later.
Place Editor
From the Edit this place button in the blue window above, you can edit a place.
See the Place Editor for more details.
Event Filters
One of the main interests of the map is to be able to apply filters to identify and analyze possible geographical relationships between individuals.
To apply filters, go to Configure View Settings. This window appears:
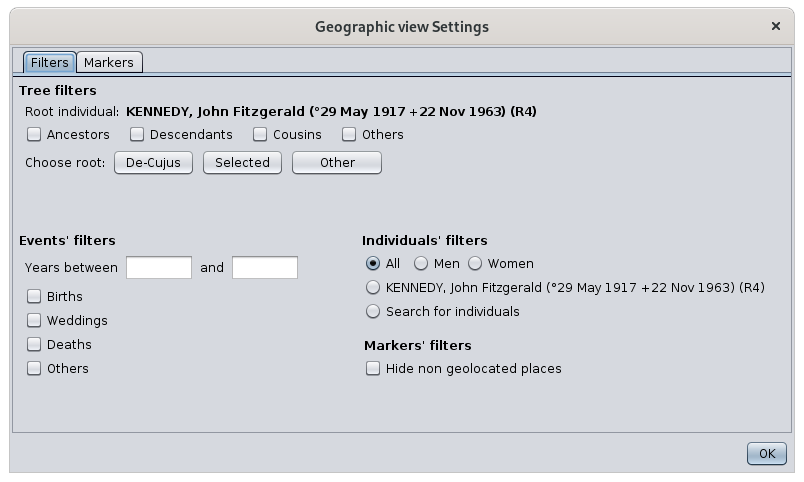
There are 4 groups of filters :
- Filters on the relationship of ascendancy or descent in a reference to a root individual which is defined only for this occasion.
- The checkboxes allow you to apply the filters. The corresponding groups of individuals will be included in the displayed markers
- Three buttons allow you to change the root individual directly if the current one doesn't suit you
- Its name is displayed above the check marks
- No numbering or data changes result from this choice of root individual
- Filters by type of event and by date of the event.
- This will display all events that correspond to the checkboxes and that fit within the period entered if any.
- Filters on individuals.
- Gender: only displays the event locations of individuals of the specified gender.
- Name of selected individual: displays only the places of the events of the selected individual whose name is displayed
- Search for individuals: displays only places with events of individuals from the advanced search
- Filter on the spot.
- Simple filter on non-geolocated locations
Any action on a filter in this window immediately updates the map.
Filters from different groups are combined with each other so that the displayed markers will have to match all conditions.
The use of filters is particularly interesting. It allows for example to answer the question: where are all the people of my genealogy whose occupation is a baker ?
To do this, simply search for all individuals with a baker occupation in the Advanced search window. Leaving this window open, go to the geographic filters above and check the "Search for individuals" box. The map will then display only the places that have had an event from a baker. You can also check the "Birth" box to have only the places of birth of the bakers.
Customization
It is possible to change the appearance of the markers :
- Their size
- Automatic adjustment of their size with the zoom level
- Their color
To do this, from the Configure View Settings, go to the Markers tab and make your choice of size and color.
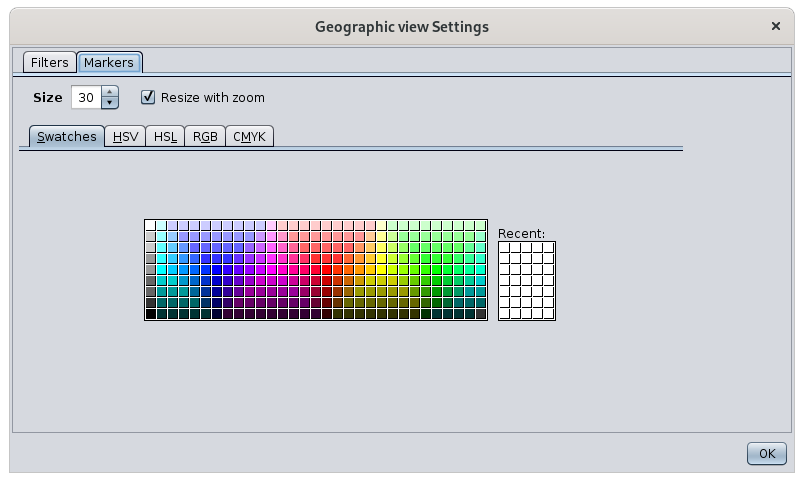
By default, the size of the markers adjusts to the zoom level used.
- The closer the map is, the larger the markers are, as they are more easily visible and do not overlap each other.
- The further away the map is, the more markers there are and the more you need to reduce them in size. On the other hand, since the map gives less detail of the topology of the places, they are also more visible and therefore do not need to be as large.
If you do not want Ancestris to change the size of the markers, uncheck the "Resize to fit zoom" box.