
Organize reference list values
This edition tool lets you organize genealogy list values such as occupation, titles, etc.
Description
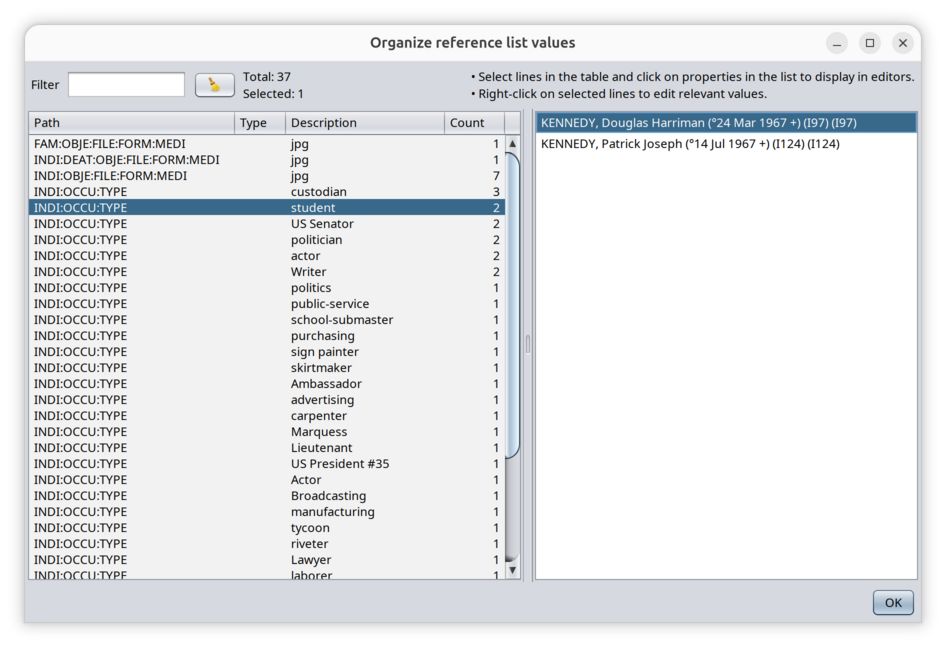
The window displays a table on the left hand side and a list on the right hand side. Above the table is a selection filter, a button and some indications.
Filter
The filter field is where you write some text to only display the table lines where the text appears anywhere in the line.
The filter is case insensitive.
Table
When opening the tool from the menu, the table is automatically populated with all the table values in your genealogy file. In Ancestris and in the Gedcom standard, some record fields are lists. FOr instance, Occupation is a list of values, Title is a list of values, etc.
All fiels tables except names, places and addresses are listed here.
The table is made of 4 columns:
- Path is the path of the field in Ancestris, visible in the Gedcom editor. It tells you how to get to the value. For instance, "INDI:OCCU:TYPE" is the field you can find when you edit an individual record, the occupation event, and the type field.
- Type: the type of the field. For an occupation, it is the type of occupation. For a title, it is the type of title. And so on.
For fields that do not any corresponding type, the value <n/a> appears (for not available). Example: a cause of death does not have a type (as per Gedcom standard) - Description: this is the full text description of the information. For an occupation, this is the occupation denomination.
For fields that do not any corresponding description, the value <n/a> appears (for not available). Example: a birth does not have a descriptoin, but it has a type (as per Gedcom standard) - Count: indicates the number of occurrences with the same value.
In the table, you can select several lines.
List
The list on the right depends on the selected lines. It lists all the properties in your genealogy corresponding to the selected lines. This shows you where the table values are used.
When you click on a property, the editors show the property in context.
In the picture above, the selected line is the Student occupation. It shows 2 people in the Kenedy genealogy have a student occupation.
Usage
This tool has 2 main goals.
- The first goal is to have an overview of the table values in your genealogy. The table can be exported if you want to perform some analysis.
- The second goal is to classify and modify the values without having to change each one of them individually through the editors.
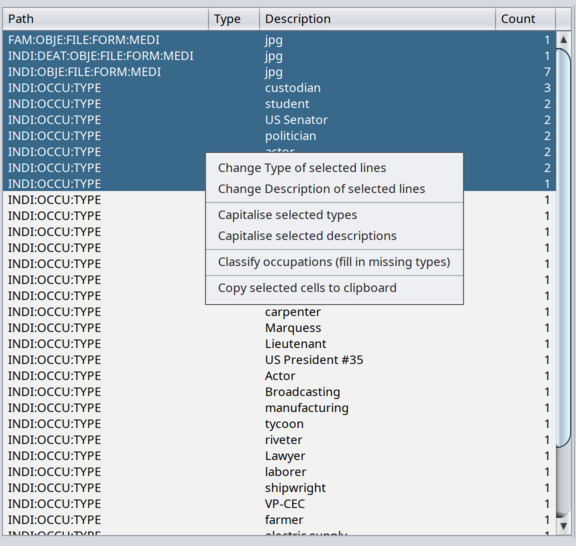
For all actions, you need to select the lines you want to perform actions upon, then right-click. A popup menu appears which shows the available actions you can do on the selected lines.
The following actions are available.
Change Type
Modifies the value of the selected types.
If one line is selected, the current value is displayed in a box and can be changed.
If several lines are selected, an empty value is displayed in a box.
Upon validation pressing OK, the values are changed and applied in the genealogy and the table is refreshed.
Change Description
Modifies the value of the selected descriptions.
If one line is selected, the current value is displayed in a box and can be changed.
If several lines are selected, an empty value is displayed in a box.
Upon validation pressing OK, the values are changed and applied in the genealogy and the table is refreshed.
Capitalize types
Modifies the types not starting with a capital letter to have a first capital letter.
Capitalize description
Modifies the description not starting with a capital letter to have a first capital letter.
Classify occupations
Only appears if the selected lines include empty occupation types.
In this case, the action automatically finds a type of occupation based on the descriptions. For the lines where an occupation cannot be classified, Ancestris will ask for your permission to use an AI engine to look for one.
Upon researching, Ancestris will automatically update the records that could be classified and tell you how many were changed and not changed. If the table is sorted, the changed lines will be displayed in their sorted order.
Classify titles
Similar to occupations, but for titles events.
Copy selected lines to clipboard
This lets you export the selected lines to Excel.
To select all table lines in one go, select a line and then press Ctrl+A.
Customization
There is no customization for this tool.