Modify place jurisdictions
This windows lets you modify the place jurisdictions format of any Gedcom file.
This definition is saved in the header of the Gedcom file. It is therefore specific to each genealogy file and there is only one for each file.
Description

When you first create a genealogy file, Ancestris uses the main language to define a default place format.
When you migrate a Gedcom file from another software, Ancestris will also define a format if none already exist, unless you do not convert the file when migrating it from this other software. In this case, Ancestris leaves the Gedcom file untouched, and just opens it.
In all cases,
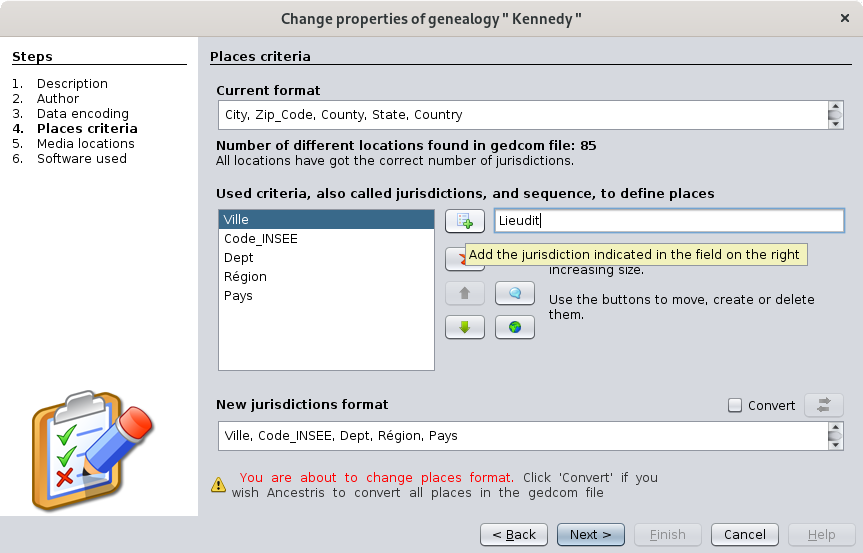
This panel shows the existing format at the top, and the new format at the bottom. The middle part is to create a format using the buttons.
Here is how to proceed.
First define the new jurisdictions format
- We use the Add criteria button
 to enter each of the French criteria one by one in the field to the right of this button.
 - We use the Remove criteria button
 on each of the American criteria.
 - We then use the movement buttons
 to put the French criteria in order from smallest to largest.


By the way, the Empty button  allows you to insert an empty criterion, and the reset button
  starts all over again.
The screen below shows the entry of the locality as the last French criterion.
We then provide the conversion rule
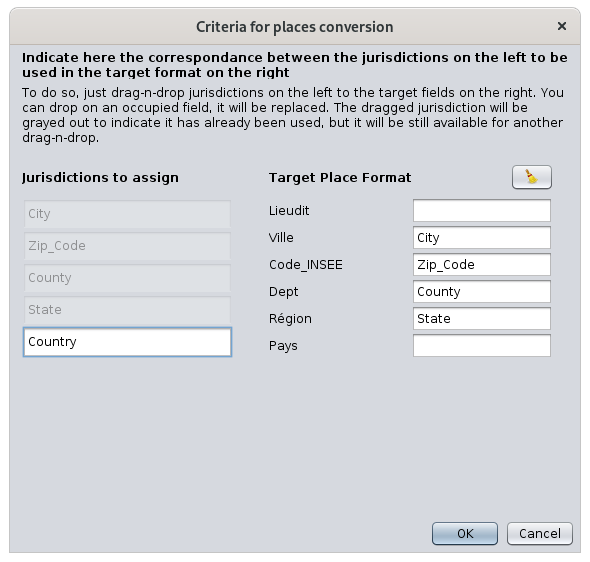
We check the convert box  then we click on the Conversion button
  which displays a correspondence table between the starting and ending formats.
The screen explains what to do.
Here is the screenshot after dragging and dropping the 4 American criteria which correspond to four of the French criteria.
The location criterion did not exist in the previous format, so it will be empty in the new format.
The County criterion is not yet assigned to a French criterion. If you allocate it to the department, the County information will be kept. if you leave County unassigned ", the information will disappear on conversion.
Once this correspondence is established, close the window and click on the Next button.
If you had changed the format of the places without checking the conversion box, two cases would arise:
- either the number of criteria between the old and the new formats is different: in this case, Ancestris would notify you of an anomaly in all places when checking for anomalies. If you reduce the number of criteria, you will obviously loose the data corresponding to the criteria which have no position in the new format.
- or the number of criteria is the same: in this case, you have made a name change of the criteria and all data will be converted without loosing any.
Media management

This screen allows you to ensure the correct link between your Gedcom file and your media files.
The first 3 indicators tell you how many Gedcom files are correctly attached or not depending on their nature, out of all the media files indicated in your genealogical data.
The problem therefore concerns the red line above, because Ancestris will not be able to display the corresponding media.
If you don't have that red line, you're fine and may move on. Otherwise follow the instructions below.
Where can the problem come from?
Have you moved your media files?
If your photo is in a /magénéalogie/photos/MaPhoto.jpg file and your Individual entity references this photo in a FILE /magénéalogie/photos/MaPhoto.jpg file, then the link is valid. Everything is fine.
Now, if you move your photo files, or simply rename your photos directory, your photo would be here: /magénéalogie/media/MaPhoto.jpg (with media instead of photos).
This is enough to break the link with your Gedcom file which remained on "photos".
The wizard will therefore display your photo as a media not found.
Have you moved your Gedcom file?
Rather than moving your media, you may have just moved your Gedcom file.
Relative position between your Gedcom and your media
- If your media files are described in relative position with respect to your Gedcom file, the link is lost, because in this case you would have had to move your media files at the same time.
- We recommend that you only specify your media in relative position of your Gedcom file location as this allows you to move your files without renaming the links.
Absolute position between your Gedcom and your media
- If your media files were described in absolute position, the link is not lost.
- But the downside is that if you move your genealogy to a USB key, for example, your media will have remained on your hard drive and you will only be able to see your media if the USB key remains on your computer.
- If it is to show your genealogy to one of your relatives, you will have to move the media to the key. But suddenly the links will be broken because the Gedcom file will think that they are still on your computer. You will have to rename them by one in Gedcom or else you use this wizard.
Have your files been deleted?
Another possible reason for a lost link between your Gedcom and your files can also be the deletion of files on disk. It is more annoying because you must already get your hands on it before continuing with the wizard or removing the links in the Gedcom file.
The wizard does not remove the links, it just renames them.
Resolution of problem
If you are confident that your media files are somewhere on your computer, click the button at the bottom of the window similar to this one.

The following window appears.
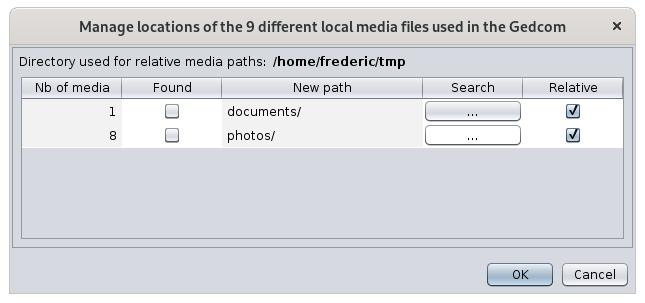
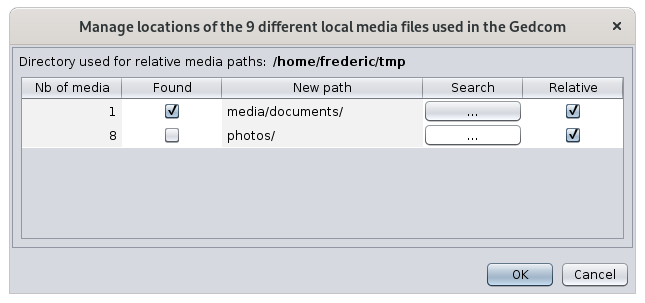
It first gives the name of the directory where the Gedcom file is located and lists all the paths found in the Gedcom below.
In the following case, you must attach 1 media which was in a documents directory relative to the location of Gedcom (box checked in the Relative column), and 8 photos which were in the photos directory.
On each row, click on the button in the Search column. The following window appears if I click on the first button.
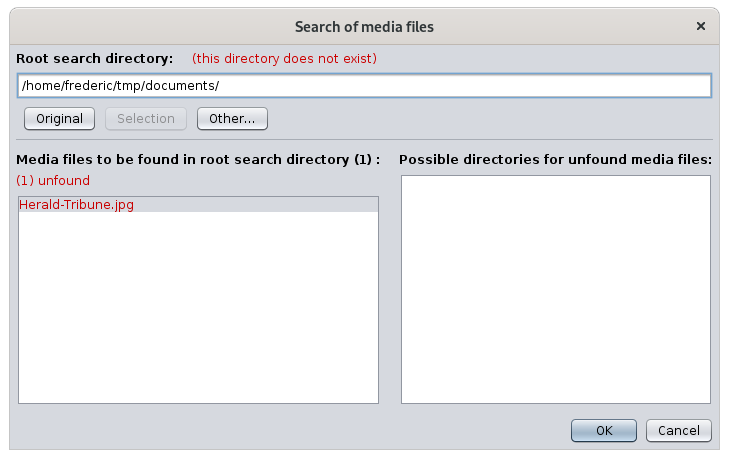
This window will therefore help you find the lost file.
- The first red message tells you that the documents directory does not exist.
- The name in the left column gives me the name of the file to look for: Herald_Tribune.jpg
With the Other... button, you will tell Ancestris the name of another root directory from which to look for the file in question.
Ancestris will search for the file in all directories within this root directory.
The directories where the files have been found will be in the right column.
Click on the directory you want. The Selection button  then becomes available. Press it to set the found directory as the new root directory. You can also directly double click on the directory to be selected.
Once the root directory is changed for the right one, the file in red turns green because it has been found.

Close the window. You see that the first line has changed, and continue with the other lines.
When all the Found boxes are checked, you have found all the lost files.
Click OK.
The Media window now displays this at the bottom:

I can always cancel, or continue by pressing next.
At this stage, no modification has been made to the Gedcom file.
Logiciel utilisé
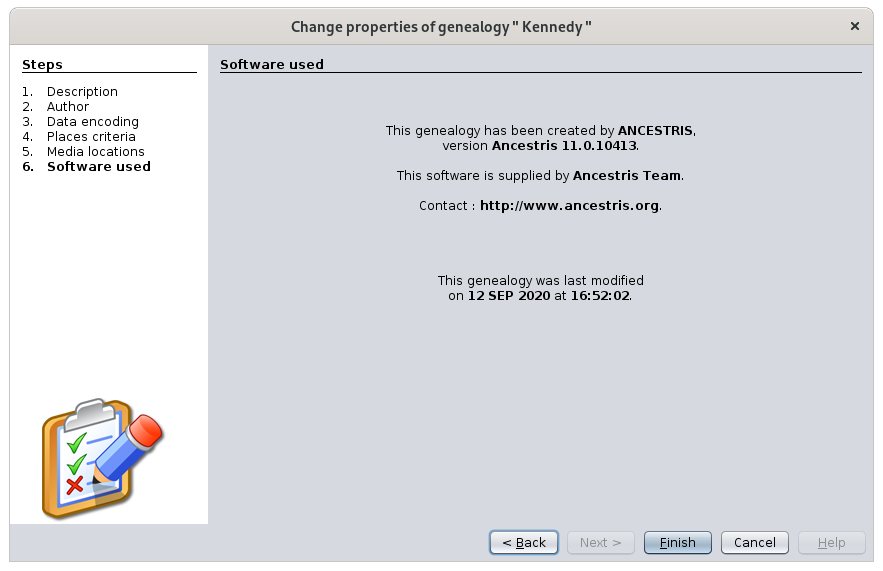
This screen is for informational purposes only.
The information that Ancestris gives you is the one entered in your file regarding the software that last updated your genealogy.
Result
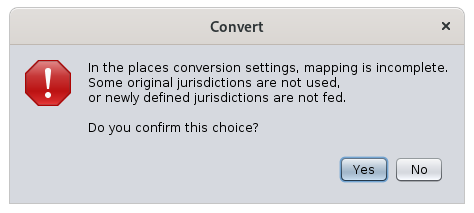
By clicking Finish on the previous screen, Ancestris asks you for each confirmation one by one.
Example here with the confirmation to be given on the conversion of media locations.
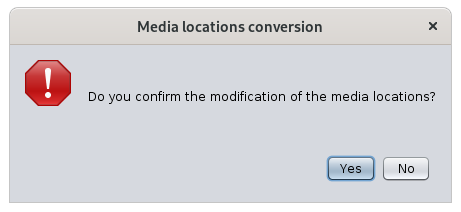
Confirmation is also requested if locations or the Gedcom norm are to be modified.
If you confirm, the transformations take place.
In case of simple modification, the following window appears and everything went well.
In the event of a larger transformation, the result window lists all the changes that have taken place.
In another example created to illustrate, here's what a result with errors would look like.

The interpretation would be as follows:
- Simple properties have been changed without error.
- The change of Gedcom norm produced one error, listed in the the dropdown list.
- The change of location format converted 85 locations successfully.
- The attachment of the 6 lost media went well.
If you have any doubts and want to start over, you can always Cancel the operation completely by clicking the Undo button  on the general Ancestris toolbar.
If you want to analyze the anomalies, you can also go to Menu / Tools / Validate Gedcom compliance and data consistency.
