Blueprints (STLM)
A blueprint is a set of parameters used to customize the display of an entity in certain views of Ancestris.
Views using blueprints
Only the following views use blueprints. For each, an example lets you see what the blueprints look like.
Dynamic tree
The Dynamic Tree uses blueprints for individuals and families. Blueprints are the areas displayed inside the frames.
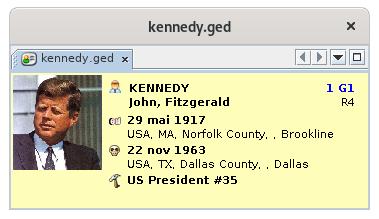
Entity card
The Entity Card uses blueprints for all categories of entities.
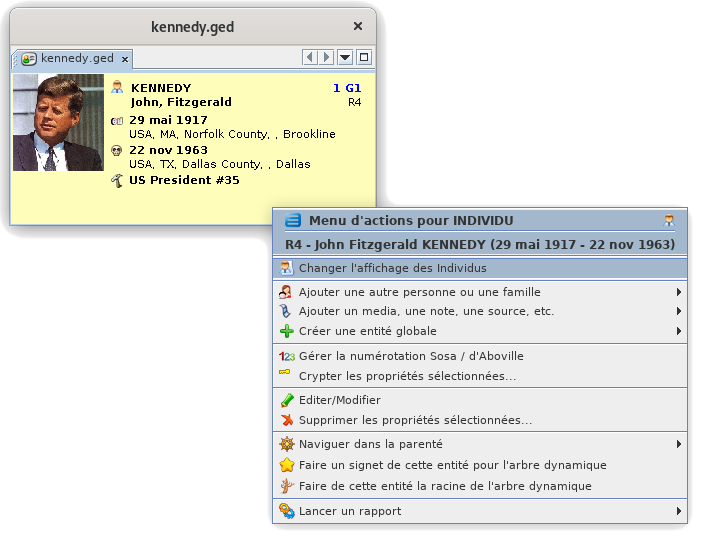
We can have the same individual blueprint as for the dynamic tree. Here, the individual blueprint is inside the Entity card.
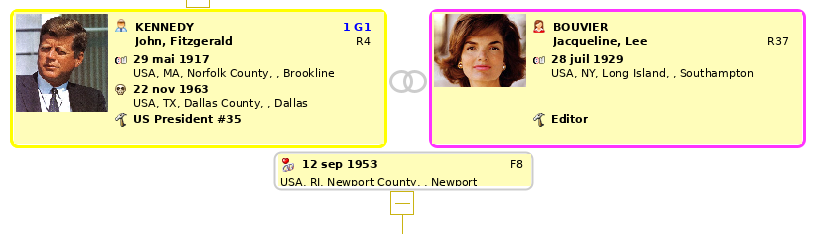
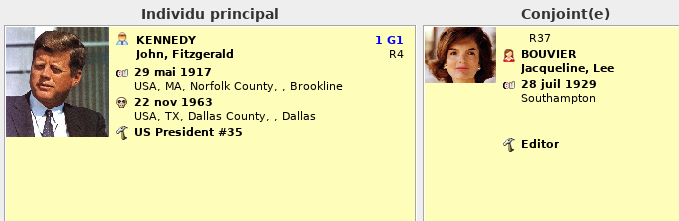
Extended navigator
Here, the blueprints used for the individuals of the selected couple. You may notice that they are not the same. The spouse blueprint does not display the Sosa number and displays the entity number above the name.
And here's a blueprint for the selected family.

Gedcom editor
The Gedcom Editor uses blueprints in its lower part for all entity categories.
As for the entity card, the Gedcom Editor uses blueprints of individuals or families, but also of other entities.
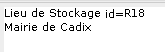
For example here is a simple blueprint of a Repository entity.
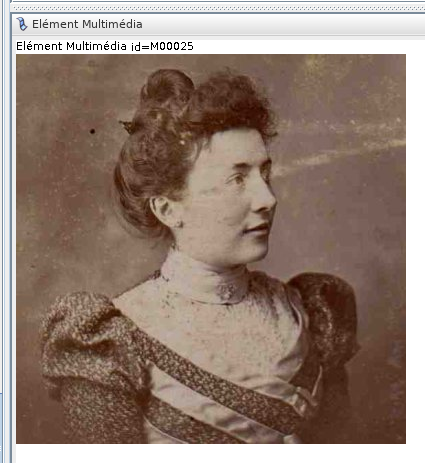
Or a simple blueprint of a Multimedia entity.
Now that you've seen what a blueprint looks like and where they're used, let's see how it works.
General principles
A blueprint is a template defining what to display of an entity, and how to display it.
A blueprint is assigned to a given entity category (individual, family, source, etc.) for a given view (Dynamic tree, Entity file, etc.).
You can define your own blueprints rather than using the ones already provided within Ancestris.
Several blueprints exist in Ancestris and are already selected by default for each of the entity categories, and in each view where blueprints apply.
Blueprints constitute a way to customize Ancestris. You are free to keep blueprints as they are or modify them to your needs.
You can define your own blueprints, i.e. both the information to display for an individual or a family (name, address, etc.) and how to display this information (color, font, alignment, layout, etc.).
If you want to make some changes regarding the blueprints, you will need to learn a little more about them. This is the subject of the following sections in this page.
Technically, a blueprint is a piece of HTML code written into a file located on your disk. Refer to the paragraph Directory containing layers for more information.
Managing blueprints
Managing blueprints consists in performing two types of activities.
- assign blueprints to entities and views
- build your own blueprints and delete them
This is done using the Blueprint window.
The Blueprint window is specific for each entity category.
This window is the same regardless of the type of entity, but the difference is that it only contains blueprints attached to the given type of entity. Also, the way to access the window starts from the corresponding entity.
To access the Blueprint window for a given entity category, you must use the Ancestris context menu from an entity of the corresponding entity.
- Right-click on an individual in the Entity card view, then select "Change display of individuals" to open the Blueprint window for individual.
- Right-click on a family in the Entity card view, then select "Change display of families" to open the Blueprint window for families.
- Ditto for Notes, Sources, Multimedia, Repositories, etc. This can be done from the Entity card or the Gedcom Editor for the corresponding entities.
Here is how to access the Blueprint window for individuals, from the Entity card, Contextual menu by right-clicking, then choose "Change display of individuals".
The Blueprint window for Individuals appears.

Whatever the category of entity, the operations in this window are the same. We will use the example of the Blueprint window for individuals in the description that follows.
Description
The Blueprint window contains the following areas.
- The list of blueprints on the left shows the blueprintss currently available for the previously selected entity category. To work on a blueprint, select it from the list.
- The preview area at the top right shows a preview of the blueprint selected in the list.
- The HTML editor at the bottom right displays the HTML code of the layer selected in the list on the left, and where you can edit the code. The horizontal separator bar with the preview must be dragged up with the mouse to see the code.
- Meaning of the buttons:
The Blueprint window size can be changed by pulling the lower right corner.
The preview area and the Text Editor area can be adjusted by moving the separator of these two areas with the mouse or by clicking on the arrows of the separator on the left:

Usage
The Blueprint window cover the following needs:
- Discover the available blueprints. To discover the available blueprints without activating them (therefore, without closing the panel), click successively on each of them in the left-hand side list, and check the result in the preview area.
- Choose a different blueprint. To assign another blueprint to the currently selected entity category in one of the views, click a blueprint in the list, then validate by pressing the OK button.
- Modify a blueprint. For security reasons, the blueprints already available cannot be modified. To modify an existing blueprint, you must first make a copy of it. Select it in the list, click New and give it a new name. Then use the HTML editor paneel to make your changes.
-
Create a blueprint. To create a new blueprint, it is recommended to copy an existing one. See above.
-
Delete a layer. To delete a blueprint, select it in the list and click the Delete button. You are then asked to confirm the deletion which will be final. Note: for security reasons, blueprints provied with Ancestris cannot be deleted.
Case study
Suppose we have a single blueprint without a photo for the individuals in the dynamic tree, and want to insert a photo. The steps to do this are detailed below. They are the as follows:
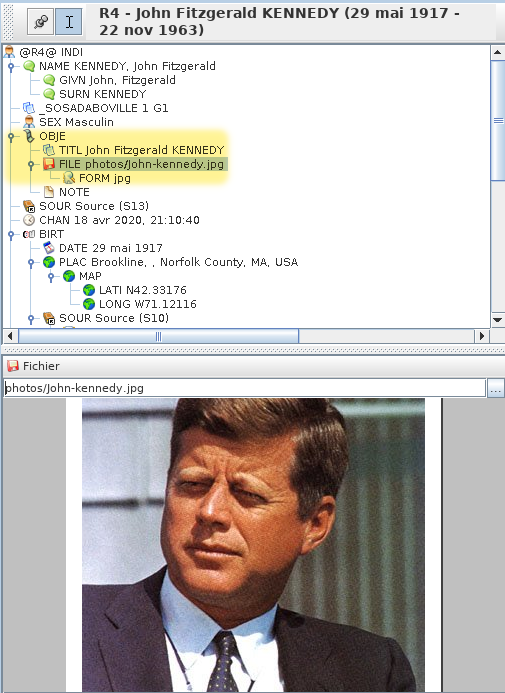
- Identify where the photo data item is inside the data of the individual. Use the Gedcom editor for that.
- Open the Blueprint window for individuals
- Create a new blueprint by copying 'simple layer' without image. Rename it 'MyBlueprint-Indi-Tree'
- Modify the blueprint to insert the photo property identified above, and adjust its size in the frame using the preview
- Save the layer and observe the result
Repérer où sont les photos des individus
L'ouverture de l'éditeur Gedcom vous permet de repérer où sont les photos pour chaque individu. On voit que c'est dans l'étiquette INDI:OBJE:FILE. C'est ce qu'on voulait savoir.
Ouvrir la gestion des calques depuis l'endroit où le calque sera appliqué
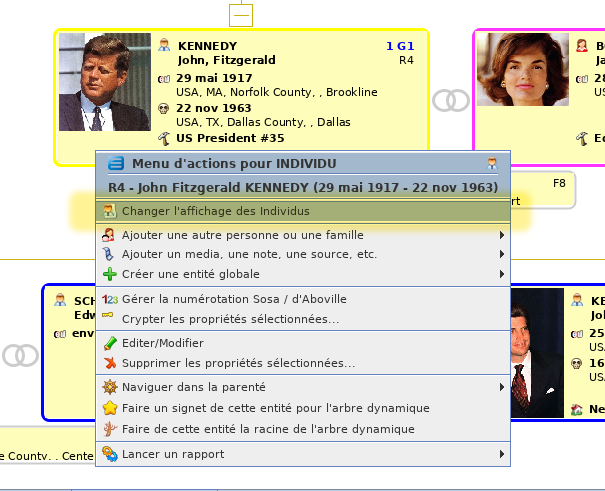
Comme on veut changer le calque des individus pour l'arbre, c'est de là qu'on appelle la fenêtre de gestion de calques.
Donc depuis l'arbre, clic-droit sur un individu. Dans le menu contextuel qui apparaît, on choisit "Changer l'affichage des individus".
Créer un nouveau calque
La fenêtre de gestion voulue apparaît.
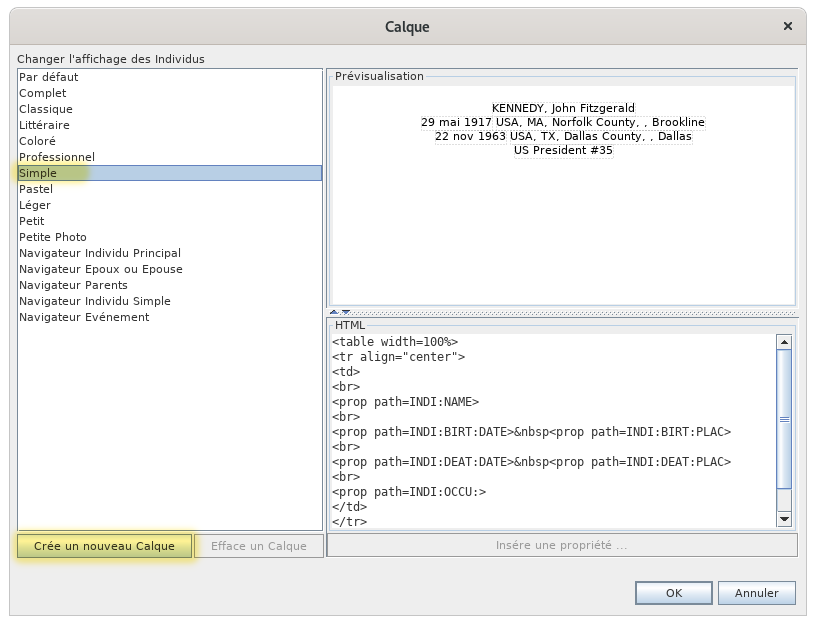
Comme on veut faire un nouveau calque, on le crée à partir du calque "Simple" par exemple. C'est plus simple !
Donc on le sélectionne. Dans l'aperçu, on voit alors ce que ce calque affiche pour un individu. Un texte simple sans photo. Nous, ce que l'on veut faire, c'est y rajouter la photo.
Donc on en crée une copie car on ne peut pas modifier celui-là.
Pour cela, on clique sur "Crée un nouveau calque". Apparaît alors cette fenêtre :
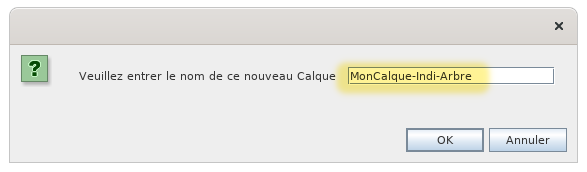
On saisit le nom du nouveau calque et on clique sur "OK".
On se retrouve alors sur la fenêtre de gestion précédente avec un nouveau calque modifiable.
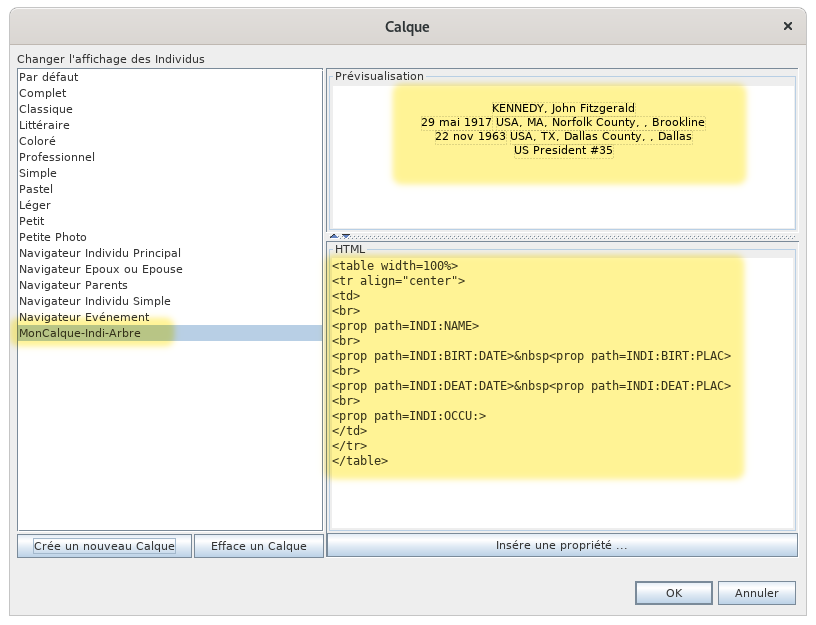
On a bien le nouveau calque sélectionné à gauche, le même aperçu en haut à droite, et le code HTML en bas à droite.
On voit que ce calque est modifiable, car les boutons "Efface un calque" et "Insère une propriété" sont cliquables.
On va maintenant changer le code HTML pour y mettre la photo.
Modifier le calque
On voit qu'il y a 4 lignes de propriétés dans le code HTML : le nom, la naissance, le décès, la profession.
La balise HTML <prop> et tout ce qui est à l'intérieur est une spécificité Ancestris. Cela permet de manipuler les données généalogiques du fichier Gedcom.
On veut mettre la photo en dessous, donc on souhaite insérer une autre propriété, celle repérée plus haut : INDI:OBJE:FILE, après les 4 déjà présentes.
On place le curseur sous </table>, étiquette qui marque la fin d'un tableau.
On clique sur le bouton "Insère une propriété" . Une fenêtre apparaît listant un choix de propriétés possibles.

Dans cette fenêtre, on retrouve la ligne Elément Multimédia OBJE, on déplie le clapet pour faire apparaître contenu de OBJE, et on voit la ligne Fichier FILE. On coche la case. Et on fait "OK".
On voit maintenant le calque qui a changé.
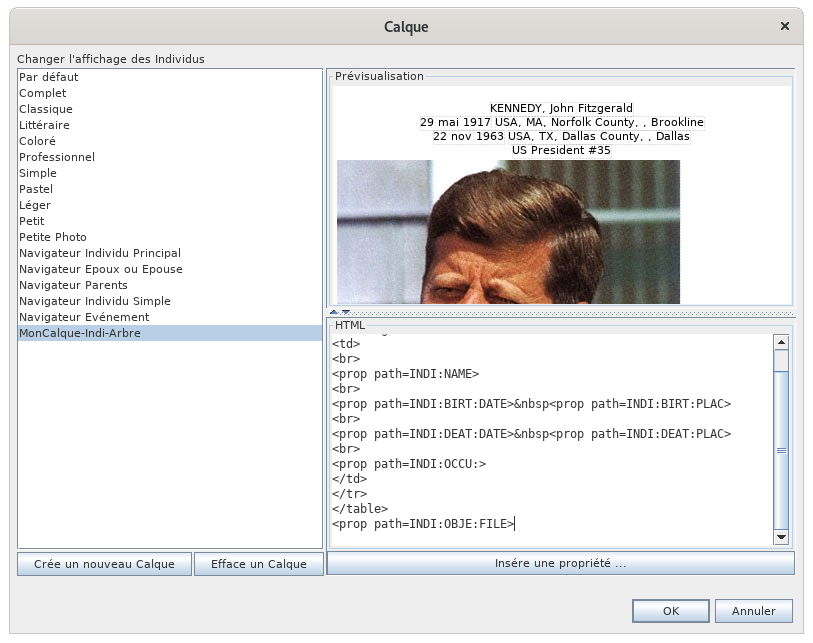
Mais ce n'est pas encore ça, car dans l'aperçu, on voit que la photo est trop grande. Et peut-être vaut-il mieux la mettre en haut à droite du texte.
Comme le texte était structuré dans un tableau, il faut en fait mettre l'image dans une case du tableau à créer, à droite du texte. Pour cela on modifie le code HTML comme suit : on déplace la ligne que l'on vient d'insérer dans la structure table en ajoutant une cellule par les balises <td></td>.
Comme on veut également limiter la taille de l'image, on lui ajoute une spécificité Ancestris : on ajoute "max = 20" à la fin, à l'intérieur de la balise <prop ... >, qui veut dire de limiter la taille de la photo à 20% de la largeur disponible. L'aperçu se modifie en même temps que vous changez le code. C'est bien pratique et permet immédiatement de voir si ce que vous faites est juste. Une fois le code modifié, l'aperçu semble correct, et la fenêtre donne ceci
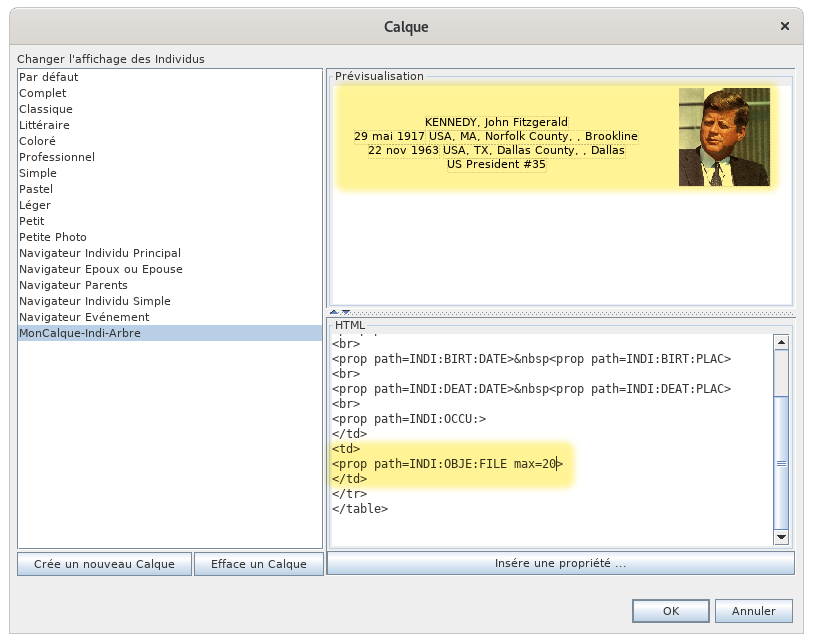
Le code en bas en jaune fait son office : la photo est dans une cellule de droite du tableau et limitée à 20% de la largeur.
Sauvegarder le calque et observer le résultat
On peut sauvegarder. On clique sur OK et on regarde en même temps l'arbre dynamique. Le calque se modifie.
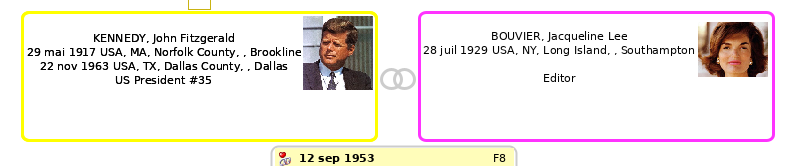
C'est bon, on a ce qu'on voulait, pour Monsieur, et pour Madame !
Pour aller plus loin
Bien sûr, le plus dur reste donc à connaître le langage HTML d'un part, et à connaître les spécificités ajoutées par Ancestris pour manipuler les données généalogiques.
Pour ce qui est du langage HTML de nombreux sites existent pour vous aider.
Pour ce qui est des spécificités Ancestris, les balises ajoutées au HTML sont
- <prop> ou <ifvalue>
- <name> ou <i18n>
- <media>
Les paragraphes suivants tentent de vous les indiquer tous.
Balise <prop> ou <ifvalue>
<prop | ifvalue path="path:to:prop" [default="path:to:other:prop"] [format="format"] [max="n"] [img="yes"] [txt="no"]>
Affiche la propriété de l'entité définie par le chemin (path). Si un autre chemin est indiqué, c'est celui qui est utilisé si la première propriété n'est pas trouvé.
Les paramètre format et max sont expliqués ci-dessous.
Le paramètre img peut être mis à 'yes' ou à 'no' pour afficher le picto de la propriété. Par défaut, c'est 'no'.
Le paramètre txt peut être mis à 'yes' ou à 'no' pour afficher la propriété ou non. Par défaut, c'est 'yes'.
Les paramètres entre crochets sont facultatifs.
Cas des noms (propriété NAME)
Pour personnaliser l'affichage du nom, on peut utiliser les sous-propriétés du nom.
Exemple : <prop path=INDI:NAME > dit : <prop path=INDI:NAME:NICK> affichera le nom complet suivi du surnom.
Exemple : DUPONT dit : DUDUCHE
Cas des lieux (propriété PLAC)
Il est possible de forcer précisément le niveau que l'on veut voir affiché pour un lieu.
La syntaxe de la ligne à mettre dans l'éditeur HTML est de la forme suivante
<prop path=INDI:BIRT:PLAC format="2 (7)">où 2 et 7 sont les rangs des juridictions dans la définition du format des lieux.
Exemple, supposons que nos lieux soient formatés comme suit dans l'étiquette PLAC
Village, Ville, Code_Insee, Code_Postal, Département, Région, PaysPour savoir le rang, on compte à partir de 1, donc 2 est la Ville, et 7 est le pays.
Dans ce cas, on peut dire que
<prop path=INDI:BIRT:PLAC format="2 (7)">affichera Ville (Pays)<prop path=INDI:BIRT:PLAC format="2, 1">affichera Ville, Village<prop path=INDI:BIRT:PLAC format="2 (5)">affichera Ville (Département)
Autres cas de formatage
format="$D": affiche la date complète d'un événement- Exemple :
<prop path="INDI:BIRT" format="{$D}">affichera 10 fév 1876.
- Exemple :
format="$y": affiche l'année de la date d'un événement- Exemple :
<prop path="INDI:BIRT" format="{$y}">affichera 1876.
- Exemple :
format="$P": affiche le lieu complet d'un événement- Exemple :
<prop path="INDI:BIRT" format="{$P}">affichera Lyon, 69002, Rhône, France.
- Exemple :
format="$p": affiche la ville de l'événement- Exemple :
<prop path="INDI:BIRT" format="{$p}">affichera Lyon.
- Exemple :
format="$n": affiche le nom de l'entité liée si elle existe- Exemple :
<prop path="INDI:CHR:XREF" format="{$n}">affichera Marie STUART, la marraine du baptème.
- Exemple :
format="$N": affiche le nom complet de l'entité liée si elle existe- Exemple :
<prop path="INDI:CHR:XREF" format="{$N}">affichera STUART, Marie (° 30 mars 1909 + 16 décembre 2008) (I0298).
- Exemple :
format="$v": affiche le nom complet de l'entité liée si elle existe avec sa nature- Exemple :
<prop path="INDI:CHR:XREF" format="{$v}">affichera Marraine : STUART, Marie (° 30 mars 1909 + 16 décembre 2008) (I0298).
- Exemple :
format="$V": affiche le numéro d'entité uniquement- Exemple :
<prop path="INDI:CHR:XREF" format="{$V}">affichera I0298 si l'on reste dans l'exemple ci-dessus. - Exemple :
<prop path="INDI:BIRT:SOUR" format="{$V}">affichera S134 l'identifiant de la source de la naissance.
- Exemple :
format="text{$e}": affiche le texte "text" si la donnée existe, rien sinon.- Exemple :
<prop path="INDI:NAME:SOUR" format="{(*)$e}">affichera (*) si INDI:NAME:SOUR existe, rien sinon.
- Exemple :
max="n": limite l'affichage à n% de la largeur disponible. Valable pour une image ou pour du texte.- Exemple :
<prop path="INDI:NAME" max=10">affichera le nom complet tronqué à 10% de la largeur disponible.
- Exemple :
Balise <media>
<media [path="path:to:media"] [max="n"]>
Affiche un media de l'entité. Si un chemin est indiqué (path), le media correspondant est utilisé sinon le premier média trouvé est affiché.
Le paramètre "max" limite la taille en largeur comme ci-dessus.
Les paramètres entre crochets sont facultatifs.
Balise <name> ou <i18n>
<name|i18n [tag="tag"] [path="path:to:prop"] [entity="tag"] >
Affiche le nom de l'étiquette donnée par tag, path ou entity.
Il faut spécifier un des 3 attributs. tag est prioritaire sur path, qui est prioritaire sur entity.
Exemple :
<name tag="NAME">affichera Nom.<name path="INDI:NAME">affichera Nom.<name entity="SUBM">affichera Fournisseur d'information.
Répertoire contenant les calques
Les calques sont sauvegardés dans le Répertoire utilisateur, dans un sous-répertoire dénommé "ancestris/blueprints".
Le répertoire blueprints, contient lui-même plusieurs sous-répertoires, chacun d'eux ayant l'intitulé de l'étiquette correspondant à l'entité concernée : c'est dans chacun de ces sous-répertoires que se trouvent les différents calques.
- INDI pour les calques des entités individus
- FAM pour les calques des entités familles
- OBJE pour les calques des entités élément multimédias
- NOTE pour les calques des entités notes
- SOUR pour les calques des entités sources
- SUBM pour les calques des entités fournisseurs d'informations
- REPO pour les calques des entités dépôts
Comme ce sont des fichiers au format HTML, vous pouvez les ouvrir avec votre navigateur internet favori.
Et vous pouvez même les partager sur la communauté Ancestris ! Merci par avance.
B-A BA
Il existe un B-A-BA pédagogique sur les calques au format PDF. Vous pouvez le télécharger.