
Age calculation
This function calculates ages of all the individuals at their respective life events.
All individuals of your genealogy have life events that are usually dated.
It can be useful to document the age of the individual at each event. This is done using an age attribute, which is a tag added to the event.
This age information is either entered by you or else if you prefer, it can automatically be added when a date event is added or modified (please refer to the Edit tab of the Preferences);
This age information can also be recalculated across your genealogy using this tool.
For an individual, all individual and family events are considered when calculating ages. In a family event such as a marriage, ages appear under the HUSB and WIFE tags of the event tag.
You can use the Event selector below to choose for which events ages are to be mass-calculated (using this tool) or auto-calculated (while editing events).
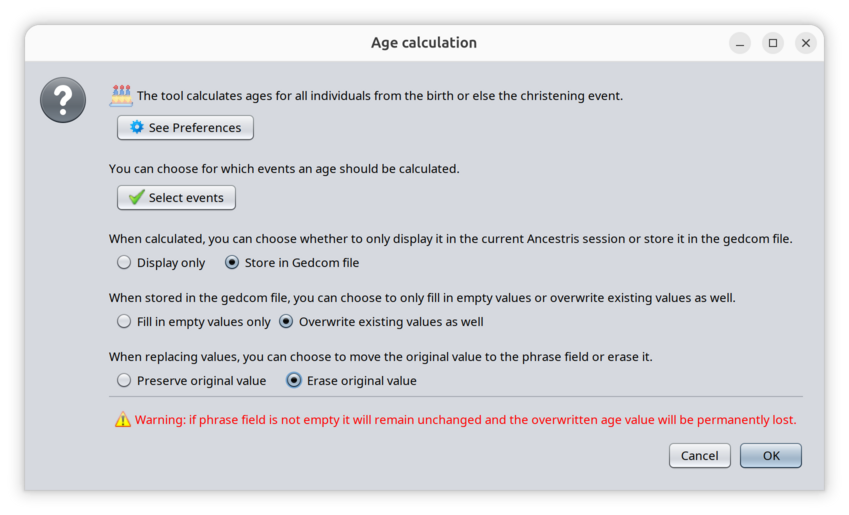
Description
The above window explains what the tool does. 4 choices are available.
Use christening when birth is not available
You can choose in the Ancestris preferences the event reference to calculate the age. If birth is not available, and if you select this option, age will be calculated assuming the christening and the birth happened on the same day (please refer to the Data tab of the Preferences)
Choose for which events the age is to be calculated
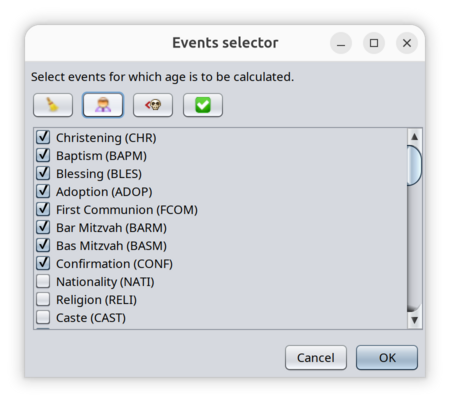
Use it to define which events should have an age calculated for.
Use any of the 4 buttons to speed up your selection.
 Unselect all events
 Select all life events (those with a Yes tag according the Gedcom 7 standard definition)
 Select all events prior to and including the death event
 Select all events


Upon pressing the OK button, the selection is saved.
The same event selection applies to automatic age calculation setting in the Ancestris preferences.
See Preferences / Edition.
Choose whether to save ages in the Gedcom file or not
If you only use calculated ages for the duration of your session in Ancestris, it might *not* be necessary to store them in the Gedcom file.
If you choose this option, all ages for all events will be displayed only : ages will appear in grey background in the Gedcom editor.
If you choose the other option, ages will be appear with a white background in the Gedcom editor, meaning they will be saved in the Gedcom.
Please note that ages which are already being saved in the Gedcom file will remain saved in the Gedcom file. This option only applies to ages being created, not to existing permanently saved ages.
Choose to erase existing values or not
xxx
Choose to save original overwritten values in the phrase field (only possible with Gedcom grammar 7)
xxx
Overwrite text values: a text value is the result of a manual input. Therefore is option prevents the Age calculation function to inadvertently erase your manual inputs. Any text value is possible for ages but only 3 values are valid and part of the Gedcom standard.CHILD = age < 8 yearsINFANT = age < 1 yearSTILLBORN = died just prior, at, or near birth, 0 years
All ages that are in grey background are displayed only and not stored in the Gedcom file. As a result, next time you open the genealogy, the corresponding age tags will not be displayed unless you recalculate the ages using this tool.
Please note that ages which are already being saved in the Gedcom file will remain saved in the Gedcom file. This option only applies to ages being created, not to existing permanently saved ages.
Choose to erase existing values or not
When ages are calculated, you can choose to erase the existing value of leave it unchanged.
Choose to save original overwritten values in the phrase field (only possible with Gedcom grammar 7)
When overwritting an existing age value, you can choose to move the existing value to the phrase field.
This choice only applies to Gedcom 7 genealogies because the phrase field does not exit in previous Gedcom standards.
If a phrase value already exists, the move wiil not be possible and you will loose the original value.
The red sentence warning at the bottom of the window is to let you know that you should only do this if you do not necessarily want to keep old values.
Usage
Ages are generally useful in the editors:
- In the Cygnus and the Aries editors, ages are calculated upon editing the events, even though they are not necessarily stored in the Gedcom file itself.
- In Cygnus, ages are visible in the events list itself
- In the Gedcom editor ages are all visible at once as well.
Ages can also be used when sorting the entity table. Generate the ages then sort the entity table on the Age column.
Step 1 - Launch
To generate all ages:
- Start this tool using the Edit Menu > Calculate ages.
- The window shown above appears.
- Make sure you read the instructions and select the options you need and press OK.
Step 2 - See result summary
Each time you generate ages, the following summary result window appears.
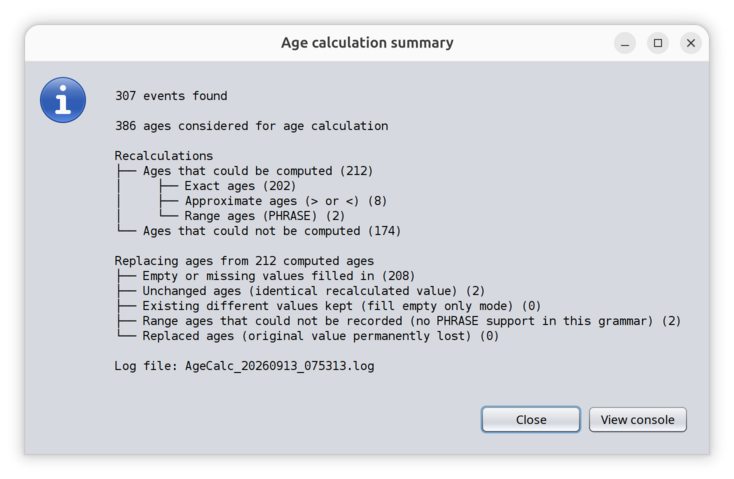
This summary is showing 5 different sections:
- The total number of events that is included in the Gedcom file and that correspond to the selected event list.
- The total number of ages to calculate. Family events have 2 ages to calculate.
- The recalculations performed explaining which ages could be calculated and how, and the number of ages that could not be calculated because of missing information. In Gedcom standard 7, range ages are aimed to be stored in Phrase field because the AGE filed does not allow that format.
- The way the recalculated ages have been used to replace existing ages in the Gedcom FIle. This list depends on whether ages are diplayed only or stored in the genealogy.
- The log file name where all the details can be found.
Step 3 - See details in the Console window
Pressing the View Console button will display the Console window.
The modificationsConsole window can be displayed at any time using the Window / Output menu or Ctrl + T.
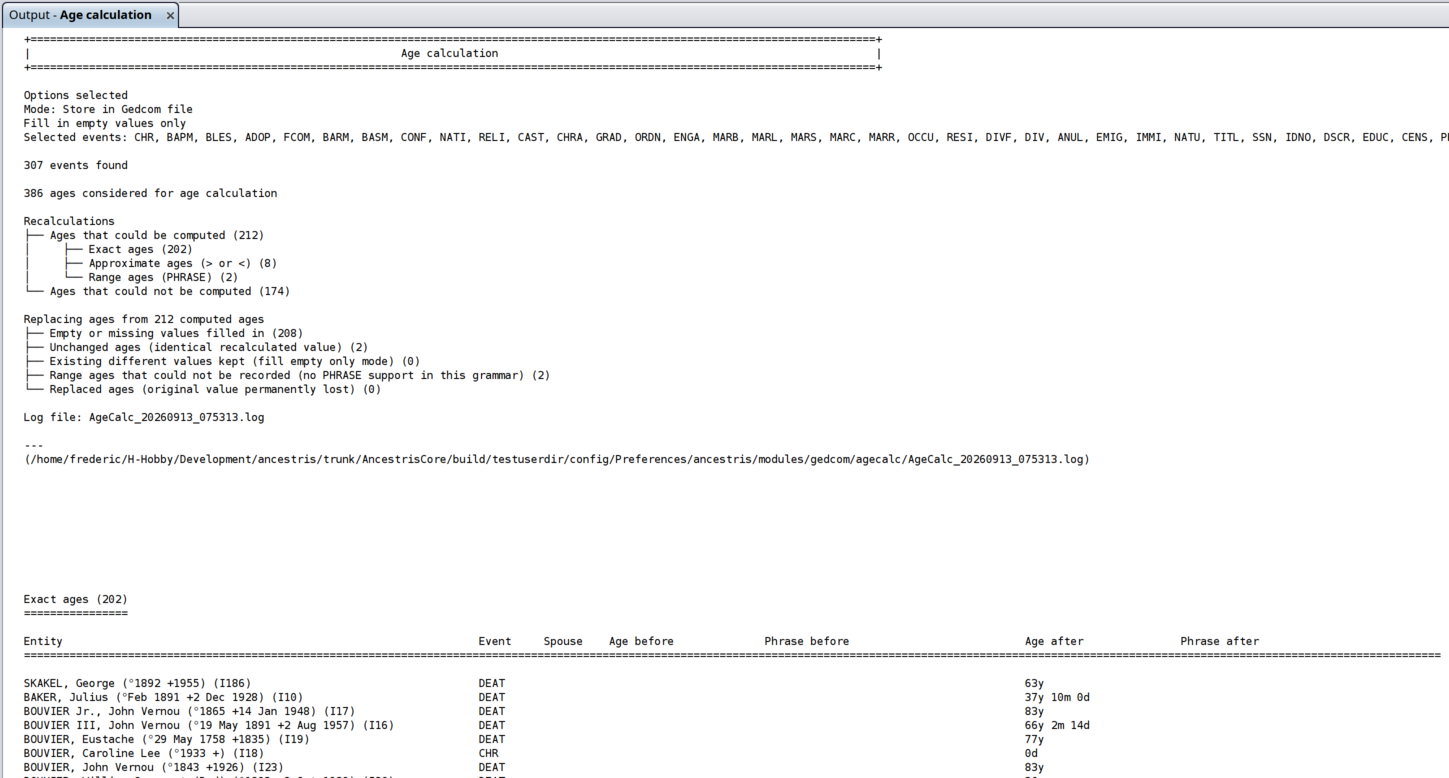
The above window details all summary items listed in the Summary result panel.
For each calculated age, you can see the corresponding entity, event, values before the change and values after the change.
Modifications applied
Modifications apply immediately.
Press Undo in the menu bar, or hit Ctrl + Z, to cancel your changes and try other settings.
Only entities where a change of value has been performed trigger an updated modification date of the entity.
General example
For example, you can see below that:
- The BIRTh event does not have any age which is normal.
- The DEATh event shows the calculated age
- The BURY age is calculated and is in grey background, meaning it will not be stored in the Gedcom file.
- The OCCUpation has
gotaancalculated agecalculatedwhich will remain in the Gedcom file.

Customization
The "Use christening"christening" options is part of the Preferences. (please refer to the Data tab of the Preferences)
The "Events selected" preference is part of the Age Calculation tool.