Guardar como
La acción Guardar como hace una copia idéntica de su genealogía bajo otro nombre de archivo Gedcom, o hace una copia parcial de su genealogía como otro archivo Gedcom, utilizando varios filtros muy útiles.
La función Guardar como también se puede utilizar para exportar ramas de un árbol genealógico.
Descripción
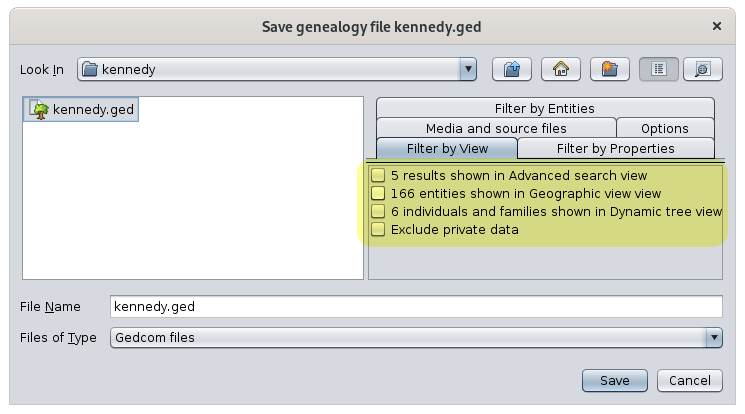
La ventana Guardar como no es solo un explorador de archivos clásico. Tiene la gran particularidad de tener varias pestañas de filtro en el lado derecho, que se pueden combinar para definir con precisión lo que desea extraer de su genealogía.
Al igual que con las herramientas de archivos clásicas, la lista de archivos le permite elegir el directorio y el nombre del archivo para guardar su genealogía, con la posibilidad de crear un directorio que aún no existe.
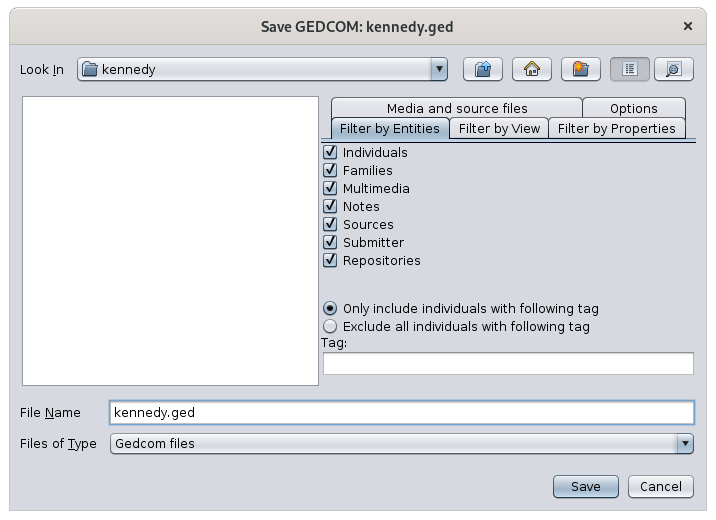
Los filtros están hechos de 5 pestañas:
- Filtrar por entidades: se utiliza para incluir o excluir categorías de entidades
- Filtrar por propiedades: se utiliza para excluir propiedades específicas de cada entidad
- Filtrar por Vista: se utiliza para limitar las entidades a las incluidas en las vistas que se muestran actualmente
- Medios y archivos fuente: se utilizan para indicar si los archivos multimedia también deben copiarse o no.
- Opciones: se utiliza para especificar la codificación y el cifrado del archivo Gedcom guardado
Uso
La acción Guardar como se puede utilizar para:
- hacer una copia idéntica de su genealogía
- hacer una copia parcial, incluida la extracción de una rama
Para hacerlo más fácil, Ancestris le pregunta primero qué quiere hacer con la siguiente ventana:
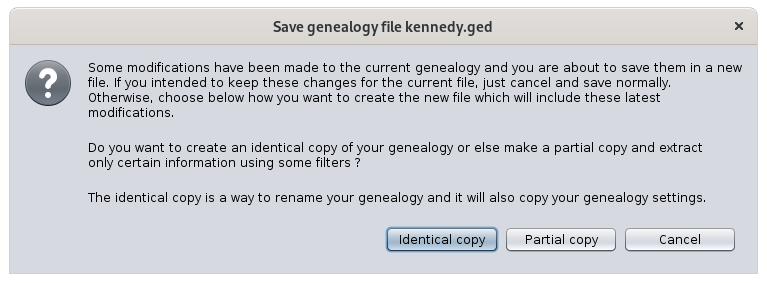
If you choose to make an identical copy, Ancestris will also copy your genealogy settings.
If you choose to make a partial copy, Ancestris will create another Genealogy and open it as it if were a new one and will not copy your settings.
In case some modifications are pending, Ancestris will notify you with the first paragraph in the message above. Make sure you save these modifications before making the copy if you intended to keep them in the current file rather than the copy.
The most significant benefit of this Save as function is to export tree branches as part of the partial copy choice. The other possibilities are pretty self-explanatory.
Exporting branches is done using the Filter by View tab. In the example below, we have restricted the display of the Kennedy tree to 3 generations and then we have folded a branch. There are therefore 4 individuals and 2 families displayed.
Here is what the Dynamic tree looks like as well as the Save-as window Filter-by-View tab:
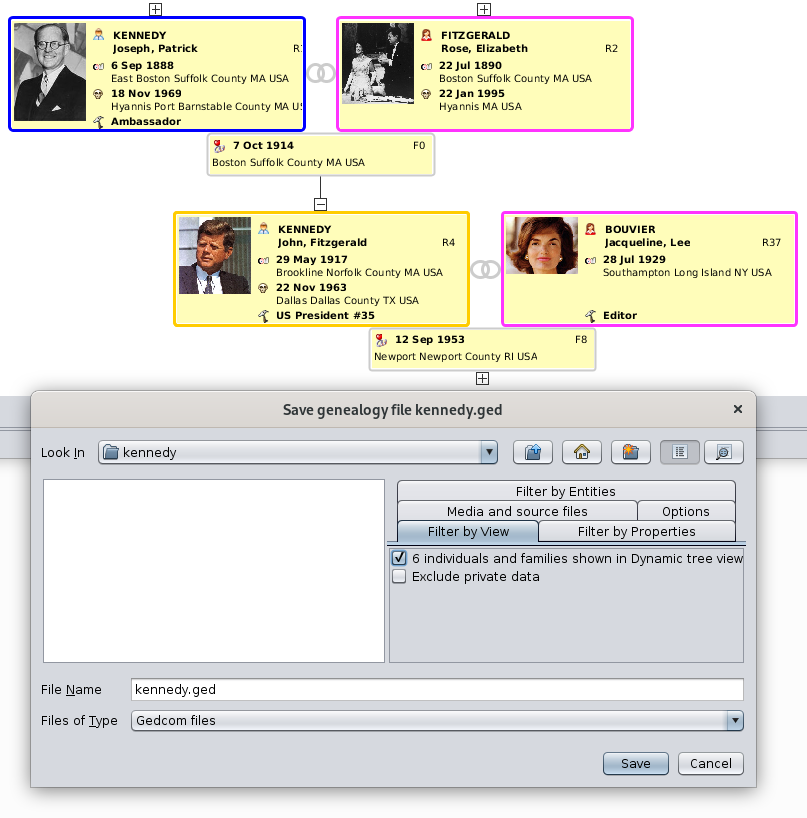
By checking the corresponding box "6 individuals and families", we will create a Gedcom file extracted from the main genealogy, with only the 6 entities displayed.
Combined with the other filters, we can add the corresponding media, notes, sources, etc. to make it a complete Gedcom file but limited to that part of the tree branch.
Other views can be used in a similar way:
- the Geographic map view, where you can display a limited number of events and individuals using geographic filters
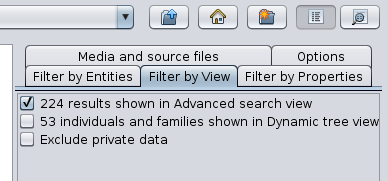
- the Advanced search view, where you can select individuals and families meeting some specific criteria on names, occupations, places, etc.
Here is what the Save-as Filter-by-View tab could look like:
This is a powerful way to finely define genealogical exports.
Example
We had the following question from a user.
I would like to extract from my gedcom, a gedcom limited to the 5th generation.
That is to say a gedcom that would only include my SOSA 16 to 31 and all their descendants.
How can I do this?
Here is a possible solution for this:
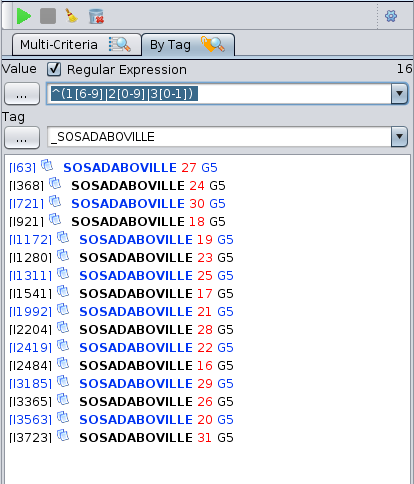
You select the 16 SOSA individuals with the Advanced search view.
- Remember to check "Regular expression".
- Type in the magic formula for regular expression. It looks for the numbers 16 to 31 in the value of the tag. Include a space character à the end.
- Choose the tag _DABOVILLE or _SOSA (the one you use for your SOSAs).
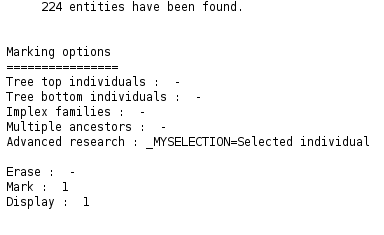
You then mark all their descendants with the Edit / Mark tool.
There are 224 of them here.
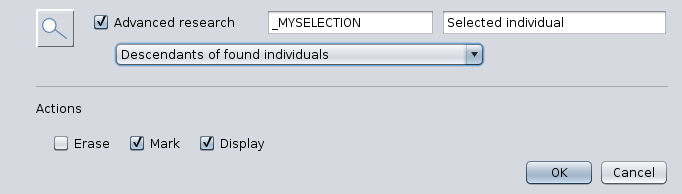
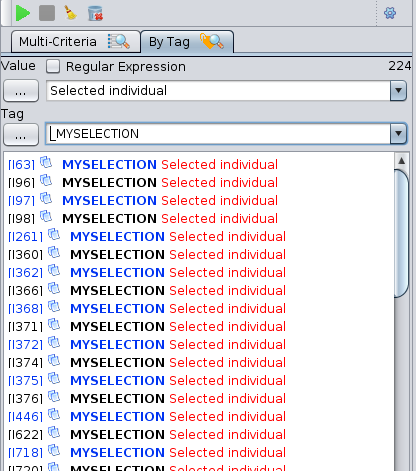
Then you select these 224 marked individuals with the Advanced search view again.
- Uncheck regular expression this time
- Type "Selected individual" since this is the value used for marking in the previous step.
- Choose the label "_MYSELECTION" since it is the previous label as well.
Ancestris finds the 224 marked individuals.
Finally you go to File / Save As... where you select the 224 individuals to be exported.