Ontwerp je eigen genealogie
Je zal zien hoe gemakkelijk het is, om vanaf het begin, je eigen genealogie met Ancestris te ontwerpen en te onderhouden. Je creëert je eerste stamboom persoon (jezelf), je ouders, broers, zusters en dichtstbijzijnde familie en dan heb je al heel snel je eerste genealogie bestand met 1 of 2 generaties gemaakt.
Het ontwerpen van een genealogie start meestal met het aanmaken van de eerste persoon (jezelf?) waarvan je gegevens zoals geboortedatum en -plaats vastgelegd worden. Daarna worden andere personen toegevoegd zoals b.v. de ouders, broers en zusters, neven, nichten en grootouders en hoe zij met elkaar verbonden zijn (relaties).
Het aanmaken van je eerste (voor)ouder
Tijdens de Rondleiding (Guided tour) gebruiken we de genealogie van de Bourbon familie. Dit is een voorbeeld van een genealogie dat door Ancestris ondersteund wordt.
Laten we deze genealogie sluiten. Om het Bourbonbestand te sluiten klik je op het kruisje in één van de actieve Bourbon vensters. Nu gaan we onze eigen genealogie maken..
Vanuit de "Welkom pagina", klik je op de knop "Een nieuwe genealogie aanmaken" of klik  op de gereedschap balk.
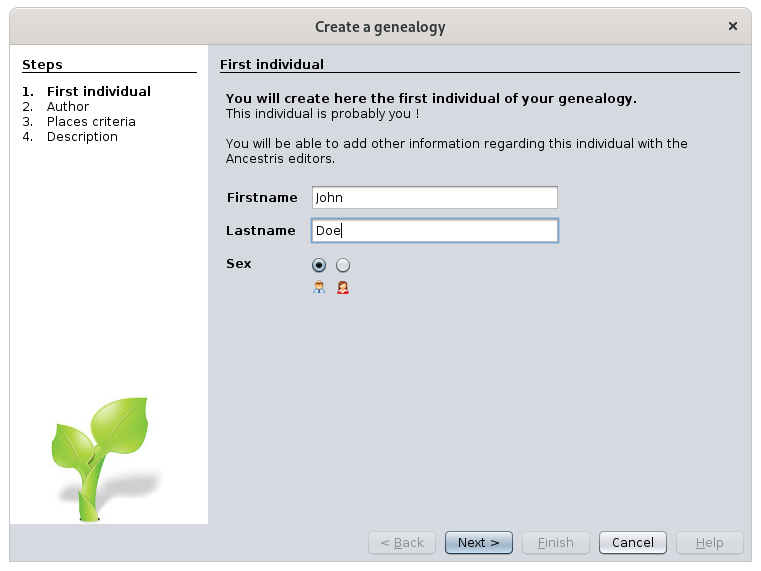
De creëer assistent start. Volg de stappen, tot je de dynamische stamboom of een boom ziet waarin jezelf in het midden te zien bent!
Op het eerste scherm van de assistent vul je je voor- en achternaam en geslacht in. klik daarna klik je op "Volgende" (Next).
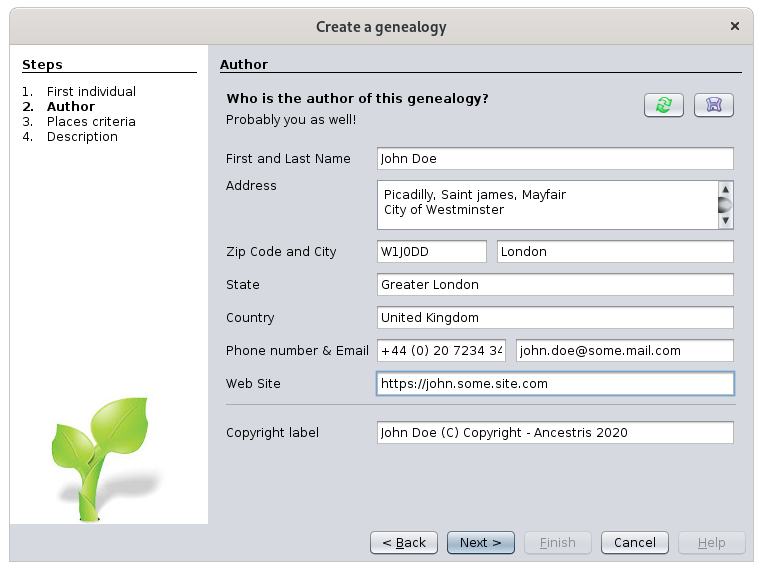
Vervolgens vul je de informatie in, die betrekking hebben op de auteur van deze nieuwe genealogie (waarschijnlijk jezelf). Klik op "Volgende" (Next).
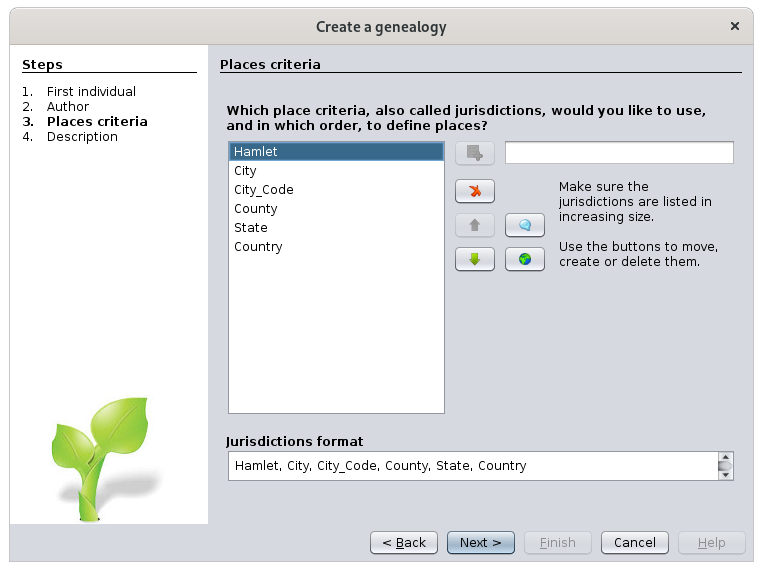
Definieer hoe de adres gegevens in jouw genealogie gebruikt moeten worden Hieronder zie een een standaard formaat dat je kunt gebruiken als je niet precies weet hoe het er uit moet zien. Je kan dit later altijd nog veranderen. Klik op "Volgende" (Next), of anders druk je op de knoppen om in te te voegen, of te wijzigen. Je kan ook nog bepaalde criteria (eigenschappen) toevoegen. Dit heten jurisdicties. Klik vervolgens op "Volgende" (Next).
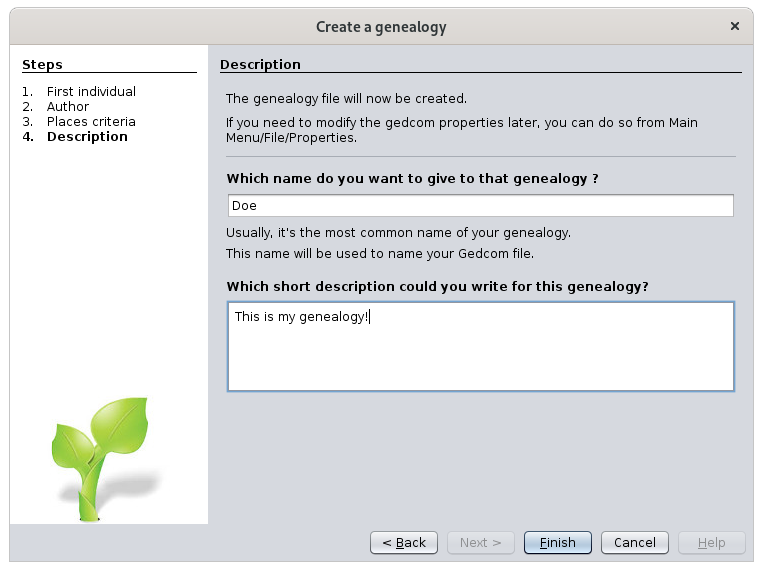
Vul nu een beschrijving van je genealogie in en druk op "Stop" (Finish).
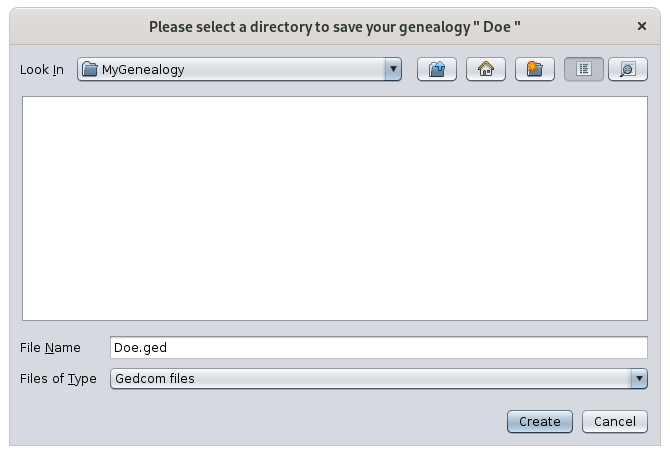
Ancestris zal daarna naar de bestandslocatie en -naam vragen, waar je gegevens moeten worden opgeslagen.
Zoals je kunt zien, wordt de informatie direct opgeslagen in een Gedcom bestand. Gedcom bestanden hebben de extension (achtervoegsel) ".ged".
Druk op "Creëer (Aanmaken)" (Create). Dat is alles!. Je hebt nu je eerste genealogie bestand gemaakt!
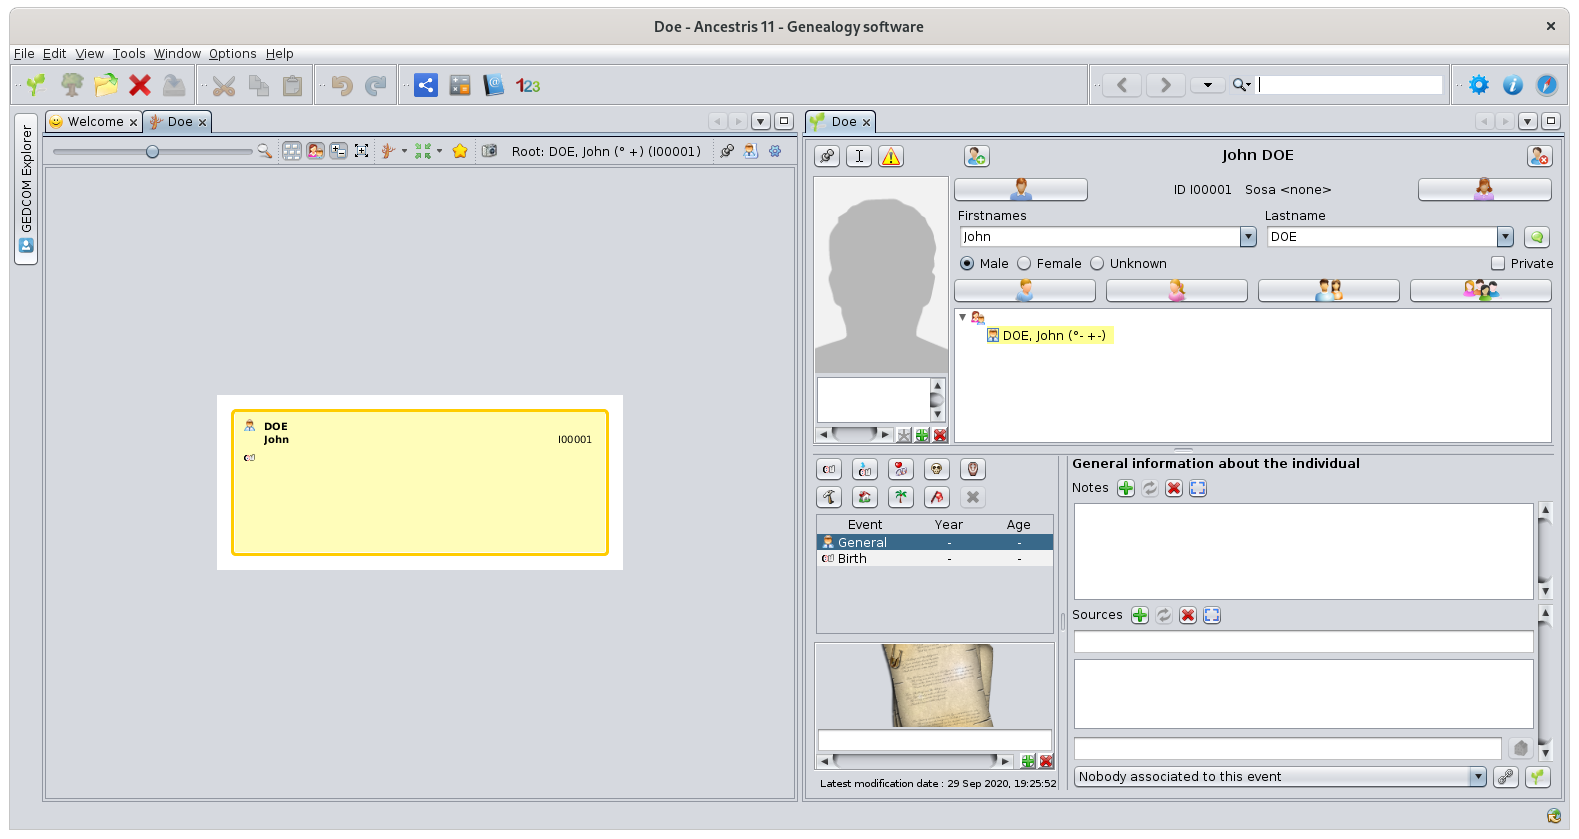
Ancestris zal nu de genealogie boom in de "Dynamische genealogie boom " (dynamic tree view) weergeven. Deze boom is nu nog voor slechts 1 persoon gemaakt. Jij dus!
Aan de rechterkant op het scherm, de Cygnus editor wordt ook geopend. Het laat hier de persoonlijke details van de persoon zien die in de boom geselecteerd is.
Met behulp van de Cygnus editor, youkan canje nownu completede thenog missingontbrekende information,informatie e.g.aanvullen, yourb.v birthje dategeboortedatum anden place for instance.geboorteplaats.
AddVoeg aeen photographfoto ofvan yourselfjezelf bytoe clickingdoor op de desbetreffende plaats te klikken.
Voeg, indien nodig, ook andere namen toe.
Wanneer je klaar bent druk je op OK om de wijzigingen die je hebt aangebracht te bewaren. Deze knop wordt onder aan het scherm zichtbaar als je in thede respectiveeditor area.
Addhebt other names if necessary.
When finished, in order to save the changes made, click on the OK button that will appear at the bottom right corner, as soon as you change your data in the editor.aangebracht.
Adopt best practices
If you keep on adding people, very soon you will reach hundreds of records: individuals, families, etc.
We recommend you to immediately adopt a consistent and harmonised way to write the frequently used information, such as:
- surnames (1st letter uppercase or not)
- occupation descriptions
- witnesses (use husband's uncle rather than Peter's uncle) to avoid repeating names
- place names (old spelling or new spelling ?)
- etc.
Also, if you have your birth certificate at hand, document it now as a source, and as comprehensively as possible. Ancestris is very good at keeping all detailed information.
Create your parents
Creating parent can be done either from the dynamic tree view or from the Cygnus editor.
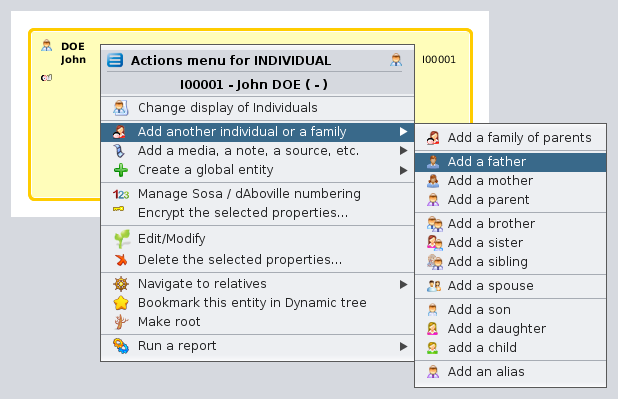
From the tree, right click the desired individual.
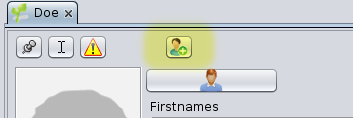
From Cygnus, we use the buttons for new parents. This is a faster method. The "Father" button is at the top left on the Cygnus editor.
In either case, you get two more boxes on the tree, above your own: your parents. Your father is created, but only a placeholder is visible for your mother. The entity corresponding to her is not yet created.
Ancestris default settings create only one parent at a time. It could be interesting to try and create both. To do so, go to preferences, using the main menu Options / Preferences / Editing, or click on  at the top right of the main window.
In the preferences, select the Editing panel, and check the option Automatically create both spouses when adding a parent.
On the father's box, the family name is automatically derived from the individual from which the father was created.
On the Cygnus editor, enter your father's information (name, date and place of birth, etc.). Click the OK button once done, to save the data.
To create the mother, whether right click on the individual and choose Add a spouse or click the corresponding button on the Cygnus editor, or right click your own box and choose Add a mother.
Create your close relatives
Next you can create your brothers and sisters, your wife and children, etc. in the same manner.
If you make a mistake, it is always possible to correct the information directly or simply undo the creation of the new individual by clicking on Undo button on the toolbar and start over.
Once you have created all the individuals of your close family, just click on your box to return to yourself.
Add information about your family
Let's suppose you want to enter your parents wedding date.
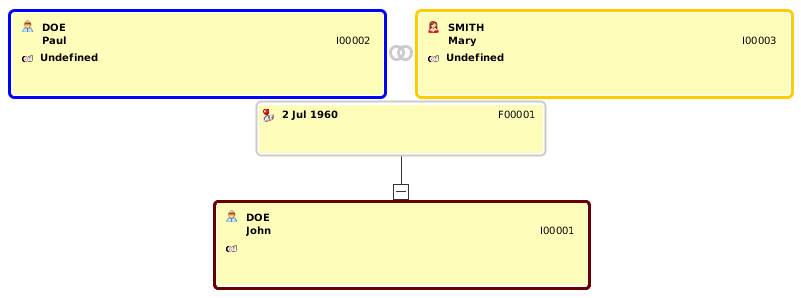
Click on the family box, the one between yours and your parents's. It is box number F00001 on the Dynamic tree view below.
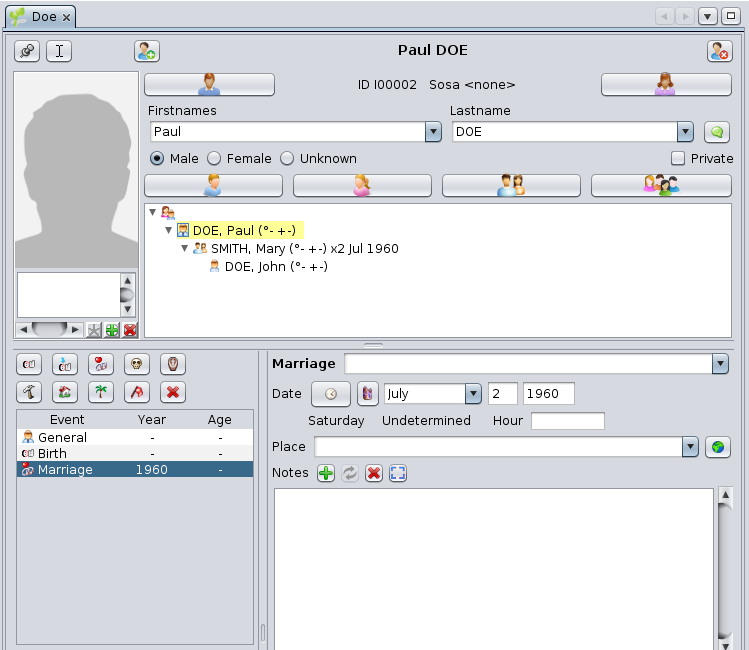
In Cygnus, you will see your father's information, and Cygnus will select the nuclear family he constitutes with your mother.
From there, click on the "Marriage" button on the Cygnus editor. The marriage event is created. Indicate the type of marriage (for example : Religious), enter the date and place, if known.
Click OK and that's it. Here is the result:
This is the current tree:
Let's now generate the Sosa numbering for this 3 people family.
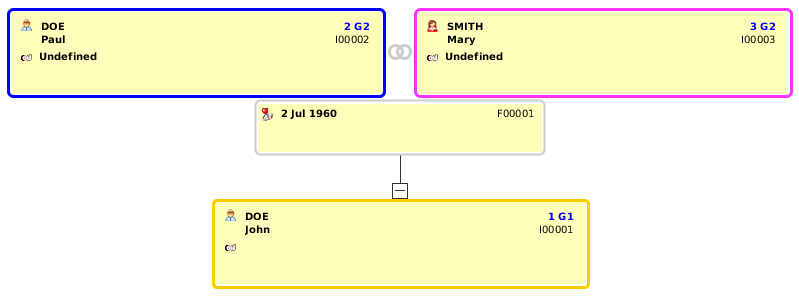
Right click on the box representing yourself and choose "Manage Sosa / d'Aboville numbering". A window will open. Just click OK and the Sosa numbering will be created like the following: number 1 for yourself, 2 for your father and 3 for your mother. G1 and G2 codes are the generation numbers.
You should now have something similar to the view below, where the Sosa numbering is visible on every box at the top right corner, above the identification numbers.
This first tree is now finished. Save it on disk by clicking  on the toolbar.
You can now close your genealogy file by clicking the red cross on the toolbar.
If you hadn't saved your data before, a window would have poped-up, asking you to save the file.
We will then see the Welcome page again, since it is now the only one opened.
From there, your genealogy will show on the "My Ancestris" tab of the Welcome panel, and at the top left on the section "Last opened genealogies".
From then on, you will probably adopt the habit of opening your genealogy from the Welcome panel.
You are now ready to take advantage of all the other features of Ancestris. The other chapters of this book will help you do so.
We wish you all the best.

