Start din slægtsforskning
Vi vil vise dig, hvor nemt det er at oprette personer fra starten med Ancestris. Vi opretter første person, forældre og nærmeste familie, så du har dit første slægtstræ med en eller to generationer.
Slægtsforskningen starter som regel med, at man opretter den første person og indtaster oplysninger om fødselsdato og fødested. Derefter opretter man andre personer, f.eks. forældre og kæder dem sammen. Derefter kommer bedsteforældre osv.
Opret den første person
Gennem den guidede tur, har vi brugt Bourbon slægten, en fransk adelsslægt. Bourbon filen. Dette er et eksempel på slægtsforskning med Ancestris. Du finder den guidede tur på velkomstsiden, når du åbner Ancestris.
Lad os lukke den og oprette en ny slægt. For at lukke Bourbon, skal du bare klikke på det røde krydsi værktøjslinjen hvor Bourbon slægtens vinduer er åbne. Lad os nu komme i gang med DIN slægtsforskning.
From theFra Welcome pageVelkomstsiden, clickklik thepå buttonknappen CreateOpret aet genealogyslægtstræ oreller clickklik på 
on thei toolbarmenuen. øverst.
TheHjælpefunktionen creationvil wizardstarte. willFølg start.trinene Followindtil thedu stepsfår until you get thevist dynamicdet treedynamiske viewtræ vindue ofmed aden treeførste withperson yourselfmidt righti at the center of it !det.
I første billede skal du oprette den første person og vælge Næste.
On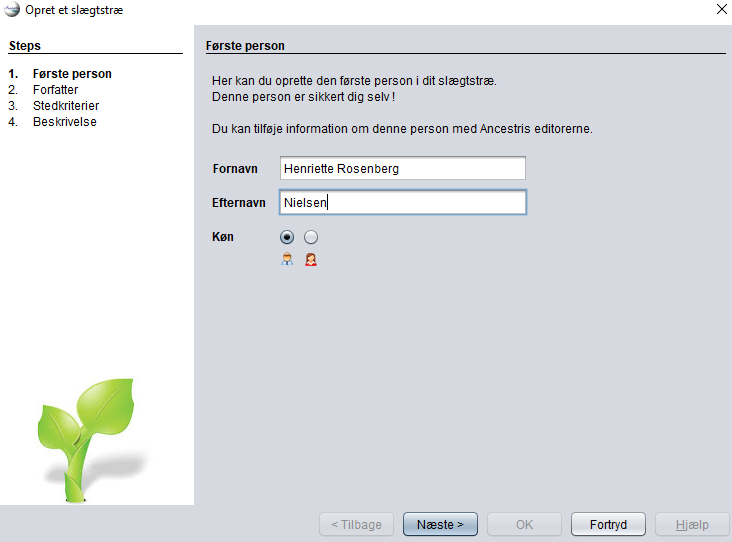
I firstandet screenbillede ofudfylder thedu wizard,alle enteroplysninger yourom nameforfatteren andtil sex,dette thenslægtstræ, clickaltså om dig selv. Vælg derefter NextNæste.

ThenI entertredje thebillede informationdefinerer regardingdu, thehvordan authordu ofvil thishave newstednavne genealogy,formateret probablyi you.din Clickslægtsfil. Nedenfor ses den danske standard, men du kan ændre på det. Som udgangspunkt vil det som regel være nok at vælge NextNæste. Det kan ændres senere.
Men du kan bruge de tilgængelige knapper for at ændre, slette eller oprette stedkriterier, også kaldes jurisdiktioner. Vælg Næste.

DefineI thesidste placestrin formatkan todu usenavngive acrossdin yourslægtsfil entireog genealogy.tilføje Belowen isbeskrivelse. theKlik standardderefter format. If you don't know now what it should be, clickpå Next. It can be changed later.
Else, use the available buttons to add, change or delete place criteria, also called jurisdictions. Then click NextOK.
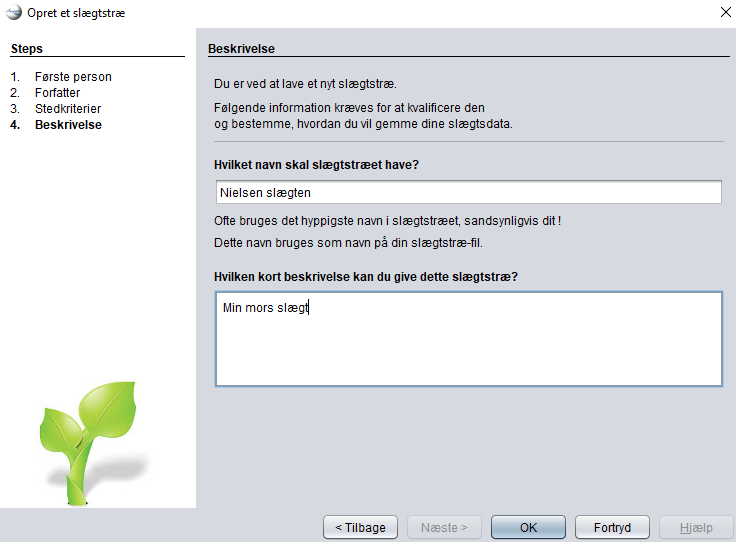
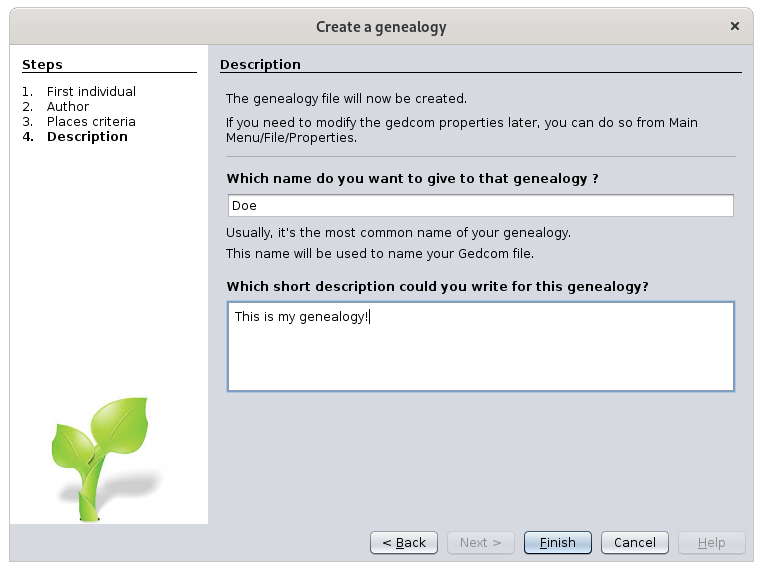
Enter a description for your new genealogy and click Finish.
Ancestris willspørger thennu, askom youhvor du vil gemme filen og du skal give filen et navn. HUSK hvor du lægger filen og giv den gerne et navn, der indeholder år-måned-dato i form af ååååmmdd for theat locationdu andkan fileholde namestyr topå, savehvilken yourversion genealogydet information.er.
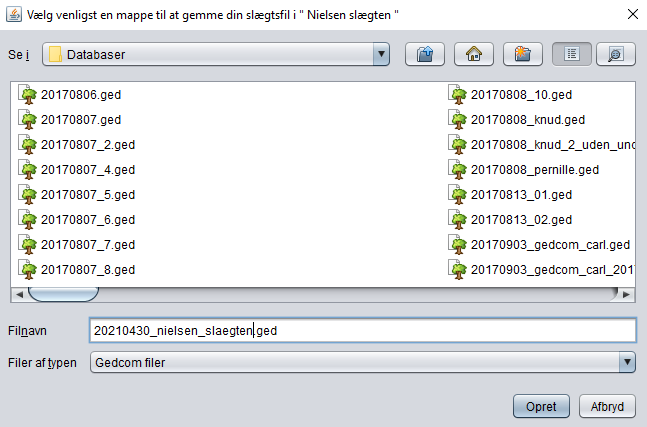
AsSom youdu cankan see,se, theer informationfilen isgemt directlysom saved as aen Gedcom file.fil. Gedcom fileshedder have.ged thei extension ".ged".slutningen.
PressTryk CreateOpret tofor save.at That'sgemme. it.Det var det!
Nu vises din fil i Ancestris will now show a genealogy tree in thei dynamicdynamisk treetræ viewvisning. ThisDette treetræ isindeholder madekun upen ofperson, onenemlig den person only:du you.oprettede for lidt siden.
OnI thehøjre rightside hand side, thevises Cygnus editorredigeringsværktøj. isDet alsoviser opened.detaljer Itom showsden thevalgte individualperson, informationsom detailser ofvalgt thei person currently selected in the tree.træet.
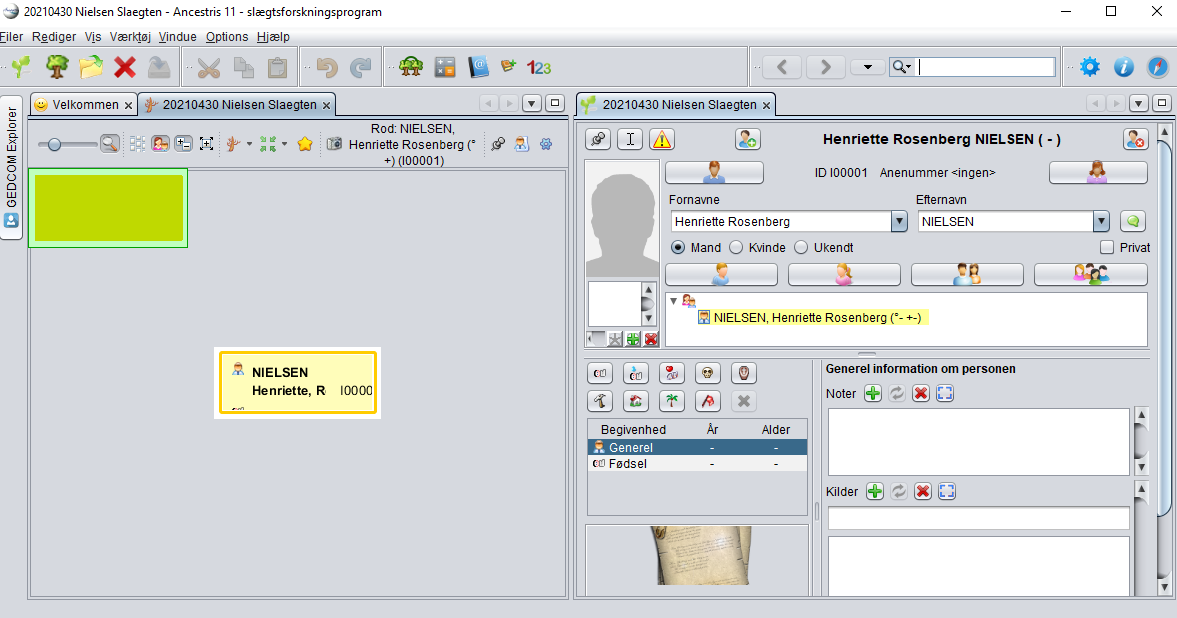
UsingVed theat bruge Cygnus editor,redigeringsværktøjet youkan candu nownu completeudfylde the missingmere information, e.g.f.eks. yourfødselsdag birthog date and place for instance.fødested.
AddTilføj aet photographfoto ofaf yourselfpersonen byved clickingat inklikke thepå respective area.silhuetten.
AddTilføj otherandre namesnavne, ifhvis necessary.nødvendigt. Ret kønnet, hvis nødvendigt.
WhenNår finished,du iner orderfærdig, tovælger save the changes made, click on thedu OK buttonknappen, thatder willvil appearfremkomme ati thehøjre bottomside rightnederst, corner,når asdu soonændrer aseller youtilføjer change your data in the editor.noget.
Adopt best practices
If you keep on adding people, very soon you will reach hundreds of records: individuals, families, etc.
We recommend you to immediately adopt a consistent and harmonised way to write the frequently used information, such as:
- surnames (1st letter uppercase or not)
- occupation descriptions
- witnesses (use husband's uncle rather than Peter's uncle) to avoid repeating names
- place names (old spelling or new spelling ?)
- etc.
Also, if you have your birth certificate at hand, document it now as a source, and as comprehensively as possible. Ancestris is very good at keeping all detailed information.
Create your parents
Creating parent can be done either from the dynamic tree view or from the Cygnus editor.
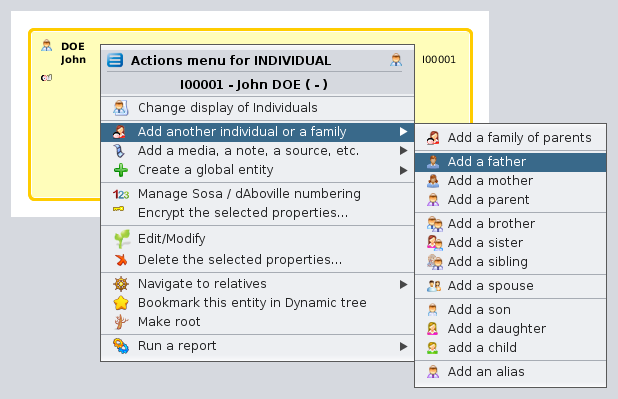
From the tree, right click the desired individual.
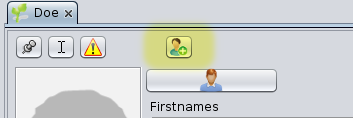
From Cygnus, we use the buttons for new parents. This is a faster method. The "Father" button is at the top left on the Cygnus editor.
In either case, you get two more boxes on the tree, above your own: your parents. Your father is created, but only a placeholder is visible for your mother. The entity corresponding to her is not yet created.
Ancestris default settings create only one parent at a time. It could be interesting to try and create both. To do so, go to preferences, using the main menu Options / Preferences / Editing, or click on  at the top right of the main window.
In the preferences, select the Editing panel, and check the option Automatically create both spouses when adding a parent.
On the father's box, the family name is automatically derived from the individual from which the father was created.
On the Cygnus editor, enter your father's information (name, date and place of birth, etc.). Click the OK button once done, to save the data.
To create the mother, whether right click on the individual and choose Add a spouse or click the corresponding button on the Cygnus editor, or right click your own box and choose Add a mother.
Create your close relatives
Next you can create your brothers and sisters, your wife and children, etc. in the same manner.
If you make a mistake, it is always possible to correct the information directly or simply undo the creation of the new individual by clicking on Undo button on the toolbar and start over.
Once you have created all the individuals of your close family, just click on your box to return to yourself.
Add information about your family
Let's suppose you want to enter your parents wedding date.
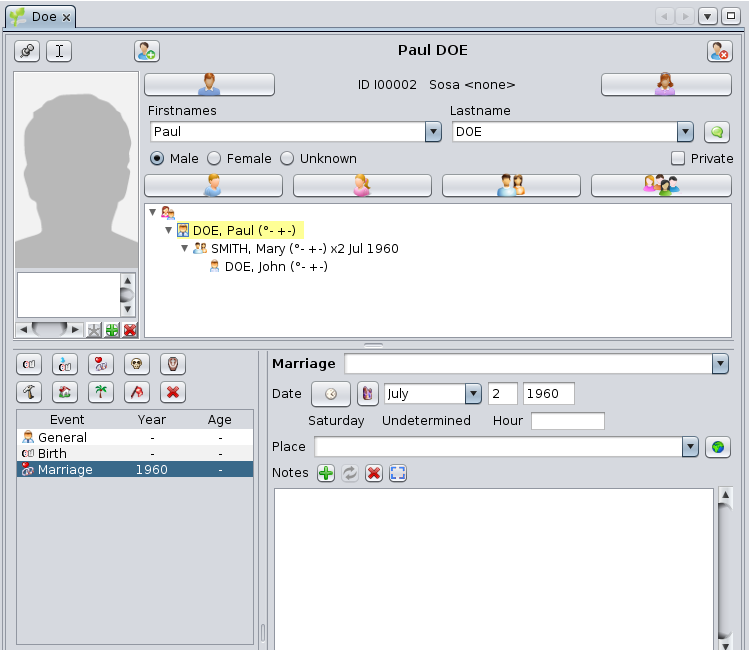
Click on the family box, the one between yours and your parents's. It is box number F00001 on the Dynamic tree view below.
In Cygnus, you will see your father's information, and Cygnus will select the nuclear family he constitutes with your mother.
From there, click on the "Marriage" button on the Cygnus editor. The marriage event is created. Indicate the type of marriage (for example : Religious), enter the date and place, if known.
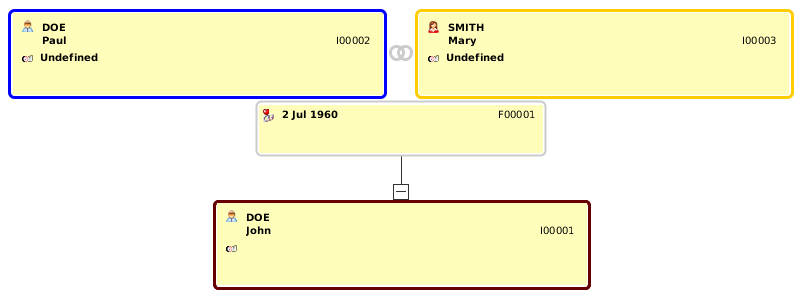
Click OK and that's it. Here is the result:
This is the current tree:
Let's now generate the Sosa numbering for this 3 people family.
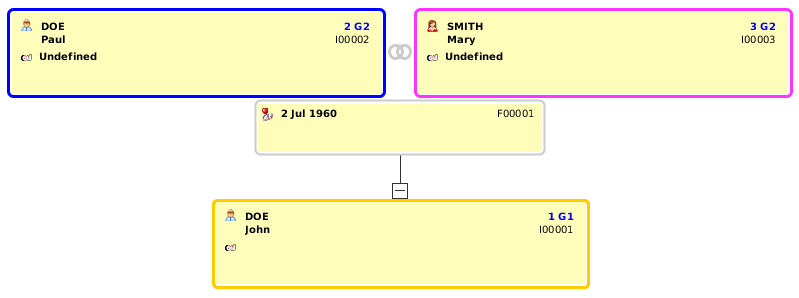
Right click on the box representing yourself and choose "Manage Sosa / d'Aboville numbering". A window will open. Just click OK and the Sosa numbering will be created like the following: number 1 for yourself, 2 for your father and 3 for your mother. G1 and G2 codes are the generation numbers.
You should now have something similar to the view below, where the Sosa numbering is visible on every box at the top right corner, above the identification numbers.
This first tree is now finished. Save it on disk by clicking  on the toolbar.
You can now close your genealogy file by clicking the red cross on the toolbar.
If you hadn't saved your data before, a window would have poped-up, asking you to save the file.
We will then see the Welcome page again, since it is now the only one opened.
From there, your genealogy will show on the "My Ancestris" tab of the Welcome panel, and at the top left on the section "Last opened genealogies".
From then on, you will probably adopt the habit of opening your genealogy from the Welcome panel.
You are now ready to take advantage of all the other features of Ancestris. The other chapters of this book will help you do so.
We wish you all the best.