Install Ancestris
Install, re-install or update Ancestris on MacOS, Windows and Linux. Java pre-requisite. Files location, launch settings and user settings.
- Install and start Ancestris
- Versions compatibility
- Reinstall or upgrade Ancestris
- Update Ancestris
- Step-by-step installation on macOS
- Step-by-step installation of the stable version on Windows
- Step-by-step installation of the daily version on Windows
- Step-by-step installation on Linux
- Java installation
- Launch settings
- Software files and User settings files
- Privacy Policy
- Release notes
Install and start Ancestris
Read license and user rights
Ancestris is free software, licensed under the GNU GENERAL PUBLIC LICENSE V3.
Ancestris is a free genealogy program, for unlimited time usage, and an unlimited number of individuals.
It is made available to you by volunteers.
Check our required configuration
Ancestris works on all latest macOS, Windows and Linux platforms running Java.
If Ancestris does not start, or shows the Ancestris splash screen and stops, it is most generally related to an issue with the Java installation.
To use Ancestris, it is required to have the following hardware configuration:
- 2 Gb RAM
- 200 Mb of available disk space
- A big enough screen, 1920 x 1080 minimum recommended
Java is a prerequisite
To use Ancestris, you need to have Java installed on your system.
See Version compatibility to identify which version of Java is compatible.
Ancestris is compatible and has been tested with the version listed above.
To identify which Java version is installed on your system, other Java versions available, how to swap between Java versions, or the Java technical requirements, check out the Java installation page.
Note to macOS users
See macOS version compatibility.
Note to Chomebook users
Chromebooks do not allow Ancestris to be launched. The limitation is that there is no version of Java that can be installed on a
Chromebook and used to launch an application.
- If you have the option to install Linux instead of the Chromebook OS, you will be able to install and use Ancestris.
- You can also try these steps to activate the Linux development environment:
https://www.youtube.com/watch?v=P9PYMkAQNhk. This activates a Linux console that should allow you to install
Java and run Ancestris.
Installation
If you need detailed installation steps, we provide you with a step-by-step guide corresponding to your system :
✔ Step-by-step installation guide for macOS
✔ Step-by-step installation guide of the stable version for Windows
✔ Step-by-step installation guide of the daily version for Windows
✔ Step-by-step installation guide for Linux
What follows is the general overview of the installation and the links in case of troubles or to change launch settings.
Go to Download on the Ancestris site
Ancestris can be downloaded for free on our page https://www.ancestris.org via the DOWNLOAD option.

Choose your Ancestris version
Two versions are available.
- Choose the stable version if you are aiming for stability and do not need to benefit from the latest developments.
- Choose the daily version if you wish to benefit from the latest functionalities.
All versions work on any device under any operating system that can use Java.
All versions work with all existing translations.
All versions are full versions and allow unlimited usage.
Download Ancestris
This shows the Download section of the Ancestris site.
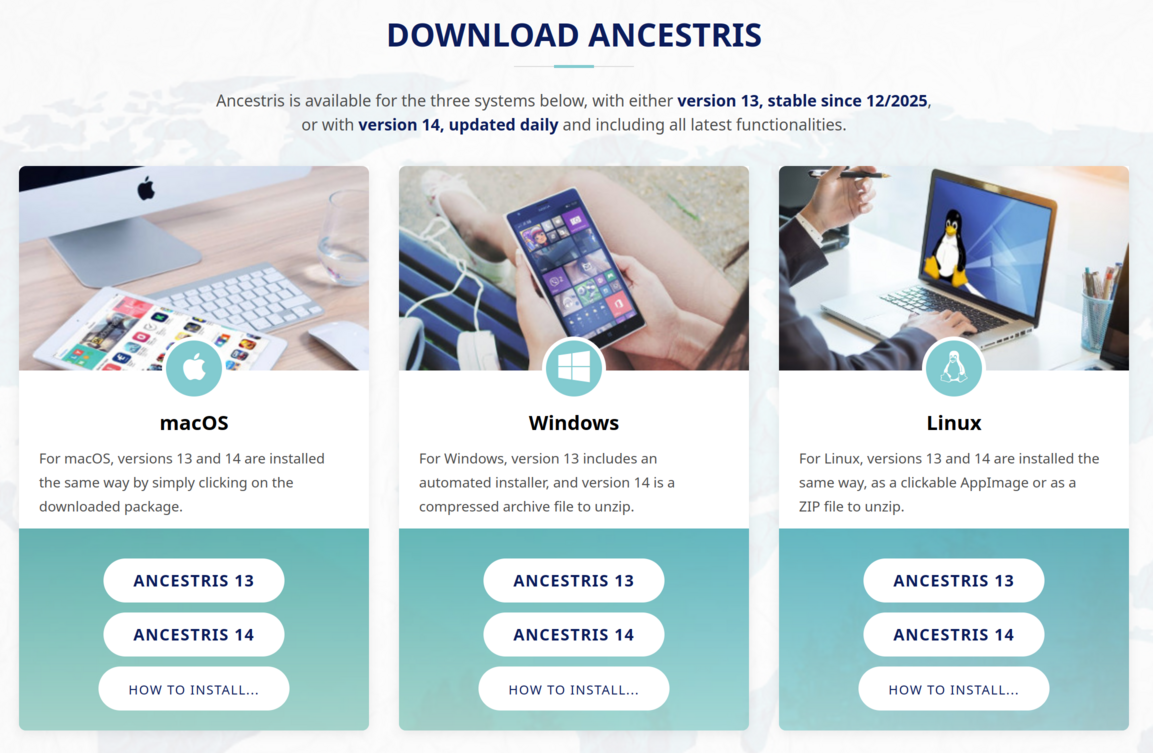
- Click on the Ancestris version button of your operating system
- macOS. It will download a pkg file.
- Windows. It will download an exe or zip file depending on the Ancestris version.
- Linux. Hovering over the buttons, a menu will appear where you can pick the AppImage file or a ZIP file.
- The downloaded file will be specific to the operating system you choose
- Follow the steps suggested by your Internet browser and save the file
- The download will take a few seconds and will result in a file of about 95Mb or 141 Mb for Windows exe file.
Choose Ancestris folder
At the end of the download, the file will be placed in your default download folder.
If you don't know what this folder is, check your Internet browser's settings or else click on the downloaded icon of your browser.
From that folder, feel free to move the downloaded file wherever you want on your computer. The software platform used by Ancestris is Netbeans. Therefore, accents in the installation path are prohibited.
- On macOS, the stable version is installed by default in /Applications.
- On Linux, the AppImage file will implement a launcher in the launch bar. Yhis launcher will be using the AppImage file so do not erase it later. Make sure you move it to a place where you will keep it.
Start Ancestris
The way to start Ancestris slightly differs depending on the OS system you have.
Ancestris's files will be inside the resulting ancestris folder. Refer to the Software files page to have the detailed view of the ancestris folder.
To start Ancestris, run the downloaded file or else run the executable in the bin folder that corresponds to the operating system you are using.
- macOS : click on the package file and Ancestris will install itself in the Applications folder, from which you can start Ancestris.
- Windows : for the stable version, just double-click on the downloaded exe file
AncestrisSetup.exe. This installation program will assist you in the installation of Ancestris and it will also create the launcher icon. For the daily version, run the ancestris64.exe file in the bin folder. - Linux :
- For the AppImage file: once it is downloaded, move it to a better folder, right clic on it to give it executable right and then double clic on it
- For the ZIP file, unzip it and then locate the ancestris/bin folder, and double-click on the 'ancestris' file. This is an executable script.
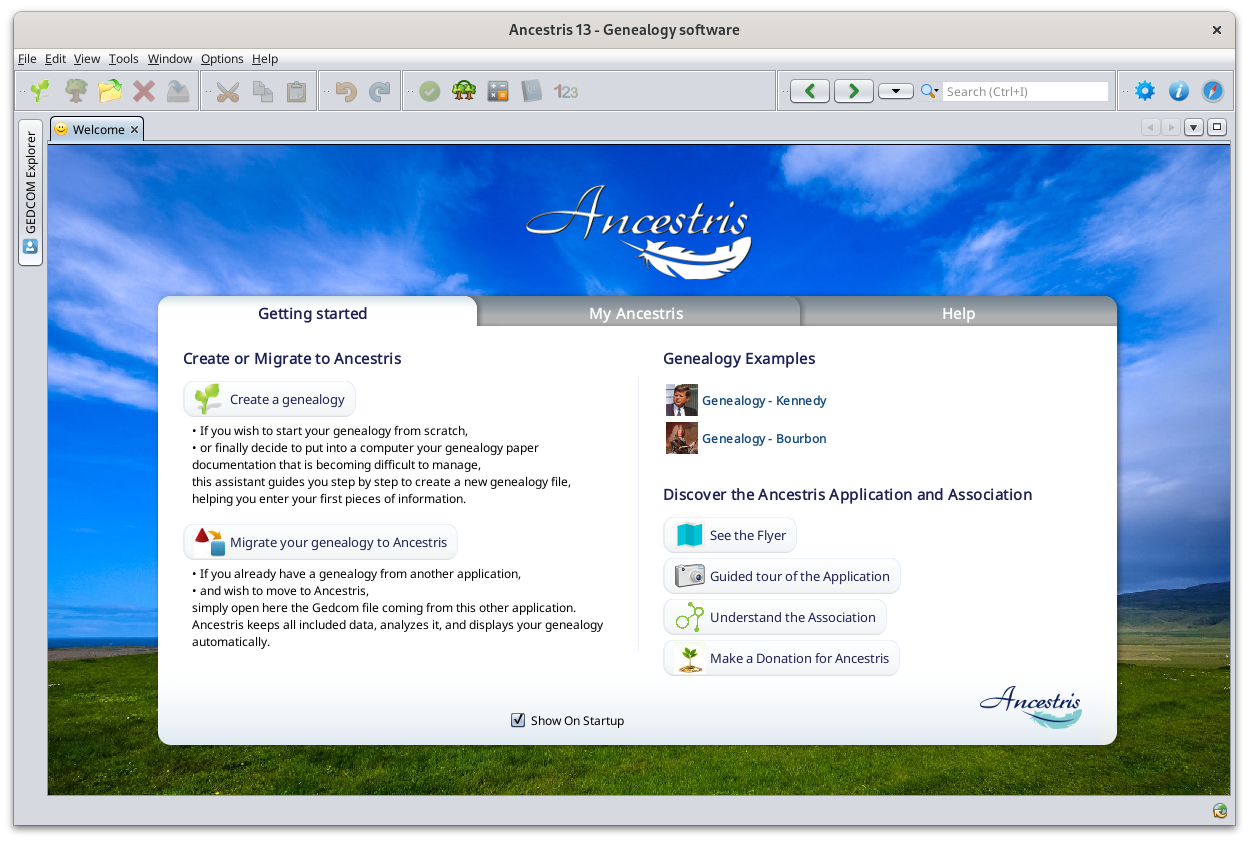
Regardless of the version, here is what you will see when Ancestris is started.

Troubleshooting
If you need detailed installation steps, please read the step-by-step guide below corresponding to your system :
✔ Step-by-step installation guide for macOS
✔ Step-by-step installation guide of the stable version for Windows
✔ Step-by-step installation guide of the daily version for Windows
✔ Step-by-step installation guide for Linux
If Ancestris does not start, or shows the Ancestris splash screen and stops, it is most generally related to an issue with the Java installation.
Either Java is not installed or Ancestris does not find it or finds an incompatible version or finds a corrupted version.
Please check the Java installation page for help.
Personalisation
Shortcut icon
If you need to customize a shortcut with a nice icon to start Ancestris, please check your operating system's documentation on how to create it, and feel free to use the included image file ancestris.gif provided within the softwares files.
For macOS, see the step-by-step guide.
For Windows, see the step-by-step guide.
For Linux, there are several of these procedures, and quite different from one system to another.
Launch settings
You can personalise the way Ancestris starts such as the memory allocation for instance. In case you need to personalise the way Ancestris is launched, please refer to the Launch settings page.
User settings
If you are interested in knowing where the user settings files are, please refer to the Software and user settings files page.
Versions compatibility
The table below shows the versions that are necessary to make Ancestris work depending on the version you choose to install.
Ancestris relies on Java and Netbeans platforms
Java versions: Java can be installed separately and you need to know which version of java is necessary for each version of Ancestris. The oldest java version to have is indicated under "Minimum Java version". The latest Java version Ancestris can work with is indicated under "Maximum Java version".
Netbeans version: The netbeans version is provided for information only. Netbeans is packaged with Ancestris and you should not worry about it, but this explains the Java version prerequisite.
Table of versions compatibility
| Ancestris version type | Ancestris version number | Release date | Last updated | Minimum Java version |
Maximum Java version | Netbeans version |
| Daily | 14 | Daily | Daily | 17 | 25 | 26 |
| Stable | 13 | 29 Nov 2025 | April 2026 | 17 | 25 | 26 |
| Obsolete | 12 | 8 June 2024 | Novembre 2025 | 8 | 24 | 12.5 |
| Obsolete | 11 | 29 May 2021 | April 2024 | 8 | 17 | 11.3 |
Note to Windows users
The Ancestris installer for Windows for the stable version automatically installs Java. You do not need to install it yourself.
- Java 25 for Windows 64 bits
- Java 17 for Windows 32 bits
Note to macOS users
Ancestris comes with a native macOS launcher which requires macOS version 10.14.4 at a minimum.
For users with a previous version of macOS, refer to this procedure to launch Ancestris.
Reinstall or upgrade Ancestris
There are several situations where you may need to reinstall Ancestris, but they all end up following the same steps described below.
Situations justifying reinstallation
Reinstalling Ancestris on the same computer
- If a new stable version of Ancestris has just been released and you want to benefit from it.
- If there was a major modification of the same version, usually the daily version. For instance, when the Ancestris team makes changes to the Ancestris platform, they will ask you to reinstall. To be notified of such changes, you will need to subscribe to the discussion list.
- If a change has happened to your computer, or if some Ancestris files are lost. In this situation, Ancestris might no longer work properly.
In all those situations, your action will result in reinstalling Ancestris.
When reinstalling Ancestris, you will automatically be able to preserve your customizations.
It is up to you to decide if you want to reinstall Ancestris at the same location on your computer or not.
In either case, we recommend you to get rid of the former Ancestris instance and replace the Software files.
In case you were to keep two different instances of Ancestris on the same computer, Ancestris might get confused as there is only one set of user settings.
Installing Ancestris on a second computer
If you are to install Ancestris on a second computer, just proceed as a regular first-time installation.
If you want to have the same user settings on both computers, you should first copy the user settings folder from one computer to the other one.
Alternatively, you can also use the export button of the Ancestris preferences window.
Reinstalling the stable version
To reinstall the main version, while preserving your user settings, just proceed as a regular first-time installation.
It should be much quicker as Java should already be installed and your Ancestris launcher is already set.
In practice, it will consist of simply replacing the 5 folders listed in the following steps.
Reinstalling the daily version
To upgrade from the stable version to the daily version, or reinstall the daily version, follow the instructions below.
You have two possibilities:
- Either erase the previous application and re-install the new one (the preferred choice).
- Or replace the existing files with the new ones, which lets you keep the launcher that you might have set up (the preferred choice for Linux and Windows).
In the first situation, erase the previous Ancestris application and reinstall the new one.
In the second situation, follow the steps below:
- Quit Ancestris, if it is running
- Download the daily version from the Ancestris web site and install it as per the initial installation.
- In case you need to replace the files manually, go to the
ancestrisfolder of the previous installation and delete the following 5 foldersancestrisbinetcharnessplatform
- Replace them with the recently downloaded corresponding 5 folders included in the package or the compressed archive.
- Restart Ancestris as usual
In case some settings no longer work, or are not compatible with the new version, please refer to the User settings page if you want to manage them yourself.
When a new stable version is released and you use the daily version, we recommend that you reinstall the daily version and clean some technical directories in the user directory. See here.
Troubleshooting
In case the newly installed application does not launch or generates an exception (ClassNotFound, etc) or shows the wrong version number, the installation process probably went wrong or there is a conflict with the previous version or that you simply refreshed the daily version using the update menu in the application instead of downloading the new version from the Ancestris web site.
In this case, please uninstall and reinstall with a clean set of files and user settings.
- Uninstall the current version already installed
- Delete the application directory
- Erase the following folders from the user directrory
- .ancestris/trunk/var/cache
- .ancestris/trunk/modules
- .ancestris/trunk/update_tracking
- Reinstall Ancestris using a new downloaded file from the Ancestris web site
Update Ancestris
The Ancestris team constantly works on improving the Ancestris software.
All updates we make to the version you have are available to you automatically, and you do not have anything to do, whether you are using the Stable version or the Daily version.
Automatic updates
You will receive an automatic notification for updates to the version you currently use, each time you start Ancestris.
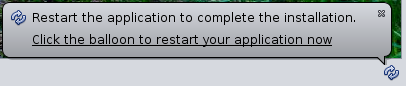
When Ancestris starts, a small window will open for a few seconds at the lower right corner, indicating the number of available updates. Just click the link in this window and follow the steps.
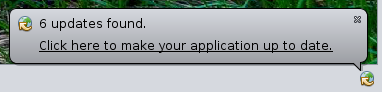
If you miss this window as it only appears for a few seconds, the little icon will remain available for you to click on it. The window above will reappear again.
![]()
If you click to get the updates, you will be asked to confirm to download the updates.
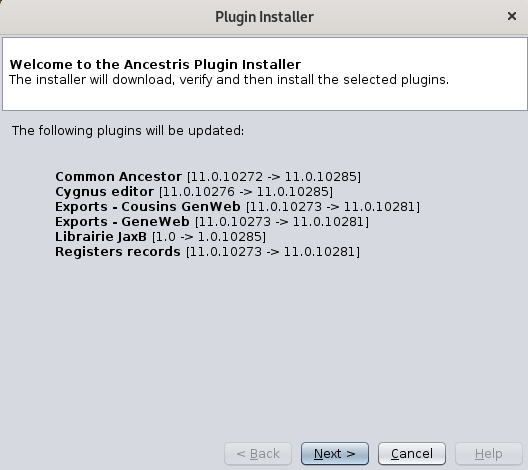
Click Next and Ancestris will download them. A progress bar will appear on the bottom right corner.

Ancestris then asks for your confirmation.
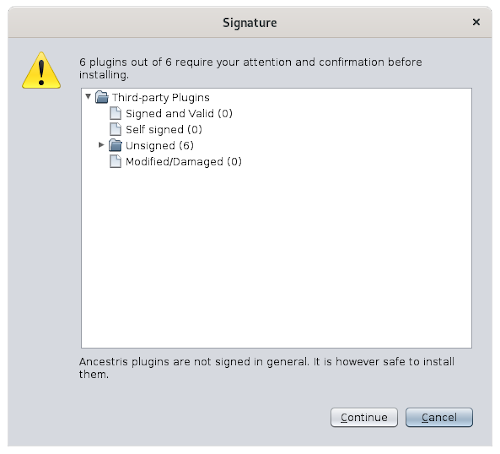
Click Continue and then, Ancestris will offer to restart. Click on the link. Ancestris will close and restart.
Proactive updates
It is also possible to retrieve updates at any time.
Just choose Options / Update Ancestris from the main menu bar.
The same assistant shown above will open.
As explained above, just follow the steps and Ancestris will offer to restart at the end.
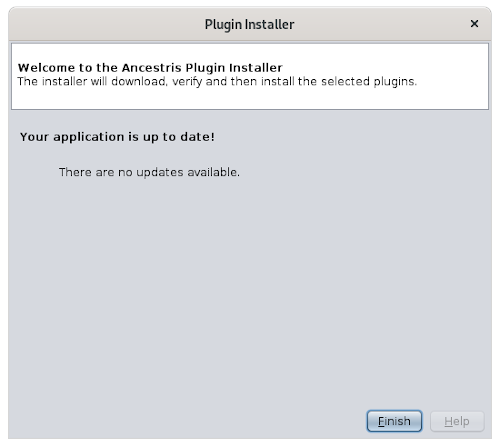
If no updates are available, the following window will appear.
Knowing more about the updates
If you use the Stable version
When we discover bugs that could impact your use of the Main version, we fix them and the update becomes available to you according to the instructions above.
These updates are very rare.
If you use the Daily version
Regarding the daily version, updates happen almost daily !
Minor updates
Most of the time, these updates are evolutions or new functionality.
These updates are available to you and happen on a regular basis.
You can benefit from them according to the description above.
That's it.
Structural updates - same version
On rare occasions, certain Ancestris updates of the Daily version happen in the core platform of Ancestris.
These changes can be simple menu translations or something major. For instance when we upgrade the underlying Netbeans platform on which Ancestris sits, or when we upgrade the stable version.
The Ancestris team will know when that happens, and will notify you through the forum or the discussion list and in the Recent updates panel of the Welcome window of Ancestris.
For instance, the image below shows an update of version 11 that occurred on June 2nd, 2020.
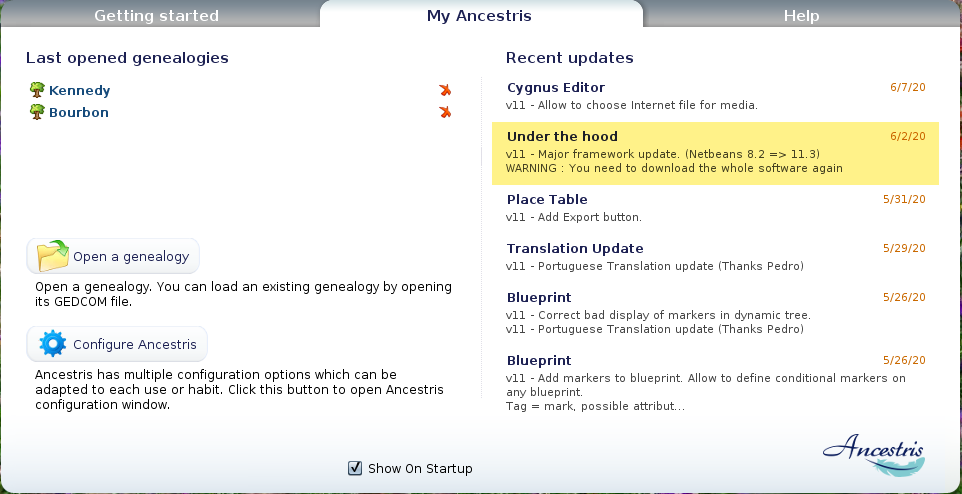
As usual, these updates will be available to you through the Automatic updates described above.
However, if you only apply these updates automatically, it will not reinstall the whole software. Therefore, either the new evolution will still not be available to you (e.g. menu translations), or maybe you will experience some major dysfunctions. Ancestris might just not work anymore.
Do not worry, you will notice if it happens and it will not alter your data.
To fully benefit from those changes, you will have to reinstall Ancestris.
Please follow the reinstallation instructions in this case.
Structural updates - change of version
In the specific situation where a new stable version is released and you use the Daily version, we recommend two actions from you.
- Uninstall and reinstall the Daily version
- Erase the following folders from the user directrory
- .ancestris/trunk/var/cache
- .ancestris/trunk/modules
- .ancestris/trunk/update_tracking
Indeed, in an upgrade, the Daily version becomes the Stable version and a new Daily version is created.
For instance, if the Stable version was version 12 and the Daily version was version 13, what will happen is the following:
- The Daily version is "frozen" and becomes the new stable version. Hence the Stable version would be now version 13.
- A new version 14 is created and is called the Daily version.
As a result, at the time of the upgrade, the automatic refresh will turn your version 13 into version 14 as shown in the About window of Ancestris after the refresh, but the window title of Ancestris will remain as Version 13 because this title is part of the core, which is only refreshed via a reinstallation.
Additionally, the cache, modules and update_tracking directories in the user directory store the status of the extensions. They might change from one version to the next hence the need to clean this status by erasing these directories.
Step-by-step installation on macOS
This page documents a detailed step-by-step installation of Ancestris on a macOS system.
We will show an example that occurred on March 2024, of the installation of an Ancestris version on macOS Sonoma.

Installation of Java
1. From the macOS desktop...

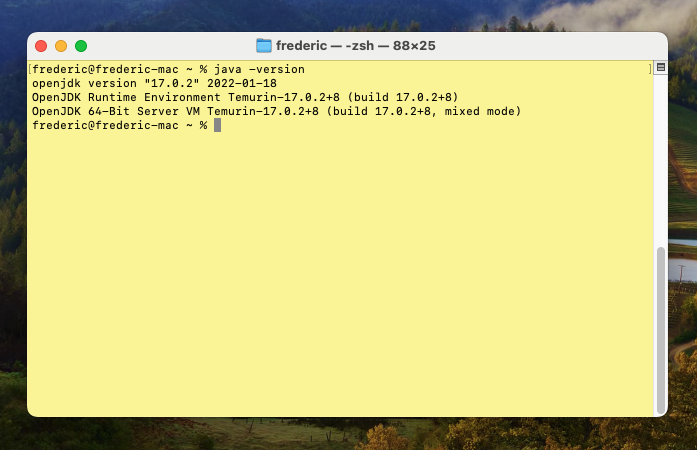
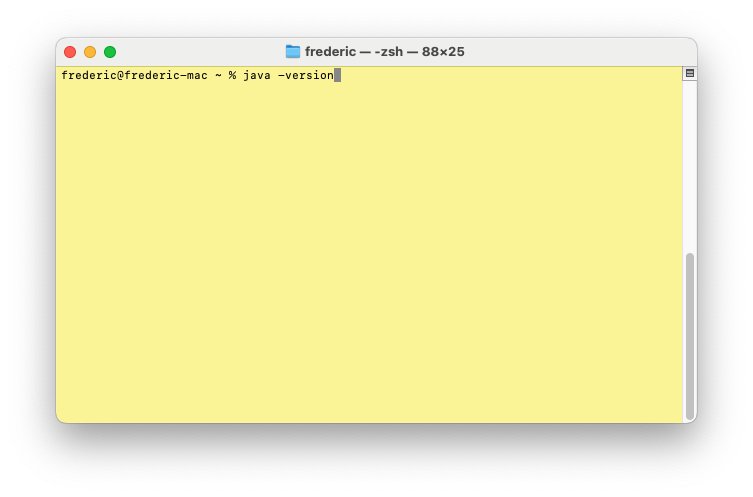
2. Open a terminal and type "java -version" to check if Java is already installed or not.
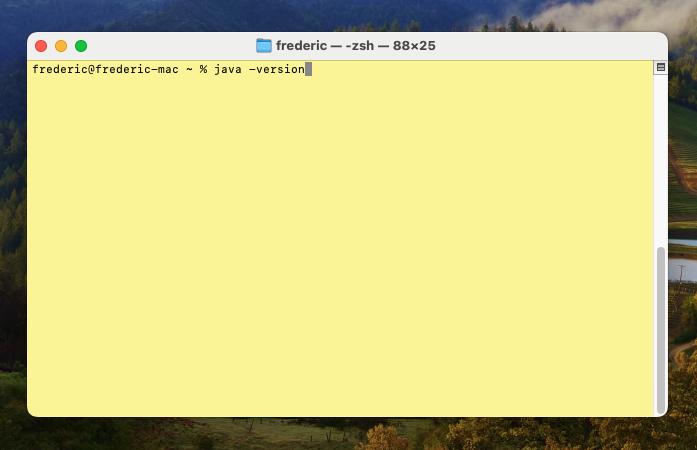
If java is installed, the response will indicate that Java is found and provide the version number. Here version 17 is installed.
Refer to the Version Compatibility table to check if a compatible version of Java is installed depending on the Ancestris version you chose to install.
In this case, all good, jump to step 5 to install Ancestris.
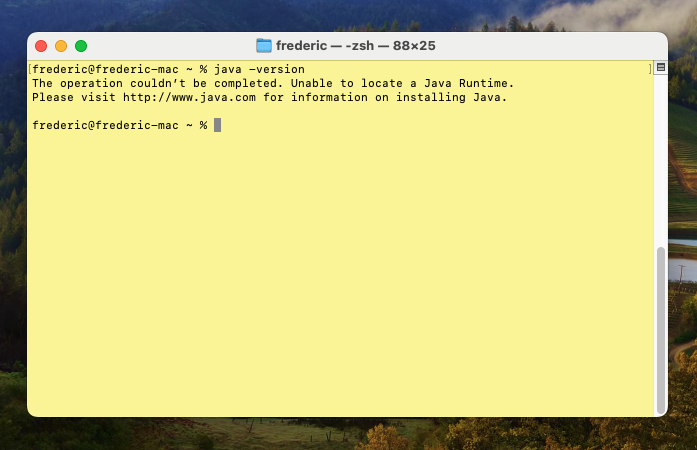
Otherwise, if Java is not installed, the response will indicate that Java cannot be located.
So install it by following these next steps.
3. Install Java by going to the Adoptium web site.
Here Adoptium suggests to install the LTS (Long Term Support) release Java 21 for macOS.
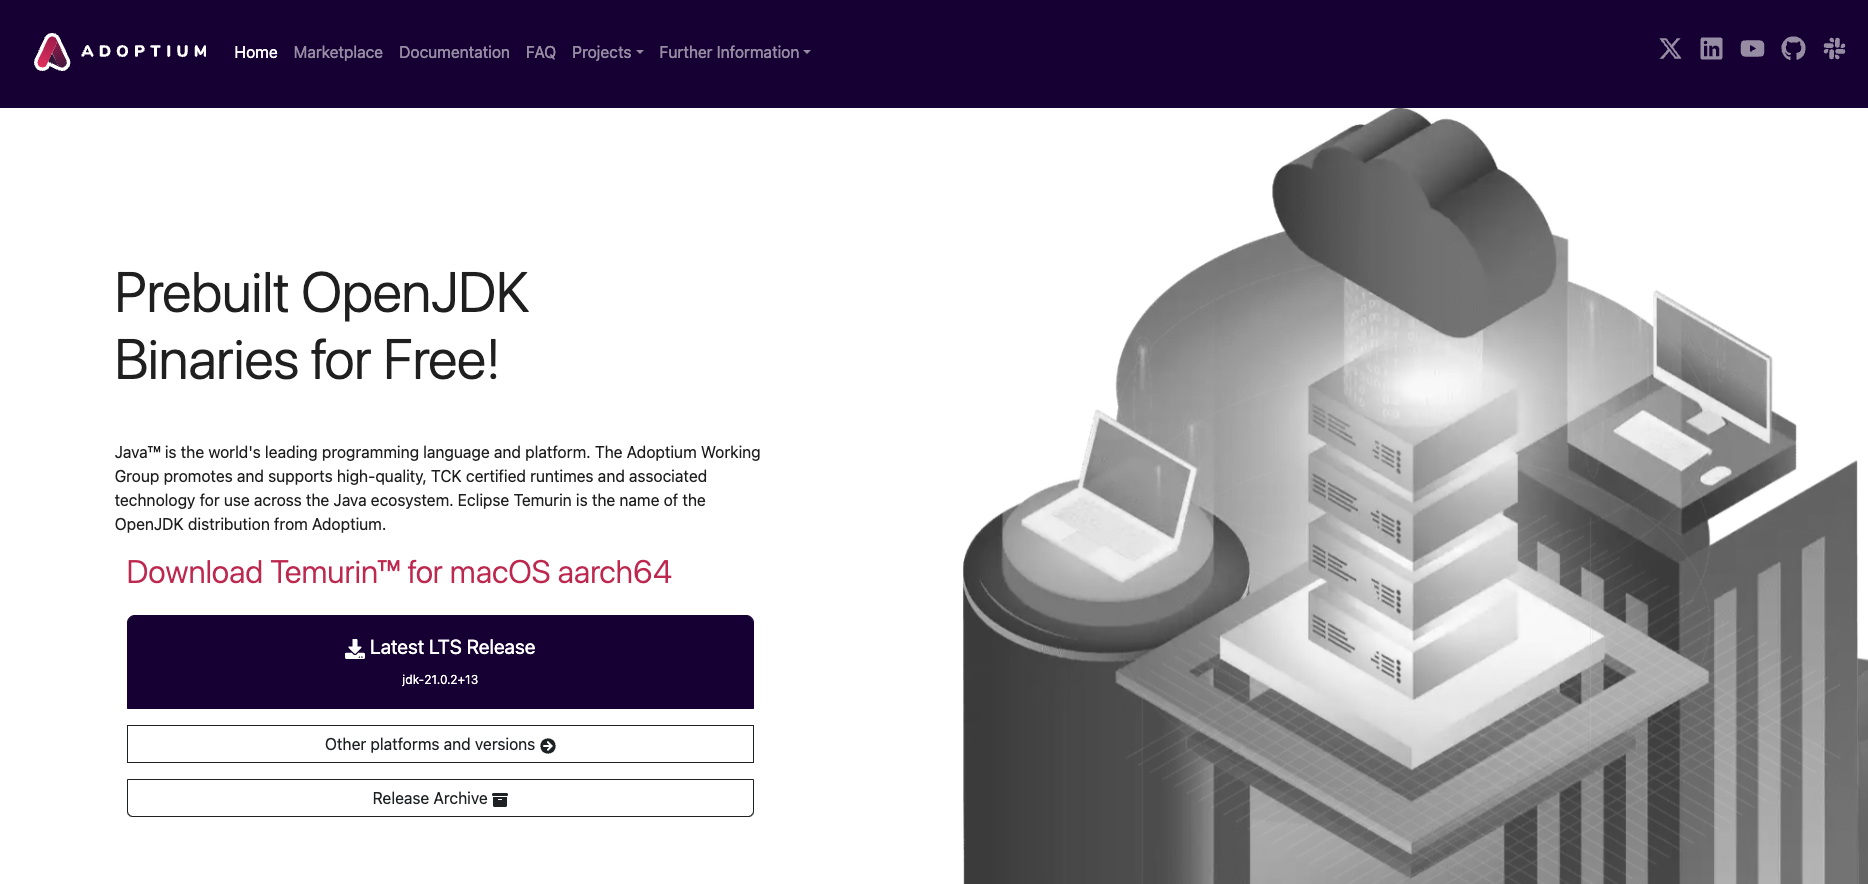
Click the "Latest LTS Release" button. You should see this page now.
Note: If you want to install another version, click the button "Other platforms and versions".
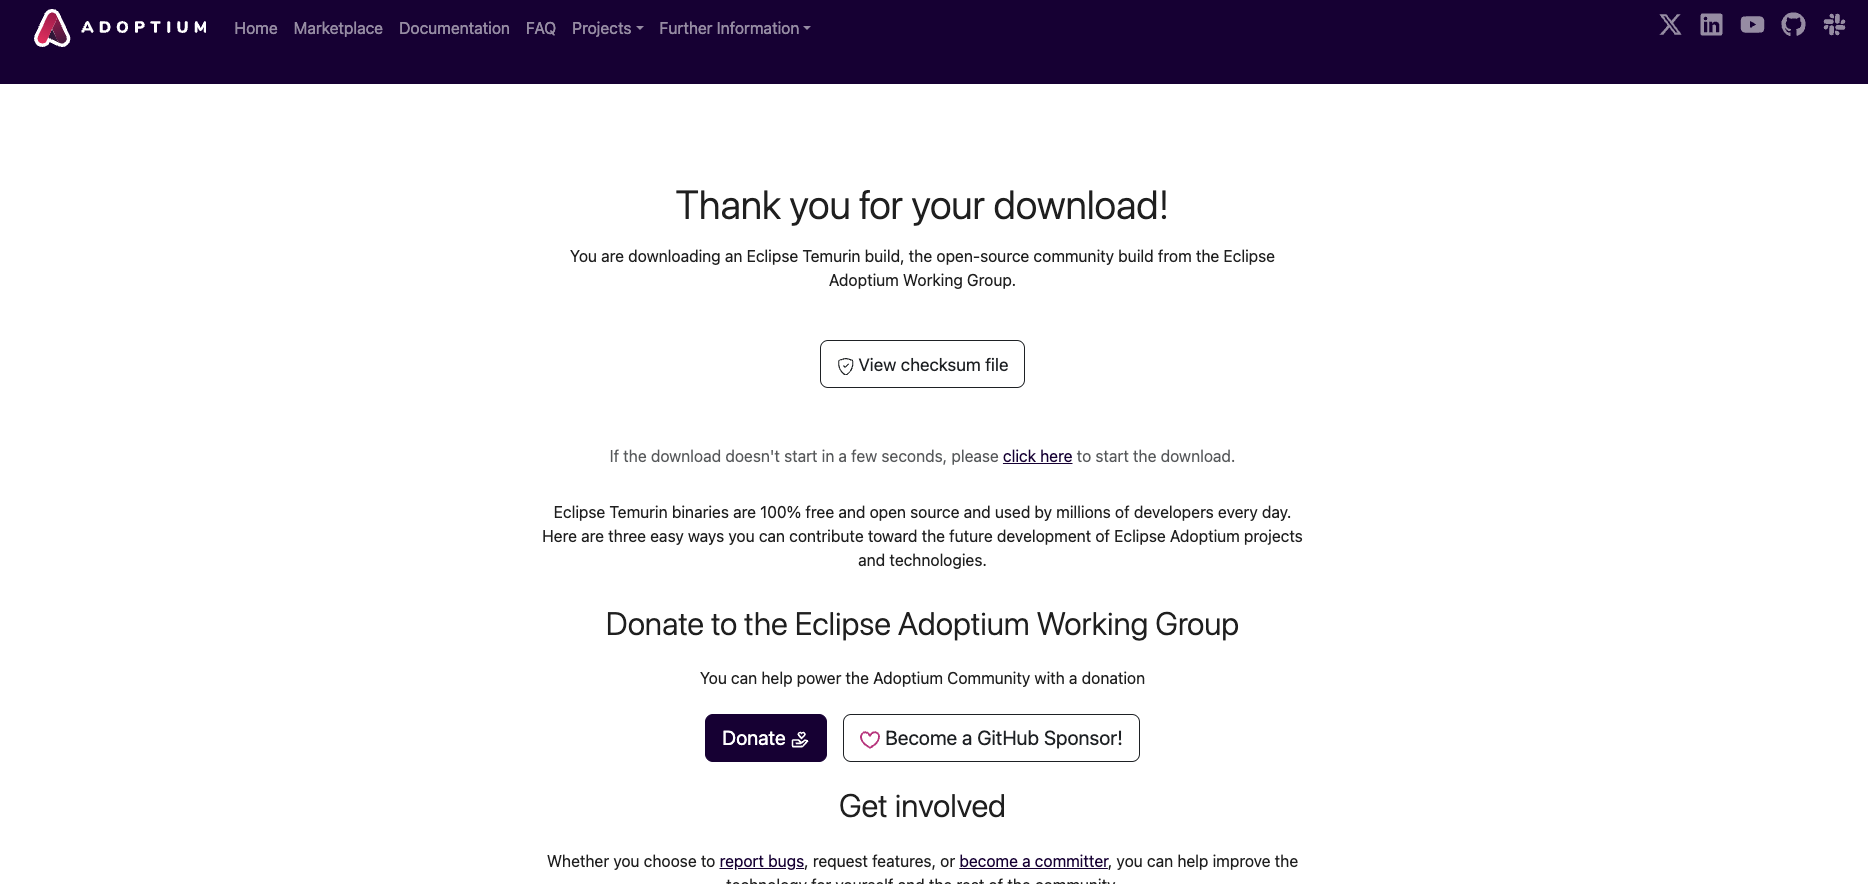
Downloading has started... Click the download round button on your browser and wait.
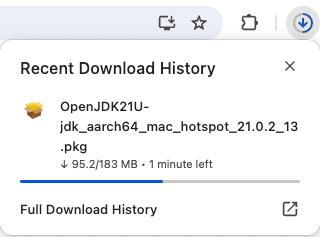
After a short moment, downloading is completed.
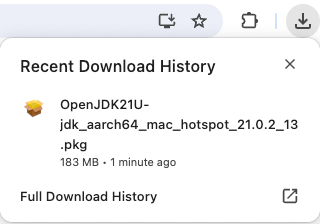
Launch the JDK package from this download popup. You should see this installation window.
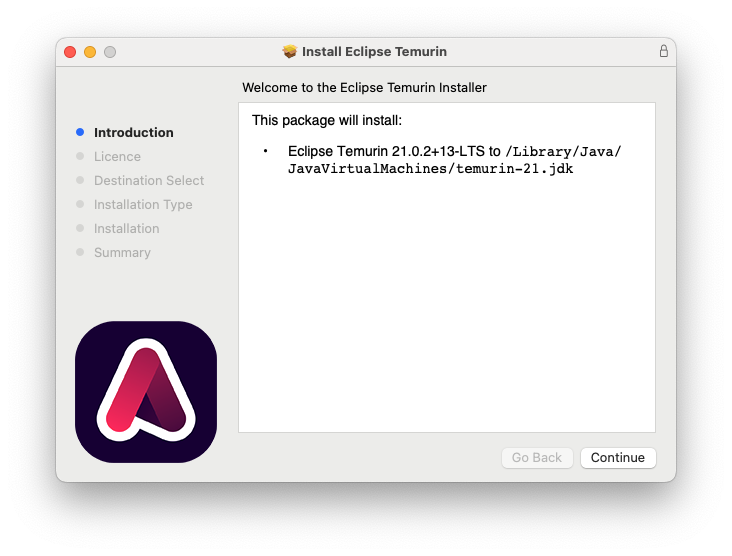
Click Continue.
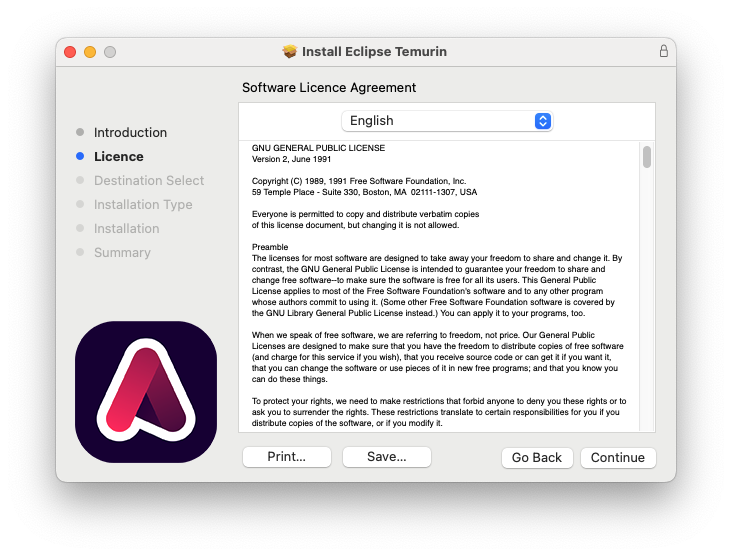
Click Continue.
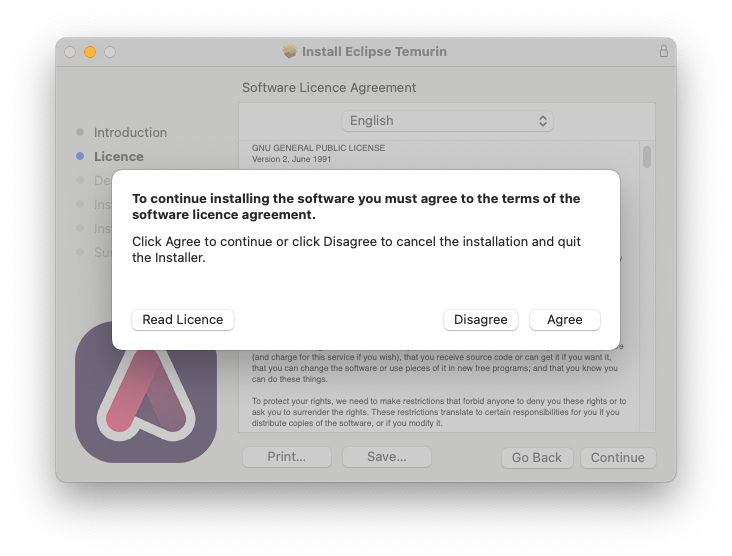
Click Agree.
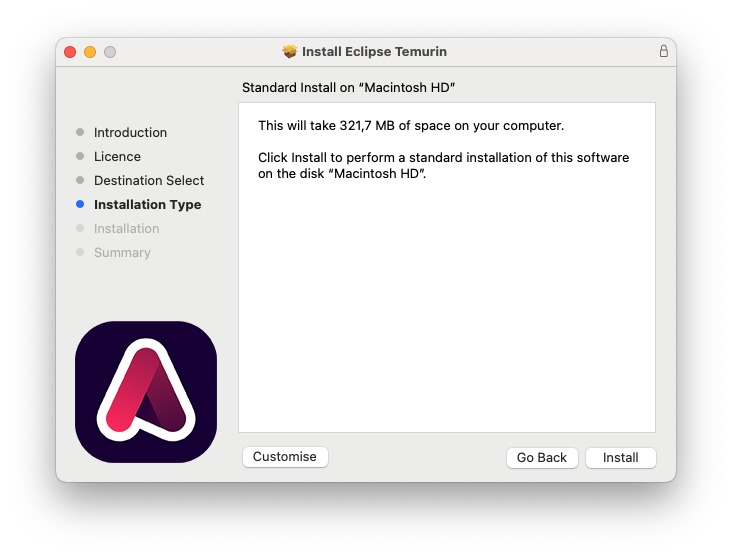
Click Install.
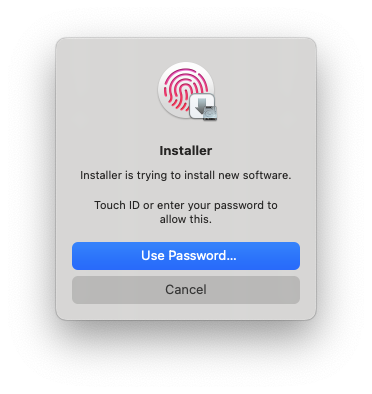
Validate with your fingerprint or provide your Mac password.

The installation starts.
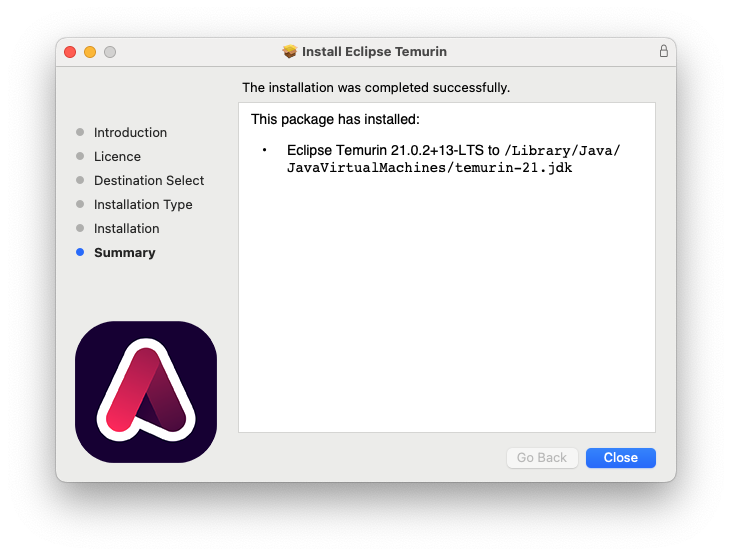
Installation is completed. It tells you where it has been installed. Click Close.
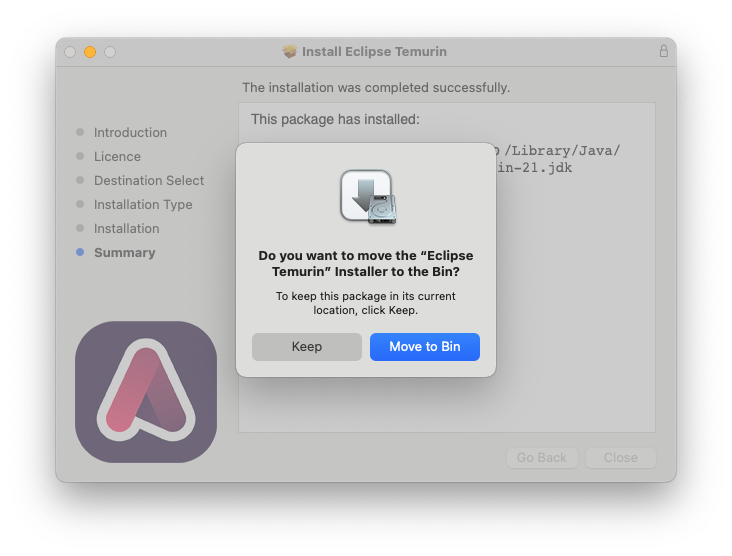
Finally, you are asked to Keep or Move the installation package to the bin. Do as you wish here.
4. Check that Java now shows up in the Terminal window.
Type "Java -version".
The following result should appear, indicating Java 21 is installed.
At the time of doing this installation, this was a Java version compatible with the available Ancestris version at the time.

You are now done with the Java installation. Let's install Ancestris now.
Installation of Ancestris
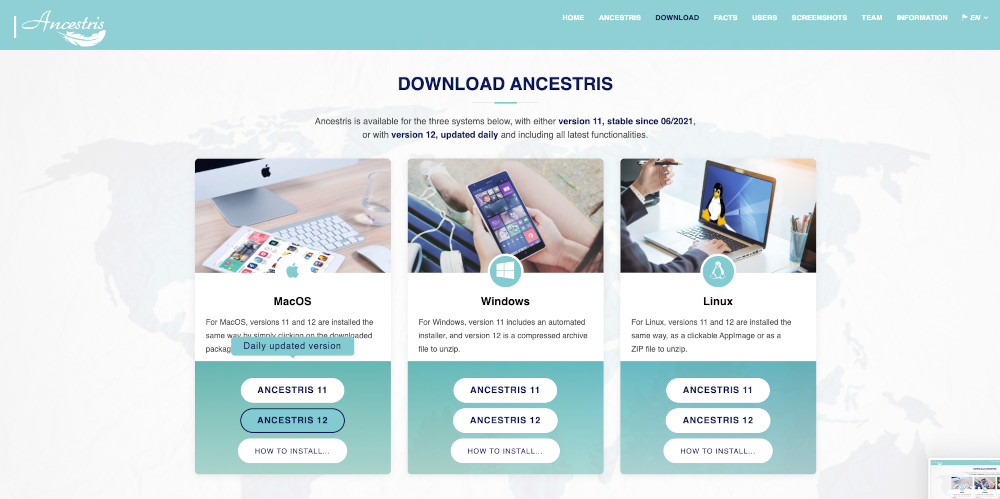
5. Go to the https://www.ancestris.org web site


You are taken to the Download section of the web site.

Click the Ancestris button that corresponds to the version you want under the macOS column.
Download starts. Click the Download round button of your browser to see the progress bar and wait.
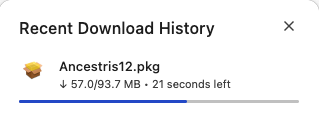
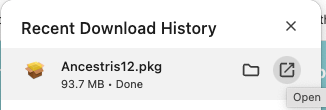
When completed, you should see the Ancestris package is approximately 94 MB.
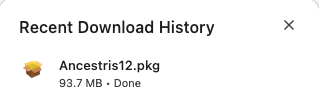
Launch it from this popup window by clicking the little "Open" icon.
The Ancestris installation window should appear.
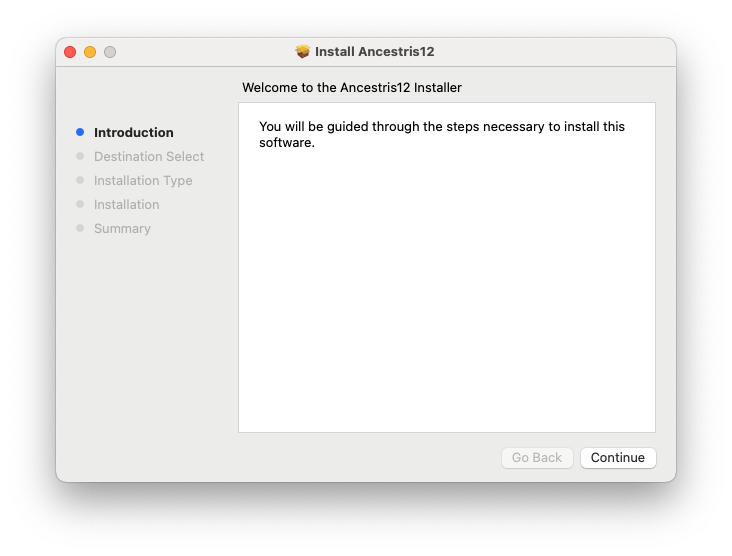
Click Continue.

Click Install. Confirm with your fingerprint or provide your Mac password.
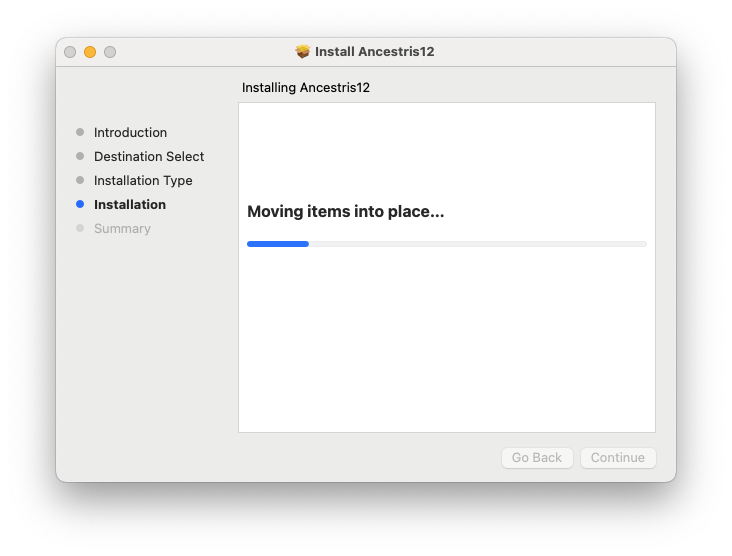
Installation proceeds...
 The installer asks for your permission to put the files on your computer. Press Allow.
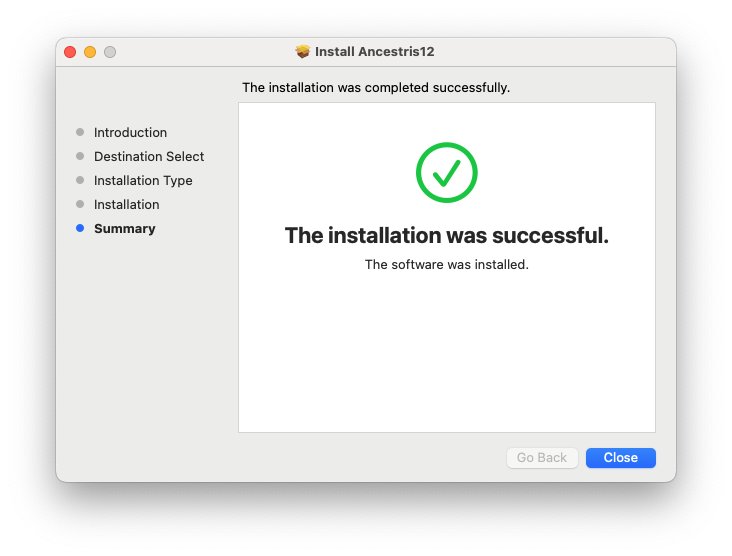
The installation completes quickly. Press Close.
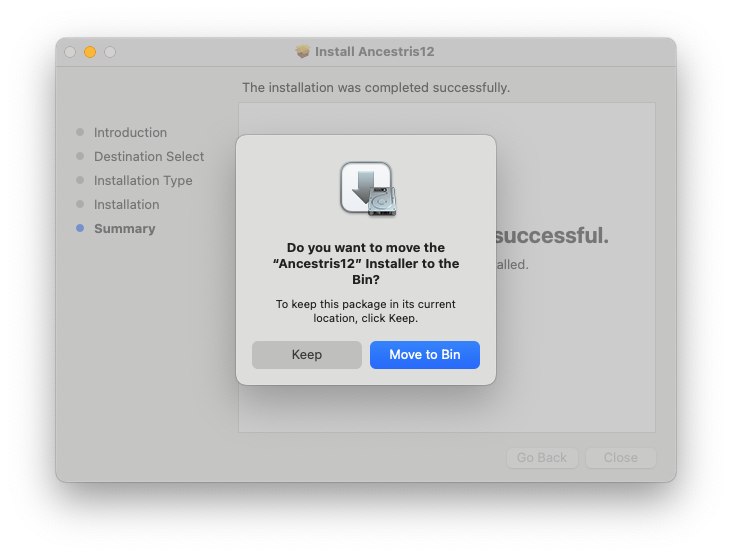
Finally, you are asked to Keep or Move the installation package to the bin. Do as you wish here.
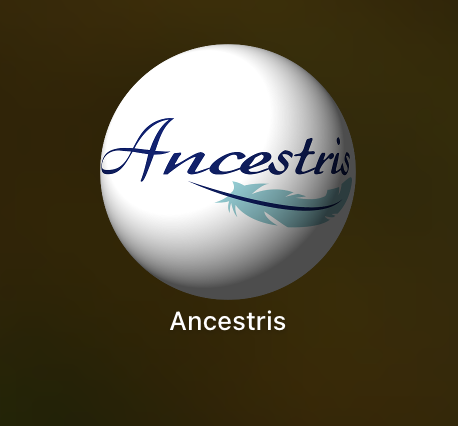
6. Launch Ancestris from the Application launchpad screen.
In your application Launchpad screen, Ancestris should appear among the other applications. Launch it.
Ancestris starts.

The main Ancestris window then appears. You are done with the installation.
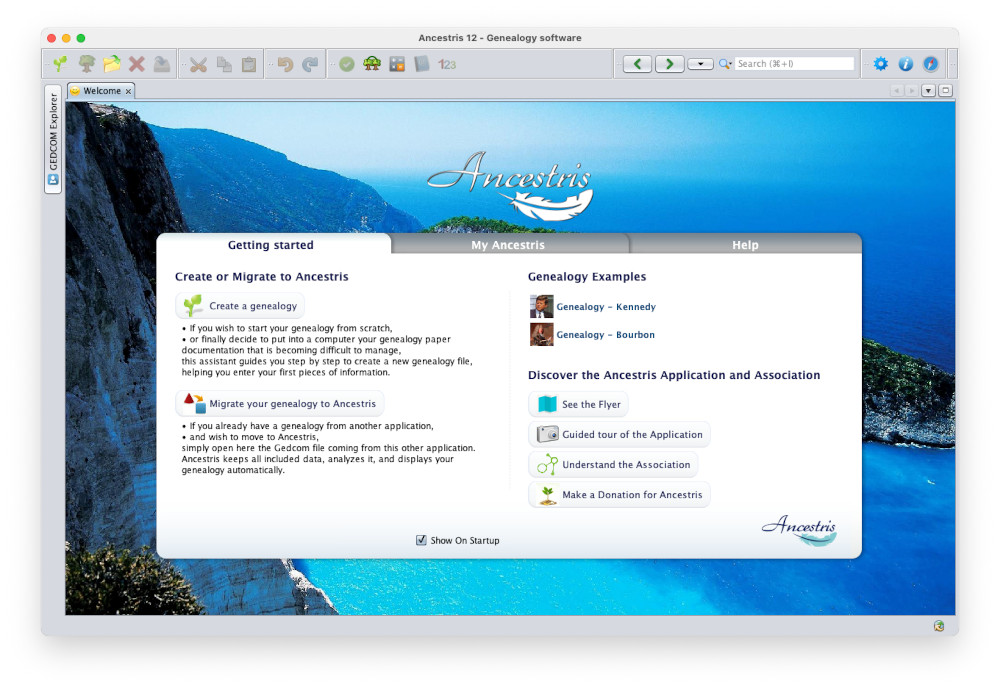
The language of the interface should automatically be set to your system language.
Congratulations.
Special note for users using macOS versions prior to 10.14.4
If you cannot upgrade your macOS version to the required version, you will need to launch Ancestris manually from the Ancestris script itself located here: /Applications/Ancestris.app/Contents/Resources/ancestris/bin/ancestris
If you use the manual way of launching Ancestris, you will not be able to write nor read files located underneath the Documents, Desktop and Downloads folders as per Apple security restrictions even though Ancestris is signed and notarized using the Apple platform. As an alternative, you will be able to store your files under /Public.
There are two ways to launch Ancestris manually.
First make sure you install Java and Ancestris as per the instructions in this page. Then use one of the following two options.
From the Finder
- Open the finder
- Go to /Application
- Locate the Ancestris.app application.
- Expand it. You will see the Contents folder.
- Go to Resources
- Go to ancestris.
- Go to bin. You should see the "ancestris" file.
- Click on it.
- A terminal window opens and Ancestris is launched.
From a Terminal
- Open a terminal
- Type
cd /Applications/Ancestris.app/Contents/Resources/ancestris/binto go to thebindirectory. ("bin" stands for binary files) - Type
./ancestris - Ancestris should launch. If not, please send us, via the Forum or the Support email, the text returned and displayed in the terminal.
Troubleshooting
If after having installed Java and launched Ancestris, nothing happens, please open Ancestris manually as described above in the From a Terminal section.
This runs the script contained in the bin folder.
The terminal window shows the script execution. If the error is not helping, copy the content of the Terminal window to a file and send it to the Forum or the Support email for assistance.
Special note for users with 2025 Mac Studio running Sequoia 15.7.2
A user has reported to us that if after a successful installation and a start of Ancestris you get the error message that the program is "broken", try the following.
- Manually delete Ancestris from the applications folder. As near as I can figure, the new installation either didn't overwrite the old version or the part that the OS was detecting as "broken" wasn't being replaced with the new version.
- As soon as I deleted it out and re-installed, it worked fine.
Step-by-step installation of the stable version on Windows
This page shows step-by-step how to install Ancestris stable on a Windows system.
Foreword 1: the installer automatically installs Java. See the version compatibility page for more information aboàut the versions.
Foreword 2 : if you have already installed a previous stable version:
- Uninstall it
- Unintall all installed Java versions
- Run the installer of the new stable version
Install Ancestris stable version
Follow the instructions below.
1/4 - DownloadAncestris
- Go to https://www.ancestris.org
- Click on 'DOWNLOAD' in the menu
- Click on the Ancestris 13 button of the Windows panel.
- Downloading may take 3 to 4 minutes as it is about 131 Mb.
If your browser is preventing you from downloading, you can bypass the download by following the procedure at the bottom of the page.
2/4 - Double-click on the downloaded file
- Ancestris 12 has a setup wizard for Windows. The downloaded file is
Ancestris13Setup.exeand its size is 131Mb.
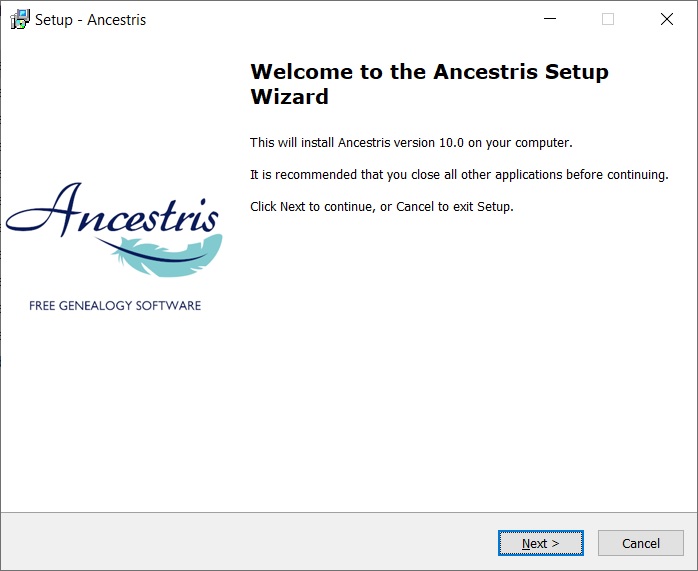
- Click on Next
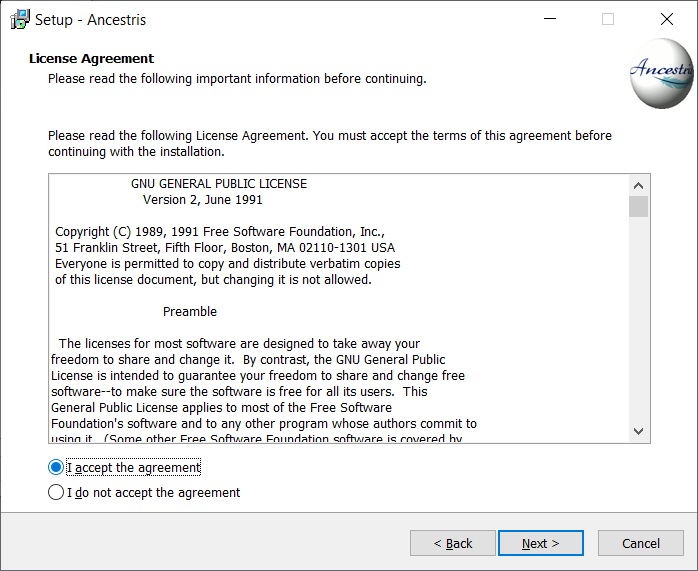
- Accept the agreement then click on Next
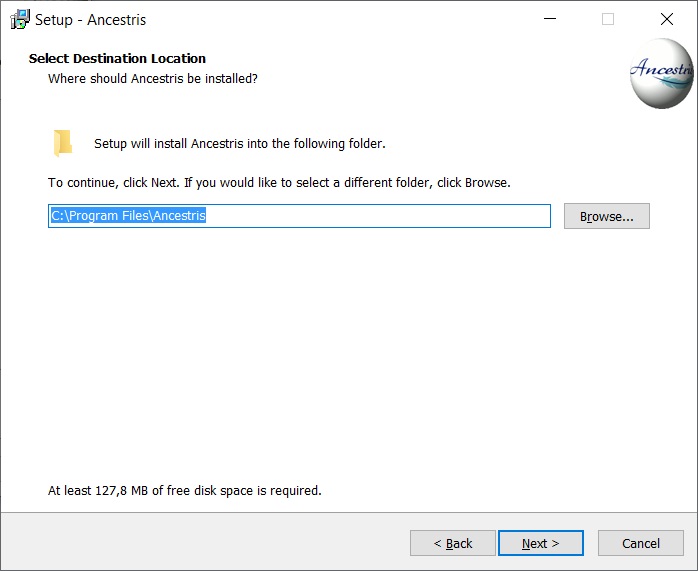
- Choose an install path.
The path shouldn't have any accent not special caracters.
- Then click on Next
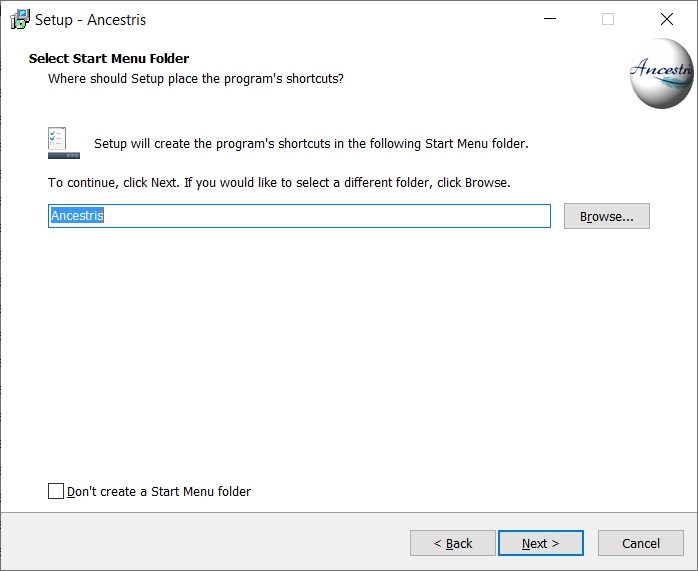
- Define a name for the short-cut in "Start" Menu.
- You can choose not to create any short-cut with the check-box on the bottom of the screen.
- Then click on Next

- Check the box to create a short-cut on the desktop.
- Then click on Next
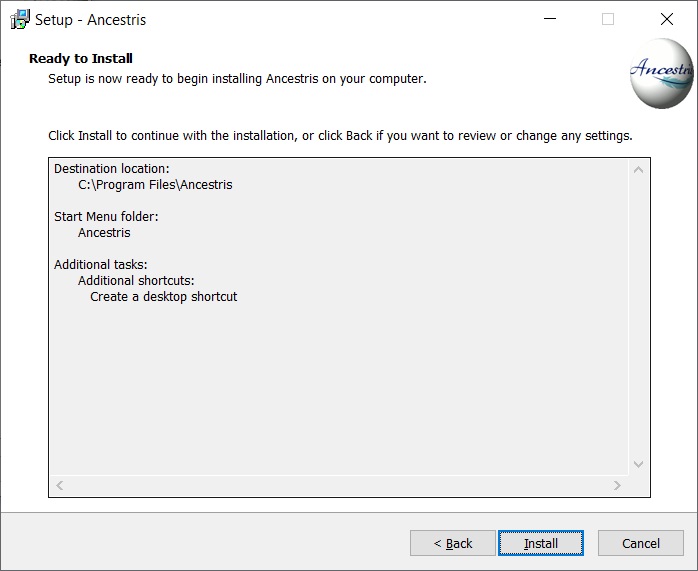
- Click on Install
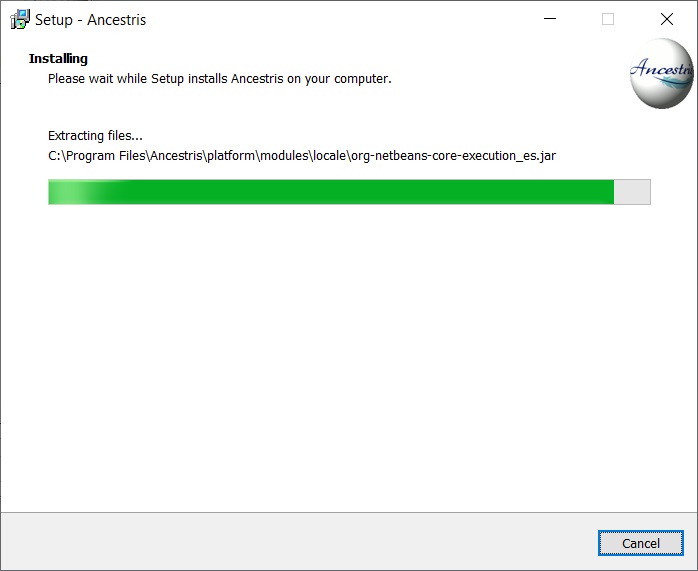
- The software is installed on your computer.

- You can launch directly the application with the "Launch Ancestris" check-box
3/4 - Click the short-cut and Ancestris then starts.

4/4 -The Welcome page then appears. You are now ready to use Ancestris.
Appendix : Unblock downloading with Edge or Chrome
1. Click on the three dots :
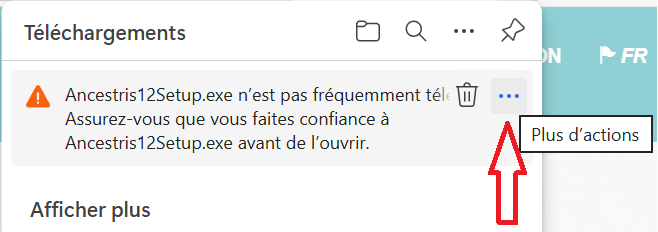
2. Choose "Keep"
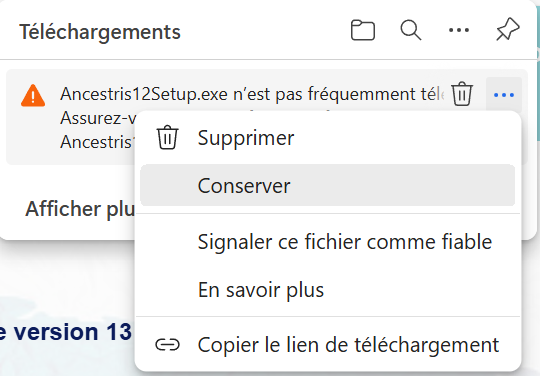
You can also click on "Report this file as safe" to help us to remove this alert.
3. Click on the arrow beside the "Delete" button and select "Keep anyway"
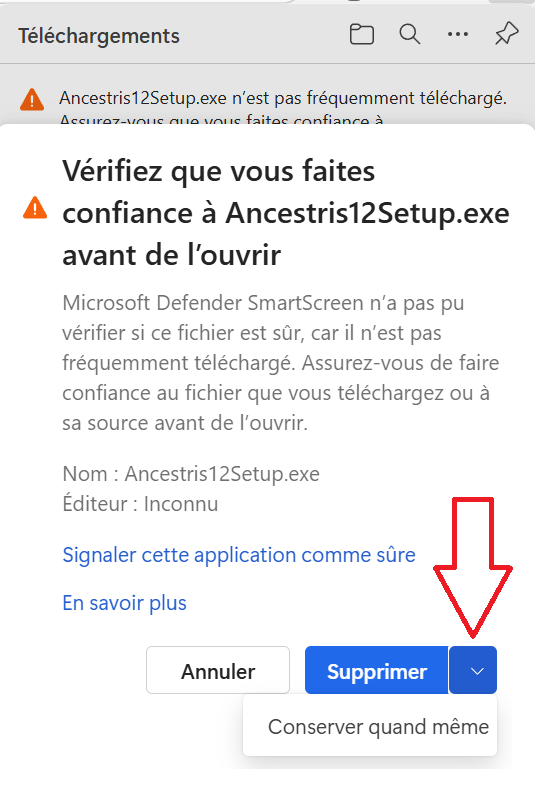
4. You can use the downloaded file and install Ancestris.
Step-by-step installation of the daily version on Windows
This page shows step-by-step how to install Ancestris on a Windows system.
The sections below are independent and do not all need to be done.
Screens shown might look different from those of the current Ancestris web site or the current Ancestris software version.
Knowing which Java version you use
Command prompt
Alternatively, these steps let you identify which version of Java is running on your system.
1 - Open a Windows PowerShell window and enter CMD or open a Command Prompt window.
2 - Type java -version at the prompt. You will obtain a display as below, which shows that Java Version 8 (aka 1.8) 64-Bit is installed. Otherwise, it means java is not installed. Follow these instructions to install it.
java version "1.8.0_221"
Java(TM) SE Runtime Environment (build 1.8.0_221-b11)
Java HotSpot(TM) 64-Bit Server VM (build 25.221-b11, mixed mode)If it shows "64 Bit", you have Java 64-Bit installed and you will be able to run ancestris64.exe to launch Ancestris
If it does not show 64-Bit, you have installed Java 32-Bit and you will not be able to launch Ancestris with ancestris64.exe. It will not find Java. You will need to launch Ancestris with ancestris.exe.
3 - Type exit once or twice to close the command window.
Install Ancestris daily version
Follow the instructions below from your Windows system.
1/6 - Download Ancestris
- Go to https://www.ancestris.org
- Click on 'DOWNLOAD' in the Menu
- Then click on the ANCESTRIS 14 button of the Windows panel.
- Downloading may take 2 to 3 minutes
2/6 - Extract the Ancestris file
- Ancestris does not need to be installed as it runs directly from its
.exefile. - So right-click the downloaded
ancestris-latest.zipfile, choose 'Extract All' and select a destination folder where the.exefile can run. - On Windows 7, unzip into the
C:\Program Filesfolder otherwise Ancestris won't run.

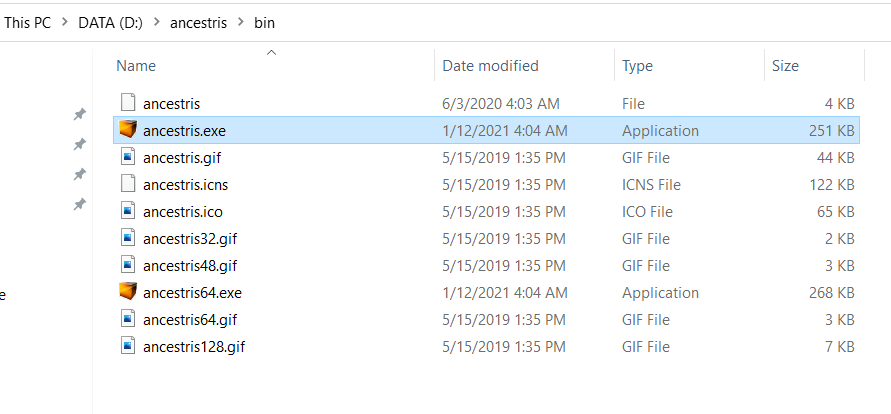
3/6 - Check the Ancestris file to run
- In the destination folder, open the
ancestrisfolder and then thebinfolder; there theancestris64.exefile will run Ancestris on a 64-bit system, while theancestris.exefile will run it on a 32-bit system.
4/6 - Add an Ancestris shortcut
- Right-click on the
ancestris64.exeorancestris.exefile and choose 'Pin to Start' or 'Pin to taskbar' to add a shortcut to the Start menu or the Taskbar.
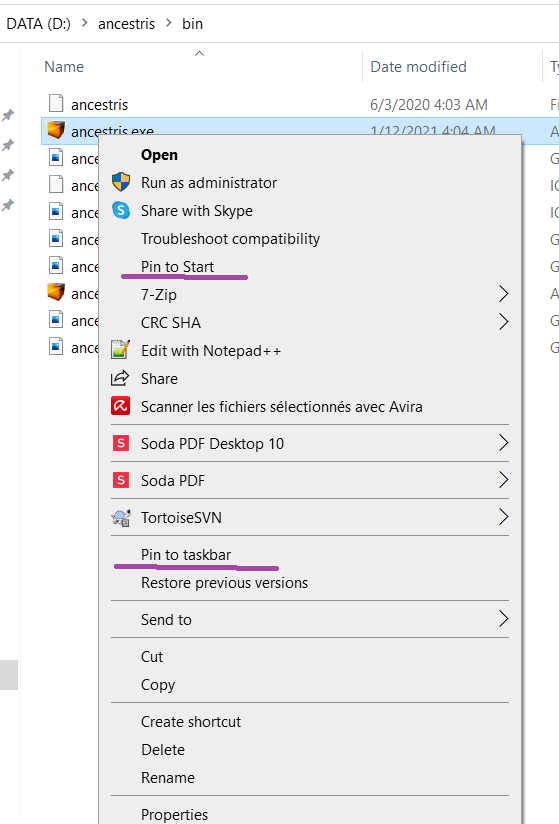
- Then set the icon of the resulting Ancestris shortcut. For that, you need to right-click on the shortcut and replace the icon with the
ancestris.giffile.
5/6 - Click the shortcut and Ancestris then starts
6/6 - The Welcome page then appears. You are now ready to use Ancestris.
If Ancestris does not start, it might be related to a Java version issue. You may have to swap the Java version.
Please follow these instructions.
Step-by-step installation on Linux
Installation with AppImage
Download the AppImage file from Ancestris web site hovering the mouse on the Ancestris Stable or Ancestris Daily button

Go to the directory where the file was downloaded and move it to a directory where you want to store the Ancestris program

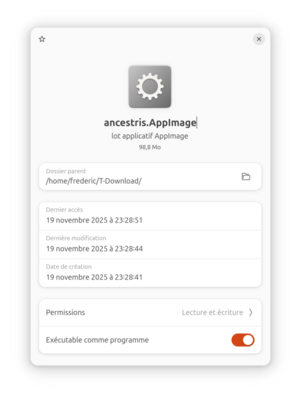
Make sure the file is executable by right clicking on it and choosing Properties
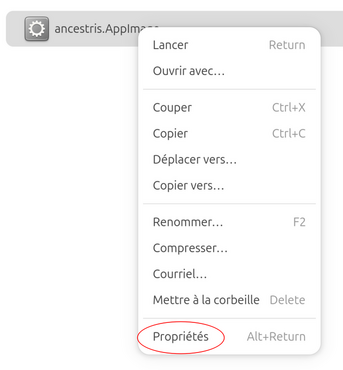
Make the file executable
Double click on it. A menu appears if you install this file for the first time. Choose either to lanch Ancestris or to Install it in the Launch bar.
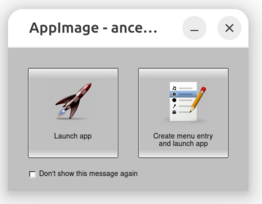
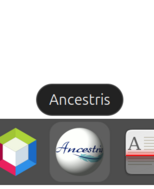
An 'Ancestris' menu button appears in the launch bar and Ancestris is launched.
If the Ancestris launcher was already present in the launch bar, the launcher will be replaced.
Installation with the ZIP file
- Dowload the ZIP file from the website similarly to the the situation described above
- Move the file to the directory of your choice
- Unzip the file
- Install a launcher: this is a .desktop file in a directory similar to ~/.local/share/applications that look like this:
[Desktop Entry]
Type=Application
Name=Ancestris
Icon=ancestris.png
Exec="~/<directory path to ancestris>/ancestris/bin/ancestris" %U
Categories=Office;Utility;- Run nancestris either using this launcher or by clicking ion the 'bin/ancestris' script
As you may have noticed, using the AppImage file is much simpler and using the ZIP file should only be used to personlize the launcher or have several Ancestris version on your computer.
Uninstallation
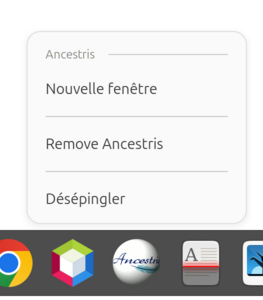
If you installed via AppImage
Right clic on the Ancestris launcher and choose Remove Ancestris.
If you installed by unpacking the ZIP file
Just delete the ancestris folder.
Troubleshooting
If double-clicking on the AppImage file does not launch it, run it manually from a Terminal window.
$ ./Ancestris13.AppImageThe response should help you identify the problem.
Possible causes:
- File is not executable
- libfuse2 library is missing
Java installation
Ancestris needs Java. Check the Versions compatibility page.
If Ancestris does not start, or shows the Ancestris splash screen and stops, it is most generally related to an issue with the Java installation. Either Java is not installed or Ancestris does not find it or finds an incompatible version or finds a corrupted version.
The following sections offer a step-by-step check to ensure Ancestris is using a valid Java version.
General principle
- Ancestris works with all Java versions listed in the Compatibility page.
- Ancestris has been tested with several versions which are LTS (Long Term Support) versions.
- We do not systematically test Ancestris with Short Term versions. They are quickly obsolete and cannot be downloaded after 18 months but some users regularly confirm that Ancestris works well with all java versions.
- Ancestris is compiled with a former long-term version for better compatibility with most users.
- If a functioning version of Java is available on your system, Ancestris will find it without having to configure anything.
- Otherwise, you can install Java from any vendor. Our users find it easier to download it from Adoptium.
- To know whether Java is installed on your system, follow these instructions.
- In case Ancestris does not start although Java is installed, please check the Troubleshooting section.
- You can have multiple versions of Java installed on your system. To tell Ancestris which one to use, you will need to
- either update the Ancestris configuration file. For this, follow these instructions.
- or change the default Java version. For this, follow these instructions.
- either update the Ancestris configuration file. For this, follow these instructions.
Install Java
A simple way to get an official Java version is to get it from Adoptium.net
- On macOS and Windows, Adoptium provides installable packages that you simply need to run.
- On Linux, it may be easier to install it via the command line.
For example, on Ubuntu, you would use the command ‘sudo apt install openjdk-21-jdk’ to install version 21.
If Java is not installed or if you want the latest or a specific version of Java, just download it from the site above.
If you use Windows, when you install Java with Adoptium, install the registry keys Javasoft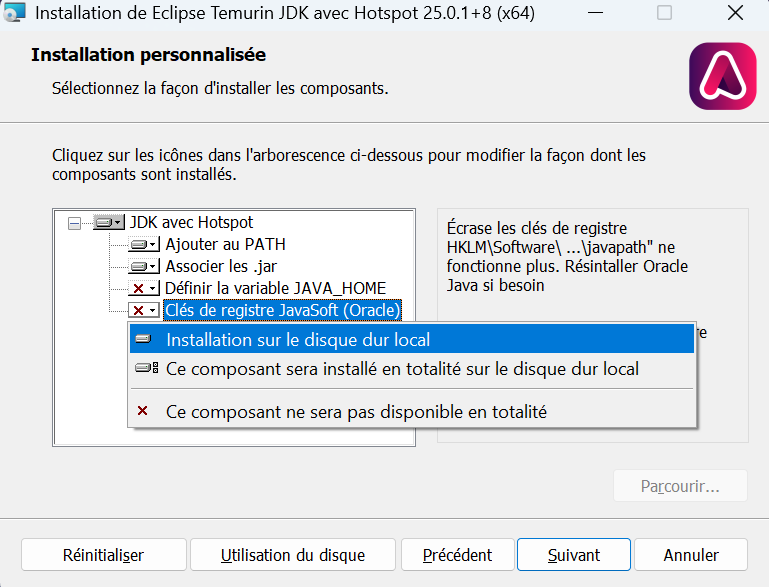
This allow to all software to detect Java.
If you use Linux, another easy way to install java is simply to type the following in a terminal: sudo apt install openjdk-17-jdk( replace the version number 17 by the version you want to install)
Identify if Java is already installed
If you don't know if Java is installed or which version is installed, open a command line terminal and type the command line:
java -version- If you see an error message in the terminal, then Java is not installed on your system. Ancestris cannot run. Please follow the Install section below to install Java.
- If you see something like this below where Java version is displayed, it means Java is installed with the indicated version. You may have several versions installed, but this one is the one Ancestris will find, unless you configured Ancestris to do differently.
java version "1.8.0_251"
Java(TM) SE Runtime Environment (build 1.8.0_251-b08)
Java HotSpot(TM) 64-Bit Server VM (build 25.251-b08, mixed mode)According to the display above, we can see that the installed Java version set by default is version 1.8, aka version 8.
If you have a Java version installed as per the example above, and are happy to use this version, you may disregard the rest of this page.
Troubleshooting
If Java is installed and Ancestris does not start, either Ancestris does not find Java or finds an incompatible version or finds a corrupted version.
Whether only one version of Java or several versions are installed on your system, you will then need to check and potentially update the configuration file to tell Ancestris where to look for Java.
Rather than changing the Ancestris configuration file, and if several version of Java are available on your system, an alternative would be to change the default Java version.
- The default Java version is the one appearing when you type
java -versionlike indicated in the section above. This is the one Ancestris will use if an Ancestris configuration file does not exist or does not include the instruction of where to find Java.
If in doubt, please run Ancestris manually from a terminal window, and send us the trace that is displayed on the screen.
- Regardless of the OS you use, open a terminal window
- Go to the application directory called
ancestris/bin - Start Ancestris manually
- by typing
./ancestrisfrom macOS or Linux, - by typing
ancestris.exeorancestris64.exefrom Windows
- by typing
- The terminal window displays what it is doing
- Send us this display
Update the Ancestris configuration file
You only need to worry about what is detailed below if Java is installed and Ancestris does not start.
You need to update the Ancestris configuration file to tell where Ancestris should look for Java, if Ancestris does not seem to find it.
The principle is the following:
- If a configuration file exists which includes a jdkhome parameter indicating where to find java, Ancestris will use the corresponding java version
- Otherwise Ancestris will use the default Java version indicated in the section above
Ancestris uses two configuration files, both named ancestris.conf
1/ The first one is the Application Configuration file, which is part of the Application directory and it is created during the installation of Ancestris.
2/ The other one is the User Configuration file, which is part of your User directory, and created when you change some Preferences when using Ancestris.
The User Configuration file takes precedence over the Application Configuration file
So the configuration file to check and update is the User Configuration file if it exists, the Application Configuration file otherwise.
- If you are installing Ancestris, you will probably need to update the Application Configuration file.
- If you have already used Ancestris and want to change the java version, you will probably need to update the User Configuration file.
Chech here to know where the configuration file is depending on your system.
The path to Java in the configuration file
So open the configuration file with a regular text editor.
1. Check the line defining default_options
This line should look like this:
default_options="--branding ancestris -J-Xms96m -J-Xmx1g --laf javax.swing.plaf.nimbus.NimbusLookAndFeel"
If one of the options in this line includes --jdkhome="/path/to/java, make sure the path specified in this option is the path to the Java version you want to use.
If this line does not include a java path, locate jdkhome elsewhere.
2. Check the line defining jdkhome
If the line looks like jdkhome="/path/to/java", then make sure the path specified in this option is the path to the Java version you want to use.
If the line starts with "#", a comment markup, Ancestris will disregard as if it did not exist.
If Ancestris does not start, it could be that the jdkhome folder name is incorrectly spelt or points to an incorrect Java version.
Whatever your operating system is, if the default active Java version is different from the one to be used with Ancestris, you have to modify the jdkhome line like this:
jdkhome="/path/to/java"Case of macOS
For macOS, if for example Java 21 and Java 17 are installed on your Mac and you want to force the use of Java 17 for Ancestris, the complete manipulation to force the version of Java would be the following:
-
Edit the Ancestris User Configuration file if it exists:
- The file is
/Users/<yourname>/Library/Application Support/ancestris/<version or trunk>/etc/ancestris.conf. - Replace <your name> with the name you use on your Mac
- Replace <version or trunk> with the version number of Ancestris you use: the current stable and official version is a number: 11 for instance ; the daily version is called 'trunk'.
- To see the Library folder in the Finder, you need to press Command+J. It is hidden by default
- The file is
-
If the user configuration file does not exist, because you never used Ancestris before, edit the Ancestris Application Configuration file (if this is a first install)
/Applications/Ancestris.app/Contents/Resources/ancestris/etc/ancestris.conf -
Look for the line
#jdkhome="/path/to/java"and suppress the starting character # in order to uncomment the line so that Ancestris takes it into account. - Replace the value to the Java path you want to use, for instance temurin-17 here, so that the line reads:
jdkhome="/Library/Java/JavaVirtualMachines/temurin-17.jdk/Contents/Home"
- Save the modified ancestris.conf file and check that it has been saved correctly.
- Restart Ancestris.
Case of Windows and Linux
For Windows or Linux for example, if the java executable is /usr/java/jdk1.8.0_291-amd64/bin/java, then you must indicate
jdkhome="/usr/java/jdk1.8.0_291-amd64/"Note: you have to exclude /bin/java in the path description.
Change the default Java versions in case multiple versions are installed
If several versions are available on your systems and you need to swap Java versions so that Ancestris uses the default one, the swap procedure depends on your operative system.
Swap default version for macOS
To swap between different Java versions, open a Terminal window and follow the steps below.
In the following example, the instructions let you set Version 8 (aka 1.8) by default, without removing Java Version 10:
1/6 - Check which version of Java is set by default
java -version
echo $jdkhomeYou can see the java version you are running.
2/6 - Get a list of all installed versions on your system and check Version 8 or 11 is among them
/usr/libexec/java_home -VIf the version you want is not in the list, then install it as explained in this section.
If it is in the list, but not the one you had above, force the path to the java version with the following step.
3/6 - Type in the following 2 lines in the Terminal
echo 'export JAVA_HOME=`/usr/libexec/java_home -v 1.8`' >>~/.bash_profile
echo 'export jdkhome==`/usr/libexec/java_home -v 1.8`' >>~/.bash_profileThese two lines will add the command to set your default Java version in your personal profile. Here, we force version 1.8 (or 8). Replace with your java version.
The first line defines the default Java version for all programs (JAVA_HOME, in uppercase).
The second line defines the default Java version to use for Ancestris (jdkhome, lowercase).
4/6 - Close the Terminal
exit5/6 - Reopen a Terminal and check that the running Java is now the one you want (version 8 in our example)
java -version
echo $jdkhomeYou can now start Ancestris.
6/6 - Start Ancestris
When Ancestris starts, a Terminal window opens at the same time.
You can see in the title bar that version 8 of Java is being used by Ancestris.
Swap default version for Windows
You have to create a BAT file per Java version you wish to keep.
Use your favourite text editor to create those files, using the code below, and place them in a folder available from your PATH.
JAVA8.BAT
@echo off
echo Setting JAVA_HOME
set JAVA_HOME=C:\Program Files\Java\jdk1.8.0_12
echo setting PATH
set PATH=C:\Program Files\Java\jdk1.8.0_12\bin;%PATH%
echo Display java version
java -versionJAVA11.BAT
@echo off
echo Setting JAVA_HOME
set JAVA_HOME=C:\Program Files\Java\jdk1.11.0_11
echo setting PATH
set PATH=C:\Program Files\Java\jdk1.11.0_11\bin;%PATH%
echo Display java version
java -versionWhile creating these files, make sure you specify the correct name for the Java files for the lines JAVA_HOME, depending on your Java installation
When you decide to change the Java version, just run the corresponding BAT file: JAVA8 for version 1.8, or JAVA11 for version 11. The Java version at use will be shown on the terminal.
To check if the change is really in effect, type java -version on a console or check this page.
Swap default version for Linux
Type the following on a console :
sudo update-alternatives --config java
Select from the list the version needed.
To get help using this tool :
sudo update-alternatives -lLaunch settings
It is possible to personalise the launch settings of Ancestris.
In general, you should not need to set or modify them.
However, in some specific circumstances, you may want to tweak them a bit.
It is as simple as editing the line in the Ancestris configuration file. Please refer to the location of the configuration file page to know where it is located.
Set memory size for large genealogies
Ancestris works perfectly fine with genealogies of several dozens or thousands of individuals.
You can get Ancestris to work with several genealogies at the same time.
We recommend a 4 GB memory for very large genealogies.
Ancestris can open and manage a simple genealogy of 600,000 individuals.
For very large genealogies, we recommend that you change Ancestris's startup parameters to increase maximum memory size for Java.
- Parameter to change:
-J-Xmxto 8GB for instance.
default_options="-J-Xmx8g --laf Nimbus --branding ancestris --locale fr -J-Xms96m"We also recommend, if needed, to reboot your device and to only start Ancestris and nothing else, so that all memory available will be allocated to Ancestris.
Set default language
The default language can be set in Ancestris preferences.
It can also be initialised to a language of your choice using the launch setting.
- Parameter to change:
--localeto the 2-digit-language code. Example : "en".
default_options="-J-Xmx1g --laf Nimbus --branding ancestris --locale en -J-Xms96m"Set default look and feel
The default look and feel can be set in Ancestris preferences.
It can also be initialised to a look and feel of your choice using the launch setting.
- Parameter to change:
--lafto the look-and-feel name provided in Ancestris preferences.
default_options="-J-Xmx1g --laf Nimbus --branding ancestris --locale en -J-Xms96m"For the standard look and feel, remove the parameter from the line.
Set default icon size
In very rare circumstances, if you modify the default size of the fonts and icons on your computer or use a very large screen, Ancestris might display its icons in too small a size.
It is possible to increase the aspects of the icons with Ancestris using the following method but only with Java 11.
- Parameter to change:
-J-Dsun.java2d.uiScale=2
default_options="-J-Xmx1g --laf Nimbus --branding ancestris --locale en -J-Xms96m -J-Dsun.java2d.uiScale=2"Windows specific instructions
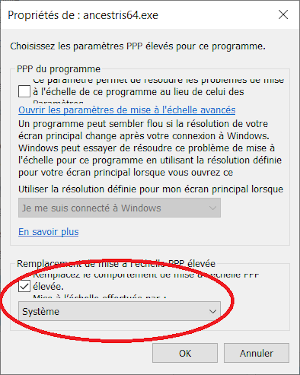
Another way to force icon size on Windows with Java version 8 is the following.
ancestris.exe or ancestris64.exe, select Properties and choose the Compatibility tab.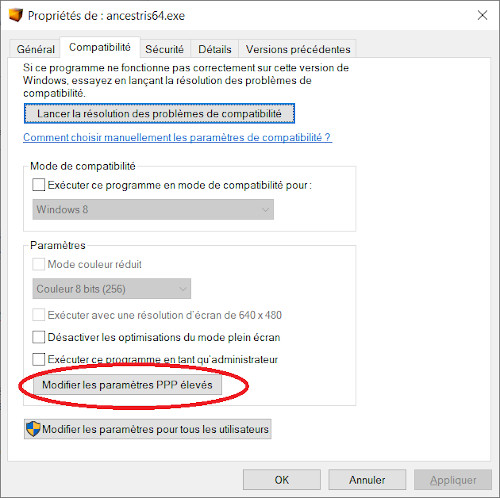
Software files and User settings files
There are two groups of files for running Ancestris.
- The software files run the application,
- The user settings files store user preferences.
You may lose the software files because you can always get them from the Ancestris website;
but you should backup you user settings files as they are specific to you.
Software files
Ancestris software files will be inside the ancestris folder used during the installation.
You can type whereis ancestris on a terminal on Linux, or locate ancestris on macOS, or dir ancestris /s /p on Windows to find out what that folder is.
This ancestris folder contains the following sub-folders.
ancestrisbinancestris: executable file to start Ancestris under macOS and Linuxancestris.exe: executable file to start Ancestris under Windowsancestris64.exe: executable file to start Ancestris under Windows with Java 64-bit architecture (recommended)ancestris.gif: Ancestris icon to use when creating an application launcher shortcut- other Ancestris icons
etc- ancestris.conf : application configuration file
harnessplatform
When you reinstall Ancestris, you simply replace those software files.
User settings files
The User directory
Ancestris user settings files are in the user directory.
You can see the location of the user directory on the About dialogue.
This dialogue can be accessed from the main menu / Help / About Ancestris or else by clicking on the About button  .
.
Example :
This user directory depends on your operating system.
- Windows :
C:\Users\[your name]\...\.ancestris\<version> - macOS :
${HOME}/Library/Application Support/ancestris/<version> - Linux :
~/.ancestris/<version>
Where <version> is the installed version number.
13: in this case, the stable version number. Check the Versions compatibility page to know which number is the Stable version.trunk: in this case, the daily version.
So the user directory, where the personalisation of Ancestris is located, is, according to your system:
- Windows :
- Stable version:
C:\Users\[your name]\...\.ancestris\13 - Daily version:
C:\Users\[your name]\...\.ancestris\trunk
- Stable version:
- macOS :
- Stable version:
${HOME}/Library/Application Support/ancestris/13 - Daily version:
${HOME}/Library/Application Support/ancestris/trunk
- Stable version:
- Linux :
- Stable version:
~/.ancestris/13 - Daily version:
~/.ancestris/trunk
- Stable version:
In case your have reinstalled Ancestris from a previous version, and if you want to continue using your previous personalisation, you just have to copy the user directory of the previous version to the user directory of the new version.
The User Configuration file and the log file
There are two especially important files in the user's folder for startup and diagnostic of eventual bugs.
- The configuration file :
<user's folder>/etc/ancestris.confdefines the launch settings. - The log file :
<user's folder>/ancestris/ancestris.logstores all warnings and error messages occurring while you use Ancestris.
Here are also located your preferences and customised templates.
- Your preferences :
<user's folder>/ancestris/config - Your personal templates :
<user's folder>/ancestris/blueprints - Your almanacs :
<user's folder>/ancestris/almanac - Your individual and family record templates :
<user's folder>/ancestris/gedart - Your history of modifications :
<user's folder>/var/cache/ModificationsHistory
Please check the user guide to learn what these templates are for.
Ancestris uses two configuration files, both named ancestris.conf
1/ The first one is the Application Configuration file, which is part of the Application directory and it is created during the installation of Ancestris.
2/ The other one is the User Configuration file, which is part of your User directory, and created when you change some Preferences when using Ancestris.
The User Configuration file takes precedence over the Application Configuration file
So the configuration file to check and update is the User Configuration file if it exists, the Application Configuration file otherwise.
- If you are installing Ancestris, you will probably need to update the Application Configuration file.
- If you have already used Ancestris and want to change the java version, you will probably need to update the User Configuration file.
Detailed description
| ~/.ancestris/13 or ~/.ancestris/trunk |
User directory |
|
|
|
|
|
|
|
|
|
|
|
|
|
|
|
|
|
|
|
|
|
|
|
|
|
|
|
|
|
|
|
|
|
|
|
|
|
|
|
|
When you reinstall Ancestris, user settings files are not modified and you should be able to run the updated version with all your previous settings.
However, there could be some changes in the way the new version uses some of the settings.
- If this is the case, we recommend you to only keep the ancestris, config, etc and ModificationsHistory folders.
- If you have trouble with the windows, we recommend you to remove the Windows2Local folder.
Uninstall Ancestris
To uninstall Ancestris, just delete the 2 folders of the software files and the user settings files.
Privacy Policy
The following describes the Privacy Policy of the Ancestris software.
License
- The Ancestris software is free and licensed under the GNU GENERAL PUBLIC LICENSE V3.
Location
- The Ancestris software is installed on the computer of the user, not on a server.
Advertising
- The Ancestris software does not include any sollicitation to promote or buy any product
- It does not allow to buy or sell any product.
Data
- The Ancestris software stores all user data in Gedcom files in folders indicated by the user
- It stores user settings in the user settings folder on the user computer
- It does not store any user data outside of these files
- The users controls 100% of their data and are free to erase these files or folders from their computer at any time
Login
- The Ancestris software does not require any login of any sort or to any web site, including the Ancestris website.
- The only existing login that might exist is for the forum in order to get user support but it is not managed from the Ancestris software nor has any connection with the Ancestris software.
Connections
The Ancestris software works well without any Internet communication. However some functionalities require an internet connection. In this case, the Ancestris software communicates outside of the user computer in two occasions:
- When communicating to the Ancestris server at startup, when checking for updates, when displaying geographic maps (Openstreetmap service), when looking for location names (Geonames service), and when closing the application. The only information stored on the Ancestris server in this case is the anonymous connection information. It is used by the Ancestris team to get volume traffic information and statistics. The Ancestris website and server is hosted on the OVH cloud and does not contain any user information managed by the Ancestris software.
- When users use the "Genealogy Compare" functionality in a sharing mode. It then compares their genealogy with that of other users on a deliberate basis. Users consciously share and indicate to include private information or not. In this case, the only information potentially shared with another user is the information the other user already has, which is the common information included in a given genealogy between the two users. The information shared is limited to names, dates, locations and event types as per public genealogy records. Notes are not shared for instance.
Publications
The Ancestris software includes functionalities to produce reports and genealogy extract. Users are responsible for the resulting genealogy information they are sharing with other parties. Ancestris cannot be held responsible in case of improper information sharing outside of the software.
Release notes
Version 13 - 30 November 2025
We are pleased to announce the release of Ancestris version 13.
- The daily version will be numbered version 14.
- Both versions are available from our web site.
Ancestris 13 in numbers
- Over 1,200 commits
- 18 months of development
- Runs on all OSes that support Java from version 17 to 25
New features
- Complete overhaul of all reports.
- Unification and improvement of report options.
- Addition of dark look and feel.
- Overhaul of the statement module.
- Addition of an AI-based(Mistral) document transcription feature.
- Feature to change all names to uppercase.
- Overhaul of the duplicate merge module.
- Addition of a search notepad
- Addition of the ability to call up reports using a button in the menu bar
- Addition of a vertical timeline report
- Addition of a descending circular report
- Addition of a report on occupations over time
- Addition of a star tree report
- Addition of a label generator
- Addition of an SVG report viewer
Changes, corrections and improvements
- Cygnus improvements
- Ariès improvements
- GEDCOM editor improvement
- GedArt additions of functions to export more data
- Family group module improvements
- Entity table corrections
- Anomaly verification module improvements
- Web book improvements
- Improvements to the website module
- Improvements to the common ancestors module
- Improvements to the tag deletion module
- Improvements to the Geneanet export
- Improvements to the graph module
- Improvements to the graphical tree
- Improvements to the Geneatique import
- Improvements to the Aldfaer import
Translation update :
- Catalan
- Czech
- Danish
- Dutch
- English
- French
- German
- Hungarian
- Polish
- Portuguese
- Russian
- Spanish
- Turkish
Thank you to all the translators for their constant work, which is so important for the whole community.
Thank you !
To conclude, we would like to thank you, the entire community, for your comments, requests and bug reports, all of which help to keep this software alive and kicking.
We are counting on you in the future to create buzz, tutorials, ideas and enthusiasm.
Version 12 - 08 June 2024
- The daily version will be numbered version 13.
- Both versions are available from our web site.
Ancestris 12 in numbers
- Over 1,700 commits
- 3 years of development
- Runs on all OSes that support Java from version 8 to 22
New features
- Support for GEDCOM 7 (complete for GEDCOM editor and Cygnus editor).
- Displays all entities (even illegal ones) in the GEDCOM explorer and in the GEDCOM editor.
- New Hungarian translation
- Save as: exact or partial copy
- Possibility of choosing burial instead of date of death for displays.
- Added option to zoom the entire application.
- Choice of backup directory
- Specific imports for: Elie, Aldfaer, RootsMagic, Ancestry.com, Brother's Keeper
- Addition of a media manager
- Addition of a GEDCOM converter
- Redesigned duplicate search module
- Rewrite calendar report
- Rewrite narrative report
- Rewrite 10-generation circular report with SVG output.
- Addition of an individual lifeline report.
- Added entity sorting at save time and the ability to sort entity properties by date.
- Ability to create a new GEDCOM directly from entities displayed in a view (Tree, Graph, Time-line, Map, Search, Family Groups).
- Family groups module rewritten with new functionalities (marking, grouping, etc.).
- Added ability to override automatic checks.
- New inbreeding calculation and loop detection.
- Addition of a list of default repositories.
- Export to Genealogieonline.nl
Changes, corrections and improvements
- Divorce symbol added to graphic tree
- Improvements to Cygnus
- Improvements to Aries
- Improvements to GEDCOM editor
- Improvements to the common ancestors module
- Opening of a new Ancestris file on SOSA 1
- FILE tag added by default for media entities in entity table
- Preserve sort order in Aries search screens
- Search without accents
- Corrected presentation tutorial for multiple screens.
- Spouse search added to advanced search
- Added marking by X chromosome
- Improved use of media links in editors.
- Geneanet, Geneatique and Heredis import improved.
- Improvements to Web Book export
- Website export improvements
- Sorting on dates in the entity table
- Addition of separators for bookmark management
- Improvements and corrections to the geographic map
- Filters added to graph view
- Allows you to select a date of change in the explorer to view only subsequent modifications.
- Improvements to the multi-generation graphical tree report
- Improves file opening to better detect and explain problems encountered.
- Geneanet export improvements
- Addition of a reset to default button for entity table settings.
- First page of pdf displayed instead of neutral image.
- File saving options retained from one run to the next.
- Print current view added to "Tools" menu.
- Displays JFIF images.
- Enhanced graph view on high resolution screens.
- Individuals can be marked from all views.
- Register module enhancements
- Addition of a maximum waiting time preference for web link verification
- Addition of icons to distinguish the addition of a numbering from the display of Sosa 1.
- Correction of different language display of reports compared to the interface.
- Use report options before launching them from the context menu.
- Added a wizard screen for genealogy comparison.
- Ability to choose the number of generations of ascendants and descendants separately in the dynamic tree.
- Addition of a new GedArt template.
- Addition of a gradient by date in the geographic map.
- Added a parameter to limit the length of a field in a layer.
- Addition of a menu with the recent opened files.
- Added the ability to underline fields in layers.
- Improved management of almanacs.
Translation update :
- Castillan
- Catalan
- Czech
- Danish
- Dutch
- German
- English
- French
- Greek
- Hungarian
- Italian
- Polish
- Portuguese
- Turkish
Version 11 - 29 May 2021
A few days ahead of schedule, we are happy to announce that version 11 is now the stable version.
For those who were in version 11, nothing changes except that from tomorrow, you will be in version 12.
For those who were on version 10 and up to date with the automatic updates, you will get a small pop-up window telling you that version 10 is obsolete and that you are invited to upgrade to version 11. This will not prevent you from continuing to use version 10, but we really recommend that you switch to version 11.
Version 11 key figures
- 1 year and 4 months of development
- 790 commits
- 1 server burnt at OVH
- A few short nights to get everything back in shape
New features
-
Display of images located on the Internet
-
Added the possibility to download the web images linked in the genealogy on his computer
-
Added the possibility to undo/redo with the keyboard in the text fields
-
Added duplicate detection when creating a new person
-
Geneanet synchronization module (files included)
-
Changed the location table to be almost a spreadsheet
-
New GEDCOM comparison module instead of tree sharing
-
Added entity drag and drop
-
Added markers in layers
-
Added module for generating Identifiers
-
Added a module for marking remarkable individuals
-
Adding a module to calculate age
-
New management of the recording of the position of windows
-
Adding the definition of the size of characters in the parameters
-
Visualization of non-standard entities
Improvements
-
Technical version upgrade (Netbeans 11), allows to use up to Java 15
-
Improvement of the toolbar and labels of the graph view
-
Modification of the menus organization
-
Display of Geonames usage rules
-
No creation of empty tags with Cygnus
-
Possibility to delete a tag only if it is empty, visualization of the content of the tags before deletion
-
Move columns in the table of entities, add keyboard shortcuts
-
Adding an input list for the pseudos
-
Replacement of the old help by the online help on the documentation server
-
Added filters on the selection windows of the Aries editor
-
Added a specific import for Ahnenblatt
-
Added specific import for Legacy
-
Added specific import for RootsMagic
-
Updated application discovery
-
Added 15 new reports
-
Added 9 new templates for GEDART reports
-
Added age at death to the age report
-
Improved the genealogy progress report to open easily in a spreadsheet
-
Improved reports when multiple images are linked to an entity
-
Added a font to display non-Roman alphabets in reports.
-
Improved performance of geolocation by internet
-
Possibility to not search for postal codes
-
Removal of the localities in the reports
-
Added the possibility to search on multiple marriages in the advanced search
-
Improvement of the support contact module
-
Search insensitive to accents
-
Search with all names of a person
-
Differentiate between siblings and semi-siblings when displaying common ancestors
-
Added control of isolated entities
-
Added date at the bottom of the printouts
-
Modified the GEDCOM import report
Corrections
- Fixed the use of passwords to encrypt GEDCOM data
- Management of the cause of an event in Aries
- Management of events that have taken place
- Fixed selection of Notes properties in the recording options
- Fixed parent/child sequence test in GEDCOM controls
- Correction of the use of the AGENCY tag in Aries
- Fixed zip code in Aries editor
- Correction of demo GEDCOMs (Kennedy and Bourbon)
- Correction of the management of the memory parameters under 1Go
- Correction of the management of the coordinates
- Fix @ in names
- Correction of the narrative report when events are empty
- Read almanacs in UTF-8 to respect diacritics
- Adds associations in GEDCOM merge
- Removes excess line breaks in GEDCOM. (On Windows under certain conditions only)
- Prevented the systematic search of the Internet to geolocate when modifying a place
- Re-enabled the display of the Web Book mapping
- Correction of the Web Book parameters.
- Correction of bookmarks with a chosen name.
- Adjustment of sorting when name prefixes are used
- Selecting an existing place no longer creates another one in Aries.
- Corrected display of common ancestors
- Corrected misuse of the ASSO tag with any other tag.
- Added the possibility to enter a fact (FACT) in the Aries editor
And a mountain of translations
- New documentation in 9 languages (3 complete : French, English, Portuguese; 6 in progress: German, Spanish, Catalan, Italian, Danish, Dutch)
- Added Turkish translation
- Added Russian translation
- Many updates of the application translations (German, English, Spanish, Catalan, Danish, French, Greek, Dutch, Italian, Latvian, Polish, Portuguese, Czech)
- Many thanks to the translators