Una finestra és una vista o una eina aplicada a una genealogia. En altres casos, s'aplica a diverses o cap genealogia.
Aquí teniu la finestra de l'editor de Cygnus, per exemple, amb una vista de la genealogia de Kennedy. [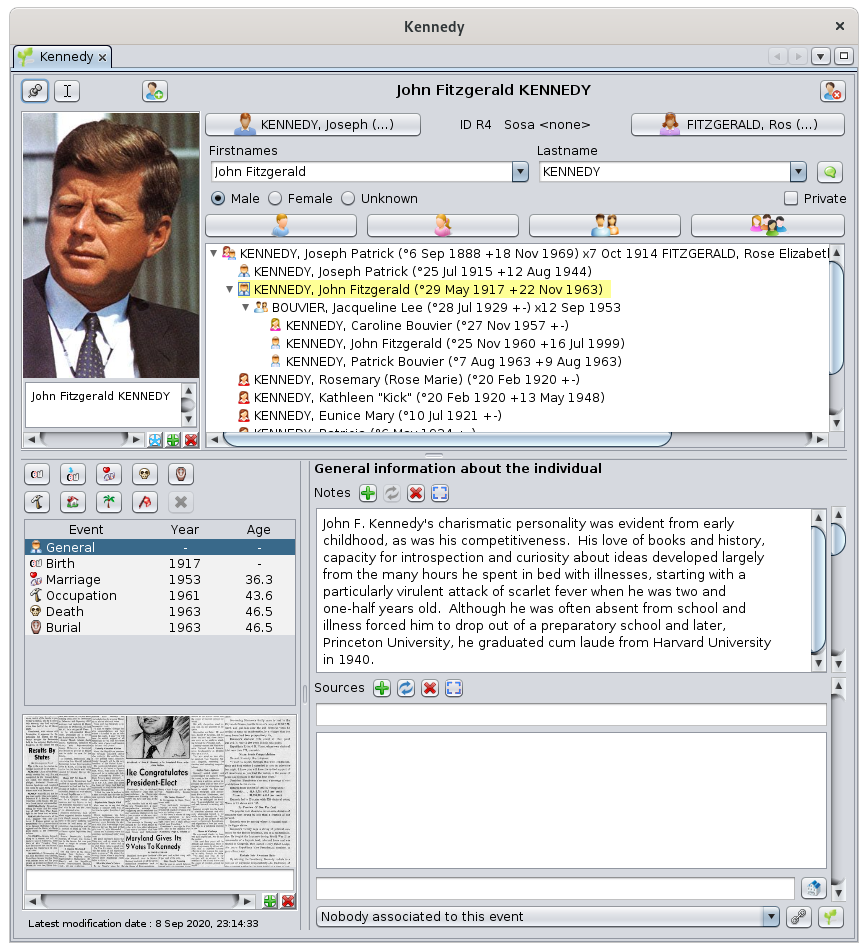](https://docs.ancestris.org/uploads/images/gallery/2020-09/en-window.png) Una finestra s'identifica amb una petita **pestanya** que conté una icona i el seu nom. Diferents finestres poden tenir diferents formes, però totes funcionen de la mateixa manera (obertura, tancament, moviment i redimensionament). A més, és possible personalitzar certs aspectes: com mostrar en l'inici, la seva posició i mida. A continuació s'expliquen els conceptes bàsics de les finestres i com personalitzar-les. ### PestanyaLa **pestanya** és el títol de la finestra. Conté una icona que representa la naturalesa de la vista o l'eina utilitzada en aquesta finestra, seguida del nom de la genealogia que es mostra a la finestra.
En general, una finestra tracta d'una sola genealogia, com en la finestra anterior. En aquest cas, la pestanya es veu així: [](https://docs.ancestris.org/uploads/images/gallery/2020-05/Onglet.png) Gràcies a aquesta pestanya, reconeixem l'editor de Cygnus per la seva icona, i la genealogia pel seu nom, escrita totalment. És el mateix nom que es mostra a la barra de títol de la finestra principal, com ja es descriu a la pàgina [ Finestra Principal](https://docs.ancestris.org/books/user-guide/page/main-window#bkmrk-barre-de-menus "Main Window"). Es poden tenir els arbres genealògics de dues genealogies diferents en dues finestres diferents l'una al costat de l'altra. En aquest cas, la icona serà la mateixa per a les dues finestres, però el nom de la genealogia serà diferent. També es pot tenir una vista en arbre i una vista geogràfica de la mateixa genealogia en dues finestres diferents. En aquest cas, el nom serà el mateix però les seves icones seran diferents. Exemples : - Aquí tenim 1 genealogia Kennedy amb dos editors diferents, Cygnus i Gedcom: [](https://docs.ancestris.org/uploads/images/gallery/2020-05/OngletsKennedy.png) - Aquí tenim dues genealogies diferents, Kennedy i Borbó, cadascuna oberta amb Cygnus: [](https://docs.ancestris.org/uploads/images/gallery/2020-05/OngletsCygnus.png) - Aquí tenim dues genealogies diferents, Kennedy i Borbó, amb Cygnus per Borbons i Gedcom per Kennedy: [](https://docs.ancestris.org/uploads/images/gallery/2020-05/OngletsBourbonKennedy.png) La pestanya pot estar sola o tenir alguns veïns. Si està sola, vol dir que la finestra també està sola en el grup. Si hi ha veïns, vol dir que les finestres corresponents comparteixen el mateix grup i només una està omplint tot l'espai disponible per al grup: aquella la pestanya del qual es ressalta. Per veure una altra finestra, només s'ha de fer clic a la pestanya. Aquí tenim l'arbre dinàmic de Kennedy en el mateix grup de pestanyes que la pàgina de benvinguda. Es mostra l' arbre dinàmic, es ressalta la seva pestanya i davant de la pestanya Benvinguda. [](https://docs.ancestris.org/uploads/images/gallery/2020-06/en_OngletsAccueilArbre.png) Tenir en compte que la finestra de benvinguda no mostra un nom genealògic perquè no tracta d'una genealogia. De fet, si la finestra no conté cap genealogia (per exemple, benvinguda, datulador, calculadora), o quan conté diverses genealogies (per exemple, cerca genealògica), el nom de la pestanya és el nom de l'eina. Exemple : [](https://docs.ancestris.org/uploads/images/gallery/2020-06/en_OngletRecherche.png) A la dreta del nom també tenim una petita creu: **'x'.** S'utilitza per tancar la finestra. Si passeu per sobre d'aquesta creu, una finestra emergent us mostrarà alguns consells sobre com tancar finestres del grup. Tornarem a això més tard. [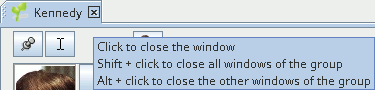](https://docs.ancestris.org/uploads/images/gallery/2020-06/en_Fen%C3%AAtre_info-bulle.png) La pestanya d'una finestra és també un recurs que permet manipular la finestra amb el ratolí, i en particular moure-la a un altre grup de finestres. El grup de finestres ja pot existir a la pantalla o crear-se en moure's. També és possible manipular la finestra a través del [Menú Finestra](#bkmrk-ic%C3%B4ne-de-la-barre-de). ### Finestra Acoblada o finestra Flotant Una finestra pot tenir dos estats diferents.: **acoblada**, o **flotant**. És **acoblada** quan s'adjunta a una àrea específica de la finestra principal. És **flotant** quan és independent de la finestra principal d'Ancestris. A continuació, es pot col·locar en qualsevol lloc de la pantalla, mentre que la finestra principal podria estar fora de la vista. Utilitzar l'acció corresponent des del [menú finestra](#bkmrk-ic%C3%B4ne-de-la-barre-de "window menu") per acoblar o fer flotar una finestra. ### Finestra oculta La pestanya també pot prendre la forma d'un botó. Això vol dir que la finestra està oculta, o en forma de calaix, en una de les vores de la finestra principal. Per amagar una finestra, arrossegueu la pestanya a una de les vores de la finestra principal i fins i tot més enllà d'aquesta vora. Un cop acoblat a la vora, la finestra està en posició oberta. Simplement feu clic al botó superior dret per tancar el calaix. Això mostra la Finestra Taula d'entitat [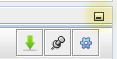](https://docs.ancestris.org/uploads/images/gallery/2020-04/reduire.jpg) Després de la reducció, la Taula d'Entitat ara s'oculta: [](https://docs.ancestris.org/uploads/images/gallery/2020-05/Onglet_Escamot%C3%A9.png) Simplement passeu el cursor per sobre d'aquest botó de pestanya o feu-hi clic per plegar/desplegar la finestra. Aquest és el cas de la finestra GEDCOM Explorer, a la part superior esquerra d'Ancestris, aquí visible desplegada: [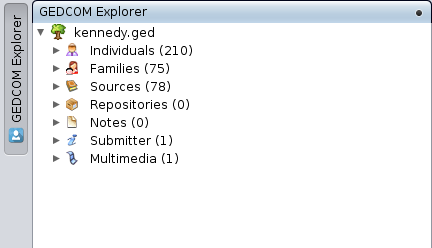](https://docs.ancestris.org/uploads/images/gallery/2020-10/en-concealed-window.png) Quan és visible, es pot ocultar temporalment prement Ctrl + 0 al teclat numèric. Per ancorar una finestra retràctil en una posició desplegada, cal fer clic a la icona Pin (el botó quadrat que conté un punt negre a la cantonada superior dreta) que després es convertirà en la icona Redueix la Finestra que establirà la finestra en el seu estat obert inicial (botó ja vist més amunt).Després dels vostres intents de moure finestres, si heu trobat la disposició que trobeu més convenient i voleu tornar a utilitzar-la per a totes les genealogies, deseu la configuració de les finestres a través de [Menú / Opcions / Desa la configuració de visualització](https://docs.ancestris.org/Save%20display%20settings "Window settings").
### Aquest menú s'obrirà amb un clic dret a la part superior de qualsevol finestra. Inclou diferents accions, utilitzades per manipular la finestra. La llista d'accions depèn d'on feu clic, si era al grup o a la pestanya . El menú Finestra també està disponible des d'Ancestris [ Menú Principal / Finestra / Finestra de configuració](https://docs.ancestris.org/books/user-guide/page/window-menu-%28l%29#bkmrk-configurer-la-fen%C3%AAtr "Window Menu (EM)"). #### Exemples de menús de finestres| [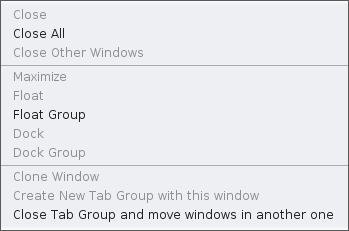](https://docs.ancestris.org/uploads/images/gallery/2020-10/en-tab-group.png) | [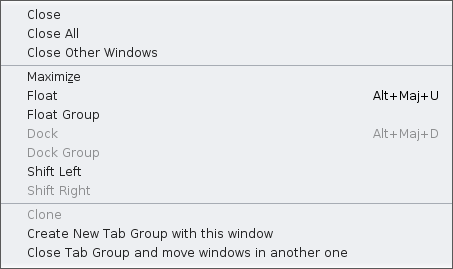](https://docs.ancestris.org/uploads/images/gallery/2020-10/en-window.png) | [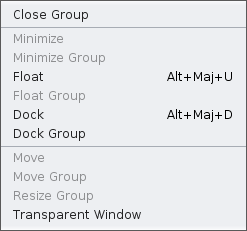](https://docs.ancestris.org/uploads/images/gallery/2020-10/en-conceiled-window.png) |
| Accions per a un grup de pestanyes (clic amb el botó dret a la vora superior) | Accions per a una finestra (feu clic dret sobre la pestanya de la finestra) | Accions per a una finestra oculta (feu clic dret sobre la pestanya de la finestra) |
Les finestres de la mateixa genealogia se sincronitzen: el seu contingut s'actualitza segons l'entitat actual que s'està seleccionant.
Un cop seleccionada una entitat en una de les finestres, les altres finestres de la genealogia corresponent s'ajustaran per mostrar la informació específica de la vista sobre aquesta entitat seleccionada. Per exemple, si seleccioneu un individu a l' arbre dinàmic, també veureu aquest mateix individu als editors i a la taula d'entitats.Aquest comportament de sincronització només es produeix quan la visualització rellevant conté l'entitat seleccionada.
Contra-exemple: l'arbre dinàmic només mostra avantpassats i descendents d'una persona arrel donada. Si, diguem, a la taula d'entitats, seleccioneu un individu que no sigui ni avantpassat ni descendent d'aquest individu arrel, el contingut de l'arbre dinàmic no canviarà. Un altre exemple, si l'entitat seleccionada de l'arbre dinàmic és una persona i no una família, i la taula d'entitat està en mode família, la taula tampoc s'actualitzarà.Aquest comportament de sincronització tampoc es produeix quan l'entitat d'una visualització està "ancorada".
És possible bloquejar la sincronització entre finestres d'algunes d'elles (editor de Cygnus, editor Gedcom, arbre dinàmic, per exemple) fent clic al botó pin [](https://docs.ancestris.org/uploads/images/gallery/2020-06/pin-button.png) de la barra superior de la vista/editor. En aquest cas, l'entitat que es mostra actualment en aquesta visualització/editor no canviarà encara que seleccioneu una altra entitat en una altra visualització. # Barra de Menús La **Barra de Menús** d'Ancestris us dóna accés a totes les accions disponibles a través de 7 menús. [](https://docs.ancestris.org/uploads/images/gallery/2020-09/en-menubar.png) ## Lògica de l'organització del menú Per trobar fàcilment les accions que busques, aquí tens l'organització triada per als menús. ### [Menú Arxiu](https://docs.ancestris.org/books/user-guide/page/file-menu-%28l%29 "File Menu") Aquest menú reagrupa totes les accions per **gestionar arxius de genealogia.** - Crear, obrir, tancar, desar, importar, fusionar, exportar, canviar les seves propietats, afegir als favorits - Surt de l'aplicació ### [Menú Editar](https://docs.ancestris.org/books/user-guide/page/edit-menu-%28l%29 "Edit Menu") Aquest menú reagrupa totes les accions per **fer canvis globals a les vostres dades genealògiques**. - Desfer / Refer - Talla / Copia / Enganxa - Cercar / Substituir / Suprimir - Generar numeració de Sosa o D'Aboville - Canviar els números ID - Marca els individus especials - Veure historial de modificacions ### [Menú Vista](https://docs.ancestris.org/books/user-guide/page/view-menu-%28l%29 "View Menu") Aquest menú reagrupa totes les accions **per accedir a les vistes genealògiques.** Aquestes vistes mostren aspectes específics de la vostra genealogia i algunes també us permeten editar la vostra genealogia (per exemple, editors, arbre dinàmic). ### [Menú Eines](https://docs.ancestris.org/books/user-guide/page/tools-menu-%28l%29 "Tools Menu") Aquest menú agrupa totes les accions **per explorar, manipular i analitzar dades genealògiques.** - Cerca Genealògica entre usuaris d'Ancestris, - Consulteu els registres de registres i utilitzeu-los per enriquir la vostra genealogia - Utilitats diverses (càlcul de dates, calculadora) - Verificar dades (anomalies, duplicats) - Analitzar dades (avantpassats comuns, llistes i informes) - Publicar localment en disc o a Internet - Imprimir la vista activa ### [Menú Finestra](https://docs.ancestris.org/books/user-guide/page/window-menu-%28l%29 "Window Menu") Aquest menú reagrupa totes les accions **per gestionar les finestres Ancestris.** - Accés a finestres especials - Gestió de finestres: obrir, tancar, flotar, ancorar, clonar, configurar a pantalla completa ### [Menú Opcions](https://docs.ancestris.org/books/user-guide/page/options-menu-%28l%29 "Options Menu") Aquest menú reagrupa les accions principals **per personalitzar Ancestris.** - Preferencies - Desar els paràmetres de visualització - Configurar barra d'eines - Actualitzar Ancestris - Gestionar Connectors ### [Menú Ajuda](https://docs.ancestris.org/books/user-guide/page/help-menu-%28l%29 "Help Menu") Aquest menú agrupa totes les accions **per obtenir ajuda** i **ajudar a Ancestris.** - Tota la documentació - Poseu-vos en contacte amb l'equip d'assistència d'Ancestris - Fer una donació - Lloc web Ancestris - Quant a Ancestris ## ## Utilització dels menús Igual que la barra de menú de molts programaris, cada menú de la barra de menú Ancestris es pot obrir de dues maneres. - o fent-hi clic - o escrivint la combinació de tecles: <Alt> + la lletra subratllada al nom del menú corresponent. Per exemple, per obrir el menú Eines, escriviu <Alt> + E. Cada acció del menú té: - una icona que il·lustra l'acció, quan aquesta icona existeix - el nom de l'acció - una drecera de teclat per iniciar aquesta acció sense passar pel menú, quan existeixi Aquí teniu un exemple amb el menú Arxiu [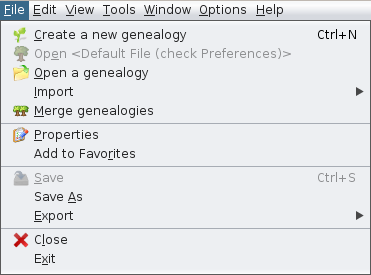](https://docs.ancestris.org/uploads/images/gallery/2020-09/en-File-menu.png) De la mateixa manera, cada acció es pot iniciar de diverses maneres: - ja sigui fent-hi clic al menú - o quan s'obre el menú escrivint la combinació de tecles: <Alt> + la lletra subratllada al nom de l'acció - o quan es tanca el menú escrivint la drecera de teclat de l'acció (Ctrl-N o Ctrl-S a l'exemple anterior) # Menú Arxiu Aquest menú reagrupa totes les accions **per gestionar arxius de genealogia**, canviar les propietats del fitxer i sortir d'Ancestris. [](https://docs.ancestris.org/uploads/images/gallery/2020-09/en-File-menu.png) A Ancestris, un arxiu de genealogia és un arxiu [Gedcom](https://docs.ancestris.org/books/user-guide/page/gedcom "Gedcom"). Cadascuna d’aquestes accions es descriu a continuació.Quan l’acció tingui la seva pròpia pàgina de descripció (en negreta), feu-hi clic per obtenir-ne tots els detalls.
## [Crear una nova genealogia](https://docs.ancestris.org/books/user-guide/page/create-a-genealogy "Create a new genealogy") Inicia un assistent per ajudar-vos a crear una nova genealogia des de zero. ## Obrir <Arxiu per defecte> (marqueu Preferències) Obre l'arxiu de genealogia per defecte. Aquest arxiu es pot configurar al [menú Opcions/Preferències, pestanya Arxius](https://docs.ancestris.org/books/mode-demploi/page/pr%C3%A9f%C3%A9rences-ac1#bkmrk-volet-fichiers-0 "Préférences Fichiers"). Aquesta opció només està disponible quan s'ha definit un arxiu per defecte a les Preferències. En cas contrari, queda gris. ## [ Obrir una genealogia](https://docs.ancestris.org/books/user-guide/page/open-a-genealogy-%28l%29 "Open a genealogy") Obre una genealogia existent, a partir d'un arxiu [Gedcom](https://docs.ancestris.org/books/user-guide/page/gedcom "Gedcom"). Si l'arxiu Gedcom prové d’un altre programari, Ancestris el detectarà automàticament i iniciarà el procés d’importació. ## [Importar](https://docs.ancestris.org/books/user-guide/page/migrate-your-genealogy-to-ancestris "Migrate your genealogy to Ancestris") Migra a Ancestris una genealogia creada per un programari de genealogia diferent. [](https://docs.ancestris.org/uploads/images/gallery/2020-06/en_Menu_Fichier_Importer.png)Actualment només podem importar arxius [Gedcom](https://docs.ancestris.org/books/user-guide/page/gedcom "Gedcom"). Aquesta acció està disponible per ajudar-vos a triar el programari original, quan la detecció automàtica de l'acció del menú **Obre una genealogia** no el detectaria correctament. ## [Combinar genealogies](https://docs.ancestris.org/books/user-guide/page/merge-genealogies-%28l%29 "Merge genealogies") Combina dues genealogies juntes. Això simplement afegeix dos arxius [Gedcom](https://docs.ancestris.org/books/user-guide/page/gedcom "Gedcom") diferents junts sense analitzar possibles duplicats. --- ## [Propietats](https://docs.ancestris.org/books/user-guide/page/file-properties "File Properties") Obre un assistent per editar les propietats de l'arxiu [Gedcom](https://docs.ancestris.org/books/user-guide/page/gedcom "Gedcom") : autor, format de llocs, carpetes multimèdia, estàndard Gedcom preferit, etc. Aquest assistent pot: - **reformateu tots els llocs** a les jurisdiccions correctes. - **cercar tots els arxius multimèdia** de la genealogia i **tornar-los a adjuntar**, per si s’han mogut. - **canvia l'estàndard Gedcom** de la versió 5.5 a la 5.5.1 i viceversa Aquesta acció només està disponible si teniu un arxiu Gedcom obert actualment. ## Afegir a Preferits Afegeix l'arxiu [Gedcom](https://docs.ancestris.org/books/user-guide/page/gedcom "Gedcom") seleccionat als vostres enllaços preferits. Es pot accedir a aquesta finestra des del [Menú / Finestra / Preferits](https://docs.ancestris.org/books/user-guide/page/window-menu-%28l%29#bkmrk-commande-document "Window Menu"). Aquesta acció només està disponible si teniu un arxiu Gedcom obert actualment. --- ## Desar Desa l'arxiu [Gedcom](https://docs.ancestris.org/books/user-guide/page/gedcom "Gedcom") seleccionat.Si hi ha altres fitxers Gedcom oberts, no es desaran.
Per motius de seguretat, Ancestris conserva diverses còpies de seguretat: aquest número es pot canviar a [Opcions / Preferències / Arxius, Nombre de copies de seguretat](https://docs.ancestris.org/books/user-guide/page/preferences#bkmrk-zone-fichier-log-et- "Preferences, Number of backup copies"). Aquesta funció només està disponible si l'arxiu Gedcom seleccionat s'ha canviat i encara no s'ha desat. ## [Desa com](https://docs.ancestris.org/books/user-guide/page/save-as-%28l%29 "Save as") Desa tot o part d’un arxiu amb un altre nom. En particular, podeu utilitzar aquesta acció per extreure una branca o part de la vostra genealogia i desar-la en un arxiu Gedcom independent. ## [Exportar](https://docs.ancestris.org/books/user-guide/page/export-%28l%29 "Export") Exporta una genealogia a altres llocs de genealogia, com ara Geneanet, Geneweb o CousinsGenWeb. [](https://docs.ancestris.org/uploads/images/gallery/2020-06/en_Menu_Fichier_Exporter.png) És important assenyalar que, ja que l'Ancestris desa el contingut de la vostra genealogia directament en format [Gedcom](https://docs.ancestris.org/books/user-guide/page/gedcom "Gedcom"), l'arxiu d'Ancestris GEDCOM és directament utilitzable per tot el programari de genealogia a tot el món. Geneanet és un dipòsit de dades genealògic francès. L'exportació de Geneanet inclou la possibilitat de guiar-vos en el procés i obre la pàgina de càrrega de Geanet. Les altres accions d'exportació són específiques franceses i només estan disponibles com a connectors addicionals per instal·lar. ## Tancar Tanca l'arxiu [Gedcom](https://docs.ancestris.org/books/user-guide/page/gedcom "Gedcom"), **sense sortir d'Ancestris.** ## Sortir Surt d'Ancestris. # Menú Editar Aquest menú reagrupa totes les accions **per fer canvis globals a les vostres dades genealògiques**: desfer, refer, tallar, copiar, enganxar, trobar, substituir, suprimir, numerar, marcar. [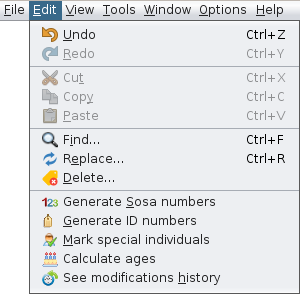](https://docs.ancestris.org/uploads/images/gallery/2021-01/en-edit-menu.png) Cadascuna d'aquestes accions es descriu a continuació.Quan l'acció tingui la seva pròpia pàgina de descripció - en negreta - feu-hi clic per obtenir tots els detalls al respecte.
## Desfer Desfà l'últim canvi que s'ha fet a l'arxiu GEDCOM seleccionat. És possible desfer fins a 10 modificacions. Aquest paràmetre es pot canviar a [Preferències, Edició, Nombre màxim de cancel·lacions](https://docs.ancestris.org/books/user-guide/page/preferences#bkmrk-zone-%C3%89diteur "Preferences / Maximum number of cancellations"). Aquest element de menú només està disponible quan s'han realitzat canvis sense desar i no es desaran. No és possible desfer els canvis guardats. Però, sempre és possible restaurar una còpia de seguretat. ## Refer Refer l'última modificació desfeta prèviament a l'arxiu GEDCOM seleccionat. És possible refer totes les modificacions desfetes. Aquesta acció només està disponible si s'ha cancel·lat almenys una modificació. --- ## Tallar Suprimeix el text seleccionat després de posar una còpia al porta-retalls. El text es pot enganxar en un altre lloc. Aquest element de menú només està disponible quan el cursor es troba en un camp de text. ## Copiar Copia el text seleccionat al porta-retalls. El text es pot enganxar en un altre lloc. Aquest element de menú només està disponible quan el cursor es troba en un camp de text. ## Enganxar Enganxa el contingut del porta-retalls a la posició del cursor, en un camp de text. Això pot ser un contingut d'un altre programari, alguna cosa copiada d'Internet, etc. Aquest element de menú només està disponible quan el cursor es troba en un camp de text. --- ## [Cercar...](https://docs.ancestris.org/books/user-guide/page/find-replace-%28l%29 "Find / Replace") Obre un assistent per ajudar-vos a trobar una cadena de caràcters, independentment d'on es trobi a l'arxiu genealògic, en qualsevol lloc del fitxer o en una ubicació específica, com ara una [entitat](https://docs.ancestris.org/books/user-guide/page/entities "Entities") o [propietat](https://docs.ancestris.org/books/user-guide/page/properties "Properties"). ## Reemplaçar... Obre un assistent per ajudar-vos a substituir una cadena de caràcters per una altra en qualsevol lloc de l'arxiu genealògic. Funciona en combinació amb la funció **Cerca** anterior. ## Esborrar... Suprimeix un element de dades globalment al llarg de la genealogia. Això és particularment útil per suprimir dades buides. --- ## [Genera Números Sosa](https://docs.ancestris.org/books/user-guide/page/generate-sosa-numbers-%28l%29 "Generate Sosa numbers") Genera numeració Sosa, d'Aboville o Sosa d'Aboville per a un individu escollit o elimina la numeració per a tota la genealogia. ## [Genera Números ID](https://docs.ancestris.org/books/user-guide/page/generate-id-numbers-%28l%29 "Generate ID numbers") Genera o modifica números d'identificació, globalment o un per un. ## [Marca els individus especials](https://docs.ancestris.org/books/user-guide/page/mark-special-individuals-%28l%29 "Mark special individuals") Marca o mostra certs individus especials en la seva genealogia, com ara famílies implexes, individus superiors, múltiples avantpassats, Y-ADN o individus mtDNA. ## [Calcula les edats](https://docs.ancestris.org/books/user-guide/page/age-calculation "Calculate ages") Calcula les edats de totes les persones en els seus respectius esdeveniments de la vida. ## [Veure historial de modificacions](https://docs.ancestris.org/books/user-guide/page/see-modifications-history-%28l%29 "See modifications history") Mostra tots els canvis fets en un arxiu Gedcom. Si cal, la llista de canvis es pot esborrar fent clic a [](https://docs.ancestris.org/uploads/images/gallery/2020-06/button-clear-history.png). # Menú Vista Aquest menú agrupa totes les accions **per accedir a les visualitzacions i editors genealògics** de la genealogia seleccionada. [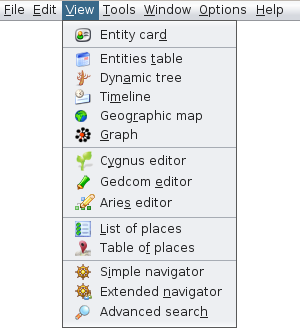](https://docs.ancestris.org/uploads/images/gallery/2020-10/en-View-menu.png) Cadascuna d’aquestes accions es descriu a continuació.Quan l’acció tingui la seva pròpia pàgina de descripció (en negreta), feu-hi clic per obtenir-ne tots els detalls.
Aquestes accions de menú només s'apliquen a la [genealogia seleccionada](https://docs.ancestris.org/books/user-guide/page/relationships-between-windows#bkmrk-une-s%C3%A9rie-de-fen%C3%AAtre "Current entity, current genealogy") i, per tant, només estaran disponibles si n'hi ha una oberta. En cas contrari, quedaran grisos. Per habilitar-los, obriu una genealogia.
Les següents descripcions es relacionen amb la [genealogia actual](https://docs.ancestris.org/books/user-guide/page/relationships-between-windows#bkmrk-une-s%C3%A9rie-de-fen%C3%AAtre "Current entity, current genealogy").
### [Targeta d'Entitat](https://docs.ancestris.org/books/user-guide/page/entity-card-%28l%29 "Entity card") Mostra la imatge, el nom i els esdeveniments sobre [l'entitat actual](https://docs.ancestris.org/books/user-guide/page/relationships-between-windows#bkmrk-une-s%C3%A9rie-de-fen%C3%AAtre "Relationships between windows") (individu, família, etc.) --- ### [Taula d'Entitats](https://docs.ancestris.org/books/user-guide/page/entities-table-%28l%29 "Entities table") Proporciona la llista de totes les [entitats](https://docs.ancestris.org/books/user-guide/page/entities "Entities") de la genealogia (individus, famílies, notes, etc.) amb els seus camps de dades respectius (número d'identificació, nom, cognom, etc.) ### [Arbre Dinàmic](https://docs.ancestris.org/books/user-guide/page/dynamic-tree-%28l%29 "Dynamic tree") Mostra l'arbre genealògic dels individus i famílies de la genealogia, amb avantpassats i descendents de l'individu seleccionat. ### [Cronologia](https://docs.ancestris.org/books/user-guide/page/timeline-%28l%29 "Timeline") Mostra una representació temporal de tots els individus en la genealogia. ### [Mapa geogràfic](https://docs.ancestris.org/books/user-guide/page/geographic-map-%28l%29 "Geographic map") Mostra un mapa geogràfic amb els esdeveniments de tots els individus localitzats a la genealogia. ### [Gràfic](https://docs.ancestris.org/books/user-guide/page/graph-%28l%29 "Graph") Mostra una representació visual innovadora de tots els individus de la genealogia en forma de gràfic. --- ### [Editor Cygnus](https://docs.ancestris.org/books/user-guide/page/cygnus-editor-%28l%29 "Cygnus editor") Obre l'editor Cygnus, un editor fàcil d'utilitzar centrat en persones i llurs esdeveniments. ### [Editor Gedcom](https://docs.ancestris.org/books/user-guide/page/gedcom "Gedcom Editor") Obre l'editor Gedcom, dissenyat especialment per veure i editar totes les dades existents de la genealogia. ### [Editor Aries](https://docs.ancestris.org/books/user-guide/page/aries-editor-%28l%29 "Aries editor") Obre l'editor Aries, un editor ergonòmic que permet realitzar tot tipus de modificacions en diverses finestres. --- ### [ Llista de Llocs](https://docs.ancestris.org/books/user-guide/page/list-of-places-%28l%29 "List of places") Ofereix una llista de tots els llocs existents a la genealogia. Cada lloc està associat amb els seus [esdeveniments](https://docs.ancestris.org/books/user-guide/page/events "Events") corresponents. Dóna accés a [l'editor de llocs](https://docs.ancestris.org/books/user-guide/page/places-editor-%28l%29 "Places editor"). ### [ Taula de Llocs](https://docs.ancestris.org/books/user-guide/page/table-of-places-%28l%29 "Table of places") Dóna accés a una llista estructurada en taula de tots els llocs existents a la genealogia. Dóna accés a [l'editor de llocs](https://docs.ancestris.org/books/user-guide/page/places-editor-%28l%29 "Places editor"). --- ### [](https://docs.ancestris.org/books/user-guide/page/simple-navigator-%28l%29 "Simple navigator") Una manera senzilla de seleccionar esquemàticament individus d’un nucli familiar. ### [](https://docs.ancestris.org/books/user-guide/page/extended-navigator-%28l%29 "Extended navigator") Una manera de seleccionar individus d’un nucli familiar mentre visualitzen la seva informació i fotos respectives. ### [Cerca Avançada](https://docs.ancestris.org/books/user-guide/page/advanced-search-%28l%29 "Advanced search") Cerca totes les persones que corresponen a diversos criteris de cerca. Ofereix una manera de seleccionar aquestes persones per mostrar-les o marcar-les més tard. # Menú Eines Aquest menú agrupa totes les eines **per explorar, manipular i analitzar dades genealògiques**. [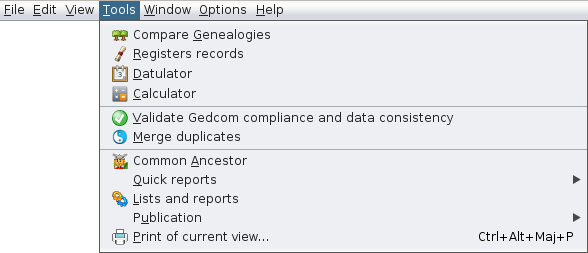](https://docs.ancestris.org/uploads/images/gallery/2021-01/en-tools-menu.png) Cadascuna d’aquestes accions es descriu a continuació.Quan l’acció tingui la seva pròpia pàgina de descripció (en negreta), feu-hi clic per obtenir-ne tots els detalls.
Algunes accions de menú només s'apliquen a la [genealogia seleccionada](https://docs.ancestris.org/books/user-guide/page/relationships-between-windows#bkmrk-une-s%C3%A9rie-de-fen%C3%AAtre "Current entity, current genealogy") i, per tant, només estaran disponibles si n'hi ha una oberta. En cas contrari, quedaran grisos. Per habilitar-los, obriu una genealogia.
## [Comparar Genealogies](https://docs.ancestris.org/books/user-guide/page/genealogy-compare "Compare Genealogies") Compara les genealogies que teniu o que tenen altres usuaris, per trobar àrees geogràfiques comunes, amb ciutats i cognoms similars, i esdeveniments similars. ## [Registre de Registres](https://docs.ancestris.org/books/user-guide/page/registers-records "Registers records") Us permet introduir certificats directament de registres o utilitzar registres digitalitzats per recuperar registres (naixement-matrimoni, defunció, altres) i integrar-los a la vostra genealogia. ## [Datulador](https://docs.ancestris.org/books/user-guide/page/datulator-%28l%29 "Datulator") Us ajuda a calcular dates a partir d’intervals de dates per a calendaris iguals o diferents. Molt útil quan cal estimar les dates a cercar a partir de certificats ja trobats. ## [Calculadora](https://docs.ancestris.org/books/user-guide/page/calculator-%28l%29 "Calculator") Mostra una calculadora senzilla per evitar haver de cercar-ne una de externa. --- ## [Validar el compliment de Gedcom i la cohèrencia de les dades](https://docs.ancestris.org/books/user-guide/page/validate-gedcom-compliance-and-data-consistency-%28l%29 "Validate Gedcom Compliance and data consistency") Detecta l'incompliment de l'estàndard [Gedcom](https://docs.ancestris.org/books/user-guide/page/gedcom "Gedcom") i anomalies en la genealogia. ## [Combinar duplicats](https://docs.ancestris.org/books/user-guide/page/merge-duplicates-%28l%29 "Merge duplicates") Identifica [entitats](https://docs.ancestris.org/books/user-guide/page/entities "Entities") duplicades i les combina. --- ## [Avantpassat comú](https://docs.ancestris.org/books/user-guide/page/common-ancestors-%28l%29 "Common ancestors") Identifica avantpassats comuns entre dos individus a la vostra genealogia. ## Informes Ràpids Executa informes directament des del menú. [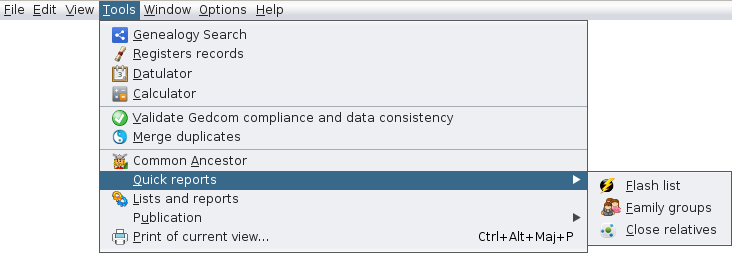](https://docs.ancestris.org/uploads/images/gallery/2020-09/en-Tools-Quick-Reports-menu.png) ### Llista Flash Executa l'informe **Llista Flash** de la persona seleccionada. ### Grups Familiars Executa l'informe de **Grups Familiars.** ### Parents Propers Executa l'informe **Parents Propers**. ## [Llistes i Informes](https://docs.ancestris.org/books/user-guide/page/lists-and-reports-%28l%29 "Lists and Reports") Proporciona les **Llistes i els Informes** d’Ancestris, un gran conjunt d’informes que podeu utilitzar a la vostra genealogia, a més dels descrits anteriorment. ## Publicació Publica la vostra genealogia en un fitxer o a Internet, en format de pàgina web. Ancestris proposa dues possibilitats diferents. [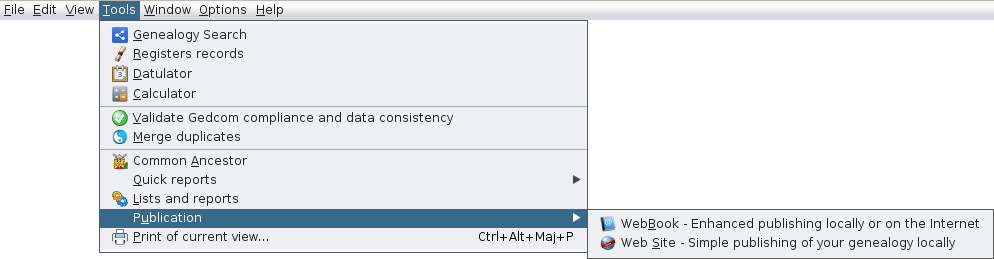](https://docs.ancestris.org/uploads/images/gallery/2020-09/en-Tools-Publications-menu.png) ### [Llibre Web](https://docs.ancestris.org/books/user-guide/page/web-book-%28l%29 "Web book") Genera una genealogia en forma de diverses pàgines web, localment o en un servidor remot. ### [Lloc Web](https://docs.ancestris.org/books/user-guide/page/web-site-%28l%29 "Web Site") Genera pàgines web senzilles. ## Impressió de la vista actual Imprimeix la vista seleccionada. S'obrirà una finestra de previsualització. Tingueu en compte que en aquest moment només es pot imprimir correctament la [Visualització de l'Arbre Dinàmic.](https://docs.ancestris.org/books/user-guide/page/dynamic-tree-%28l%29 "Dynamic tree") # Menú Finestra Aquest menú reagrupa totes les accions **per gestionar les finestres Ancestris.** [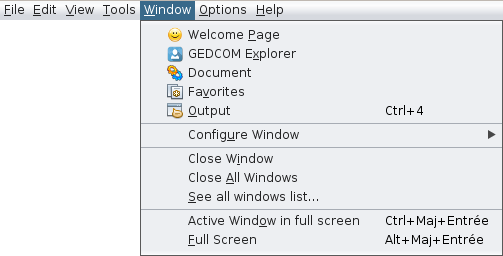](https://docs.ancestris.org/uploads/images/gallery/2020-09/en-Window-menu.png) Cadascuna d’aquestes accions es descriuen a continuació.Quan l'acció tingui la seva pròpia pàgina de descripció (en negreta), feu-hi clic per obtenir-ne tots els detalls.
## [Pàgina Benvinguda](https://docs.ancestris.org/books/user-guide/page/welcome-page-%28l%29 "Welcome Page") Obre la pàgina de Benvinguda. Proporciona accés directe a diverses funcions clau d’una manera amigable. ## [Explorador GEDCOM](https://docs.ancestris.org/books/user-guide/page/gedcom-explorer-%28l%29 "GEDCOM Explorer") Obre l'explorador [GEDCOM](https://docs.ancestris.org/books/user-guide/page/gedcom "Gedcom"), que mostrarà les genealogies obertes i una llista d'arbres de totes les seves entitats respectives. ## Document Obre la finestra **Document**, que conté els resultats dels darrers informes. ## Preferits Obre la llista de **preferits**, un conjunt d'arxius i carpetes seleccionats amb [Arxiu / Afegeix a preferits](https://docs.ancestris.org/books/user-guide/page/file-menu#bkmrk-ajouter-aux-favoris "Add to favourites"). ## Sortida Obre la finestra de S**ortida,** que conté el resultat de missatges interns. Per exemple, el procés [d'importació](https://docs.ancestris.org/books/user-guide/page/import-%28l%29 "Import") retornarà la llista dels canvis realitzats. ## [Configurar Finestra](https://docs.ancestris.org/books/user-guide/page/workspace-and-windows#bkmrk-ic%C3%B4ne-de-la-barre-de "Window Menu") Configura la finestra actual amb el submenú ja comentat que podem obtenir fent clic dret a la pestanya de la finestra. Veure [Espai de treball i finestres](https://docs.ancestris.org/books/user-guide/page/workspace-and-windows "Workspace and windows (VM)") per obtenir més informació. [](https://docs.ancestris.org/uploads/images/gallery/2020-09/en-Window-Configure-menu.png) ## Tancar Finestra Tanca la finestra activa. ## Tanca Totes les Finestres Tanca totes les finestres del grup de pestanyes, el que conté la finestra activa. ## Veure tota la llista de finestres ... Mostra la llista completa de totes les finestres obertes a Ancestris. Aquesta és una manera d’activar una finestra concreta des de la seva icona i nom. [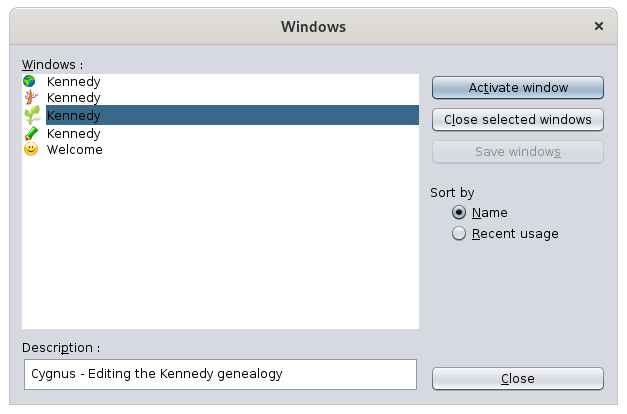](https://docs.ancestris.org/uploads/images/gallery/2020-09/en-Windows-All-menu.png) La llista de finestres obertes actualment es troba a la part esquerra. Es ressalta la finestra seleccionada. La seva descripció i dades es mostren a continuació. És possible seleccionar diverses finestres: - Seleccionar la finestra desitjada i feu clic a **Activa la finestra**. - Seleccionar diverses finestres i fer clic a **Tanca les finestres seleccionades.** El botó d'**Ordre** ordenarà la llista de diferents maneres.Hi ha una altra manera d'anar directament a una altra finestra. Premeu **Ctrl+Tab**, manteniu premuda la tecla **Ctrl** i utilitzeu **Tab** o **Shift+Tab** per desplaçar-vos per la llista.
Això mostrarà una petita finestra amb la llista de finestres obertes: [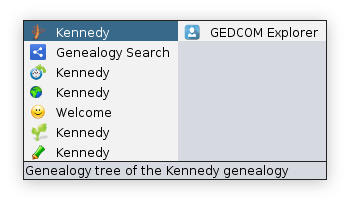](https://docs.ancestris.org/uploads/images/gallery/2020-09/en-Windows-List.png) Les finestres amagades són les últimes de la llista i a la dreta. A dalt podem veure la finestra de l'Explorador GEDCOM que és una finestra oculta. La línia inferior indica la descripció de la finestra. ## Finestra activa a pantalla completa Marqueu aquesta opció per a moure la **finestra activa a pantalla completa**, o tornar- la a la seva posició i mida originals. ## Pantalla completa Marqueu aquesta opció per a moure la **finestra principal d' Ancestris a pantalla completa** o tornar- la a l' estat anterior. # Menú Opcions Aquest menú reagrupa les accions principals **per personalitzar Ancestris.** [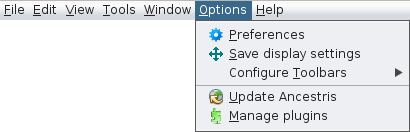](https://docs.ancestris.org/uploads/images/gallery/2020-09/en-Options-menu.png) Cadascuna d'aquestes accions es descriu a continuació.Quan l'acció tingui la seva pròpia pàgina de descripció - en negreta - feu-hi clic per obtenir tots els detalls al respecte.
[Preferències](https://docs.ancestris.org/books/user-guide/page/preferences "Preferences") Defineix les preferències i personalitzacions de l'usuari. ## [Desa la configuració de visualització](https://docs.ancestris.org/books/user-guide/page/windows "Save display settings") Saves or deletes window settings for one or all genealogies. ## Configura la Barra d'eines Personalitza la barra d'eines Ancestris. Només cal marcar o desmarcar els elements del menú per mostrar o ocultar els quadres d'eines corresponents. Consulteu la [Barra d'eines](https://docs.ancestris.org/books/user-guide/page/toolbar-%28l%29 "Toolbar") per obtenir més informació. [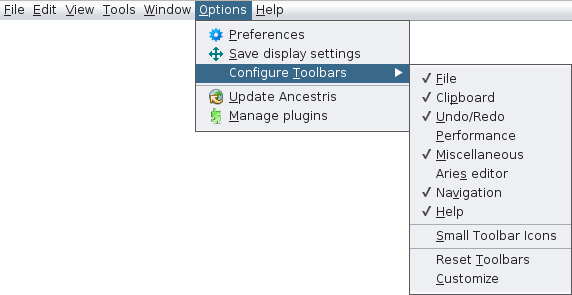](https://docs.ancestris.org/uploads/images/gallery/2020-09/en-Options-Toolbars-menu.png) També hi ha tres accions més: - **Icones de Barra d'eines petites:** redueix la mida de les icones de la barra d'eines. - **Reinicialitza la Barres d'eines:** reinicialitza la configuració per defecte de la barra d'eines. - **Personalitza:** ajuda a crear les pròpies dreceres a la barra d'eines i suprimir-les. ## [Actualitza Ancestris](https://docs.ancestris.org/books/user-guide/page/update-ancestris "Update Ancestris") Comprova les últimes actualitzacions d'Ancestris i les instal·la. ## [Administra els connectors](https://docs.ancestris.org/books/user-guide/page/extensions "Extensions") Instal·la o desinstal·la mòduls Ancestris. # Menú Ajuda Aquest menú reagrupa totes les accions **per obtenir ajuda** i **ajudar Ancestris**. També proporciona informació sobre la versió d'Ancestris instal·lada actualment. [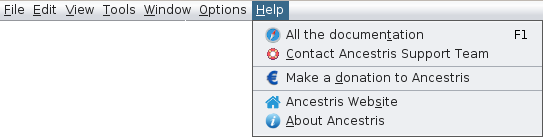](https://docs.ancestris.org/uploads/images/gallery/2020-09/en-Help-menu.png) Cadascuna d'aquestes accions es descriu a continuació.Quan l'acció tingui la seva pròpia pàgina de descripció - en negreta - feu-hi clic per obtenir tots els detalls al respecte.
## Tota la documentació Accedeix a aquesta [**Guia d'usuari**](https://docs.ancestris.org/books/user-guide "User Guide"). Prement la F1 també l'obrirà, independentment d'on estiguis a Ancestris. ## [Poseu-vos en contacte amb l'Equip de Suport d'Ancestris](https://docs.ancestris.org/books/user-guide/page/contact-ancestris-support-team-%28l%29 "Contact Ancestris Support Team") Envia'ns un correu electrònic, afegint automàticament el fitxer de registre. Aquest arxiu ens permetrà valorar el seu problema. ## [Fer un donatiu a Ancestris](https://docs.ancestris.org/books/user-guide/page/make-a-donation-to-ancestris-%28l%29 "Make a donation to Ancestris") Explica per què i com fer una donació a Ancestris. ## Lloc Web d'Ancestris Accedeix al [lloc web d'Ancestris](https://www.ancestris.org/index.html "Ancestris Website").** ** ## Sobre Ancestris Proporciona informació sobre la versió actual d'Ancestris. # Menú contextual El **menú Contextual** proporciona accions que depenen d'un objecte i que s'aplicaran a ell. La majoria d'aquestes accions són addicionals a les que podeu trobar a la **barra de menús**, les **dreceres de teclat** o la **barra d'eines.**Accediu al menú contextual quan feu clic amb el botó dret del ratolí a un objecte, normalment a una entitat (individual, familiar, font, etc.).
[](https://docs.ancestris.org/uploads/images/gallery/2020-10/en-context-menu.png) El menú contextual té un títol i una llista d'elements d'acció. El **títol** és el nom de l'entitat "clicada". La **llista d'elements d'acció** depèn de l'entitat en què heu fet clic i de la finestra on es troba. És per això que se l'anomena menú "contextual". Cada acció proposada s'aplica a l'entitat en el seu context específic. L'exemple anterior és el Menú Contextual en fer clic en una Entitat individual a la vista d'arbre Dinàmic.Només certes vistes ofereixen un menú contextual.
Són les següents: - [**L**'Arbre Dinàmic](https://docs.ancestris.org/books/user-guide/page/dynamic-tree-%28l%29 "Dynamic tree"), per a particulars i famílies. El clic dret s’ha de fer en una casella individual o familiar. - La [Taula Entitat](https://docs.ancestris.org/books/user-guide/page/entities-table-%28l%29 "Entities table")[s](https://docs.ancestris.org/books/user-guide/page/entities-table-%28l%29 "Entities table"), per a totes les categories d'entitat. El clic dret s'ha de fer en una de les cel·les, preferiblement a la columna incloent el número d'identificació. - L'[editor Cygnus](https://docs.ancestris.org/books/user-guide/page/cygnus-editor-%28l%29 "Cygnus editor"), per a l'individu mostrat. El clic dret s'ha de fer a la pancarta superior que dóna el nom complet de l'individu. - L'[editor Gedcom](https://docs.ancestris.org/books/user-guide/page/gedcom-editor-%28l%29 "Gedcom editor"), per a totes les categories d'entitats i la informació que conté. El clic dret s'ha de fer en qualsevol de les línies de l'entitat o en el plafó inferior on es mostra la descripció de l'entitat. - La [Targeta d'entitat](https://docs.ancestris.org/books/user-guide/page/entity-card-%28l%29 "Entity card"), per a totes les categories d'entitat. El clic dret s'ha de fer a l'àrea mostrada. - L'[Explorador GEDCOM](https://docs.ancestris.org/books/user-guide/page/gedcom-explorer-%28l%29 "GEDCOM Explorer"), per a totes les categories d'entitat. El clic dret s'ha de fer en una entitat. ## Accions del menú contextual A continuació es descriu totes les accions possibles quan es crida el menú contextual des d’una entitat.**El menú contextual també es pot cridar des d’un objecte Gedcom**. És el cas de l'[explorador GEDCOM](https://docs.ancestris.org/books/user-guide/page/gedcom-explorer-%28l%29 "GEDCOM Explorer"). Consulteu la pàgina corresponent per veure l’aspecte del Menú Contextual en aquest cas.
#### Canvia la visualització d'individus / de famílies Configura el disseny i el contingut de dades de la informació de l'entitat que es mostrarà. Això es fa creant o modificant un [pla](https://docs.ancestris.org/books/user-guide/page/blueprints "Blueprints"). Aquest element d'acció només apareix quan feu clic a una entitat en el seu pla. #### Tallar, Copiar, Enganxar Talla, copia o enganxa els elements clicats. Aquest element d'acció només apareix quan feu clic a una entitat d'un dels editors. #### Afegir una propietat directament Afegeix una [propietat](https://docs.ancestris.org/books/user-guide/page/properties "Properties") a l'entitat. Ancestris només suggerirà que les propietats compatibles amb Gedcom s'afegiran a la ubicació clicada. No et pots equivocar aquí. Aquest element d'acció només apareix quan feu clic a una entitat o a una propietat de l'[editor Gedcom](https://docs.ancestris.org/books/user-guide/page/gedcom-editor-%28l%29 "Gedcom editor"). Aquí teniu un exemple de propietats que es poden afegir a un individu. [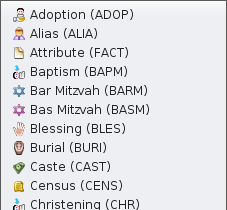](https://docs.ancestris.org/uploads/images/gallery/2020-10/en-add-a-property.png) #### Afegeix propietat a través de l'assistent... Afegeix una [propietat](https://docs.ancestris.org/books/user-guide/page/properties "Properties") a l'entitat mitjançant la finestra següent per guiar-vos: [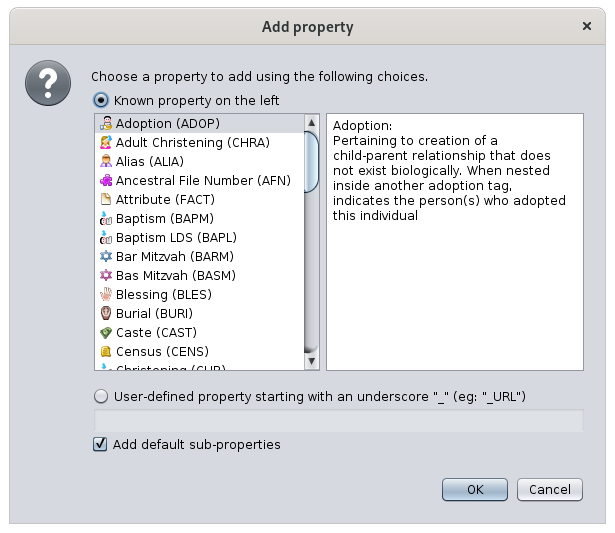](https://docs.ancestris.org/uploads/images/gallery/2020-10/en-add-a-property-assistant.png) Es proporciona una llista de possibles propietats. La selecció es fa fent clic en un element de propietat de la columna de l'esquerra. La descripció d'aquesta propietat apareix a la columna lateral dreta. Per crear una [propietat definida per l'usuari](https://docs.ancestris.org/books/user-guide/page/tags#bkmrk-symbole "User-defined tags"), feu clic al botó corresponent i introduïu el seu nom tal com es mostra al camp de text. Per crear automàticament sub properties a aquesta propietat, marqueu la casella corresponent. Per exemple, una propietat MAP afegirà automàticament les propietats LATI i LONG. Aquest element d'acció només apareix quan feu clic a una entitat o a una propietat de l'[editor Gedcom](https://docs.ancestris.org/books/user-guide/page/gedcom-editor-%28l%29 "Gedcom editor"). #### Propaga la propietat seleccionada... Propaga la propietat sobre la qual heu fet clic amb el botó dret del ratolí: - a totes les entitats de la categoria en tota la genealogia - o, a una entitat en particular, per ser seleccionats del menú desplegable que apareixerà. [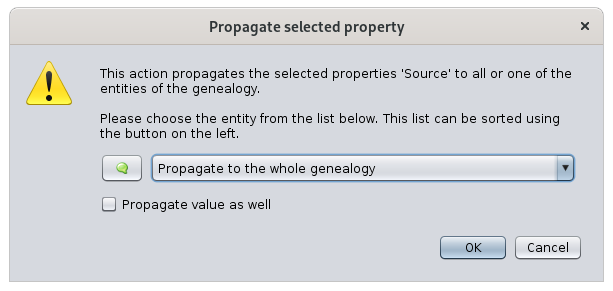](https://docs.ancestris.org/uploads/images/gallery/2020-10/en-propagate.png) Marqueu la casella **Propagar i el valor d'aquesta propietat.** Propagarà automàticament la propietat i el seu valor. Aquest element d'acció només apareix quan feu clic a una propietat de l'[editor Gedcom](https://docs.ancestris.org/books/user-guide/page/gedcom-editor-%28l%29 "Gedcom editor"). #### Afegiu una altra persona o una família Enllaça una persona o una família amb l'entitat seleccionada. Depenent de l'entitat o de la propietat en què es faci clic, no totes les sub-accions estaran disponibles. A continuació, es mostren els elements d’acció quan feu clic a una persona: [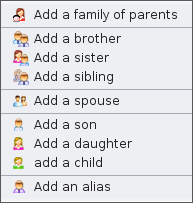](https://docs.ancestris.org/uploads/images/gallery/2020-10/en-add-indivudal-or-family.png) - **Afegeix una família de progenitors:** afegeix els dos quadres que representen la ubicació dels progenitors de la persona seleccionada - **Afegir un germà / germana / germà-germana:** afegeix un germà o una germana o un germà-germana a una persona - **Afegir un cònjuge**: afegeix un cònjuge a una persona. - **Afegir un fill / filla / fill-filla:** afegeix un nen o nena a una persona o a una família. Per a les persones amb diverses famílies, això s’ha de fer des de la família. Des de l’individu, el nen s’afegeix a la primera família. - **Afegir un àlies:** afegeix un àlies a l'individu. Un àlies és un altre individu que suposadament és diferent originalment, però que podria designar la mateixa persona. Quan el menú contextual es troba en una propietat, el menú mostra el següent: [](https://docs.ancestris.org/uploads/images/gallery/2020-10/en-add-indivudal-or-family-association.png) - **Associar una persona:** afegeix una relació persona a la propietat, normalment un esdeveniment. #### Afegiu un arxiu multimèdia, una nota, una font, etc. Enllaça una entitat, nova o existent, a l'entitat en què s'ha fet clic. [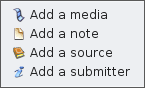](https://docs.ancestris.org/uploads/images/gallery/2020-10/en-add-an-entity.png) Aquestes són les possibles sub-accions, que depenen de la categoria de l'entitat a la qual s'ha fet clic: - **Afegir un suport:** afegeix un [element multimèdia](https://docs.ancestris.org/books/user-guide/page/entities#bkmrk-fichier-multim%C3%A9dia "Media") compartit nou o existent. - **Afegir una nota:** afegeix una [nota](https://docs.ancestris.org/books/user-guide/page/entities#bkmrk-note "Note") compartida nova o existent. - **Afegir una font:** afegeix una [font](https://docs.ancestris.org/books/user-guide/page/entities#bkmrk-source "Source") compartida nova o existent. - **Afegir un remitent**: afegeix un [remitent](https://docs.ancestris.org/books/user-guide/page/entities#bkmrk-fournisseur-d%27inform "Submitter") compartit nou o existent. #### Crear una entitat global Crea una entitat global que no estarà vinculada a la persona clicada. Afegirà una entitat a la vostra genealogia. [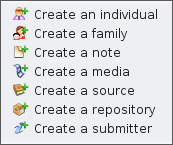](https://docs.ancestris.org/uploads/images/gallery/2020-10/en-create-an-entity.png) Aquestes són les possibles sub-accions: - **Crear un individu:** crea un [individu](https://docs.ancestris.org/books/user-guide/page/entities#bkmrk-individu "Individual") d'entitat nova - **Crear una família:** crea una nova [família](https://docs.ancestris.org/books/user-guide/page/entities#bkmrk-famille-0 "Family") d'entitats - **Crear una nota:** crea una [nota](https://docs.ancestris.org/books/user-guide/page/entities#bkmrk-note "Note") d'entitat nova - **Crear un multimèdia**: crea un nou [element multimedia](https://docs.ancestris.org/books/user-guide/page/entities#bkmrk-fichier-multim%C3%A9dia "Media") d'entitat - **Crear una font:** crea una [font](https://docs.ancestris.org/books/user-guide/page/entities#bkmrk-source "Source") d'entitat nova - **Crear un dipòsit:** crea un [repositori](https://docs.ancestris.org/books/user-guide/page/entities#bkmrk-lieu-de-stockage "Repository") d'entitats nou - **Crear un remitent:** crea un nou [remitent](https://docs.ancestris.org/books/user-guide/page/entities#bkmrk-fournisseur-d%27inform "Fournisseur d'informations") #### [Gestionar la numeració SOSA / d'Aboville](https://docs.ancestris.org/books/user-guide/page/generate-sosa-numbers-%28l%29 "Generate Sosa numbers") Permet generar o esborrar numeracions de genealogia, a partir de la persona sobre la qual heu fet clic amb el botó dret. L'individu seleccionat es converteix en el Sosa o d'Aboville número 1 de la genealogia i una nova numeració de tots els avantpassats i descendents serà numerada a partir d'ella. #### Girar... Substitueix l'entitat relacionada per una altra entitat que s'ha de seleccionar. [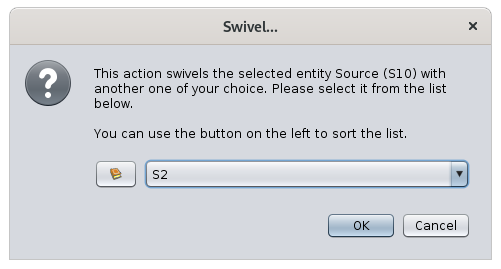](https://docs.ancestris.org/uploads/images/gallery/2020-10/en-swivel.png) Aquesta acció només està disponible per a propietats relacionades amb una altra entitat (persones associades, àlies, fill en família, cònjuge en família, font vinculada, nota vinculada, etc.). #### Establir criteris de llocs Obre una finestra que permet canviar els criteris de llocs. [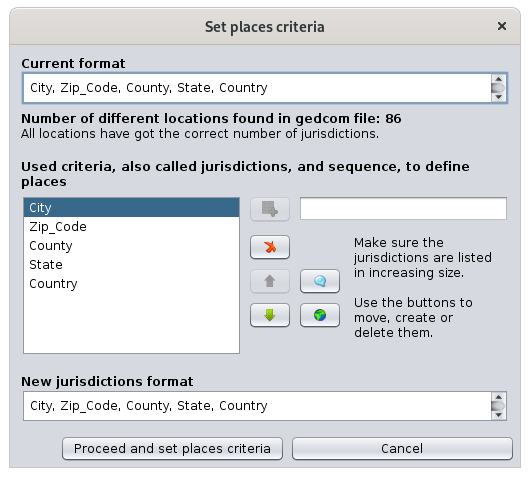](https://docs.ancestris.org/uploads/images/gallery/2020-10/en-set-place-criteria.png) Aquesta finestra és la mateixa que s'utilitza per definir el format de llocs per defecte a [Arxiu/Propietats](https://docs.ancestris.org/books/user-guide/page/file-properties#bkmrk-crit%C3%A8res-de-lieux "File Properties"). Aquest element d'acció només apareix quan feu clic a una propietat de lloc a l'[editor Gedcom](https://docs.ancestris.org/books/user-guide/page/gedcom-editor-%28l%29 "Gedcom editor"). #### Xifra les propietats seleccionades Permet xifrar tota la informació de l'entitat. [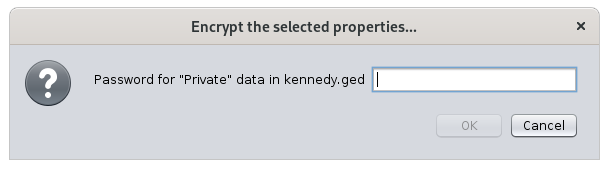](https://docs.ancestris.org/uploads/images/gallery/2020-10/en-encrypt.png)No perdeu la contrasenya utilitzada per al xifratge, ja que impossibilitarà recuperar la informació.
Aquest element d'acció només apareix quan feu clic a una entitat o una propietat a l'[editor Gedcom](https://docs.ancestris.org/books/user-guide/page/gedcom-editor-%28l%29 "Gedcom editor"). #### Editar/Modificar Obre l'editor predeterminat de l'entitat o propietat seleccionada. L'editor per defecte es defineix a les [preferències](https://docs.ancestris.org/books/user-guide/page/preferences#bkmrk-zone-%C3%89diteur "Preferences"). Si es crida el menú contextual des d'una propietat de lloc, Ancestris obre l'[editor de Llocs](https://docs.ancestris.org/books/user-guide/page/places-editor "Places editor") per a tots els llocs similars. Per editar només un lloc, només cal que utilitzeu un dels editors i editeu directament els camps del lloc. #### Suprimir les propietats seleccionades ... Suprimeix les propietats seleccionades. [](https://docs.ancestris.org/uploads/images/gallery/2020-10/en-delete-property.png)Per motius de seguretat, Ancestris us demanarà confirmació.
Aquest element d'acció només apareix quan feu clic a una entitat o una propietat a l'[editor Gedcom](https://docs.ancestris.org/books/user-guide/page/gedcom-editor-%28l%29 "Gedcom editor"). #### Navega fàcilment fins a parents propers de la persona. [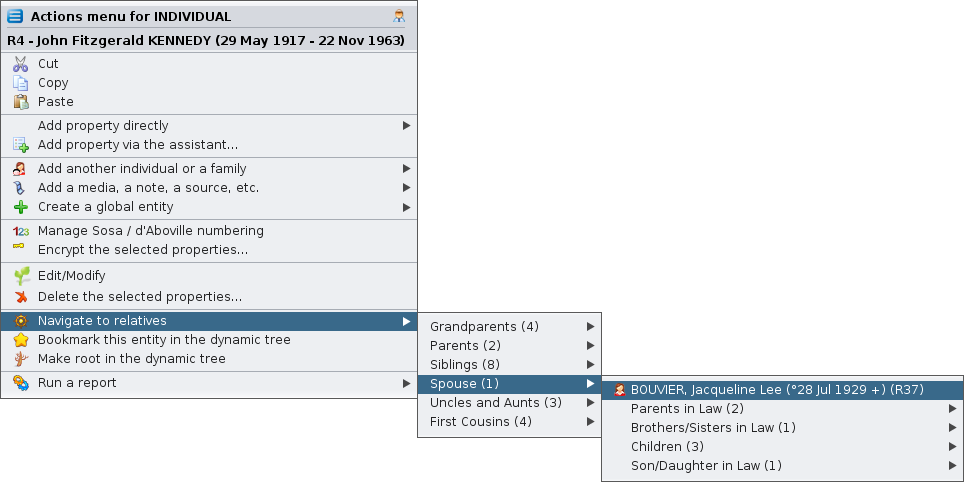](https://docs.ancestris.org/uploads/images/gallery/2020-10/en-navigate-relatives.png) #### Marcar aquesta entitat a l'arbre dinàmic Crea un marcador d'aquesta entitat a l'arbre dinàmic. [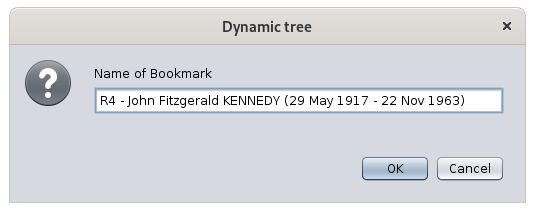](https://docs.ancestris.org/uploads/images/gallery/2020-10/en-bookmark.png) A continuació, podreu mostrar ràpidament l’arbre dinàmic d’aquest individu o família mitjançant el [botó de marcador a la barra de menú de l'arbre dinàmic](https://docs.ancestris.org/books/user-guide/page/dynamic-tree-%28l%29#bkmrk-bouton-signets "Dynamic tree bookmark button"). #### Triar com a família preferida per a l'arbre dinàmic Només per a l'entitat familiar, l'estableix com a matrimoni preferit per mostrar a la visualització d'arbre dinàmic. L'acció té aquest aspecte quan encara no es tria la família i, per tant, es pot configurar: [](https://docs.ancestris.org/uploads/images/gallery/2020-10/en-preferred-on.png) I es veu així, amb la petita estrella a la icona, quan s’ha escollit la família i, per tant, es pot restablir: [](https://docs.ancestris.org/uploads/images/gallery/2020-10/en-preferred-off.png) #### Fer arrel a l’arbre dinàmic Reconstrueix l'arbre dinàmic amb l'entitat feta clic com a arrel nova. #### Executar un informe Inicia qualsevol informe possible per a l'entitat seleccionada o per a tota la genealogia. A mesura que seleccioneu aquest element del menú, es desenvolupen diversos submenús. L'estructura d'aquests menús segueix l'estructura de la finestra [Llista i Informes](https://docs.ancestris.org/books/user-guide/page/lists-and-reports-%28l%29 "Lists and reports") [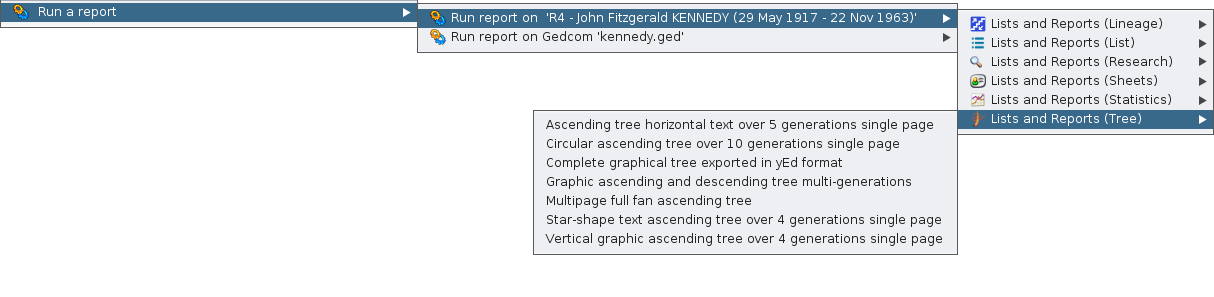](https://docs.ancestris.org/uploads/images/gallery/2020-10/en-run-report.png) #### Intercanviar cònjuges Intercanvia marit i muller en una família. Això és molt més fàcil corregir un error de sexe en les persones que tornar a crear tota la família. #### Foto de registre: naixement | matrimoni | defunció | misc Al [visor d'actes](https://docs.ancestris.org/books/user-guide/page/registers-records#bkmrk-les-fichiers-0 "Registers records - Act viewer"), mostra la foto del certificat corresponent a l'esdeveniment en què s'ha fet clic. Aquest element del menú només està habilitat si l'esdeveniment té una foto provinent d'una declaració d'acta dels registres de registres. L'eina [Registers Records](https://docs.ancestris.org/books/user-guide/page/registers-records "Registers records") també ha d'estar instal·lada, però no necessàriament oberta. # Menú Arrossegar i Deixar anar El menú **Arrossegar i Deixar anar** es pot utilitzar per copiar entitats a través de genealogies o per combinar entitats dins de la mateixa genealogia. També es pot utilitzar per construir una relació entre les dues entitats implicades, per fer que sigui molt més ràpid per a vostè per construir la seva genealogia.| [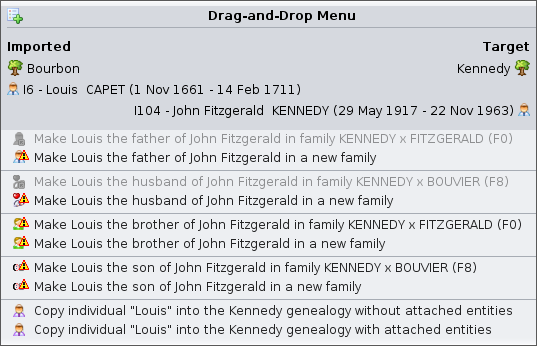](https://docs.ancestris.org/uploads/images/gallery/2021-03/en-drag-n-drop-different.png) | [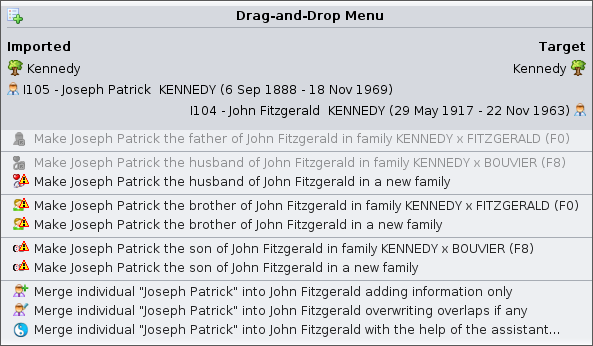](https://docs.ancestris.org/uploads/images/gallery/2021-03/en-drag-n-drop-same.png) |
| Menú d'Arrossegar i Deixar anar utilitzat en diferents genealogies | Menú d'Arrossegar i Deixar anar utilitzat dins de la mateixa genealogia |
El menú Arrossegar i Deixar anar apareix en deixar anar una entitat prèviament clicada i arrossegada. Primer heu de fer clic a qualsevol entitat i començar a moure-la a un altre lloc, i després heu de deixar-la caure en una zona no prohibida. A cada ubicació on podeu accedir al [Menú Contextual](https://docs.ancestris.org/books/user-guide/page/context-menu "Context Menu"), podeu Arrosegar o Deixar anar una entitat.
## Descripció El menú Arrossegar i Deixar anar té un títol i una llista d'elements d'acció. El **títol** mostra les dues entitats implicades en el gest Arrossegar i Deixar anar. L'entitat de la part esquerra és l'entitat a la qual heu fet clic i s'anomena entitat importada. L'entitat de la part dreta és l'entitat a la qual heu baixat i s'anomena entitat de destinació. El menú Arrossegar i Deixar anar difereix en funció de si moveu una entitat a través de diferents genealogies o dins de la mateixa genealogia. - **A través de diferents genealogies**, Ancestris assumeix que voleu copiar entitats - **Dins de la mateixa genealogia,** Ancestris assumeix que voleu fusionar entitats Ancestris suggereix altres accions per unir les dues entitats. Les accions difereixen en funció de la categoria d'entitat. ## Menú d'accions d'Arrossegar i Deixar anar A continuació es mostra una descripció de totes les accions possibles incloses al menú Arrossegar i Deixar anar. #### Feu que l'individu importat sigui <progenitor | cònjuge | germà | fill> de l'individu objectiu Quan ambdues entitats són individus, Ancestris ofereix crear una relació entre elles. Si trieu aquesta acció, Ancestris crearà els enllaços necessaris i no hi haureu de contribuir manualment. #### Adjuntar l'entitat importada a l'entitat de destinació Quan l'entitat importada no és una persona, Ancestris ofereix adjuntar-la a l'entitat de destinació. Per exemple, pot ser una NOTA adjunta a una FONT o un OBJECTE multimèdia adjunt a un esdeveniment individual. En el cas d'un esdeveniment, Ancestris mostra la llista de tots els esdeveniments existents per a aquesta persona. Només s'ha de triar quin vols. #### Copiar l'entitat importada a la genealogia objectiu Quan les genealogies implicades són diferents, Ancestris suggereix dues maneres possibles de copiar l'entitat importada a la genealogia objectiu: - Còpia sense les entitats enllaçades - Còpia amb les entitats enllaçades Les entitats enllaçades de les persones importades són les persones directament vinculades a aquesta persona (progenitors, cònjuge, fills), així com els seus respectius objectes multimèdia, fonts i notes adjunts. Per a les entitats no individuals, les entitats adjuntes són els repositoris, els objectes multimèdia i les notes de les fonts, les notes dels objectes multimèdia.Quan escolliu una còpia amb entitats adjuntes, Ancestris farà totes les còpies pertinents per vosaltres.
#### Combina l'entitat importada amb l'entitat de destinació Quan només hi ha una genealogia, Ancestris suggereix tres maneres possibles de combinar l'entitat importada amb l'entitat objectiu: - Només s'afegeix informació a l'entitat de destinació i no es modifica la informació que ja podria existir - Afegeix i sobreescriu informació que ja podria existir - Mostra l'assistent per permetre't triar, poc a poc, la informació que cal tenir sobre l'entitat objectiu Aquesta acció només es mostra quan ambdues entitats són de la mateixa categoria, és a dir, dues persones, o dues fonts, o dues notes, etc. ## Accions d'Advertiment i Inhabilitació #### Advertiment Quan una acció és possible però està subjecta a un desajust, Ancestris afegeix un signe d'advertiment al començament de la descripció de l'acció. Aquest és el cas d'afegir un cònjuge a una persona que ja en té un. A la pràctica, això és possible, però Ancestris prefereix alertar-te en cas que realment puguis pensar en una altra persona. Un consell explica la raó per la qual l'acció és arriscada. #### Acció inhabilitada Quan una acció pot ser possible però no ho és, Ancestris mostra l'acció i la desactiva. Aquest és el cas, per exemple, quan es pot crear un pare a una persona que ja té un pare. Un consell explica la raó per la qual no es pot dur a terme l'acció.Independentment de l'acció realitzada al menú, més endavant es pot desfer.
# Barra d'eines La Barra d'eines de la Finestra Principal d'Ancestris és una barra horitzontal que mostra una sèrie d'eines en forma d'icones. Es troba entre la barra de menús i l'espai de treball. [](https://docs.ancestris.org/uploads/images/gallery/2020-09/en-toolbar.png) També hi ha barres d'eines per a finestres diferents de la finestra principal. Es descriuen a les pàgines corresponents d'aquesta documentació. Les Barres d'eines també es poden personalitzar, almenys parcialment. A la part inferior d'aquesta pàgina trobareu una manera de definir les seves posicions o direccions. ## Icones de la barra d'eines Les icones de la barra d'eines s'organitzen en grups. Cada grup correspon a un conjunt lògic d'accions similars. Les accions que executen es descriuen en els menús corresponents. Es pot configurar si es mostra o no un grup. ## Grup de fitxers Les icones següents pertanyen al [menú Fitxer](https://docs.ancestris.org/books/user-guide/page/file-menu "File Menu"). - **[](https://docs.ancestris.org/uploads/images/gallery/2020-10/New.png) Crear una genealogia** - **[](https://docs.ancestris.org/uploads/images/gallery/2020-10/OpenDefault.png) Obrir <fitxer predeterminat>** - **[](https://docs.ancestris.org/uploads/images/gallery/2020-10/Open.png) Obrir una genealogia** - **[](https://docs.ancestris.org/uploads/images/gallery/2020-10/Close.png) Tancar** - **[](https://docs.ancestris.org/uploads/images/gallery/2020-10/Save.png) Desar** ## Grup porta-retalls Les icones següents pertanyen al [menú Editar](https://docs.ancestris.org/books/user-guide/page/edit-menu "Edit menu"). - **[](https://docs.ancestris.org/uploads/images/gallery/2020-10/cut.gif) Tallar** - **[](https://docs.ancestris.org/uploads/images/gallery/2020-10/copy.gif) Copiar** - **[](https://docs.ancestris.org/uploads/images/gallery/2020-10/paste.gif) Enganxar** ## Desfer / Refer grup Les icones següents pertanyen al [menú Editar](https://docs.ancestris.org/books/user-guide/page/edit-menu "Edit menu"). - **[](https://docs.ancestris.org/uploads/images/gallery/2020-10/undo.gif) Desfer** - **[](https://docs.ancestris.org/uploads/images/gallery/2020-10/redo.gif) Refer** ## Grup de rendiment Les icones següents tenen funcions purament tècniques. No es mostren per defecte, no pertanyen a cap menú. [](https://docs.ancestris.org/uploads/images/gallery/2020-10/perf.png) - **Gràfic d'ús de memòria i recollida de brossa** - **Fent una foto de l'ús de la memòria de l'aplicació** ## Grup miscel·lània Les icones següents pertanyen al [menú Editar](https://docs.ancestris.org/books/user-guide/page/edit-menu "Edit menu") i al [menú Eines](https://docs.ancestris.org/books/user-guide/page/tools-menu "Tools Menu"). - **[](https://docs.ancestris.org/uploads/images/gallery/2020-10/treesharing.png) Cerca de genealogia** - **[](https://docs.ancestris.org/uploads/images/gallery/2020-10/Calc.png) Calculadora** - **[](https://docs.ancestris.org/uploads/images/gallery/2020-10/WebBook.png) Llibre Web** - **[](https://docs.ancestris.org/uploads/images/gallery/2020-10/SosaNumbersIcon.png) Mostra l'individu De Cujus** o genera numeració si no n'hi ha cap. ## Grup de l'editor Àries Les icones següents us permeten gestionar les entitats de genealogia vinculades a l'[editor Aries](https://docs.ancestris.org/books/user-guide/page/aries-editor-%28l%29 "Aries editor"). No pertanyen a cap menú i no es mostren per defecte. - **[](https://docs.ancestris.org/uploads/images/gallery/2020-10/edit.png) Editar aquesta entitat:** per modificar l'entitat activada actualment a la genealogia. - **[](https://docs.ancestris.org/uploads/images/gallery/2020-10/indi_add.png) Crear un individu:** per afegir un individu a la genealogia. - **[](https://docs.ancestris.org/uploads/images/gallery/2020-10/family_add.png) Crear una família:** per afegir una família a la genealogia. - **[](https://docs.ancestris.org/uploads/images/gallery/2020-10/media_add.png) Crear un mitjà:** per afegir un element multimèdia a la genealogia. - **[](https://docs.ancestris.org/uploads/images/gallery/2020-10/note_add.png) Crear una nota:** per afegir una nota a la genealogia. - **[](https://docs.ancestris.org/uploads/images/gallery/2020-10/media_add.png) Crear una font:** per afegir una font a la genealogia. - **[](https://docs.ancestris.org/uploads/images/gallery/2020-10/submitter_add.png) Crear un repositori:** per afegir un repositori a la genealogia. - **[](https://docs.ancestris.org/uploads/images/gallery/2020-10/submitter_add.png) Crear un remitent**: per afegir un remitent d'informació a la genealogia. ## Grup de Navegació Les icones següents us permeten utilitzar la cerca general. Llurs accions es descriuen a la [barra de navegació](https://docs.ancestris.org/books/user-guide/page/navigation-bar-%28l%29 "Navigation Bar") i a la [cerca general](https://docs.ancestris.org/books/user-guide/page/genealogy-search-%28l%29 "Genealogy Search"). - **[](https://docs.ancestris.org/uploads/images/gallery/2020-10/Back.png) <Fletxa esquerra>:** per mostrar l'entitat anterior a l'historial de navegació. - **[](https://docs.ancestris.org/uploads/images/gallery/2020-10/Forward.png) <Fletxa dreta>:** per mostrar la següent entitat a l'historial de navegació. - **[](https://docs.ancestris.org/uploads/images/gallery/2020-10/down.png) <Fletxa avall petita>:** per mostrar l'historial de navegació i seleccionar una entitat. - **[](https://docs.ancestris.org/uploads/images/gallery/2020-10/search.png) Zona d'entrada de cerca:** cerca general a tot Ancestris i genealogies obertes. ## Grup d'Ajuda Les icones següents pertanyen al [menú Opcions](https://docs.ancestris.org/books/user-guide/page/options-menu "Options Menu") i al [menú Ajuda](https://docs.ancestris.org/books/user-guide/page/help-menu "Help Menu"). - **[](https://docs.ancestris.org/uploads/images/gallery/2020-10/Options.png) Preferències,** per accedir al panell de Preferències. - **[](https://docs.ancestris.org/uploads/images/gallery/2020-10/About.png) Sobre Ancestris,** per veure informació sobre el programari. - **[](https://docs.ancestris.org/uploads/images/gallery/2020-10/Help.png) Ajuda,** per accedir a aquesta documentació. ## Personalització de la Barra d'eines La Barra d'eines es pot personalitzar, per exemple movent els grups utilitzant el "handle" de l'esquerra, la petita zona rectangular coberta amb línies de punts en relleu. Aquí, el grup d'Eines "Diversos" s'està movent a una segona línia d'eines. [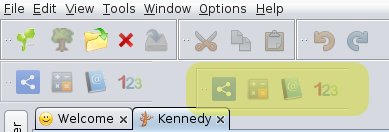](https://docs.ancestris.org/uploads/images/gallery/2020-09/en-moving-menu-group.png) En general, les finestres que tenen barres d'eines es poden personalitzar de la mateixa manera, el menú pot canviar de direcció, horitzontal o vertical, en una de les vores de la finestra. A causa de l'interès bastant limitat d'aquesta possibilitat, poques finestres amb barra d'eines tenen aquesta funció. Per a aquells que el tinguin, les barres d'eines afectades tenen la petita àrea de punts a la seva esquerra. Aquí teniu un exemple amb la barra d'eines de l'[Editor Gedcom](https://docs.ancestris.org/books/user-guide/page/gedcom-editor-%28l%29 "Gedcom editor"). - Barra d'eines de l'Editor Gedcom en direcció horitzontal: [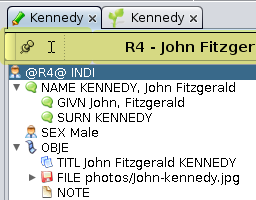](https://docs.ancestris.org/uploads/images/gallery/2020-09/en-horizontal-menu.png) - La barra d'eines de l'Editor Gedcom es mou en direcció vertical: [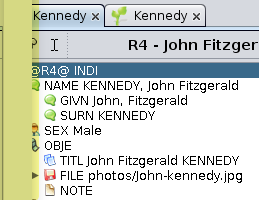](https://docs.ancestris.org/uploads/images/gallery/2020-09/en-moving-menu.png) - Barra d'eines de l'editor Gedcom en direcció vertical: [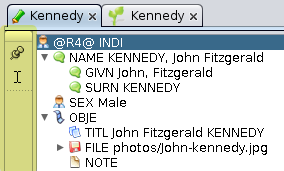](https://docs.ancestris.org/uploads/images/gallery/2020-09/en-vertical-menu.png) # Barra de Navegació La barra de navegació permet navegar cap endavant i cap enrere en l'historial de navegació, és a dir, la llista de totes les entitats seleccionades successivament des de l'obertura de l'última genealogia. [](https://docs.ancestris.org/uploads/images/gallery/2020-04/barre_navigation.png) ## Descripció La barra de navegació inclou tres botons per navegar per l'historial de navegació. Aquests botons es desactiven quan la llista està buida. ### Botó de fletxa esquerra Seleccionar l'entitat anterior a la llista. ### Botó de fletxa dreta Seleccionar la següent entitat de la llista. ### Botó de fletxa avall Mostra l'historial de navegació per seleccionar directament l'entitat que voleu. ## Ús Tan bon punt s'obre una genealogia a Ancestris, la barra de navegació emmagatzema en una llista totes les entitats que seleccioneu successivament. És possible tornar a visitar una entitat que heu seleccionat anteriorment i després tornar a l'entitat que heu seleccionat per darrera vegada. - La llista és compatible amb múltiples Gedcom: emmagatzema les entitats de diverses genealogies obertes al mateix temps en una única llista. - La llista és multicategoria d'entitats: emmagatzema totes les categories d'entitats en una única llista. La llista es torna a zero tan bon punt es tanca una genealogia, tot i que una genealogia roman oberta amb contingut d'historial de navegació. ### Exemple La imatge següent mostra un historial de navegació de 12 entitats de les genealogies Borbó i Kennedy. Com podeu veure, ambdues genealogies estan obertes al mateix temps. L'historial de navegació pot tenir persones, famílies i totes les altres categories d'entitat. [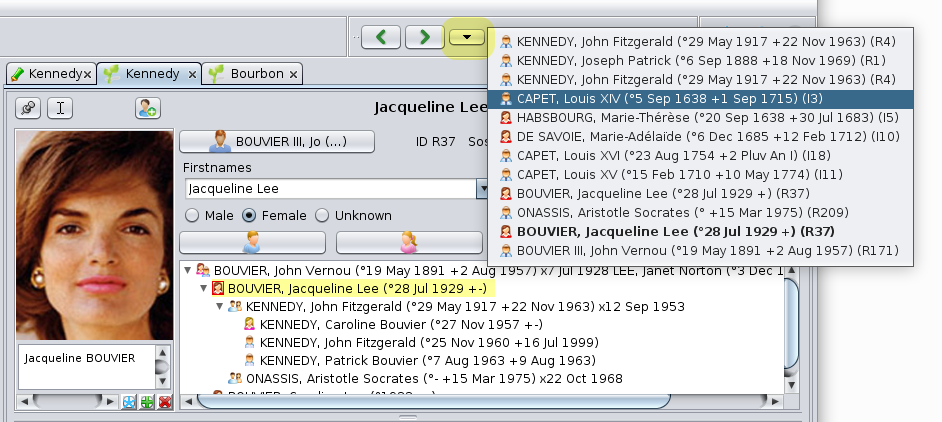](https://docs.ancestris.org/uploads/images/gallery/2020-09/en-navigation-list.png) L'entitat actual que es mostra és la descripció de Jackie Kennedy a l'[editor Cygnus](https://docs.ancestris.org/books/user-guide/page/cygnus-editor-%28l%29 "Cygnus editor"). A la llista de l'historial de navegació, aquesta entitat apareix en negreta. Un clic a una de les línies selecciona i mostra l'entitat corresponent, sense esborrar la llista. Com podeu veure, sembla que l'usuari opta ara per tornar a l'entitat Lluís XIV. # Barra de Cerca La barra de cerca general us permet trobar qualsevol tipus d'informació a qualsevol lloc dels fitxers de genealogia oberts i a la pròpia aplicació Ancestris. [](https://docs.ancestris.org/uploads/images/gallery/2020-04/recherche_generale.png) ## Descripció ### Camp d'entrada El camp d'entrada s'utilitza per introduir el text a cercar. Si passeu el ratolí per sobre d'aquest camp, es mostra una descripció explicativa i indica la drecera de teclat Ctrl + I per mostrar l'historial de cerca. [](https://docs.ancestris.org/uploads/images/gallery/2020-09/en-search-hover.png) ### Llista de resultats La cerca de la cadena de text explora: - totes les entitats de les genealogies obertes (individus, famílies, notes, fonts i fitxers multimèdia), - i la pròpia aplicació Ancestris: menús i finestres, i preferències (també anomenades opcions). El resultat de la cerca és una llista que es classifica en les seccions següents: - **Cerques:** Resultats entre l'historial de cerques - **Individuals**: Resultats de tipus individual - **Famílies**: Resultat tipus família - **Notes:** Resultat del tipus nota - **Fonts:** Resultat del tipus font - **Multimèdia**: Resultat del tipus multimèdia - **Accions**: Tipus d'acció resultat en un menú d'aplicació - **Registres**: Registre del resultat del tipus registre - **Preferències:** Resultat del tipus Preferències d'Ancestris Per a cada ítem, es mostren els 7 primers resultats trobats, sent la vuitena línia la continuació de la llista "...". [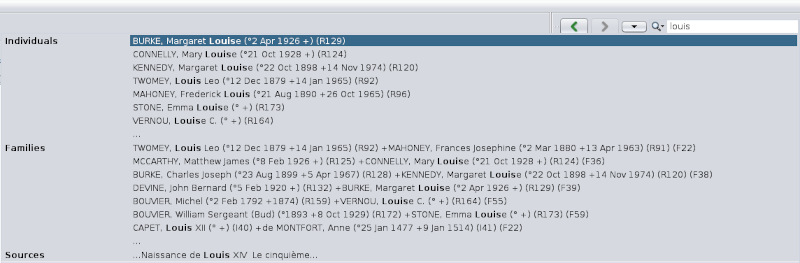](https://docs.ancestris.org/uploads/images/gallery/2020-09/en-search.png) Un clic en una línia selecciona l'entitat corresponent. Les cerques s'emmagatzemen a l'historial de cerques. Les cerques posteriors realitzades també cerquen dins de la llista emmagatzemada. ### Criteris de Cerca La lupa a l'esquerra del camp d'entrada us permet comprovar o desmarcar el tipus de resultats als quals voleu limitar la cerca. [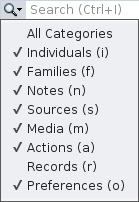](https://docs.ancestris.org/uploads/images/gallery/2020-09/en-search-menu.png) Només has de marcar o desmarcar les categories corresponents. ## Ús ### Realització d'una cerca Hi ha dues maneres de fer-ho: amb el ratolí o amb la drecera del teclat. Utilitzar el ratolí per anar al camp de cerca general de la Barra d'eines i començar a introduir un text per cercar. Alternativament, escriviu Ctrl + I en qualsevol moment a Ancestris. El cursor es posicionarà al camp i es mostra el resultat de les cerques anteriors: [](https://docs.ancestris.org/uploads/images/gallery/2020-09/en-search-history.png) A mesura que escriviu, el resultat es mostra sense haver d'escriure Enter. Si sabeu exactament en quines seccions voleu cercar, desmarqueu les altres seccions als criteris de cerca. ### Seleccionar un resultat En qualsevol moment, seleccioneu un resultat. Si no veieu el que busqueu en una secció de resultats, podeu fer clic a la línia de continuació "...". En aquest moment, només es mostren els elements coincidents: [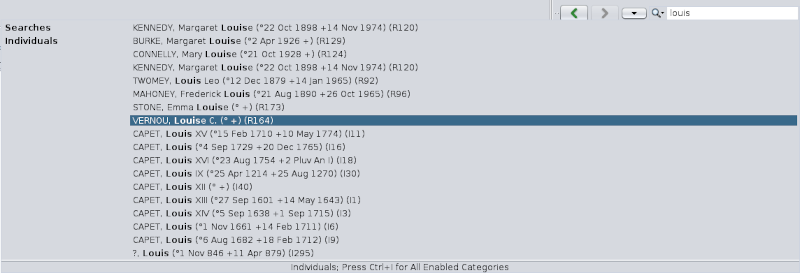](https://docs.ancestris.org/uploads/images/gallery/2020-09/en-search-result.png) Els resultats poden provenir de diversos fitxers Gedcom. Podeu veure a la imatge de dalt que la llista d'individus inclou individus de la genealogia borbònica i individus de la genealogia Kennedy. Si apareixen massa resultats, milloreu la cerca. Si es mostra el resultat esperat, seleccioneu-lo amb un clic. - Si se selecciona una entitat, es mostra instantàniament a les vistes obertes actualment i aquesta entitat es converteix llavors en l'entitat activa. - Si se selecciona una acció Ancestris, s'inicia immediatament. - Si se selecciona una opció (preferència), es mostra la finestra corresponent. # Create a new genealogy This action helps you create a new genealogy. Below is the image of the first page of the wizard that will guide you. [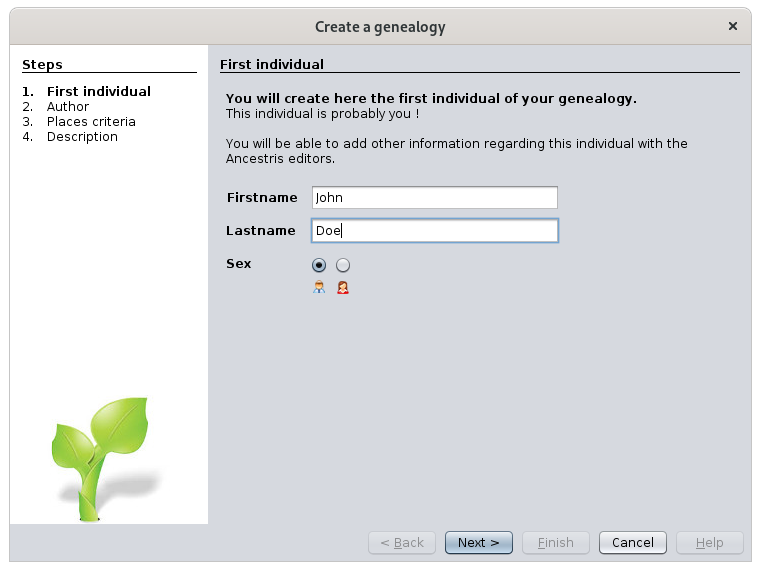](https://docs.ancestris.org/uploads/images/gallery/2020-09/en-create-genealogy.png) This wizard has already been described in this documentation. Please refer to the full description at the page [Discover Ancestris > Create your genealogy](https://docs.ancestris.org/books/user-guide/page/create-your-genealogy "Create your genealogy"). # Open a genealogy This action opens a genealogy. In Ancestris, a genealogy is stored in a file in the [Gedcom](https://docs.ancestris.org/books/user-guide/page/gedcom "Gedcom") format. Ancestris asks you for the name of a Gedcom file to open. Choose it and click Open.A warning is displayed if some physical files are referenced more than once. It is inefficient because changing the file name on disk will require you to update the genealogy in more than one place. Click the "Show all files" button to identify which are these "duplicate" files and consolidate them into the same media entity.
- **Local files**: this is the number of files physically located on your disks (hard drive, USB keys, etc). It is made of relative path files and absolute path files. - **relative path files** start from the location of the Gedcom file. The path string does not start with "/" or "C:\\" for instance. - **absolute path files** start from the root disk folder, usually "/" or "C:\\". - **Remote files**: this is the number of physical files located somewhere on Internet web sites. - A **Check existence** button lets you check if all remote file really exist. If you click this button, Ancestris will scan all remote files and try to access them. This can take a long time depending on your Internet connection and the response time of the various web sites involved. If there are no remote files in your genealogy, this button will be disabled. - **Files attached to media entities**: the file references (FILE) are sub-properties of media entities, and can therefore be used as references multiple times throughout the Gedcom file. - **Files attached to media properties**: the file references (FILE) are sub-properties of media properties, and cannot be used anywhere else in the Gedcom file. The next information is the full path name of your Gedcom file, from which relative paths will be starting. Finally, the "**Refresh**" button updates the statistics in case some files have changed locally or remotely, and the "**Show all files**" button opens the [Media viewer](https://docs.ancestris.org/books/user-guide/page/media-viewer "Media viewer") with all the pictures of the genealogy.This Media viewer is the same viewer as the one accessed from the [Cygnus editor](https://docs.ancestris.org/books/user-guide/page/cygnus-editor "Cygnus editor") with one difference: the list of pictures in Cygnus is limited to either events media or sources media.
### Edition This section includes various elements: - A [table](#bkmrk-folders-table) listing all folders used by the genealogy, split into different lines depending on whether the included files are found or not, local or remote, attached to entities or properties, relative or absolute. - Above the table are [filters](#bkmrk-filters) to only display certains lines. - To the right-hand side of the filters are the [Clear and Select buttons](#bkmrk-clear-and-select-but) to help you select and unselect lines more quickly. You can also select lines using the mouse. - [Actions field and buttons](#bkmrk-action-field-and-but) below the table let you to make global changes to several folders at the same time.Changes made in this editor are made in the Gedcom file and can be undone either via the undo button below, or using the Ancestris main menu bar undo/redo buttons.
#### Folders table Each line in the table correspond to **a group of files within the same folder and with the same attributes**, found/unfound, local/remote, entity/property, and relative/absolute. - The columns on the left-hand side are for information only. - **Files**: number of physical file references included in the mentioned folder, that have the found, local and entity attributes indicated - **Found**: checked if files in this group are found, otherwise they are unfound - **Local**: checked if files in this group are local, otherwise they are remote - **Entity**: checked if files in this group are attached to entities, otherwise they are attached to properties - **Folder**: folder name. This is the FILE property value of the Gedcom file. For empty FILE values, Ancestris will display <empty/> as shown in the main window above. Please note empty files will be considered 'unfound'. - The columns on the right-hand side let you make some modifications on the folders and identify unfound files in particular. - **Relative**: checked if files in this group have a relative path, otherwise they have an absolute path. Clicking on the checkbox changes this attribute. It swaps from relative to absolute path and vice versa. - **Action**: this button opens a window which lists all the files included in this group to help you search for them when they are unfound. The window differs if the group is made of local files, or remote files. See below an example of each window. - **Selection**: click on the checkbox to select or unselect the line. The [Replace button](#bkmrk-action-field-and-but) and [Download button](#bkmrk-action-field-and-but) will apply to this selection. **Numbers in column headers of the attributes** indicate the number of files with the corresponding attribute. **The number in the Selection header column** indicates the number of lines selected. This is an example of the Search window for local files. An explanation of this window is provided in the [corresponding usage section ](#bkmrk-r%C3%A9solution-du-probl%C3%A8)below. [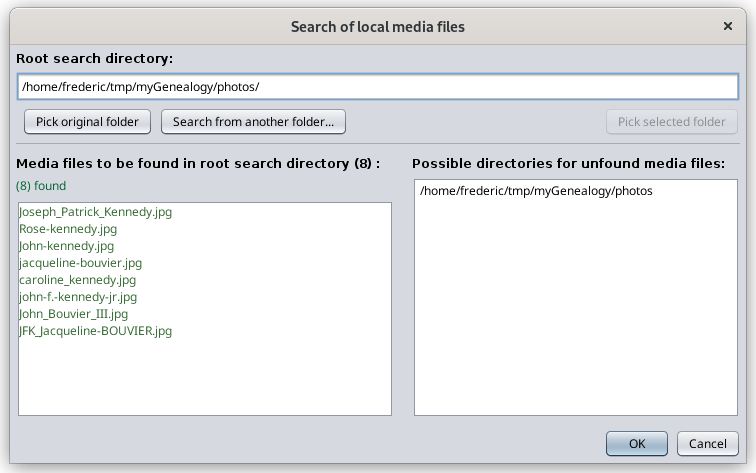](https://docs.ancestris.org/uploads/images/gallery/2023-03/en-file-medias-2.png) This is an example of the Search window for remote files. [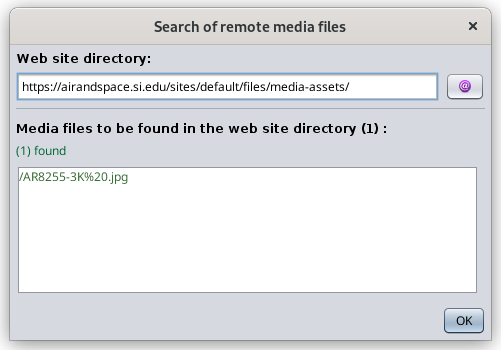](https://docs.ancestris.org/uploads/images/gallery/2023-03/en-file-medias-3.png) In this "Search of remote media files" window, the Internet button opens up your browser on the corresponding web site directory. In the list of media files, clicking on a file will try to open it in your browser. The files are listed in green if they could be accessed, in red otherwise. #### Filters - **Unfound**: check this filter to only display unfound files.Please note remote files are initially assumed to be found until an action has revealed there are unfound. Such action is for instance the "Check existence" button in the Statistic section, opening a remote file in your browser from the "Search of remote media files" window, or accessing media files via the Media viewer window, which can be opened via the Show all files" button or the Cygnus editor.
- **Local**: check this filter to only display local files. - **Remote**: check this filter to only display remote files. In particular used when you want to download them. - **Relative**: check this filter to only display relative path files. - **Absolute**: check this filter to only display absolute path files. - **Selected**: check this filter to only display selected files. Once a filter is applied, the numbers in the column headers adjust themselves to only count the filtered files. #### Clear and Select buttons These actions apply to filtered lines only. - **Clear**: click this button to unselect filtered lines. - **Select/Unselect**: click this button to swap the selection of mouse-highlighted filtered lines. If no line is mouse-highlighted, swaps the selection box of filtered lines. #### Action field and buttons - **Replace subpath field**: - Applies to selected lines (selection check box). - When lines are selected, this field displays the longest common path of selected lines. - It can be edited and the new path string will replace the former one when the Replace button is pressed. - **Replace button**: if the subpath string has been changed, replaces the old subpath with the new one. - **Relative button**: - Applies to all filtered lines, whether selected or not - Swaps all relative paths to absolute paths and vice versa - **Download button**: - Applies to selected lines (selection check box). - Downloads all remote files in a folder of your choice and modified the path to be the corresponding local one. - The local folder structure will be the one of the Internet web site. - **Undo button**: - Reverse any change made within this editor, up to the situation of the Gedcom file when the Media manager window was last open. - To undo changes made before that, use the Undo button of the Ancestris main menu bar. ## Usage The main use cases of the Media manager tool are the following. - **To "reconnect" media files to your genealogy** if you are migrating from another software or if you have moved files on your computer. This is the problem of 'unfound files" described below. - **To check if all your files are still well connected** to your genealogy, in particular remote files. - **To make all files relative** rather than absolute - **To download remote files**, for instance when importing your genealogy from Geneanet or any genealogy web site, in order to make a local backup copy. - **To simply access and view** all your media filesIn case you have your main genealogy on a website like Geneanet and Ancestry.com, it is **our topmost recommendation** to make sure you have usable local copies of this genealogy, including media files, in distinct locations. **A 'usable' copy means a file in Gedcom format with separate media files properly attached to the Gedcom file events and sources.**
### Problem of 'unfound files' Where can the problem come from? #### 1. Have you renamed your media folder or your media file? If your photo is in a `/mygenealogy/photos/MyPicture.jpg` file and your Individual entity references this photo in a `FILE` tag with value of `/mygenealogy/photos/MyPicture.jpg`, then the link is valid. Everything is fine. Now, if you rename your photos directory or just the media file, it may generate a broken link. For instance, if your photo file becomes `/mygenealogy/media/MyPicture.jpg` with media instead of photos, Ancestris will not find it because it still thinks it is in the "photos" folder, not "medias". This is enough to break the link. The Media Manager above will consequently display your photo as an unfound media. #### 2. Have you moved your Gedcom file? Rather than renaming a media folder or a file, you may have just moved your Gedcom file. ##### Relative position between your Gedcom and your media - If your media files are described in relative position with respect to your Gedcom file, the link is lost, because in this case you would have had to move your media files at the same time as your genealogy Gedcom file. - We recommend that you only specify your media in relative position of your Gedcom file location as this allows you to move your files without renaming the links. ##### Absolute position between your Gedcom and your media - If your media files are described in absolute position, the link to the media is not lost because it is not using the position of the Gedcom file. - But the downside is that if you move your genealogy to a USB key, for example, your media will have remained on your hard drive and you will only be able to see your media if the USB key remains on your computer. - If it is to show your genealogy to one of your relatives, you will have to move the media to the USB key. But suddenly the links will be broken because the Gedcom file will think that they are still on your computer. You will have to rename them by one in Gedcom or else you use this Media manager tool. #### 3. Have your files been deleted? Another possible reason for a loss of link between your Gedcom file and your media files can also come from file deletions on the disk. It's more annoying because you have first to get hold of these files before continuing with the media manager or else removing the links in the Gedcom file.The Media manager does not remove the links, it just renames them.
#### 4. Case of remote files In the case of remote files, 'unfound files' can just be the result of the web site being reorganised, or renamed or any other web site structural modifications. #### Resolution of the 'unfound files' problem for local files Let us consider the following example with the unfound line below where 1 file is missing in the documents folder. [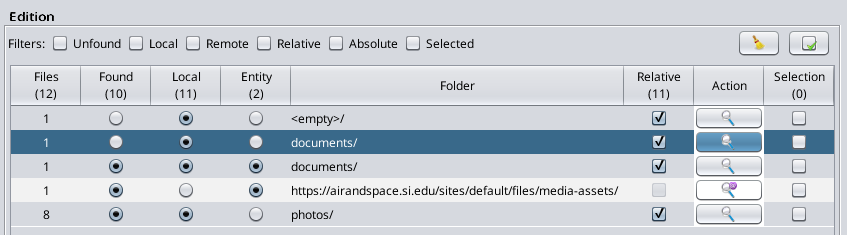](https://docs.ancestris.org/uploads/images/gallery/2023-03/en-file-medias-4.png) If you are confident that your media file is somewhere on your computer, click on the "Search" button in the Action column to locate the corresponding media file. The following "Search of local media files" appears. [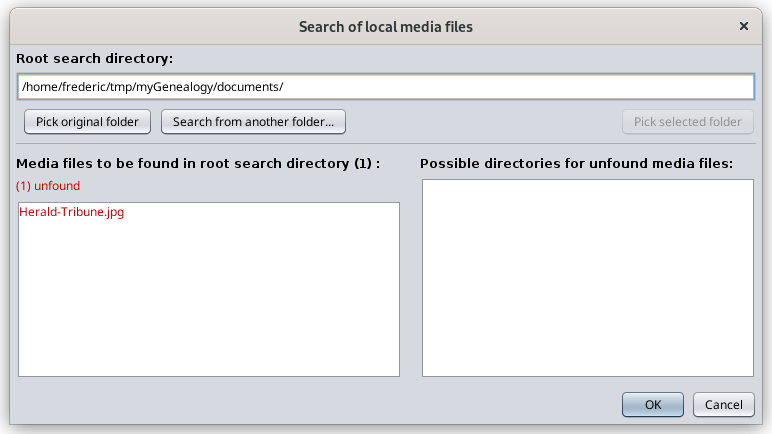](https://docs.ancestris.org/uploads/images/gallery/2023-03/en-file-medias-5.png) This window will help you find the lost file. In the window above, Ancestris will search for the missing files in all directories underneath the root directory indicated at the top. You can change it using the "**Search from another folder...**" button, or '**Pick original folder**" to go back to the original root directory where the Gedcom file is located. The files to be found are listed in red in the left column. Otherwise, they will appear in green. In this example, the file to be found is "Herald\_Tribune.jpg".Please note unfound files can also be quickly located using the "[Validate Gedcom compliance and Data consistency](https://docs.ancestris.org/books/user-guide/page/validate-gedcom-compliance-and-data-consistency "Validate Gedcom compliance and data consistency")" tool if you have indicated in the [Preference window](https://docs.ancestris.org/books/user-guide/page/preferences "Preferences") that files not found are to be considered invalid. However it does not help you find them.
The directories where the files exist are listed in the right-hand-side column. - If no directory appears on the right, it means the file does not exist in any of the folders underneath the root directory indicated on top. If you change the root folder and still no directory appear, it means the file is either deleted or its name has changed. You would have to use your file explorer on your PC to identify its new name or else recreate the media file. - If one or more folder is listed on the right, select one of them. The **Pick selected folder** button should become available. Press it to set the found directory as the new root directory. You can also directly double click on the directory to be selected. For instance, using the "Search from another folder..." button, I changed the root directory, to **myGenealogy** and two folders appear on the right-hand-side. It means the missing file - or at least a file with the same name as the missing file - sits within both folders. [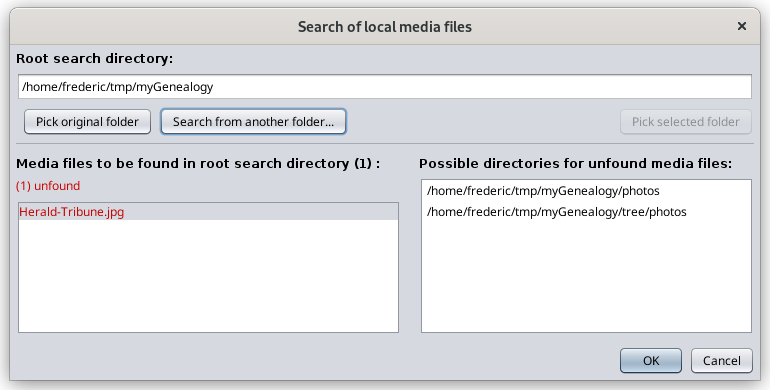](https://docs.ancestris.org/uploads/images/gallery/2023-03/en-file-medias-6.png) If I would rather move the missing file from one of these folders to the one it was supposed to be in before (in this example the documents/ folder), I would use my computer file explorer to do that and reopen the main panel of the Media manager, or press the "[Refresh](#bkmrk-statistics)" button to refresh the statistics. Otherwise, if I want to leave the missing file in that folder, I have to "re-attach" it to the Gedcom file from where it is. I select the first folder for instance. I get the following window where the "Pick selected folder" becomes enabled. [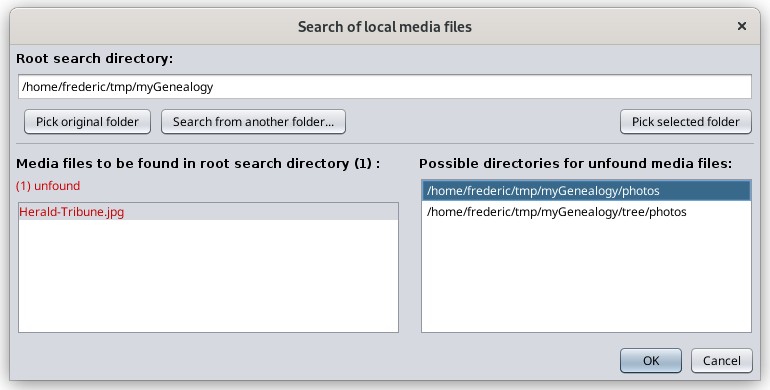](https://docs.ancestris.org/uploads/images/gallery/2023-03/en-file-medias-7.png) I press the "Pick selected folder" button and then, the root folder is updated to point to the "photos" folder and the file on the left becomes green again. [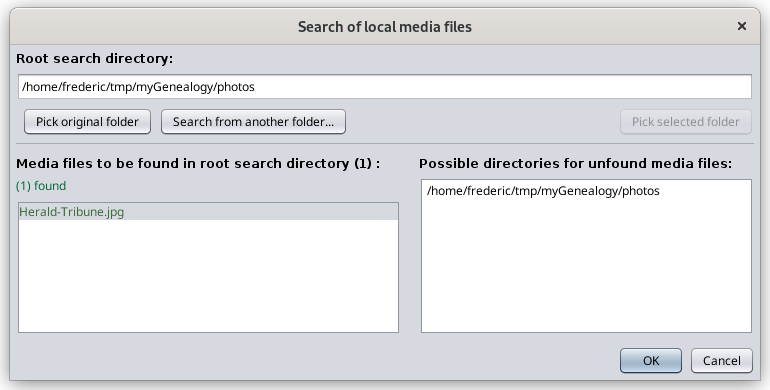](https://docs.ancestris.org/uploads/images/gallery/2023-03/en-file-medias-8.png) I click **OK** to go back to the Media manager window. The line now appears as found. This is the line with 9 found files in folder "photos/". I was showing 8 found files before. Now it is showing 9, and the line with the missing file is no longer there. [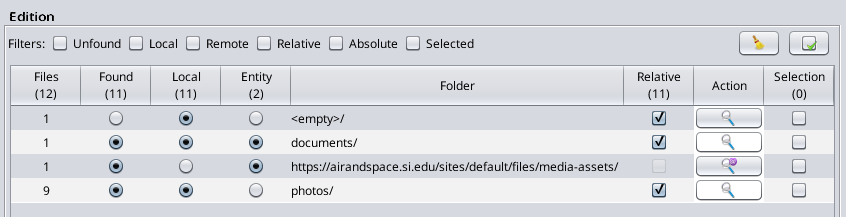](https://docs.ancestris.org/uploads/images/gallery/2023-03/en-file-medias-9.png) Done! ### Downloading remote files Let's look at a use case where you might want to download remote files. For instance, you have been working days and nights for two years on your genealogy and have used a web site such as Geneanet, Ancestry.com or Genoom. You have now more than 5000 individuals and 500 media files referenced on Geneanet for instance. This actually happened to a friend of mine. Of course, you can export your genealogy from Geneanet and open the corresponding Gedcom file from Ancestris. It will work. You will see your genealogy tree with all the pictures as well, even though the pictures are still on the Geneanet web site. Three issues may arise: - The first time you display each picture, the response time from Ancestris might be a bit long. This is because the picture is read from the Internet and cached in memory. With many pictures, and depending on the memory size of your computer and the quality of your Internet connection, it might be a bit annoying. Nothing serious though. - A bit more serious is if you loose your connection temporarily. Ancestris will not see your picture which are only on a remote web site. - Finally, **an issue is much more serious. If the web site disappears - this happened to all Genoom users, you no longer have access to your pictures.** You have to make a local copy. > In this situation, you will want to have a copy of your pictures on your computer or a USB drive. **But you need all your Gedcom file links to be modified and link to the local files rather than the remote files.** Of course! Here is an example of what you would see and do. The following window shows the Media manager window right after importing the genealogy called RemoteGen from Geneanet and opening it. It contains 430 files linked 567 times throughout the genealogy. [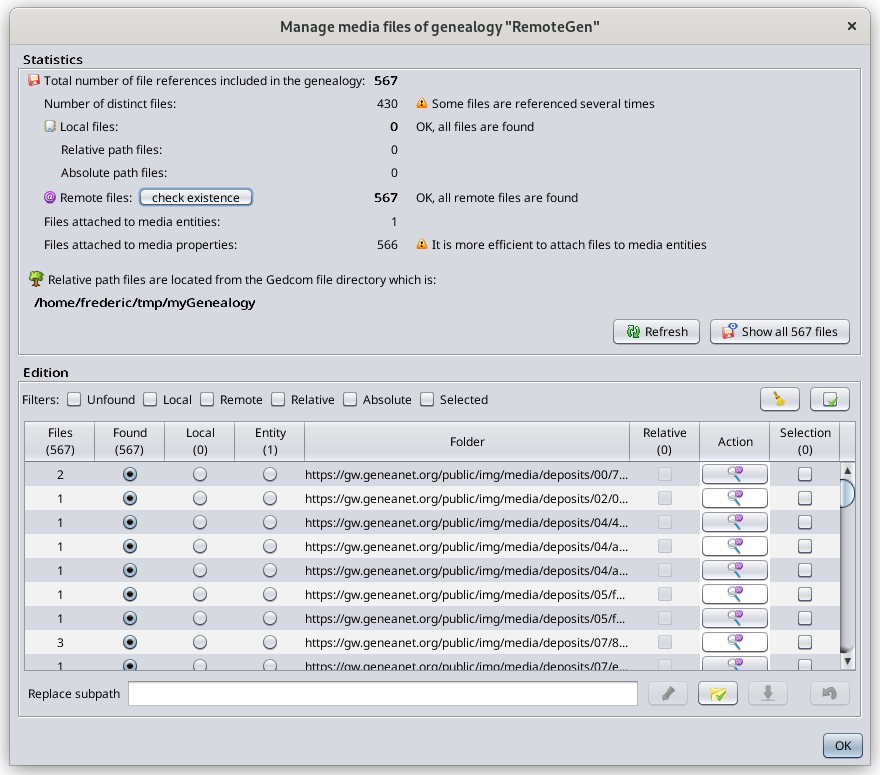](https://docs.ancestris.org/uploads/images/gallery/2023-03/en-file-download-1.png) As we can see, all files are in separate folders on the web site. We are now going to download them all. By default, all remote files are assumed to be found. First, we will check that remote files exist on the Internet to only download those that do exist. It would not differ much to just download them all right away, and just get the one that exist. Ok, so we press the "check existence" button. The progress bar shows the checking process. [](https://docs.ancestris.org/uploads/images/gallery/2023-03/en-file-download-2.png) Once completed, we can see this on the statistics. [](https://docs.ancestris.org/uploads/images/gallery/2023-03/en-file-download-3.png) All but 3 files exist. Select all files using the "Select/Unselect" button next to the filters. If you want, unselect the unfound ones to exclude them. Then click the Download button. The following window lets you choose the destination folder. [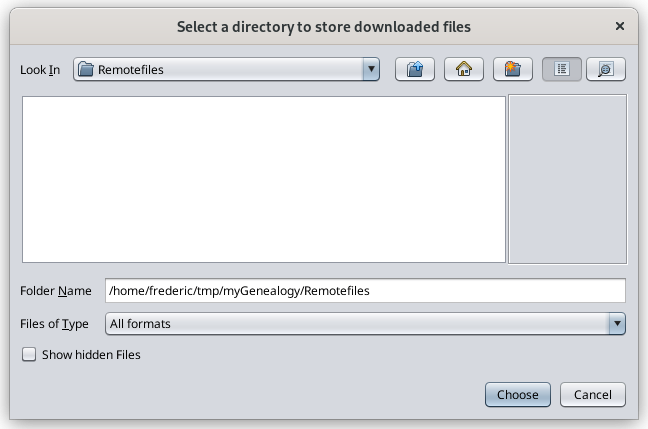](https://docs.ancestris.org/uploads/images/gallery/2023-03/en-file-download-4.png) Then click the Choose button. The download process starts. [](https://docs.ancestris.org/uploads/images/gallery/2023-03/en-file-download-5.png) Upon completion, the following result window appears. [](https://docs.ancestris.org/uploads/images/gallery/2023-03/en-file-download-6.png) Here, it says that 564 files out of the 567 have been downloaded successfully. The 3 unfound files have been set to unfound in case there were not already. Press OK and the Media manager window now shows 564 local files in their local folders, with the same folder structure as there is on Geneanet. [](https://docs.ancestris.org/uploads/images/gallery/2023-03/en-file-download-7.png) Done! ### Editing the path of multiple folders Now let's see how to edit multiple paths at the same time. Let's consider the following situation where we would like to tell Ancestris that the three following folders have actually been moved to a "tree" folder which is in the same folder as the Gedcom file. [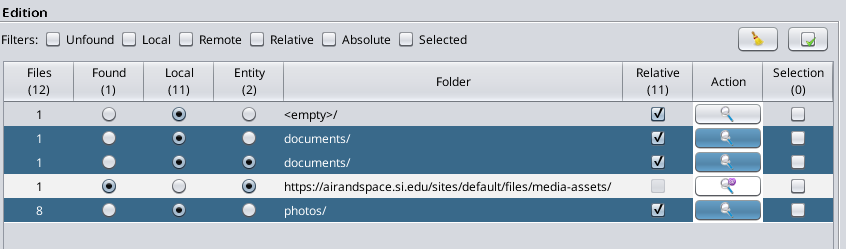](https://docs.ancestris.org/uploads/images/gallery/2023-03/en-file-replace-1.png) The folders are highlighted with the mouse. So now let's click the "**Select/Unselect**" button. It will check the 3 corresponding check boxes. [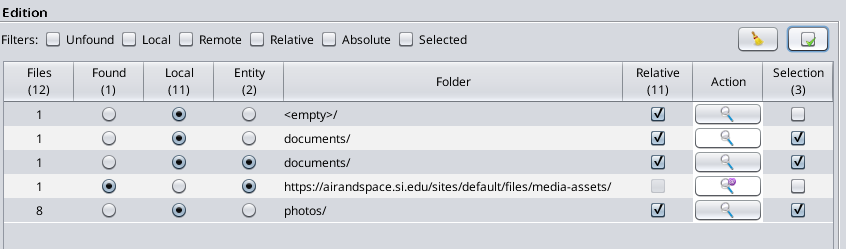](https://docs.ancestris.org/uploads/images/gallery/2023-03/en-file-replace-2.png) The Subpath field is empty. This is because there is no common path between the 3 folders. We will see below another example where it is not empty. In the empty field, type "tree/". [](https://docs.ancestris.org/uploads/images/gallery/2023-03/en-file-replace-3.png) Then press the "**Replace**" button with the pencil. Ancestris has added "tree/" in front of the previous path names. [](https://docs.ancestris.org/uploads/images/gallery/2023-03/en-file-replace-4.png) You will notice the "**undo**" button becomes enabled if it was not already. [](https://docs.ancestris.org/uploads/images/gallery/2023-03/en-file-replace-5.png) Press it to cancel the previous change. We are back to the initial situation. Let's now select both lines with the "documents" folders. The subpath field now says "documents/" because this is the longest common string between both lines. [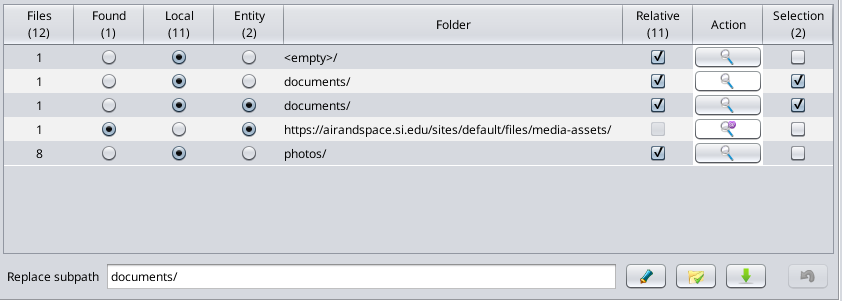](https://docs.ancestris.org/uploads/images/gallery/2023-03/en-file-replace-6.png) Add "Other/" after "documents/" in the text field. [](https://docs.ancestris.org/uploads/images/gallery/2023-03/en-file-replace-7.png) Upon pressing the "**Replace**" button, the paths have changed accordingly. [](https://docs.ancestris.org/uploads/images/gallery/2023-03/en-file-replace-8.png) Done! ### # Media viewer The Media viewer displays all the media files of the genealogy in one single window. You can visualize all of them easily with filters and sorting possibilities. You also identify how they are used the genealogy. The Media viewer can be accessed from the [Media manager](https://docs.ancestris.org/books/user-guide/page/manage-medias-files "Manage medias files") and from the [Cygnus editor](https://docs.ancestris.org/books/user-guide/page/cygnus-editor "Cygnus editor"). [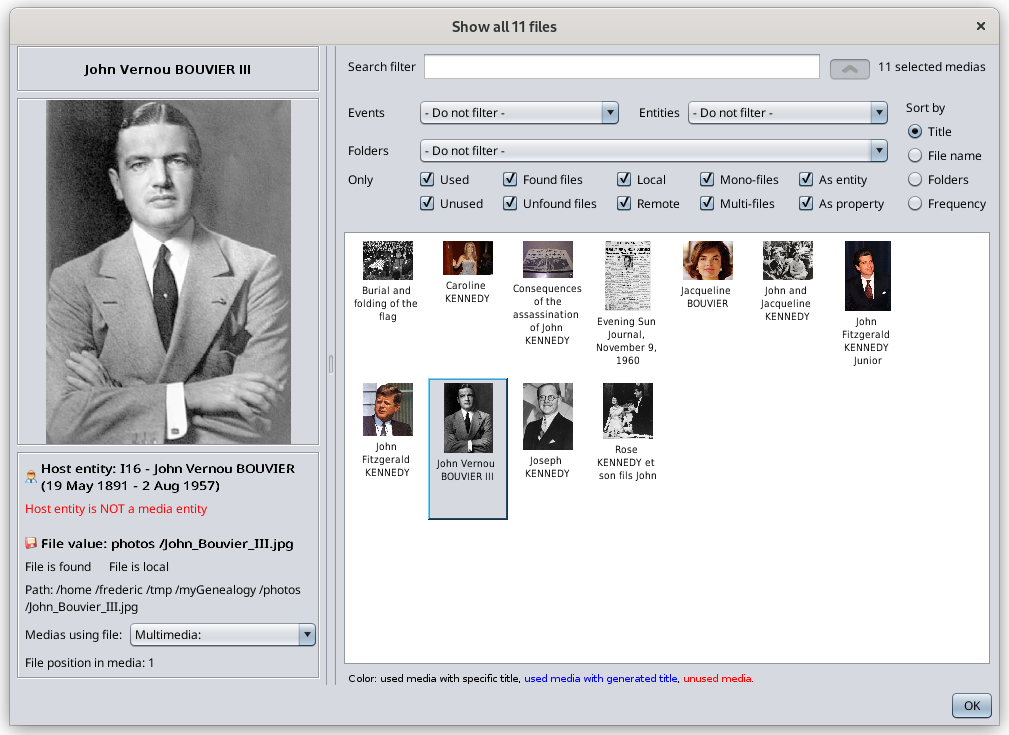](https://docs.ancestris.org/uploads/images/gallery/2023-03/en-media-viewer-1.png) ## Description All media files appear in the list as pictures. For media files like video or sounds, they appear as simplified icons. On top of the list of pictures are some filters and a sorting choice. When a media is selected, its image appears on the left-hand-side with its characteristics. ### List Pictures appear dynamically as you scroll. Once the pictures have appeared once, they are quicker to appear the next time you scroll. Right-clicking on a picture lets you select it in the other Ancestris editors. Titles that appear underneath the pictures are the media titles used in the genealogy if you have provided them, or else the name of the entity it is attached to, or else "Multimedia" if it has no title and is not used in the genealogy. A note at the bottom of the window specifies how the title was generated and associates it to a color. ### Filters A number of filters can be used to reduce the list of media files to be displayed, for quicker search. The search filter lets you enter any string of characters that Ancestris will use to match the title, the file name or the hosting entity of the media files. A button next to the search filter unfolds the other filters or hides them. Filters include the type of Event or Entity the media file is attached to. It includes also whether the media file is used or not, whether it is found or not, local or remote, mono-file or multi-files, as entity or as property. - **Used**, if at least one entity if referencing the media file - **Found**, if the file exists on your local disks or on the Internet - **Local**, if the file is on your local disks - **Mono-file**, if the file is alone in the media property or entity. For information, one media entity can include several files, from Gedcom version 5.5.1 - **As Entity,** if the media file is attached to a media entity - rather than a media property, which means the same file can be reused to various other entities without having to reference the physical file more than once. The filters help you quickly clean your genealogy from unwanted media files. Unwanted media files are generallythe ones which are either: - **unused**, unless they are there waiting to be used - **unfound**, because they are not usable - **remote**, because they tend to be slower to appear - **multi-files**, because the same physical file should not need to be referenced more than once in the genealogy. - **as property**, because files cannot be reused without repeating the attachment of the file. If the file name changes, you would have to change it il several properties for instance. ### Sorting choices The list of media files can be sorted based on their Title, their File name, their folder location or their frequency of usage in the genealogy. ### Media characteristics The characteristics of the media file are displayed under the image. - **Title**: this is the title of the media referencing the file, as described above. - **Attachment** of the media file: this indicates whether the media file is attached to an entity or to a property. In case it is attached to a media entity, a drop down list box displays all the entities using it. This corresponds to the frequency sort criteria mentioned above. - File **value**: this is the value of the FILE property referencing the physical file. You can see if it is an absolute path (starting with '/' or 'C:\\' for instance), or a relative path. - **Found** indicator: indicates whether the file is found or not.. - **Local** indicator: indicates whther the file is local or remote. - Full **path** of the file: this is the full path of the physical file, either local or on the Internet. - **List of medias** using the file: a drop down list box lists all the media using this file if more than one. When the media manager statistics indicate that a file is referenced more than once, that is how you see it. This is the same meaning as "multi-files" in the filters. - **File position** within the media: if several files are attached to the same media property, this gives its position. When a media content does not fit onto one single file, it is useful to bundle them to the same Media entity (or property). No problem there. ## Usage Usage is pretty straight forward. You can select multiple filters at a time. The values and information provided in this window match the information provided in the [Media manager](https://docs.ancestris.org/books/user-guide/page/manage-medias-files "Manage medias files") window. It is to be used in association with the media manager when it comes to organising and cleaning your media files. ## Customization All filters, sort criteria and fold/unfold of filters are memorised for the next time you open the Media viewer. This customization is attached to a Gedcom file. That means that two different genealogy files have different settings. # Convert Gedcom format This window lets you modify the Gedcom norm or the character formatting of any Gedcom file. These characteristics are defined in the Gedcom standard. They are stored in the header of the Gedcom file. They are therefore specific to each genealogy file. ## Description [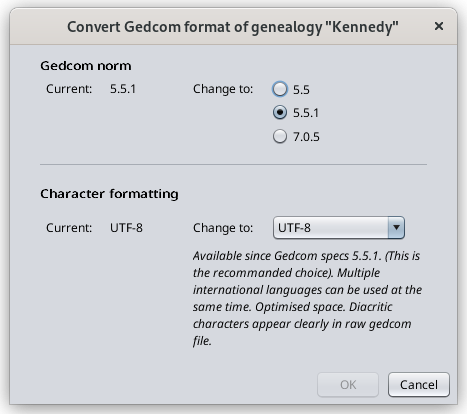](https://docs.ancestris.org/uploads/images/gallery/2022-11/en-file-conversion-1.png) ### Gedcom norm The first choice defines the Gedcom standard of the file. Ancestris can manage versions 5.5 and 5.5.1.Ancestris can convert your genealogy file from 5.5 to 5.5.1 and vice versa.
The Ancestris team is working on supporting version 7 of Gedcom standard. This functionality is not yet available.
### Character formatting The next choice defines the ability to display accented characters. We recommend that you use UTF-8 encoding which covers most cases. You may have in your possession Gedcom files with ANSI or ANSEL encoding. We suggest you change it. ## Result By clicking OK, Ancestris will transform your Gedcom file to the corresponding norm and character setting. In case of successful conversion, a window similar to this one appears. [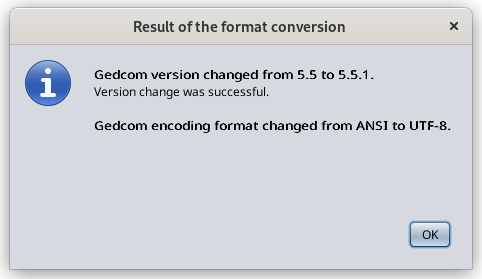](https://docs.ancestris.org/uploads/images/gallery/2023-01/en-file-conversion-success.png) In case of anomalies during the conversion, a window similar to this one appears. [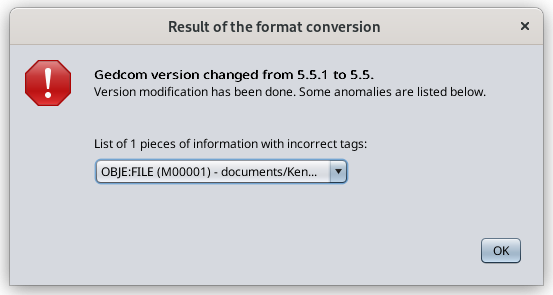](https://docs.ancestris.org/uploads/images/gallery/2023-01/en-file-properties-failure.png) # Save as The **Save as** action either makes an identical copy of your genealogy under another Gedcom file name, or makes a partial copy of your genealogy as another Gedcom file, using several very useful filters.The **Save as** function can also be used to export branches of a genealogical tree.
[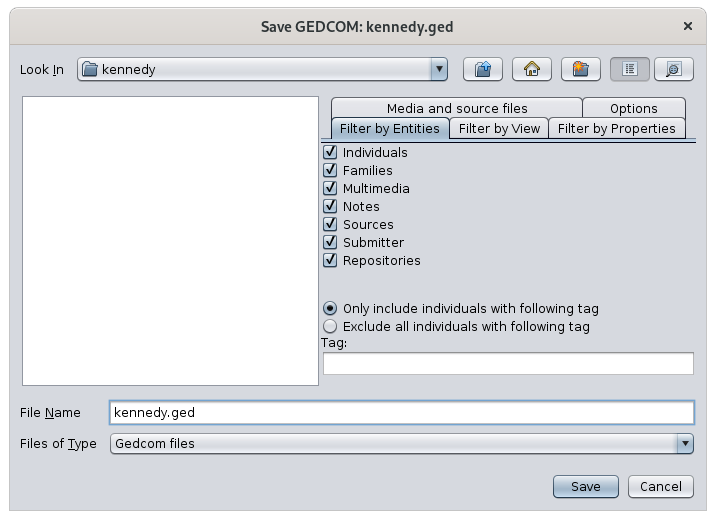](https://docs.ancestris.org/uploads/images/gallery/2020-09/en-save-as.png) ## DescriptionThe **Save as** window is not just a classic file explorer. It has the great particularity of having several filter tabs on the right hand side, which can be combined together to define precisely what you want to extract from your genealogy.
As with classic file tools, the file list allows you to choose the directory and the name of the file to save your genealogy, with the possibility of creating a directory that does not already exist. The filters are made of 5 tabs: - **Filter by Entities**: used to include or exclude categories of [entities](https://docs.ancestris.org/books/user-guide/page/entities "Entities") - **Filter by Properties**: used to exclude specific [properties](https://docs.ancestris.org/books/user-guide/page/properties "Properties") of each entity - **Filter by View**: used to limit the entities to those included in the views currently displayed - **Media and source files**: used to indicate whether media files should be copied along as well or not - **Options**: used to specify the encoding and encryption of the saved Gedcom file ## Usage The **Save as** action can be used to: - make an identical copy of your genealogy - make a partial copy, including extract a branch To make it easier, Ancestris asks you first what you want to do with the following window: [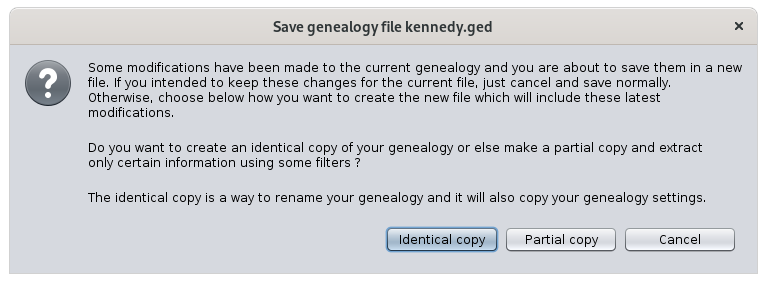](https://docs.ancestris.org/uploads/images/gallery/2021-06/6JCen-saveas-identicalcopy.png)If you choose to make an identical copy, Ancestris will also copy your genealogy settings.
If you choose to make a partial copy, Ancestris will create another Genealogy and open it as it if were a new one and will not copy your settings.
**In case some modifications are pending**, Ancestris will notify you with the first paragraph in the message above. Make sure you save these modifications before making the copy if you intended to keep them in the current file rather than the copy.
The most significant benefit of this **Save as** function is to export tree branches as part of the partial copy choice. The other possibilities are pretty self-explanatory. Exporting branches is done using the **Filter by View** tab. In the example below, we have restricted the display of the Kennedy tree to 3 generations and then we have folded a branch. There are therefore 4 individuals and 2 families displayed. Here is what the [Dynamic tree](https://docs.ancestris.org/books/user-guide/page/dynamic-tree-%28l%29 "Dynamic tree") looks like as well as the **Save-as window Filter-by-View** tab: [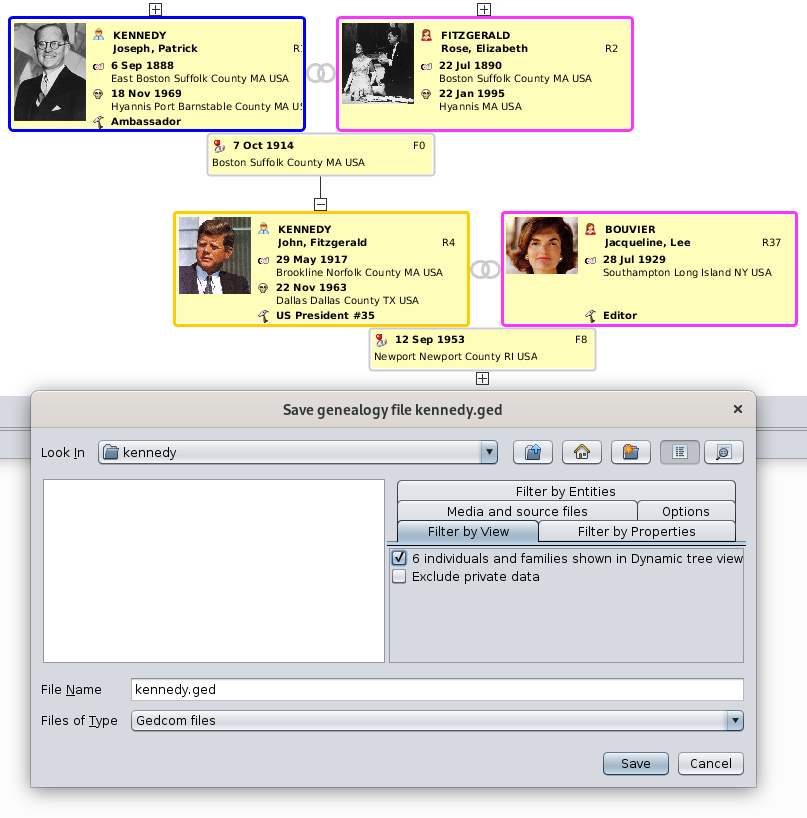](https://docs.ancestris.org/uploads/images/gallery/2020-09/sLhen-save-as.png) By checking the corresponding box "6 individuals and families", we will create a Gedcom file extracted from the main genealogy, with only the 6 entities displayed. Combined with the other filters, we can add the corresponding media, notes, sources, etc. to make it a complete Gedcom file but limited to that part of the tree branch. Other views can be used in a similar way: - the [Geographic map](https://docs.ancestris.org/books/user-guide/page/geographic-map-%28l%29 "Geographic map") view, where you can display a limited number of events and individuals using geographic filters - the [Advanced search](https://docs.ancestris.org/books/user-guide/page/genealogy-search-%28l%29 "Genealogy search") view, where you can select individuals and families meeting some specific criteria on names, occupations, places, etc. Here is what the **Save-as Filter-by-View** tab could look like: [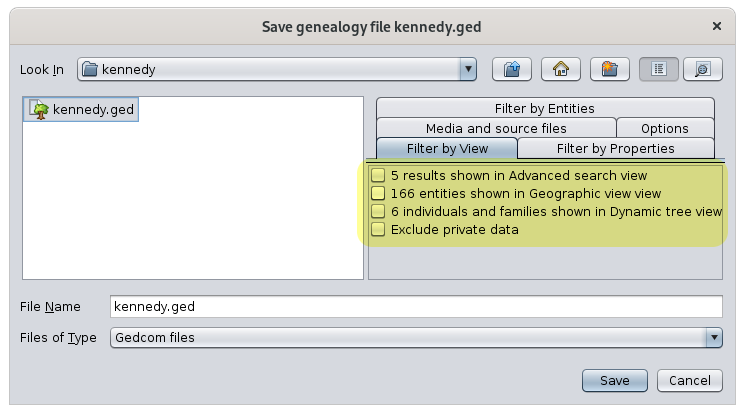](https://docs.ancestris.org/uploads/images/gallery/2020-09/en-save-as-views.png) This is a powerful way to finely define genealogical exports. ### Example We had the following question from a user. >| [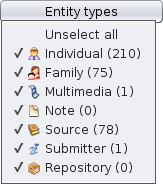](https://docs.ancestris.org/uploads/images/gallery/2020-09/en-find-replace-entities.png) | [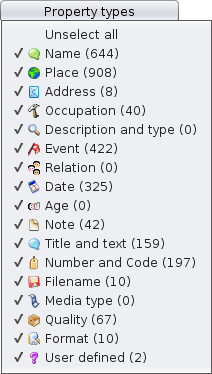](https://docs.ancestris.org/uploads/images/gallery/2020-09/en-find-replace-properties.png) |
| Filter on entities | Filter on properties |
Note that Ancestris also offers two other complementary research tools: (1) [General search](https://docs.ancestris.org/books/user-guide/page/search-bar "Search Bar") which scans all open Gedcom files and the application. (2) [Advanced search](https://docs.ancestris.org/books/user-guide/page/advanced-search-%28l%29 "Advanced search") which is a multi-criteria search within the active genealogy.
If you want to globally change one word to another, or change a date, a place name, or whatever else, the Find and Replace tool is very useful. You can access it via the [Edit menu](https://docs.ancestris.org/books/user-guide/page/edit-menu "Edit Menu") or via the shortcut Ctrl + R. Fill in your text to replace, the text you want to replace it with and the results should already appear. You can then refine your search using the criteria or filters described above. As soon as you check a filter, it takes a little time to refresh the results. If no results appear, check the filters, they are stored from one search to the next. You can then perform the replacements one by one by scrolling through the data found. ## Customization The customization that exists concerning this tool is the possibility of memorizing the search criteria and the filters from one time to the next. # Delete This function deletes data elements from a genealogy. [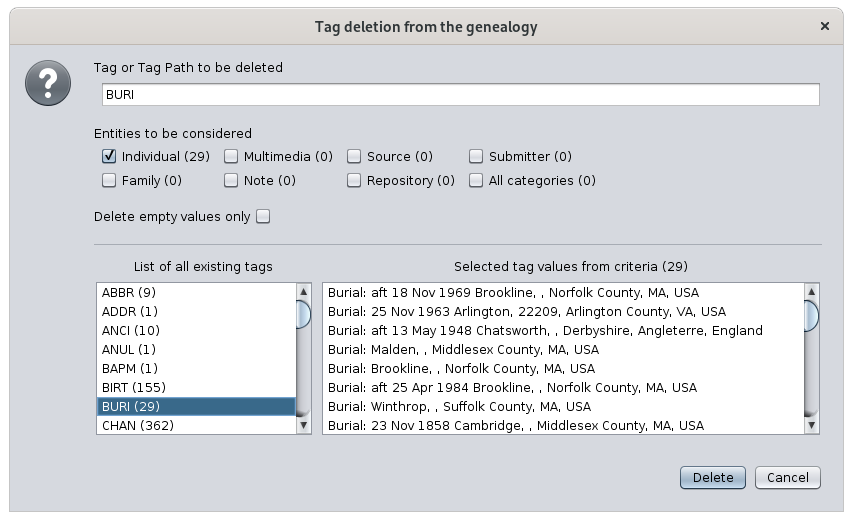](https://docs.ancestris.org/uploads/images/gallery/2021-03/en-delete-tag.png) ## Description Your genealogy information is stored in a [Gedcom](https://docs.ancestris.org/books/user-guide/page/gedcom "Gedcom") file. In this file, each piece of information is stored in a data element called a [Property](https://docs.ancestris.org/books/user-guide/page/properties "Properties"). Example: Name, date of birth, place of marriage, etc. Each property is referenced by a tag. A tag is the name of the data element. See the page about the [tags](https://docs.ancestris.org/books/user-guide/page/tags "Tags") for more details. The Delete function is a tool to delete a tag everywhere in your genealogy. You can choose to delete any tag, for all categories of entity or only some of them, and you can also choose to only delete those that are empty, i.e. that have no value. Underneath your choices, you can see the list of existing tags in the genealogy on thee left hand side, and the list of tag values that would be deleted if you continued and pressed Delete. ## Usage Start this tool using the Edit Menu > Delete. The window shown above appears. Enter the name of the tag to delete. Indicate whether the deletion should only be done for a certain type of entity. And then check or not the box depending on whether you want to delete this label only if it is empty or even if it is filled in.The deletion takes place as soon as you press the Delete button. There is no alert.
If you want to go back, press the Undo button on the toolbar or hit Ctrl + Z.
For example, you can delete all empty dates in individual and families events, and keep the other ones. You would then indicate "**DATE**" in the tag field, you would only check the "**Individual**" and "**Family**" boxes, and you would check the box "**Delete empty values only**". ## ## Customization There is no customization of this function. # Generate Sosa numbers This function generates or erases genealogical numberings of individuals in a genealogy. [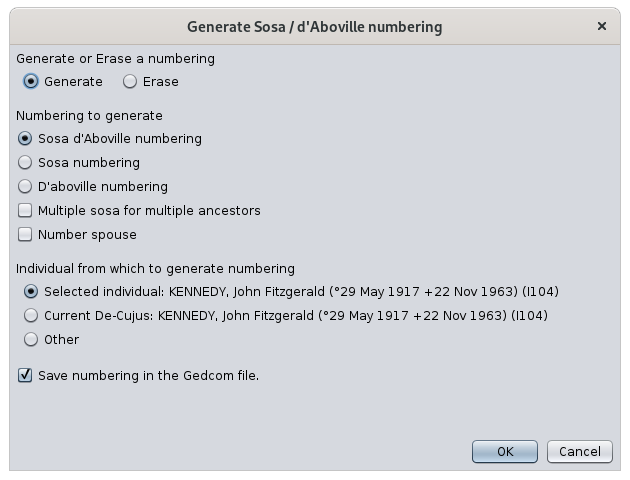](https://docs.ancestris.org/uploads/images/gallery/2021-06/en-sosa-numbering.png) The possible numberings are the Sosa-Stradonitz, d'Aboville, and Sosa-d'Aboville numberings. In genealogy, these numberings make it possible to easily identify, for a given individual (the "*De Cujus*"), his ancestors (Sosa numbering), his descendants (d'Aboville numbering) or both (Sosa-d'Aboville numbering).The term **De Cujus** comes from the Latin expression whose entire formula is "Is de cujus successione agitur" and designates that of the succession of which we are debating.
The term **Sosa-Stradonitz** refers to two famous genealogists: on the one hand Jérôme de Sosa, a Spanish Franciscan monk, who in 1676 used this system (invented, it seems, by Michel Eyzinger at the end of the 16th century), on the other hand Stephan Kekulé von Stradonitz, who, from the end of the 19th century, took up and popularized the system advocated by Sosa.
The **d'Aboville numbering** owes its name to the genealogist Jacques d'Aboville (1919-1979) who invented it.
The **Sosa-d'Aboville numbering** is an Ancestris invention and combines the two previous numberings.
Several numberings can coexist at the same time in the same genealogy. Ancestris allows you to add and remove them as you wish.
It is also possible to maintain dynamic numbering each time an individual is created or deleted. We do not recommend this possibility on large genealogies because it is both unhelpful and resource intensive.
## Description From a reference individual - the De Cujus -, the Sosa numbering goes back in the past. It is generally associated with a numbering of the generations. ### De Cujus The *De Cujus* is the individual taken as a reference in the Sosa numbering, the one who receives the number 1, and which is also called *root*. 1. In Ancestris, do not confuse the root Sosa (i.e. the *De Cujus*) with the root of the dynamic tree. Indeed, the fact of changing root in the dynamic tree does not modify either the choice of *De Cujus* nor the Sosa numbering which results from it. 2. The “Sosa” *De Cujus* should not be confused with the *De Cujus* of the Aboville numbering, they can be distinct. The choice of the "Sosa" *De Cujus* is arbitrary. It can be yourself, your spouse, your elder child, your grandson, etc. The younger the person chosen as the *De Cujus*, the more individuals will carry a Sosa number. In Ancestris, this choice is not definitive: as we will see, this tool makes it possible to change of *De Cujus* easily and instantly. ### Numbering principle The numbering principle is simple: regardless of the individual with a Sosa number, his father carries twice that number, and his mother carries twice that number plus one. In other words, the mother's Sosa number is equal to the father's Sosa number plus one. - Example. An man has the Sosa number 14. Therefore, his father carries number 28 (i.e. 14 x 2) and his mother carries number 29, i.e. (14 x 2) + 1. With the exception of the *De Cujus,* whose sex can be either male or female, all even numbers designate men, therefore, fathers, while the odd numbers designate women, therefore, mothers. - Example. Number 15891 designates a woman, while number 59948 designates a man. The two members of the same parent couple, respectively bear two consecutive numbers, the even number for the husband (the father), the odd number who immediately succeeds. , for the wife (mother). - Example. The numbers 6 and 7 represent the maternal grandparents of the *De Cujus*, namely: the father (6) and mother (7) of the mother (3) of the *De Cujus* (1). ### Generation indication Each generation, i.e. each degree of ancestry, can be calculated and numbered from the Sosa number. For each generation, the smallest number is the same as the theoretical number of this generation. - The smallest Sosa number of the first generation is 1. This generation therefore includes only one individual, the 1 (the *De Cujus*) - The smallest Sosa number of the second generation is 2. This generation therefore includes two individuals, the 2 and the 3 (i.e. the two parents of the *De Cujus*) - The smallest Sosa number of the third generation is 4. This generation therefore includes four individuals, the 4, the 5, the 6 and the 7 (i.e. the four grandparents of the *De Cujus*) - The smallest Sosa number of the fourth generation is 8. This generation therefore includes eight individuals, the 8, 9, 10, 11, 12, 13, 14 and 15 (i.e. the eight great-great parents of the *De Cujus*) - Etc. The Sosa numbering and this method of calculating generations therefore produce an ascending tree always having the same structure: an individual in the first generation (the *De Cujus*), two in the second (both parents of the *De Cujus*), four in the third (the four grandparents of the *De Cujus*), eight to the fourth (the eight great-grandparents of the *De Cujus*), and so on. When Ancestris displays the Sosa number, it also displays the generation number calculated in this way. - Example. Paternal grandfather of paternal grandfather is Sosa 16. This would be generation number 5. Therefore, the complete Sosa number displayed in Ancestris would be "16 G5". ## Sosa and Ancestris Computers have made the Sosa system much less critical. Genealogy software are obviously capable of managing, in an automated and secure manner, the various links between individuals of 'a single file, without any recourse to this numbering method. This is why the Gedcom standard has not provided any particular tag to store the Sosa number. However, as this numbering system is still very popular among genealogists, and very useful to identify relatives, Ancestris decided to use it. Certain views will display the Sosa number of the individual if it exists for that individual, and if it has been generated in the genealogy for at least one *De Cujus* individual. To store the Sosa number, Ancestris uses a special user-defined tag starting with the character "\_" (underlined): the \_SOSA tag, which indicates the Sosa number, followed by the generation number of the individual. ### Generate Sosa numbering In order to generate the Sosa numbering, select the to-be *De Cujus* individual and open the [Context Menu](https://docs.ancestris.org/books/user-guide/page/context-menu "Context Menu") with a right click on it. Another alternative: go to the [Edit menu](https://docs.ancestris.org/books/user-guide/page/edit-menu "Edit Menu") and select **Generate Sosa numbers**. Alternatively, press the [](https://docs.ancestris.org/uploads/images/gallery/2020-10/SosaNumbersIcon.png) button in the main [toolbar](https://docs.ancestris.org/books/user-guide/page/toolbar "Toolbar"). The **Generate Sosa / d'Aboville numbering** panel opens up and displays the various numbering possibilities. Make your choices and press OK to start numbering.When a direct ancestor of number 1 *De Cujus* is added to the genealogy, the Sosa number is not automatically attached to this new individual. You would have to generate again the numbering.
Likewise, if you decide to modify the choice of the *De Cujus*, you must erase and regenerate the numbering again from the newly chosen *De Cujus*.
## D'Aboville numbering The Aboville numbering designates a method of numbering all the direct descendants of an individual taken as a reference. ## Overview From a reference individual, the d'Aboville numbering is carried out in descending generations, that is to say from the past to the present. ### * De Cujus * In the d'Aboville numbering, the *De Cujus* is the individual taken as a reference, in other words, the common ancestor from which this numbering starts. It is assigned number 1. ### Numbering principle A d'Aboville number is made up of several numerical elements separated by dots, the first element (or prefix) relating to the *De Cujus*, the last (the one on the right), to the individual himself. It is for this reason that the *De Cujus* number contains only one element: the number 1, the latter possibly being accompanied by a letter (1a, 1b, 1c, etc.) Apart from the *De Cujus*, each individual receiving a d'Aboville number is necessarily a direct descendant of this *De Cujus*. The number of each of these descendants always includes: - first of all the d'Aboville number of its immediate parent (the father or mother of this individual) - then the birth order number of this individual, within the siblings to which it belongs Examples. - **1.1** means the first child of the *De Cujus* - **1.2** means the second child of the *De Cujus* - **1.3** means the third child of the *De Cujus*, etc. - **1.1.1** means the first child of the eldest of the *De Cujus* - **1.1.2** means the second child of the eldest of the *De Cujus* - **1.1.3** means the third child of the eldest of the *De Cujus*, etc. - **1.2.1** means the eldest child of the *De Cujus*' second child, etc. - **1.4.2.1** means the eldest child of the second child of the *De Cujus*' fourth child, etc. When a "d'Aboville" person (a descendant or the *De Cujus*) is part of several families (in the event of remarriage, for example), the numerical element which represents him is accompanied by a lowercase letter. following the chronological order of these different families: **a** for the first family, **b** for the second, **c** for the third, etc. Examples. - **1b.3** means the third child from a second marriage of *De Cujus* - **1.3a.2** means the second child from a first marriage of the third child *De Cujus*, etc. ### Generation count If the d'Aboville numbering is unable to indicate the sex of the individuals - unlike the Sosa numbering, it does, however, make it possible to know the generation to which the individual belongs. It is in fact the number of elements contained in the number of an individual which indicates the number of generations separating this individual from the *De Cujus* (including the extreme generations, that of the *De Cujus* and that of the individual). Examples. - **1.3** means 2 generations - **1.2.1** means 3 generations - **1.5a.2.3** means 4 generations - **1.3.2.4b.2** means 5 generations ## D'Aboville and Ancestris Just like the Sosa numbering, computers have made the d'Aboville system much less critical. This is why the Gedcom standard has not provided any particular tag to store the d'Aboville number. However Ancestris decided to use it. Certain views will display the D'Aboville number of the individual if it exists for that individual, and if it has been generated in the genealogy for at least one *De Cujus* individual. To store the d'Aboville number, Ancestris uses a special user-defined tag starting with the character "\_" (underlined): the \_DABOVILLE tag, which indicates the d'Aboville number. ### Generating the d'Aboville numbering Choose the d'Aboville numbering in the **Generate Sosa / d'Aboville numbering** panel. The same considerations as for the Sosa numbering apply. Check [the corresponding section](#bkmrk-g%C3%A9n%C3%A9ration-de-la-num "Use the numbering panel"). ## Sosa-d'Aboville numbering As the name suggests, the alternative numbering Sosa-d'Aboville is a hybrid of the two systems Sosa and d'Aboville. In a genealogy, it identifies all the individuals having common genes with the *De Cujus*, while maintaining a distinction between, on the one hand, the direct ancestors (the "Sosa" individuals), and on the other hand, the collaterals (brothers, cousins, small-cousins, etc.) From a "Sosa" *De Cujus*, the Sosa-d'Aboville method generates a double numbering. 1\. Each direct ancestor of the *De Cujus* (each "Sosa" individual), receives a regular Sosa number. 2\. Each “non-Sosa” individual descending from a “Sosa” ancestor receives a “d'Aboville” number, generated from the closest Sosa ascendant. The prefix (the first numeric element) of this particular number is not 1 - as in the “strict” d'Aboville numbering, but the number of the nearest Sosa person. This is how among the children of Sosa 6, we will find, the Sosa 3 (the mother of the *De Cujus*), but also the numbers 6-1, 6-2, 6-3, etc. (the brothers and sisters of the *De Cujus*). Example: the individual carrying number 4-1.2 is a cousin of the *De Cujus* on the paternal side, in other words the second child of his uncle and aunt. In Ancestris, the property tag associated with this numbering is \_SOSADABOVILLE.When you use Ancestris, we recommend you use the hybrid Sosa d'Aboville numbering - \_SOSADABOVILLE - as it includes the benefits of both Sosa and d'Aboville numberings. This is also a visual way to identify "blood-related" individuals at first sight.
# Generate ID numbers This function renumbers the entities of your genealogy by redefining their identification number. [](https://docs.ancestris.org/uploads/images/gallery/2020-09/en-generate-ID-Numbers.png) ## Description The window that appears presents two main choices. - Mass renumbering for a category or all categories of entities. - Renumbering on one single entity. In mass numbering, it is possible to define a numbering format. This will always start with a letter. In Ancestris, entity numbers always start with a letter. - **I** for individuals - **F** for families - **M** for media - **N** for notes - **R** for repositories - **S** for sources - **B** for submitters Then it is possible to define a prefix, then a number of a chosen number of digits, then a suffix. In the case of the numbering of the entities one by one, you enter the ID of the entity to renumber, and the new ID number. ## Usage The renumbering of the entities sorts the selected entities in alphabetical order of their name and then allocates number "1" to the number of entities, without leaving any number empty, and according to the the formatting provided. For single entity numbering, use the red arrow button to choose the current entity. If you indicate an existing ID, Ancestris warns you with a message to the right of the button. For the new identifier, Ancestris tells you if the chosen identifier is free and is not already allocated to an entity in your genealogy. [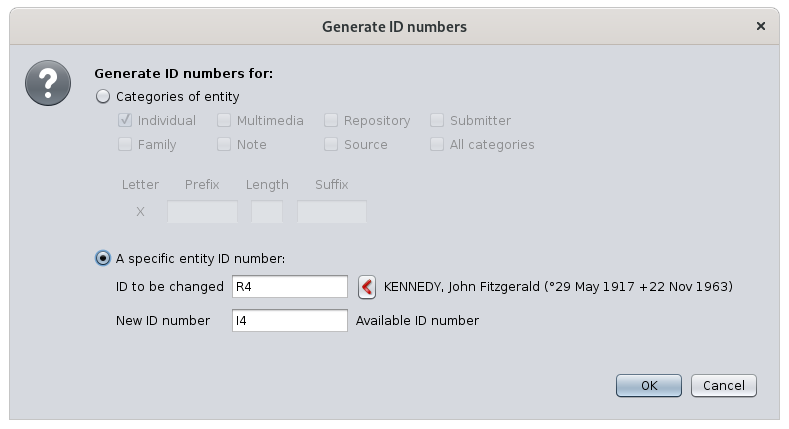](https://docs.ancestris.org/uploads/images/gallery/2020-09/en-generate-ID-Numbers-2.png) Whether in case of mass or individual renumbering, Ancestris displays the following message when it is completes successfully. [](https://docs.ancestris.org/uploads/images/gallery/2020-09/en-generate-ID-Numbers-result.png) ## Customization There is no specific customization for this tool. # Mark special individuals This feature marks or displays certain special individuals in your genealogy such as implex families, tree top individuals, Y-DNA related people, etc. [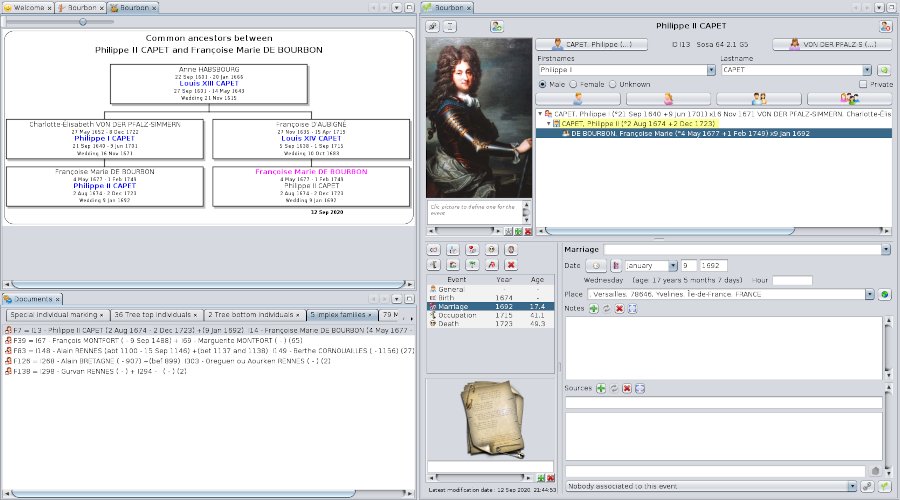](https://docs.ancestris.org/uploads/images/gallery/2020-09/en-marking-individuals-overview.png) ## Description At Ancestris, we have identified several types of populations in your genealogy that might be of great interest to you. They are listed in this window and described below. [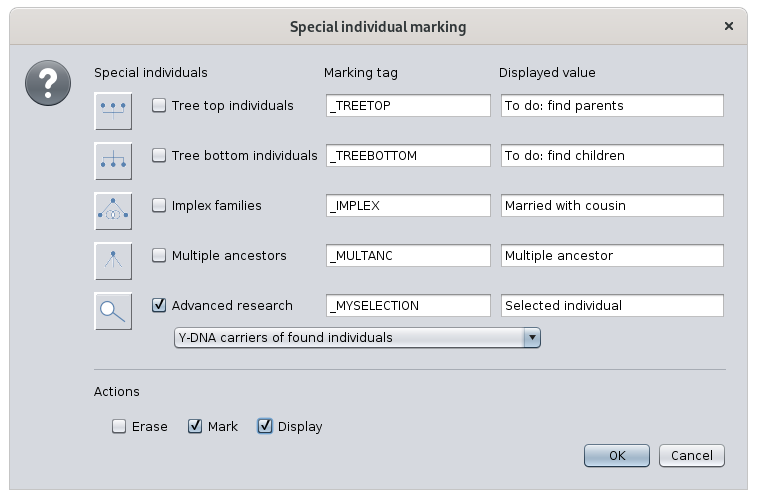](https://docs.ancestris.org/uploads/images/gallery/2020-09/en-marking-individuals.png) - **Tree top individuals**: these are the individuals without parents at the top of the ascending tree of a given root individual taken as *De Cujus.* - **Tree bottom individuals**: conversely, these are the individuals without children at the base of the tree descending from a root individual taken as a starting point. They can be single or married, and they do not have recorded descendant. - **Implex families**: these are "couples of cousins", i.e. individuals forming a union and having at least one common ancestor. Their union generates the *implex*, that is to say *a reduction in the number of ancestors of their descendants*. They may or may not already have children identified in the genealogy. - **Multiple ancestors**: these are the individuals who have implex families among their descendants. Each multiple ancestor can be a multiple ancestor of different couples. - **Advanced research**: these are the individuals found and resulting from the [Advanced search](https://docs.ancestris.org/books/user-guide/page/advanced-search-%28l%29 "Advanced search"), or persons relating to them in a certain way. Hence we can choose to mark: - the found individuals themselves - the **parents** of the found individuals - the **children** of the found individuals - the **spouses** of the found individuals - the **ancestors** of the found individuals - the **descendants** of the found individuals - the **carriers of the Y-DNA** of the found individuals - the **carriers of the mt-DNA** of the found individuals - the **potential** **carriers of an X** chromosome of the found individuals For each of these populations, Ancestris lets you define a user-defined tag to mark them and find them more easily later, for example in the Advanced search view itself. You can name the tag as you like. Ancestris will make sure it starts with the '\_' character. Ancestris also lets you define the value for that tag. The screen above suggests possible tags and values. Finally, the check boxes at the bottom of the window let you choose whether to erase, mark, or display only the corresponding individuals. Once the individuals are marked, you can see the tags in the [Gedcom editor](https://docs.ancestris.org/books/user-guide/page/gedcom-editor-%28l%29 "Gedcom editor"). ## Usage Marking individuals can be very useful to easily locate individuals and doing some analysis.The tree top individuals and the tree bottom individuals represent the outer perimeter of your genealogical progress in terms of individuals. - Tree top individuals are the ones from where you search for ancestors. - Tree bottom individuals are the ones from where you search for descendants.
Implex families and multiple ancestors provide a better understanding of filiations in your genealogy.
As you can see in the following example, Ancestris quickly highlights you the implex couples in your genealogy and their relationships via their common ancestors, thanks to this tool combined with the [Common Ancestors](https://docs.ancestris.org/books/user-guide/page/common-ancestors-%28l%29 "Common ancestors") tool. You can also see 5 tabs in the **Documents** window. The first one, "Special individual marking" is a summary of what was found and marked. Each of the other tabs corresponds to a special individual population. [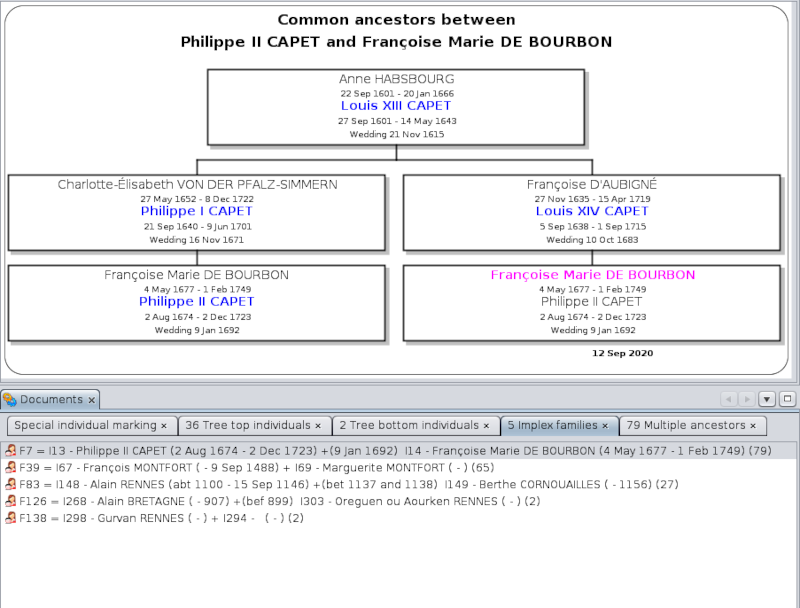](https://docs.ancestris.org/uploads/images/gallery/2020-09/en-marking-individuals-ancestors.png) To get there, first we have selected an individual in the genealogy. Then we have opened this "mark special individual" tool from the Edit menu, then we have checked the populations we were interested in, filled in the tags and values we wanted, and finally pressed OK. The choice of a reference individual is only useful for tree top and tree bottom individuals. For implexes and multiple ancestors, Ancestris searches the entire genealogy. For each of the special populations, Ancestris creates a tab in the Documents window. What follows is a description of each population marking. ### Tree top individuals [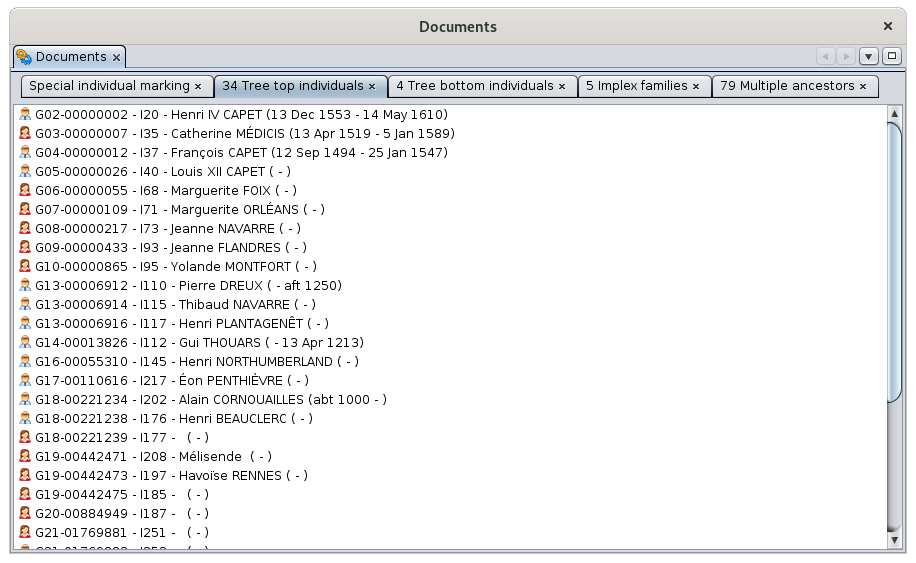](https://docs.ancestris.org/uploads/images/gallery/2020-09/en-marking-individuals-top.png) In the case of the Bourbon file used here, we asked for the marking and display of the top individuals after first selecting the individual Louis XIII. Ancestris found 34 tree top individuals in the ascendant tree of Louis XIII. These individuals are listed in the tab. Just click on them to display them in the views of Ancestris. Each individual name is preceded by a Sosa number generated for the occasion, but not stored in the genealogy. This number is constructed like the other Sosa numbers in Ancestris, that is to say with the generation number and the Sosa number itself. The list is sorted in ascending order of Sosa number. By clicking on one of the individuals and viewing it in the Gedcom editor, we see that the \_TREETOP label has been added. [](https://docs.ancestris.org/uploads/images/gallery/2020-09/en-marking-tag-top.png) ### Tree Bottom Individuals [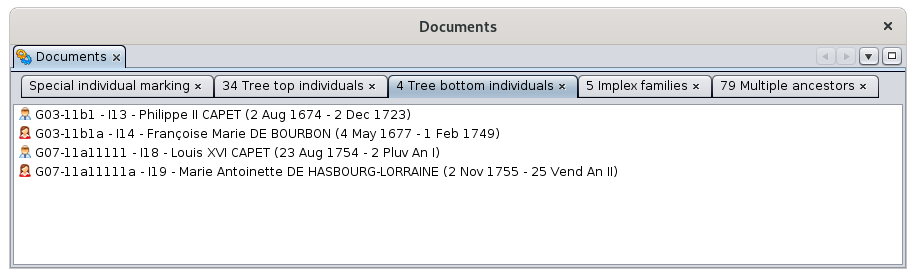](https://docs.ancestris.org/uploads/images/gallery/2020-09/en-marking-individuals-bottom.png) In the case of the Bourbon file used here, we requested the marking and display of tree bottom individuals by first seleccting Louis XIII. Ancestris found 4 individuals at the bottom of Louis XII descending tree. These individuals are listed in the tab. Just click on them to display them in the views of Ancestris. Each individual name is preceded by a d'Aboville number generated for the occasion, but not kept in Gedcom. This number is constructed like the other Ancestris d'Aboville numbers, that is to say with the generation number and the actual d'Aboville number. The list is sorted in ascending order of d'Aboville number. By clicking on one of the individuals and viewing it in the Gedcom editor, we see that the \_TREEBOTTOM tag has been added. [](https://docs.ancestris.org/uploads/images/gallery/2020-09/en-marking-tag-bottom.png) For tree bottom individuals who belong to families without children, the family ID is added to the value of the tag, to make it easy for you to identify the family from the individual. ### Implex families [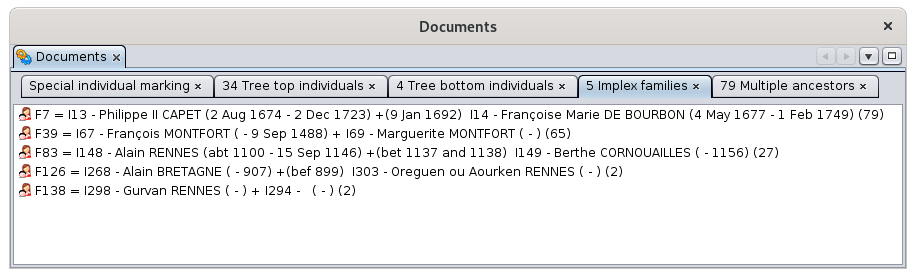](https://docs.ancestris.org/uploads/images/gallery/2020-09/en-marking-individuals-implex.png) In the case of the Bourbon file used here, we requested the marking and display of the implex families. This marking does not require specifying a reference individual. The result of the marking tool is the same regardless of which individual is selected. Ancestris found 5 implex families in the entire Bourbon genealogy provided. These families are listed in the tab. Just click on them to display them in the views of Ancestris. Each family name is followed by a number between parentheses. This is the number of common ancestors to both members of the couple. Note that these individuals will be themselves in the Multiple Ancestors tab ! The list is sorted in descending order of the number of common ancestors. By clicking on one of the families, the [Common Ancestors](https://docs.ancestris.org/books/user-guide/page/common-ancestors-%28l%29 "Common ancestors") viewing window appears and shows the visual path between one of the common ancestors and the two members of the couple. [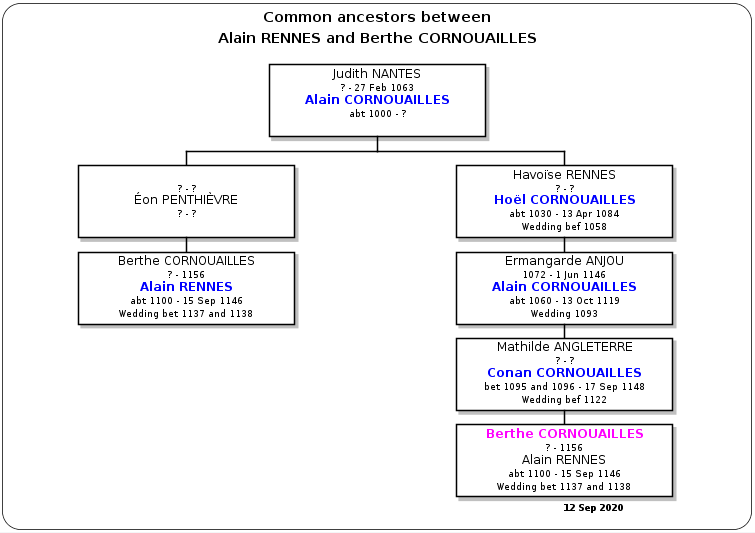](https://docs.ancestris.org/uploads/images/gallery/2020-09/en-marking-individuals-implex-ancestors.png) In the Gedcom editor, we see that the \_IMPLEX tag has been added to the family, suffixed with the numbr of common ancestors. [](https://docs.ancestris.org/uploads/images/gallery/2020-09/en-marking-tag-implex.png) ### Multiple ancestors [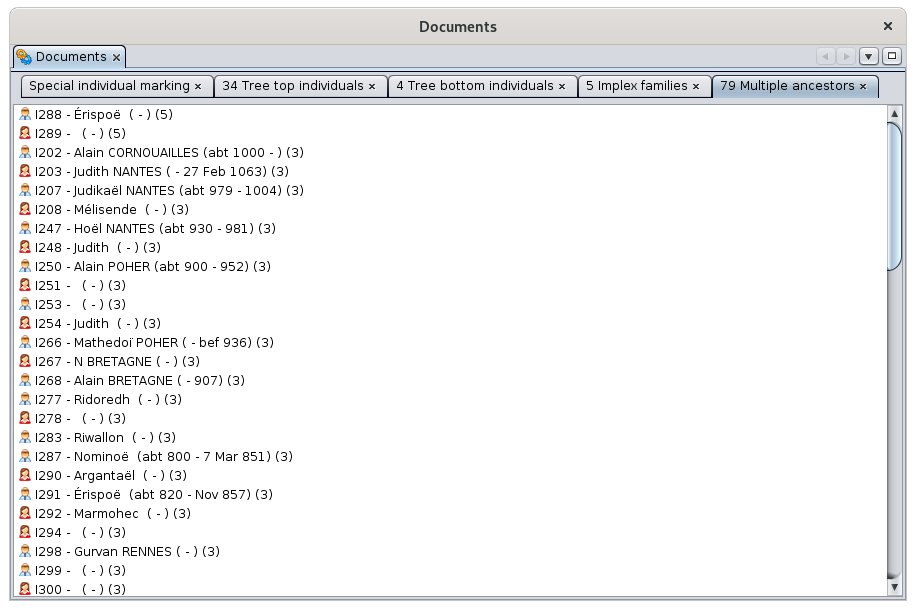](https://docs.ancestris.org/uploads/images/gallery/2020-09/en-marking-individuals-multiple.png) In the case of the Bourbon file used here, we requested the marking and display of multiple ancestors. This marking does not require to first select a reference individual. Ancestris found 79 multiple ancestors throughout the Bourbon genealogy provided by Ancestris. These individuals are listed in the tab. Just click on them to display them in the views of Ancestris. Each individual name is followed by a number in parentheses. This is the number of couples among its descendants who are implex families. Note that these families will be in the previous Implex families tab. The list is sorted in descending order of the number of these implex families. Clicking on one of the individuals displays it in the views of Ancestris. In the Gedcom editor, we see that the \_MULTANC tag has been added to the individual, followed by the list of all the descending implex families. [](https://docs.ancestris.org/uploads/images/gallery/2020-09/en-marking-tag-multiple.png) Multiple ancestors are displayed in black if they are related to the current *De Cujus* of the genealogy - that is to say, they hold a \_SOSA or \_SOSADABOVILLE tag, or they are displayed in purple otherwise. ### ### Advanced search [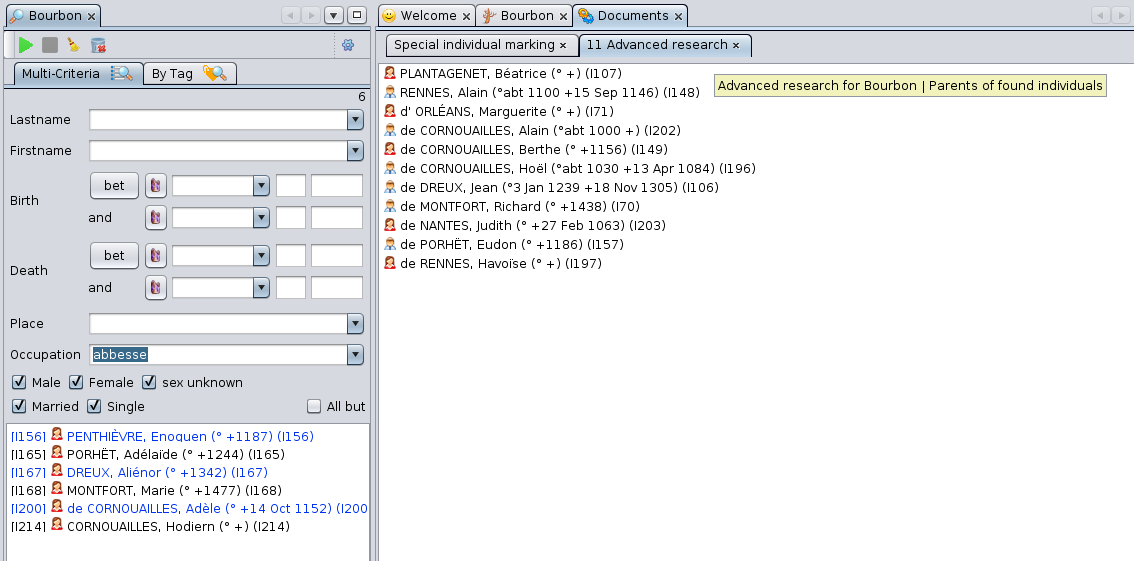](https://docs.ancestris.org/uploads/images/gallery/2020-09/en-marking-individuals-search.png) In the case of the Bourbon file used here, we asked for the marking of the parents of individuals who had an occupation of Abbess. In the [Advanced search](https://docs.ancestris.org/books/user-guide/page/advanced-search-%28l%29 "Advanced search"), we have selected the Abbesses individuals. Then in the marking tool, we have checked Advanced search and chose the relation "Parents of individuals found" in the dropdown list. Ancestris found 6 abbesses in the Advanced search, who have together 11 parents as we can see in the marking tools. The individuals are sorted in alphabetical order. Clicking on one of the individuals displays it in the views of Ancestris. In the Gedcom editor, we see that the \_MYSELECTION tag has been added to the individual, followed by the value defined. [](https://docs.ancestris.org/uploads/images/gallery/2020-09/en-marking-tag-search.png) ### Special individual marking tab In order for you to know the marking request you did, the first tab generated is a summary of your request and the list of results. [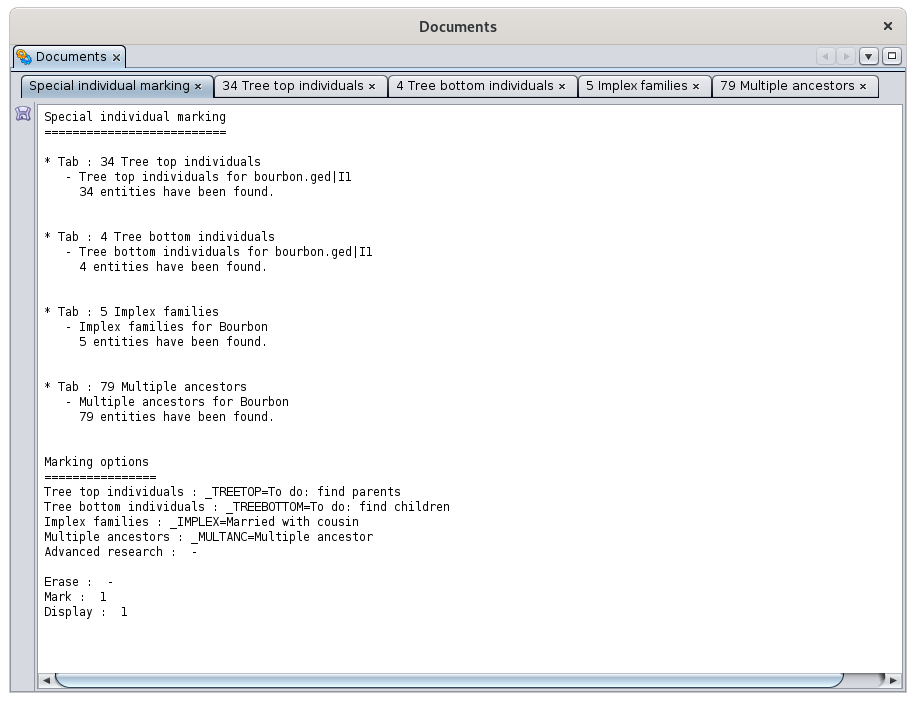](https://docs.ancestris.org/uploads/images/gallery/2020-09/en-marking-individuals-summary.png) ## Customization There is no specific customization for this tool. # Age calculation This function calculates ages of all the individuals at their respective life events. [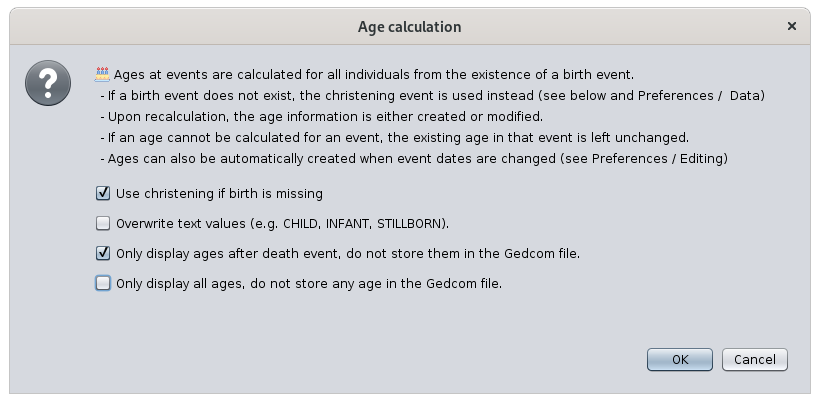](https://docs.ancestris.org/uploads/images/gallery/2021-01/en-age-calculation.png) ## Description All individuals of your genealogy have life events that are usually dated. It is often useful to document directly the age of the individual at each event. This is done using an age attribute, which is a tag added to the event. The age information is either automatically added when a date event is added or modified [(please refer to the Edit tab of the Preferences)](https://docs.ancestris.org/books/user-guide/page/preferences#bkmrk-zone-%C3%89diteur "Preferences / Editing"); or else you can use this tool if you want to force all AGE tags to be added or updated. The Age calculation function is a tool to updated all AGE tags in your genealogy.For an individual, all individual and family events are considered to calculate ages. In a family event such as a marriage, ages appear under the HUSBand and the WIFE tags of the event tag.
The above window explains the basic of what the tool does. 4 settings are available: - **Use christening when birth is not provided**: if checked, the age will be calculated assuming the christening and the birth happened on the same day [(please refer to the Data tab of the Preferences)](https://docs.ancestris.org/books/user-guide/page/preferences#bkmrk-dates "Preferences / Data") - **Overwrite text values**: a text value is the result of a manual input. Therefore is option prevents the Age calculation function to inadvertently erase your manual inputs. Any text value is possible for ages but only 3 values are valid and part of the Gedcom standard. - CHILD = age < 8 years - INFANT = age < 1 year - STILLBORN = died just prior, at, or near birth, 0 years - **Only display ages after death events**: naturally ages stop progressing at the death event. During the automatic calculation, ages are calculated for any event except birth. If you are OK to display them after death, but do not want to keep them in the Gedcom file, use this option. - **Only display ages, do not store them in the Gedcom file**: if you only use automatically calculated ages, it might \*not\* be necessary to store them in the Gedcom file. If you check this box, all ages for all events will be displayed only : ages ill appear in grey background. If you uncheck this box, ages ill be changed to white background, meaning they will be saved in the Gedcom.All ages that are in grey background are displayed only and not stored in the Gedcom file. As a result, next time you open the genealogy, the corresponding age tags will not be displayed unless you recalculate the ages using this tool.
## Usage Ages are generally useful in the editors: - In the Cygnus and the Aries editors, ages are calculated upon editing the events, even though they are not necessarily stored in the Gedcom file itself. - In Cygnus, ages are visible in the events list itself - In the Gedcom editor ages are all visible at once as well.Ages can also be used when sorting the entity table. Generate the ages then sort the entity table on the Age column.
To generate all ages: - Start this tool using the Edit Menu > Calculate ages. - The window shown above appears. - Make sure you read the instructions and select the options you need and press OK.The modifications apply immediately.
Press Undo in the menu bar, or hit Ctrl + Z, to cancel your changes and try other settings.
For example, you can see below that: - The BIRTh event does not have any age which is normal. - The DEATh event shows the calculated age - The BURY age is calculated and is in grey background, meaning it will not be stored in the Gedcom file. - The OCCUpation has got an age calculated [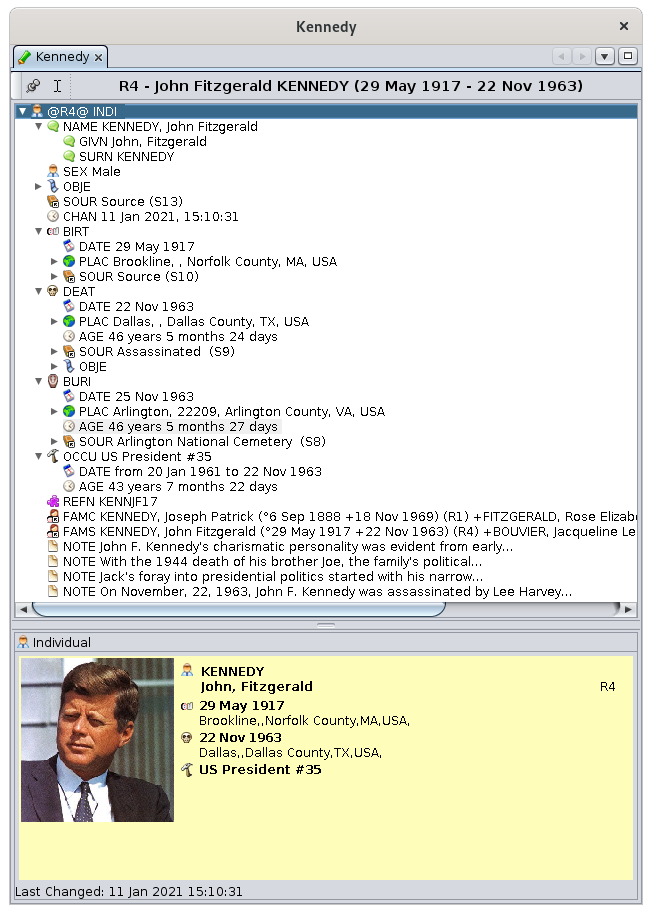](https://docs.ancestris.org/uploads/images/gallery/2021-01/en-age-calculation-results.png) ## ## Customization The "Use christening" options is part of the Preferences. [(please refer to the Data tab of the Preferences)](https://docs.ancestris.org/books/user-guide/page/preferences#bkmrk-dates "Preferences / Data") # See modifications history This function gives the history of modifications made to a genealogy within Ancestris. [](https://docs.ancestris.org/uploads/images/gallery/2020-09/en-modifications-history.png) ## Description If you want to trace precisely what happened in your Gedcom file, modification by modification, this table gives it to you. In 7 columns, this table gives you the date and time of the modifications, the entity involved, if it is a creation of data, a modification or a deletion. It also gives the modified data, its old value and its new value. It is possible to reset this history because the number of lines can indeed be important. The information provided is therefore logged since the last reset of this history. Changes that were rolled back - undo & redo - remain in the history. Their cancellation appears as an additional modification. ## Usage You can sort the table by clicking on the column of your choice. The table can only be sorted on one column at a time. You can move the columns with the mouse. You can reset the history with the button at the top right.As soon as the button is pressed, the data is erased without the possibility of recovering them, unless a backup of the parameters file has been made.
In this case, be aware that the files containing this information are located in the [User directory](https://docs.ancestris.org/books/user-guide/page/software-files-and-user-settings-files#bkmrk-the-user-directory "Software files and User settings files"), in the `var/cache/ModificationsHistory`, with one history file per Gedcom file. ## Customization There is no specific customization for this tool. # Entity card The **Entity card** gives an overview of the [current entity](https://docs.ancestris.org/books/user-guide/page/relationships-between-windows "Current entity of the Current genealogy"). [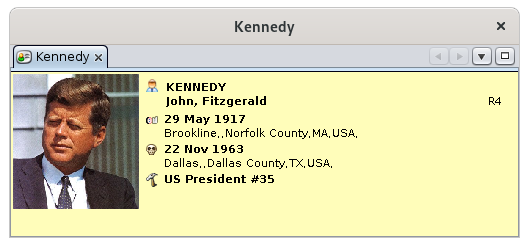](https://docs.ancestris.org/uploads/images/gallery/2020-09/en-entity-card.png) The content of the card shows the key elements of information regarding this entity. It depends on the entity. Essentially dedicated to consultation, this view does not allow navigation, but has a number of commands accessible from the [Context menu](https://docs.ancestris.org/books/user-guide/page/context-menu "Context Menu"), available by right click. ## Customization Everything displayed in this window can be personalized using [blueprints](https://docs.ancestris.org/books/user-guide/page/blueprints "Blueprints"): the presence and position of the photo, information elements, background color, font (type, color, size), etc. The blueprints defined for this view can be much more detailed than what you see here, or than in the [Dynamic tree](https://docs.ancestris.org/books/user-guide/page/dynamic-tree-%28l%29 "Dynamic tree") view, where it would require too much resource given the large number of individuals and families to display in the tree. You can define your own if you access the blueprint manager using the [Context menu > Change the display of individuals / families](https://docs.ancestris.org/books/user-guide/page/blueprints#bkmrk-managing-blueprints "Context Menu to display blueprint manager"). # Entities table The **Entities table** lists all the [entities](https://docs.ancestris.org/books/user-guide/page/entities "Entities") of the genealogy and provides detailed information for each of them in columns. [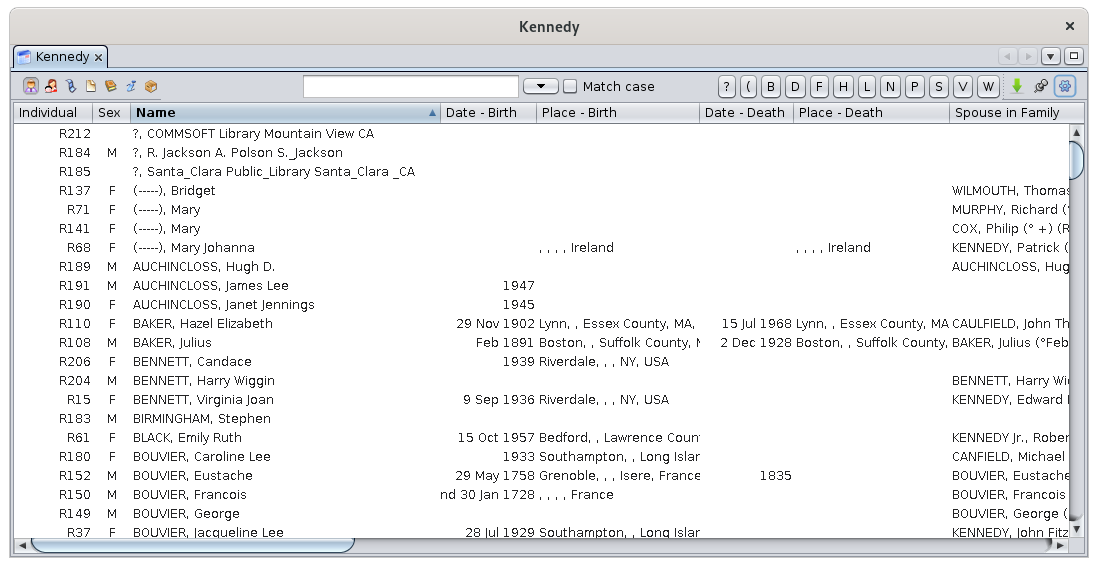](https://docs.ancestris.org/uploads/images/gallery/2020-09/en-entities-table.png) This view is the one that best allows you to list and navigate through the entire genealogy. You can also create, modify, and delete entities from this table using the [Context menu](https://docs.ancestris.org/books/user-guide/page/context-menu "Context Menu"). ## Description The entity table displays a table of entities. At the top of the table is a specific toolbar. ### Data table #### Rows and columns Each row represents an entity, which belongs to the category currently selected using the selection buttons in the toolbar. Each column represents a property associated to this category of entity (individual, family, note, source, etc.). #### Sorting entities The header of each column shows its title. It corresponds to the name of the property associated with the category of entity selected. These column headers are also buttons to sort the table. To sort the table on a specific field, just click on its corresponding header. A small triangle is displayed on this column header shows the sorting orientation : ascending or descending (pointing upwards : ascending direction, pointing downwards : descending direction). This direction is immediately reversed with a new click on the header. When sorting columns, a serie of cursor buttons appear on the toolbar, between the Search window and the Export button. These buttons have letters or date labels. Clicking on a letter or a date takes you directly to the first entity whose first letter or date corresponds to the clicked cursor button. #### The Table View allows you to display the Context Menu by right-clicking on any cell of the table. ### Toolbar [](https://docs.ancestris.org/uploads/images/gallery/2020-04/tableentitetool.jpg) #### Entity selection buttons Located on the left hand side of the bar, these buttons materialize each entity. One button is always selected, and only one at a time. Each of the 7 buttons displays the table of the 7 different types of entities in a [Gedcom](https://docs.ancestris.org/books/user-guide/page/gedcom "Gedcom") file. - [](https://docs.ancestris.org/uploads/images/gallery/2020-10/Ancestris_gedcom_tag_sexin.png) [Individuals](https://docs.ancestris.org/books/user-guide/page/entities#bkmrk-individu "Individuals") - [](https://docs.ancestris.org/uploads/images/gallery/2020-10/Ancestris_gedcom_tag_fam.png) [Families](https://docs.ancestris.org/books/user-guide/page/entities#bkmrk-famille-0 "Families") - [](https://docs.ancestris.org/uploads/images/gallery/2020-10/Ancestris_gedcom_tag_obje.png) [Media](https://docs.ancestris.org/books/user-guide/page/entities#bkmrk-fichier-multim%C3%A9dia "Media") - [](https://docs.ancestris.org/uploads/images/gallery/2020-10/Ancestris_gedcom_tag_note.png) [Notes](https://docs.ancestris.org/books/user-guide/page/entities#bkmrk-note "Notes") - [](https://docs.ancestris.org/uploads/images/gallery/2020-10/Ancestris_gedcom_tag_sour.png) [Sources](https://docs.ancestris.org/books/user-guide/page/entities#bkmrk-source "Sources") - [](https://docs.ancestris.org/uploads/images/gallery/2020-10/Ancestris_gedcom_tag_subm.png) [Submitters](https://docs.ancestris.org/books/user-guide/page/entities#bkmrk-fournisseur-d%27inform "Submitters") - [](https://docs.ancestris.org/uploads/images/gallery/2020-10/Ancestris_gedcom_tag_repo.png) [Repositories](https://docs.ancestris.org/books/user-guide/page/entities#bkmrk-lieu-de-stockage "Repositories") Shortcuts: the <**Ctrl+Left**> or <**Ctrl+Right**> keys select the entity to the **left** or the entity to the **right** of the selected button. #### Search field At the right of the selection buttons, you can type a text in the search field to look for a name in the table. As soon as a character is entered in the field, the number of corresponding entities is displayed at the left of the field. To the right of the field, a check box **Exact Match** forces the search to distinguish upper case and lower case. #### Cursor buttons These buttons work in correlation with the entity selection buttons, and adapt to the selected column. If the selected column is a text field, the cursor buttons are labelled with letters. If the selected column is a date, the cursor buttons are labelled with dates. If the search field is used, only the cursor buttons corresponding to the search results are displayed. These buttons directly access the first line of the table whose columns value starts with that letter or that date range. #### Export button This export the table to a tab-separated text file that you can save on your computer. #### Freeze Table View Button This locks the current selection on the highlighted line. If another entity is selected in another Ancestris views, the highlighted line will remain. #### Configure View Button It opens a panel to set the Table display preferences. Refer to the [customization section](#bkmrk-param%C3%A9trage-de-la-ta "Customization"). ## Usage This table provides an efficient way to quickly select any entity in the genealogy. Once selected, it is displayed in all Ancestris views. From this table, you may as well create, modify or delete an entity. ### Select an entity To select an entity in the Table, first click on the selection button for that type of entity or press **<Ctrl+Left>** or **<Ctrl+Right>** to scroll through the entity categories. Then use the table as a spreadsheet and use the search bar, sort or cursor buttons to find the entity you are looking for.You can sort across multiple columns by holding down the control key and clicking on the column headers.
You can also, from a sorted column, type the first letter of a name or the first number of a date to go directly to the first row that begins with that letter or number.You can also move the columns with the mouse if it makes your search easier.
Once the entity you are looking for is visible in the table, a simple click in one of the cells of the row selects the entity. This selection will be instantly reflected in the other views of Ancestris.A double click on the identity number will make this entity appear as the root of the Dynamic Tree.
### Create an entity To create an entity, right-click anywhere in the table to open the [Context menu](https://docs.ancestris.org/books/user-guide/page/context-menu#bkmrk-ajout-propri%C3%A9t%C3%A9-ou-e "Context Menu - Create a global entity") and choose **Create a global entity** and choose the category of entity you want to create. ### Modify an entity To enter or modify an entity from the entities table, first selected it. Then open the [Context menu](https://docs.ancestris.org/books/user-guide/page/context-menu#bkmrk-%C3%89diter%2Fmodifier "Context Menu - Edit/Modify") and choose **Edit/Modify**. ### Delete an entity To delete an entity from the entities table, first selected it. Then open the [Context menu](https://docs.ancestris.org/books/user-guide/page/context-menu#bkmrk-effacer "Context Menu - Delete the selected properties") and choose **Delete the selected properties.**To delete an entity, the right click must be made very precisely on the cell of the column corresponding to the ID number column of the entity to be deleted. If this right click is made on another column, the command will not delete the entity, but will simply erase the content of this cell.
## Customization The Configure view button open the panel to customize the Entities table view. This settings will apply to the entity category currently selected by the selection buttons. This panel lists all the possible data element (tags) that can be displayed. [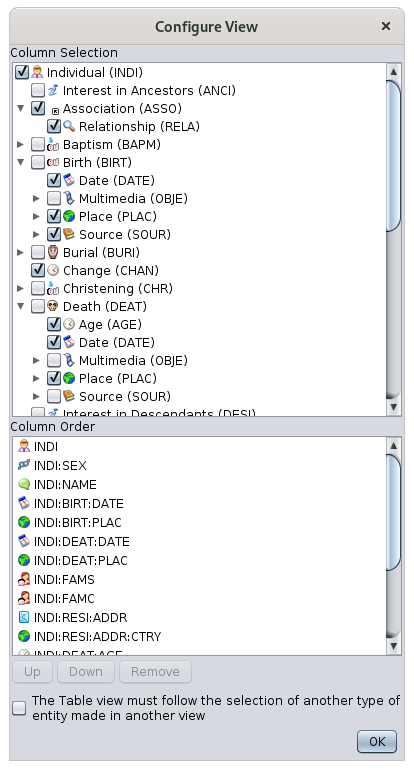](https://docs.ancestris.org/uploads/images/gallery/2020-10/en-entities-table-configure.png) This panel has two horizontal areas displaying the [tags](https://docs.ancestris.org/books/user-guide/page/tags "Tags") related to the selected entity category. ### Columns selection The upper area (Columns Selection) shows, in a tree structure and in an indented presentation, the tags containing the information that can potentially be displayed. To the left of each of them, use the checkbox to display the corresponding information or to hide it. ### Column orderThe column order can be changed directly with the mouse by dragging and dropping the columns one by one.
It can also be changed in this panel. The lower area (Column Order) lists the tags currently enabled from the above section. The order of the columns from left to right, will be the order in the list from top to bottom. To modify the order, click an item in the list and use the **Up** and **Down** buttons. To remove a column, click on the **Remove** button. About the check box "**The Table view must follow the selection of another type of entity made in another view**" : when this box is checked, the selection, from another view, of an entity of a different category from the one currently selected in the entities table, will switch the table to this category. ### Width of the columns The width of the columns can be changed directly from the table itself, by moving the edge of the columns with the mouse. # Dynamic tree The **Dynamic tree** shows a genealogy in the form of a tree. You can quickly select any individual in the tree, and you can also use this view to build the tree. [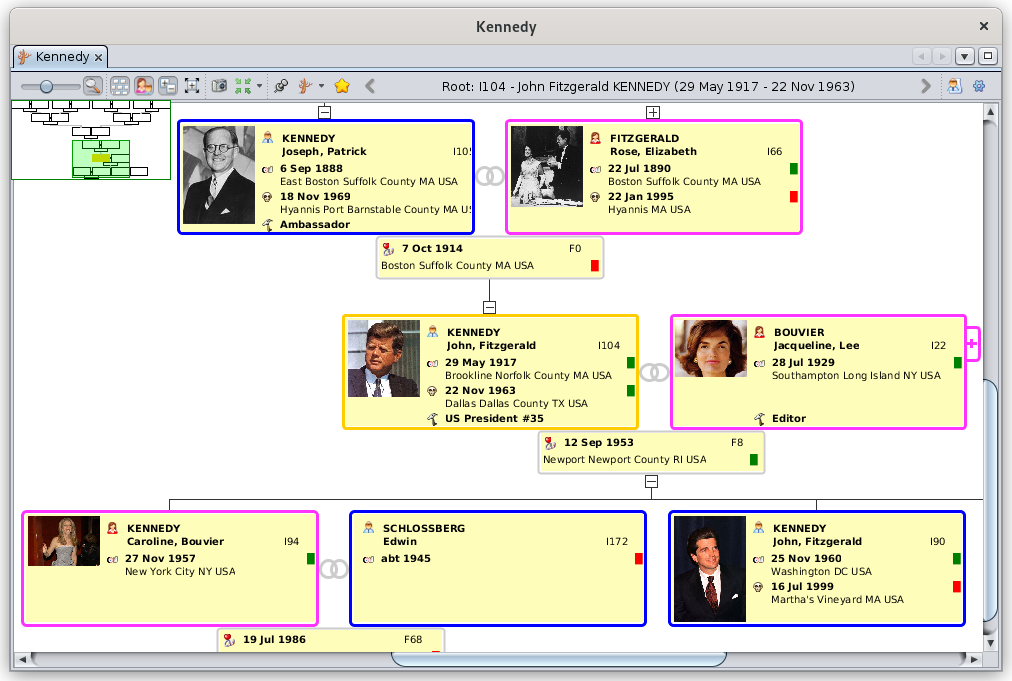](https://docs.ancestris.org/uploads/images/gallery/2022-01/en-dynamic-tree.png) The view is the closest to that of a traditional family tree, and it best captures the simple relationships between individuals and their families. ## Description The Dynamic tree is displayed below a toolbar. ### Tree The tree is structured around a **root individual**. The tree is actually a "double-tree". Ancestors form a tree on one side of the root individual, and the descendants form another tree on the other side. Individuals and their families are represented by boxes. These boxes are joined together by lines of filiation, and organized in an ascending and descending tree-like manner.The tree is a partial view of the genealogy and it does not show all the individuals of the genealogy.
- Only ancestors and descendants of the root individual are visible - All spouses of a descendant are visible, because they all have originated - or will originate - other descendants. Only one spouse is completely visible at a time though. See [below](#bkmrk-les-cases-individus- "Spouses"). - Not all spouses of an ancestor are visible. Only the one who is the ancestor of the root individual is visible. - All the other individuals of the genealogy are not visible in this tree, but they can be visible in other trees, when you change the root individual. The tree can be displayed vertically (ascending at the top) or horizontally (ascending on the left). When the tree is too large to be displayed in its entirety, scrollbars at the bottom and on the right allow you to move over the entire tree. You can also use the green minimized-tree to move around the tree. #### Root Individual The root individual is the one around which the double tree is built. The root can also be a family which does not fundamentally change the display of the tree. For this discussion, we will therefore call it the root individual or simply the root. Th name of the root is indicated in the [tree toolbar](#bkmrk-barre-d%27outils "Tree toolbar"). By default, it is the individual -or the family - inside the brown frame, except when it is the selected individual, in which case the border is yellow. [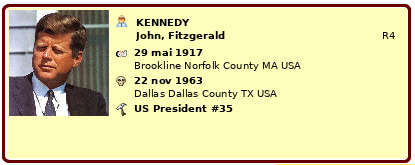](https://docs.ancestris.org/uploads/images/gallery/2020-04/arbre_racine.png) The tree changes each time another individual is chosen as root. This is why the Tree is called **dynamic**.Please note that the **root individual** can be a different person from the [**selected individual**](https://docs.ancestris.org/books/user-guide/page/relationships-between-windows "Selected Individual").
Indeed, in order to be able to move in the tree to select one by one the individuals and display them in the views and editors, it is preferable that the tree does not change at each selection of an individual. #### Selected individual The selected individual is the one that appears by default in a yellow frame. [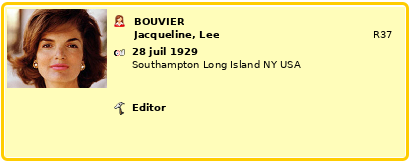](https://docs.ancestris.org/uploads/images/gallery/2020-04/arbre_individu_selectionne.png) #### Individual and family boxes Each box displays information about the individual or the family it represents. Aspects of the boxes (fonts, alignment, colors, dimensions, etc.) as well as the categories of information they display (name, dates, locations, etc.) can be customized using the [blueprints](https://docs.ancestris.org/books/user-guide/page/blueprints "Blueprints") or the [Configure view](#bkmrk-bouton-param%C3%A8tres-de "Configure view") button. When a descendant of the root has entered into multiple unions, the spouse's box on his or her right-hand side has a button with a plus sign. Each click on this button displays successively all the spouses of the individual. [](https://docs.ancestris.org/uploads/images/gallery/2020-04/nextspouse.png)Boxes can be right-clicked to call the [context menu](https://docs.ancestris.org/books/user-guide/page/context-menu "Context Menu"). This is how you add individuals or families to the tree.
#### Colors By default the outlines of the boxes have the following colors. - Yellow for the selected individual - and the root individual if it is the same one. - Brown for the individual or the root family if different from the selected entity - Blue for men, pink for women, dark grey when sex is unknown - Light grey for families It is possible to change these colors. See the paragraph on [customization](#bkmrk-volet-couleurs "customization of colors"). #### Union Symbol This symbol [](https://docs.ancestris.org/uploads/images/gallery/2020-04/arbre_union.png) is located between two spouses and indicates that the tree displays families and spouses. It is possible to hide spouses and families. #### Buttons for contracting or extending a branch Buttons are placed at both ends of branches. These are branch contraction and branch extension buttons that allow to fold[](https://docs.ancestris.org/uploads/images/gallery/2020-04/arbre_contraction.png) or unfold [](https://docs.ancestris.org/uploads/images/gallery/2020-04/arbre_extension.png) a branch. This is to optimize the display of certain parts of the tree. ### Toolbar The toolbar of the dynamic tree lloks like the following:. [](https://docs.ancestris.org/uploads/images/gallery/2022-01/en-dynamic-tree-menubar.png) Hovering over a button with the mouse gives you the function of the button. #### Zoom slider The zoom slider changes the **zoom level** of the tree in the display area. - Towards the left, the zoom level moves backwards: more individuals can be seen in the display area. - Towards the right, the zoom level moves forward: we see fewer individuals but the information is more readable and the boxes are likely to display more information. Thanks to this cursor, you can instantly adapt the scale of the display area to your needs.You can also use the Control key and the mouse wheel to change the zoom level.
#### Show/Hide Overview Button The overview shows the entire tree as a miniature tree that you can use to move quickly anywhere in the tree, in case the tree does not fit entirely in the display area. When the overview button on the toolbar is activated, a small overview appears at the top left of the display area. [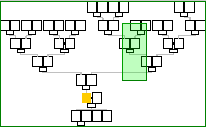](https://docs.ancestris.org/uploads/images/gallery/2020-04/arbre_apercu.png) This window displays a scaled model of the complete tree. We see in yellow and brown the selected and root individuals. Here, they are the same, therefore in yellow. A new click on the button hides this overview. Inside this overview, a green rectangle represents the currently visible area of the tree, depending on the size of the window or the size of the screen. Moving this colored rectangle with a mouse drag immediately affects the entire display area, so that some areas that were not visible until now become visible without having to manipulate the scrollbars. A click on a mini-box inside the overview repositions the tree: the corresponding individual is placed at the center of the display area. This movement of the tree in the overview or the repositioning click does not modify either the root individual nor the selected individual. Moreover, it is possible to modify the size taken by the overview, by means of a drag and drop of the mouse from its lower right corner. #### Show vertical or horizontal layout Button This button toggles between vertical and horizontal display of the tree. - **Vertical display**: according to the meaning usually associated with the opposition ancestors / descendants, the ancestors are placed at the top, and the descendants at the bottom. - **Horizontal display**: according to the usual representation of a time line (from left to right), the ancestors are placed at the left, and the descendants at the right. #### Show or Hide Families and Spouses Button This button toggles between two display modes regarding spouses of the root individual and those of his/her descendants. This choice is only possible when the root entity is an individual, and not a family. - **Family mode**: shows spouses and families - **Individual mode**: hides spouses and families Hiding spouses and families saves space in the display area. Each click on the icon button immediately switches the display to the other mode. #### Show fold/unfold symbols Button This button toggles between two display modes for the branch contraction or extension buttons. - **Visible mode**: shows the symbols for branch contraction or extension - **Hidden mode**: hides these same symbols Hiding these symbols saves space for the display area. Each click on the icon button immediately switches the display to the other mode. #### Fold/Unfold branches Button This button toggle between two display modes regarding tree branches, once you have contracted at least one previously. - **Extended branches**: unfolds all the branches that may have been contracted before individually. - **Contracted branches**: folds back all branches that were previously unfolded This is a way to remember the folded branches, and to switch more easily between the two modes, if it is always the same branches that you want to fold. Each click on the icon button immediately switches the display to the other mode. #### Change Root Entity Button This button includes two actions, both of which set a new root entity. A click on the button performs the first action. A click on the small down arrow to the right of the button selects one of the following two actions. - **Rebuild the tree from the selected entity**: makes the current selected entity the new root of the tree. - **Rebuild the tree from an entity of your choice:** offers to select an indivudual or a family from the genealogy and makes it the new root of the tree. #### Center the tree Button This button includes two actions, both of which allow you to re-center the tree. A click on the button performs the first action. A click on the small down arrow to the right of the button selects one of the following two actions. - **Center the tree on the selected entity**: places the current selected entity at the center of the display area. - **Center the tree on the root**: places the root entity at the center of the display area. #### Bookmarks Button This button sets the root individual from a list of entities previously registered as bookmarks. Clicking the button opens up a dropdown list with the bookmarks. Here is an example of dropdown list with 5 entities that have been bookmarked previously: [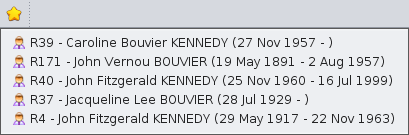](https://docs.ancestris.org/uploads/images/gallery/2020-10/en-bookmarks.png) This menu is a quick way to rearrange the tree according to the main individuals you most frequently work with. As bookmarks are fully user-configurable, this menu is empty if you have never defined any bookmark. To create a new bookmark, use the [context menu](https://docs.ancestris.org/books/user-guide/page/context-menu "Context Menu") on the entity you want to bookmark. - Open the Context Menu by right-clicking on the visible entity. - Select the [Bookmark this entity](https://docs.ancestris.org/books/user-guide/page/context-menu#bkmrk-faire-un-signet-de-c "Context Menu - Bookmark this entity") action. - A confirmation window let you define a name for the bookmark. - After validation, the bookmark is created and then appears in the dropdown menu. You can only put a maximum of 16 bookmarks in the list. If the user tries to create a 17th bookmark, it will replace one of the 16 already saved, which will be permanently deleted without any warning. The management of the currently saved bookmarks, their order of appearance in the menu and their deletion, is done in the Bookmarks tab of the Configure View window. Check the [Customization](#bkmrk-volet-signets "Bookmarks setting") section at the end of this page. #### Screenshot Button This button makes a screenshot of the display area and puts it in the clipboard or a file. In the example below, the captured part will be the green area, and it will be put in the clipboard. This green area can be moved and modified with the mouse (drag and drop or stretch lower right corner). [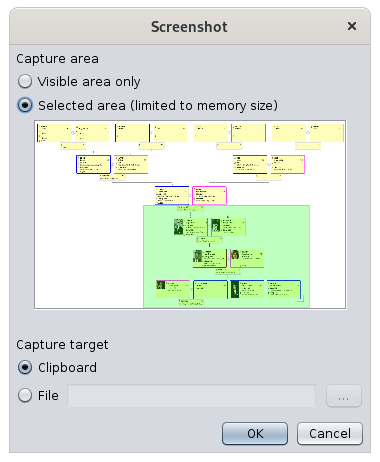](https://docs.ancestris.org/uploads/images/gallery/2020-09/en-dynamic-tree-screenshot.png) #### Name of the root entity In the toolbar is then displayed the name of the root individual - or family - of the tree. #### Stick current view Button This button fixes the display of the selected entity in the tree when you select another entity in another Ancestris view. If the pin is not pushed, the yellow frame follows the selected entity in Ancestris. If the pin is pushed, the yellow frame sticks to the individual it was on regardless of the selected entity in other Ancestris views.. #### Change display of individuals/families Button This button changes the [blueprint](https://docs.ancestris.org/books/user-guide/page/blueprints "Blueprints") of the individuals or families. The type of blueprints will depend on whether an individual or a family is selected when the button is pressed. A click on the button opens the list of blueprints corresponding to either an individual or a family. Ready-to-use templates allow the user to adapt the display to its personal taste. See the [Blueprint instructions](https://docs.ancestris.org/books/user-guide/page/blueprints "Blueprints") to change them. [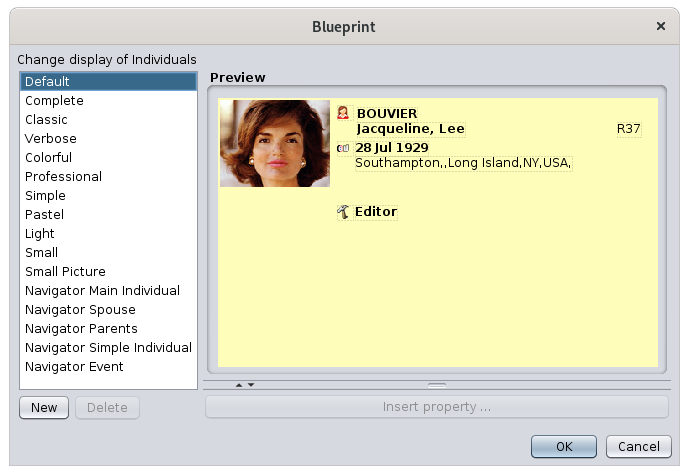](https://docs.ancestris.org/uploads/images/gallery/2020-09/en-dynamic-tree-blueprint.png) #### Configure View Button This button customize many elements about the presentation of the dynamic tree. It opens the [customization panel](#bkmrk-param%C3%A9trage-de-l%27arb "Customization") of the Dynamic tree view. ## Usage The main goals of the dynamic tree view are to : - **Visualize the relationships between individuals**, publish parts of the tree to share it, or partially export branches - **Navigate in the genealogy** to quickly display and edit an individual or a family - **Build the tree**, by adding or removing individuals ### Visualize the relationships between individuals The Tree displays the ancestors and the descendants of a root individual. As already mentioned above, the other individuals will not be visible. Your first choice is therefore to choose this root person in such a way as to have the maximum number of individuals in the tree, or at least to make sure you will see the branches you expect to see. Once chosen, there are several ways to change the root individual. - The [Change Root Entity](#bkmrk-change-root-entity-b "Change Root Entity") button on the toolbar - The [Bookmark](#bkmrk-bouton-signets "Change Root Entity") button in the toolbar, provided you have defined bookmarks beforehand - A **double-click on the box of the chosen entity** in the dynamic tree view - A **double-click on the chosen entity** in the entity table or the Gedcom editor - The [context menu](https://docs.ancestris.org/books/user-guide/page/context-menu "Context Menu") and select "Make root in the dynamic tree". As soon as a new root is defined, the displayed tree changes and redraws the corresponding ancestors and descendants. The root entity also becomes the selected entity until another entity is selected. In order to see or hide elements to optimize the presentation of your tree, use the buttons of the toolbar. You can also customize the way the tree is displayed and use styles. Refer to the [customization section](#bkmrk-style "Customization of the Tree") below. Once the tree looks the way you want, you can print it or make a screenshot of it to keep an image of it. It is also possible to **export the visible individuals** to a new Gedcom independent file. To export a branch of the tree, make sure then that only the corresponding branch is unfolded and visible. Then refer to the [save as function](https://docs.ancestris.org/books/user-guide/page/save-as "Save as") for the extraction details. ### ### Navigate in the genealogy From the root individual, you can navigate through family relationships within the ancestors of the root entity, or within the descendants and their spouses. In general, navigation within tree entities is done using the mouse. - **Press and hold the mouse anywhere on the tree to move it around** until you see the desired individuals - **A double-click on the box of an entity to make it the new root entity**, which then makes you see its ancestors and descendants. - **A single click on an entity's box to select it and display its information in the other views** and in particular in the editors. To navigate within the ancestors of an ancestors of thee root individual, or the descendants of a descendant of the root individual, you do not need to redraw the tree with another root.You will have to redraw the tree if you want to see the descendants of an ancestor, or the ancestors of a descendant.
For example, to see the brothers and sisters of an individual, set the root individual to their father or any of their ancestors. Whatever the way of operating, the selection of an individual or a family in the dynamic tree is instantaneously reflected in the other windows. Selecting an entity does not modify the choice of the root, and therefore has no effect on the structure of the displayed tree. The root entity is in the brown box. If the brown box is not visible, it is probably because it is also the selected individual. There are indeed two situations resulting in the selected individual and the root individual being the same: it is when the root is selected, or when the selected individual is double-clicked. ### ### Build the tree The dynamic tree view can also be used as a sort of editor, to add or remove relationships and the corresponding individuals and families. You can build a tree visually directly from the dynamic tree using the [context menu](https://docs.ancestris.org/books/user-guide/page/context-menu "Context Menu"), with a right-click on the individual from which you want to add an entity, or which you would like to remove. #### Creation of an additional individual In the Dynamic Tree view, the creation of an individual or a family is done by means of the context menu which opens with a right click on the box of an entity chosen as reference. Here, you can see the context menu from the individual Jacqueline Bouvier : [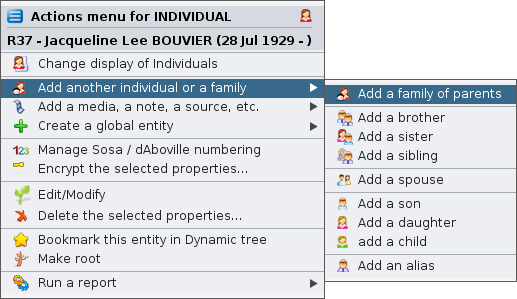](https://docs.ancestris.org/uploads/images/gallery/2020-09/en-dynamic-tree-context-menu.png) - To create or add an individual related to Jacqueline Bouvier, choose the action **Add another individual or a family**, then, in the sub-menu that is displayed, choose one of the desired actions **Add a family of parents**, **Add a brother**, etc.). - You can also directly add other categories of entity with the action **Add a media, a note, a source, etc**. - For the creation of an entity without any link with this reference entity, choose the action **Create a global entity** When adding an entity, Ancestris asks you via, the following window, to confirm whether you want to create a new entity or link an existing one. Example here to add a brother, as indicated in the last sentence: [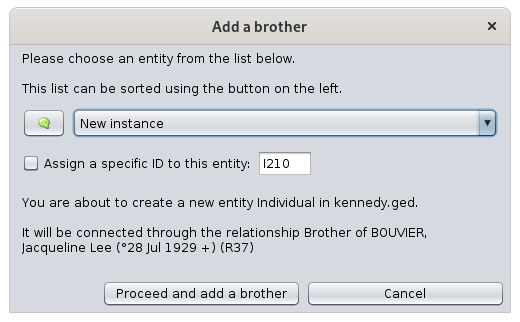](https://docs.ancestris.org/uploads/images/gallery/2020-09/en-dynamic-tree-add-brother.png) In case of a new entry, Ancestris will put you in the [default editor](https://docs.ancestris.org/books/user-guide/page/preferences#bkmrk-zone-%C3%89diteur "Preferences - default editor") on a new individual to start entering its description. You enter the corresponding information, validate it, and the individual is then added in the tree, provided that the added individual is an ancestor a descendant of the root individual. Otherwise, it has been created but does not appear. #### Modification of an individual or a family information The modification of an individual is either done by selecting on it and then using the editor if one is already open, or else by opening the context menu and chose **Edit/Modify**. Make your modifications. They will appear immediately after your validation, as long as they are part of the information displayed in the boxes. #### Deleting an individual or a family Deleting an individual or family is done through the Context Menu. Choosing the **Delete the selected properties** action then confirm your choice. [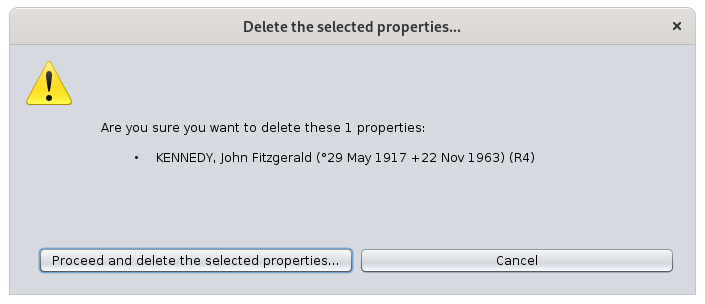](https://docs.ancestris.org/uploads/images/gallery/2020-09/en-dynamic-tree-confirm-deletion.png) If the deletion is confirmed, the tree updates its structure immediately. This can significantly change the tree display if the selected entity was the root or the middle of a branch.If the root individual is deleted, the tree disappears completely.
If an individual in a branch is deleted, the whole end of the branch disappears.
## Customization Customization of the tree can be done using two buttons in the toolbar: - **Change display**: changes the [Blueprint](https://docs.ancestris.org/books/user-guide/page/blueprints "Blueprints") which is what is displayed inside the boxes - **Configure View**: changes the structure of the tree, the colors of the borders and the size of boxes. You can also save your display settings in your own style. Here is the Configure View window. [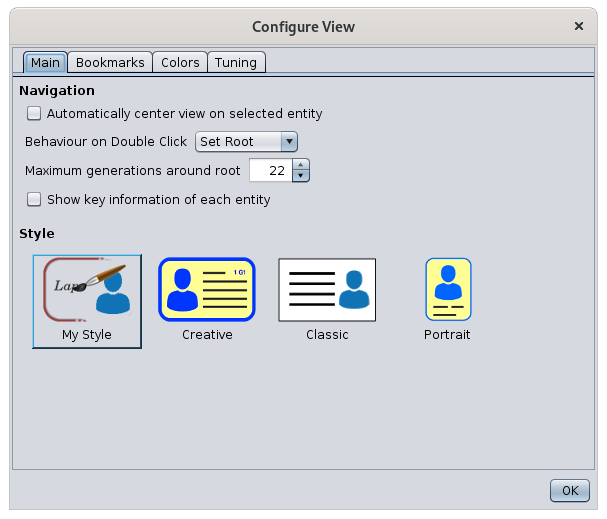](https://docs.ancestris.org/uploads/images/gallery/2020-10/en-dynamic-tree-configure.png) Make your modifications in the various tabs. The tree is modified instantly. ### Main Tab This tab allows you to change navigation settings and display style. #### Navigation - **Automatically center view on selected entity:** forces the tree to position the selected entity at the center of the display as soon as one is selected. - **Behaviour on a double-click**: defines the action to be performed when double-clicking on an entity: - None - Center - Set root (default choice) - **Maximum generations around root**: displays only the corresponding number of generations. When changing this parameter, the tree changes immediately, and folds or unfolds branches so respect that constraint. The maximum is 99 generations on either side of the root. - **Show key information on each entity**: displays a tooltip window when hovering over an entity with the mouse. This window includes basic information about the entity, in case too little information is displayed in the boxes, or if this information in the box is not visible enough. #### Style Three styles are predefined by default, and a fourth allows you to define your own. When you choose a style, the tree changes immediately. To create your own style, select My Style and then go to set the blueprint, the colors and sizes you want. These will be stored as your style. - ### Bookmarks tab The Bookmarks tab is used to manage bookmarks: order and deletion. It consists of the list of currently saved bookmarks, under which there are three buttons: **Up**, **Down**, **Delete** and **Separator**. The order of the bookmarks in this list is an exact reflection of the order in which the bookmarks appear in the [Bookmark](#bkmrk-bouton-signets "Bookmark") button on the toolbar. To change this order, select the bookmark to be moved from the list, and use the **Up** and **Down** buttons. To delete a bookmark, select it and then click on the **Delete** button. The **Separator** button allow you to create a visual separation between your bookmarks to organize them more precisely. This tab does not allow you to create or rename a bookmark. To create a bookmark, see the Bookmark Button paragraph. To rename a bookmark, you must first delete it, then create another one from the same entity and with the appropriate name. ### Colors tab This tab customizes the colors of the connectors between boxes, the borders, and the background of the tree. #### Zone of choice of the element to be colored The upper area of the Colors tab lists the elements in the tree view whose color can be changed, each line ending with a square of the currently selected color for that element. [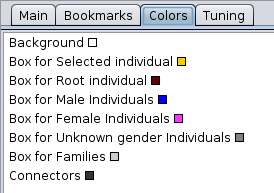](https://docs.ancestris.org/uploads/images/gallery/2020-09/en-dynamic-tree-colors.png) When one of the above items is selected with a mouse click, its color can be changed in the lower area. #### Color Selection Area The lower area of the Colors tab itself contains a number of tabs that are different ways to choose colors. Choose the color you want, this will update the small square in the element in the upper area. ### Tuning tab This tab allows you to choose the font and its size, a display modes, and the size of the boxes. [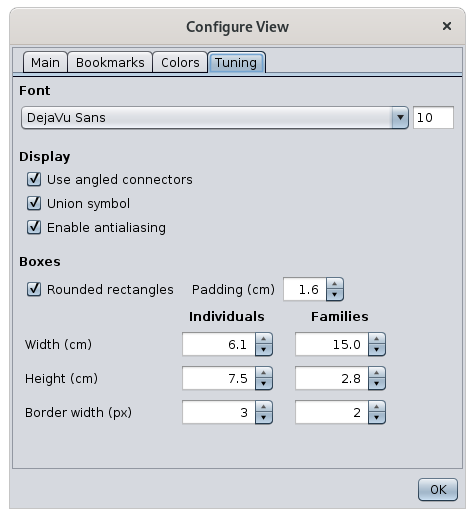](https://docs.ancestris.org/uploads/images/gallery/2020-10/en-dynamic-tree-tuning.png) #### Fonts - The Font menu allows you to select the type of font from a drop-down list. - The Font zise is changed using the entry field on the right. #### Display - **Use angled connectors:** turns the filiation links between the boxes into broken or angled lines, rather than straight lines. - **Union symbol: d**isplays a double ring between the two individuals making up a family. - **Enable antialiasing:** produces a smoothing of the pixel display for images. #### Boxes - The Boxes area allows you to choose the shape and size of boxes for individuals and families. # Timeline The **Timeline** shows all the individual of the genealogy along a timeline of events that occurred in different countries. Individuals can be displayed as a genealogical tree. [](https://docs.ancestris.org/uploads/images/gallery/2020-09/en-timeline.png) ## Description This view displays a menu bar, a timeline frieze and the individuals' events. ### The timeline The timeline looks like the following: [](https://docs.ancestris.org/uploads/images/gallery/2020-04/chrono-frise.png) - The timeline lists the years and for each of them, marks its exact time with a grey cursor. - The timeline also displays blue markers: these are important events that occurred in the countries of the Ancestris' almanacs. Below the timeline, the view offers two modes of displaying events over time. - **Individual mode**: events are grouped within individuals' lifespans, these being arranged in a horizontal genealogical tree: the ancestors on the left, the descendants on the right. - **Event mode**: events are listed in bulk from the oldest to the newest, and packed vertically to take up the least amount of space possible. ### Individual mode All individuals in the genealogy are displayed, which is not the case for the Dynamic Tree view. For each individual, the sequence Birth, Marriage, and Death are displayed. The other events are not displayed. Individuals are listed in a genealogical order. #### Representation of an individual In the following picture, we see 4 individuals : [](https://docs.ancestris.org/uploads/images/gallery/2020-09/en-timeline-individual.png) Women are represented by a red line, men by a blue line. If the gender is unknown, the line is grey. - The line begins on the left with a small triangle marking birth, then follows a diamond marking marriage, and finally an end triangle indicating death. - If dates are unknown, an approximation is used and the line is dotted over the uncertain period. Above the line is the individual's icon and full name. The individual in yellow is the [selected individual](https://docs.ancestris.org/books/user-guide/page/relationships-between-windows#bkmrk-une-s%C3%A9rie-de-fen%C3%AAtre "Selected individual") in Ancestris. #### Order of Individuals Individuals are listed one below the other in chronological order of births and in genealogical order.This representation of a timeline is an Ancestris invention. It is a genealogical timeline-tree.
As the set of individuals is displayed, you will find individuals from the same family as well as individuals from more distant branches. Ancestris therefore lists the individuals in order of births, and for each individual, scrolls through all the branches of his/her descendants, then moves on to the next individual in the births. If the next individual is part of another tree, a line is skipped. The descending branches of each individual's tree are traversed by the descendants in chronological order. As soon as the youngest descendant is reached, the display resumes from the next siblings. As soon as all siblings have been displayed, the display goes back to the siblings of the parent already displayed, then the spouse, descendants, siblings, etc. This implies that: - below an individual is usually his/her descendants or siblings in the descending direction (to the right), or his uncles and aunts or other relative in the ascending direction (to the left) - if there is a line break, it means that we skip to another tree - two spouses of the same couple are therefore separated by all their common descendants ### Event mode All the events of the genealogy are displayed. [](https://docs.ancestris.org/uploads/images/gallery/2020-09/en-timeline-event.png) For each event a diamond is displayed showing the date of the event, the icon of the type of event and the name of the individual to whom the event relates. The events are listed in chronological order vertically. As soon as there is enough space to display another event to the right of an event already displayed, a column starts again. This results in the following type of display: [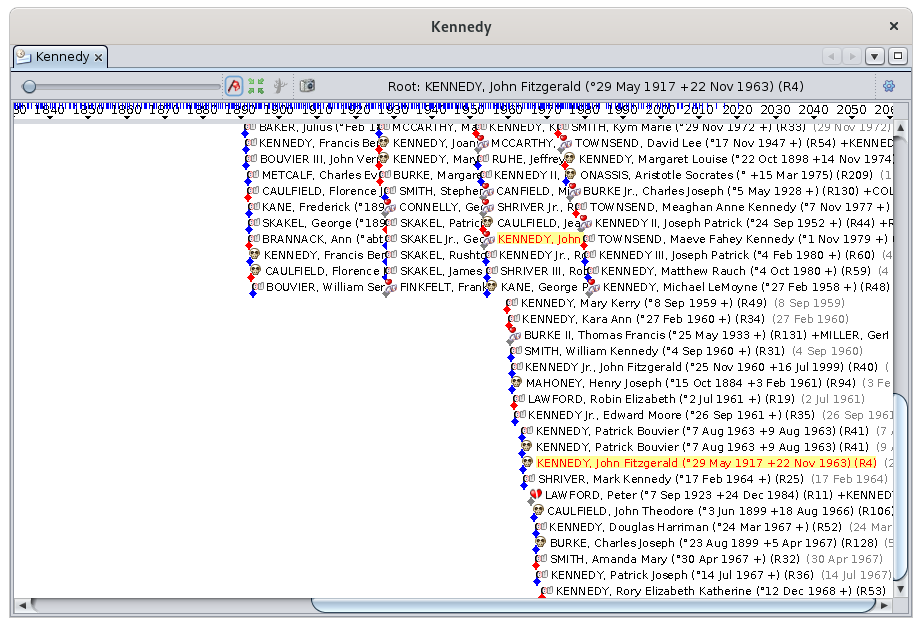](https://docs.ancestris.org/uploads/images/gallery/2020-09/en-timeline-event-mode.png) Of course, it's a bit "cramped". You will then understand the usefulness of the Zoom slider, which allows you to stretch the timeline and put a little space between each event.This view can be used in combination with the Dynamic tree view. If you want to rebuild the dynamic tree with a new root individual, just double-click on an individual in the Chronological view and it becomes the root individual of the Dynamic tree view.
It is possible to choose the events to display or to add a grid in the display area for a better identification. See the [customization](#bkmrk-choix-des-%C3%A9v%C3%A9nements "Customize the display area") section. ### Display of the almanac To display the important events that have taken place during the life of an individual in the history of his country, simply hover over the blue markers of the chronological frieze. A window appears listing the most important events recorded by Ancestris in the language of their country. Here is an example where the mouse hovers over the marker of the year 1917. The popup displays the different historical events in the almanacs selected by the user in personalised colors. [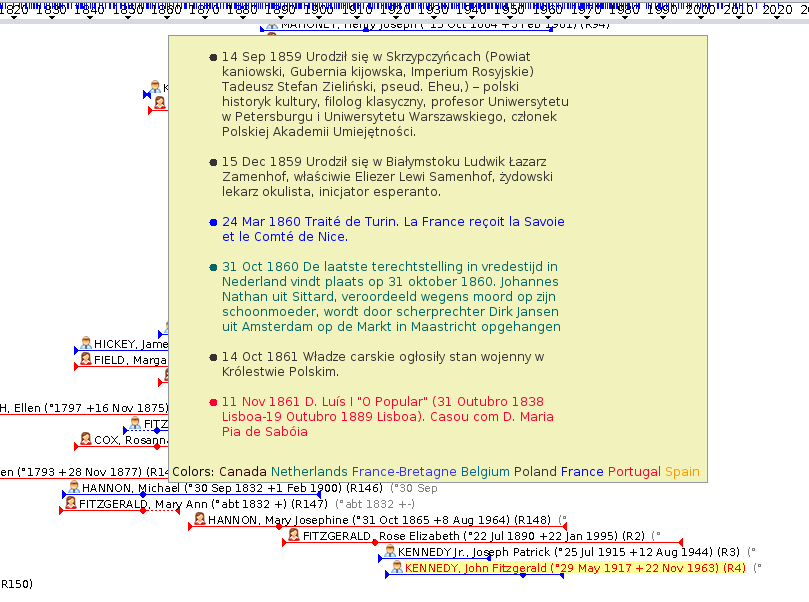](https://docs.ancestris.org/uploads/images/gallery/2020-09/en-timeline-almanac.png) Customizing the display area and the almanacs is described in the next section. ### Almanac Utility There is also an Almanac utility available from the menu bar [Tools > Lists and Reports > List > List of Almanac events](https://docs.ancestris.org/books/user-guide/page/lists-and-reports-%28l%29 "Lists and reports"). [](https://docs.ancestris.org/uploads/images/gallery/2020-09/en-timeline-almanac-report.png) The output of this report is a text file to be saved. An option offers to have the results grouped by years. If you launch this report from the menu, the result will contain all the events between the two extreme dates of the genealogy. If you launch this report with a right click on an individual, from the context menu, the result will contain all the events between the birth and death dates of this individual. ## Customization It is possible to customize the display area, the almanacs and the colors. ### Choice of events and display settings [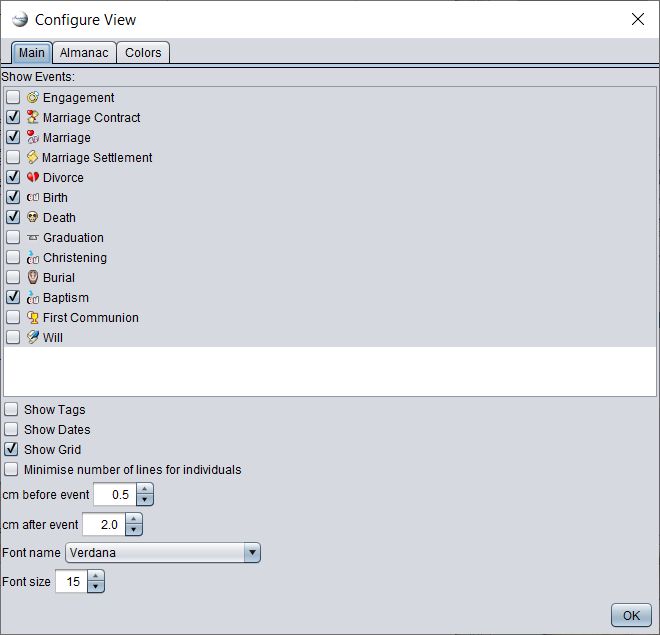](https://docs.ancestris.org/uploads/images/gallery/2021-07/ancestris-timeline-pref-en.png) This tab allows you to choose the events to be displayed in the two display modes knowing that only birth, marriage and death are possible for the Individual mode. It also allows you to choose other aesthetic or practical parameters to improve the visibility according to your needs. ### Choice of almanacs [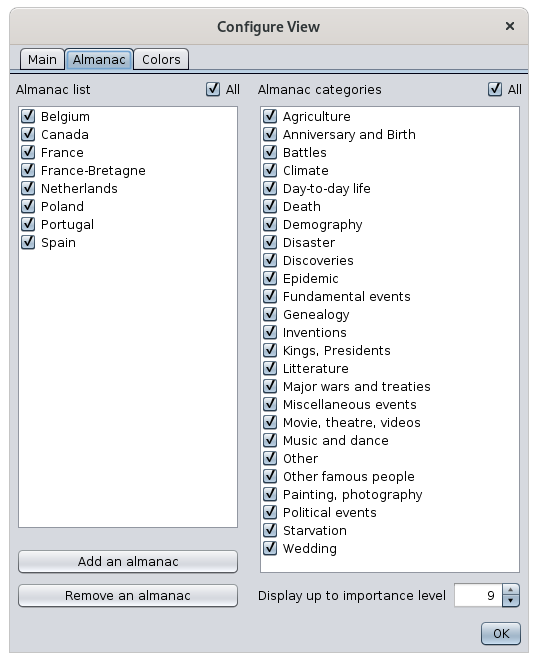](https://docs.ancestris.org/uploads/images/gallery/2020-10/en-timeline-configure-almanac.png) The left column allows you to select the almanacs to be used in Ancestris, including the Almanac utility. The "All" checkbox selects them all at once. The right column allows you to select the categories of events to remember, among the selected almanacs. The checkbox "All" selects them all at once. The number below on the right is the level of importance of the events to be selected. - 0: Only the most important events will be visible. - 9: all events will be visible The two buttons at the bottom left allow you to add or delete an almanac.The files are placed in the [User Directory](https://docs.ancestris.org/books/user-guide/page/software-files-and-user-settings-files#bkmrk-the-user-directory "User Directory"). When they are deleted, they are permanently deleted.
#### #### Creation of an almanac It is possible to create and add your own almanac. To create your almanac, you will need to create a list of events for a given country. There is a certain format to be respected so that Ancestris can read the list of events. To respect this format, we suggest you use the spreadsheet [fr-modele-almanach.ods](http://www.ancestris.org/compteur_dl.php?/dl/pub/ancestris/docs/fr-modele-almanac.ods "Download Almanac file model") which is an OpenOffice file. This will help you to enter the events and create the file for Ancestris in the right format. Once downloaded, open this file by activating the macros (guaranteed virus-free), follow all the instructions in sheet 1 "Parameter" to complete sheet 2 "Events". Once completed, you click on the Validate button in the sheet and this will copy your data in text format to the clipboard. The text looks like this : ``` 1110;;fr;;;4;a;fr=Le sarrasin est ramené d'orient par les croisés. On appellera cette plante aussi, improprement, blé noir (biéna);;;; 1636;;fr;;;4;a;fr=L'évêque de Rennes, Pierre CORNULIER, possède dans son jardin de son manoir de Saint-Armel en Bruz, 15 variétés de poiriers. On peut penser que parmi celles-ci figure la variété Bon Chrétien, obtenue dès le XV° siècle;;;; 1649;1652;fr;;;3;a,h,g;fr=Mauvaise récolte de grains. Disettes et épidémies. La population rurale diminue.;;;; ``` Paste this text in a file you will call `country.name.almanac` where **country** is a two letter code for the country corresponding to your almanac (it can be England, so "en" for England), **name** is a specific name you give to your almanac, and '**almanac**' must stay written like that. For example, you can call it `en.my.almanac`. Then open the almanac' tab in the settings, click on the **Add an almanac** button, use the file manager to select your almanac. It then appears in the list of almanacs that Ancestris can use. ### Choice of colors [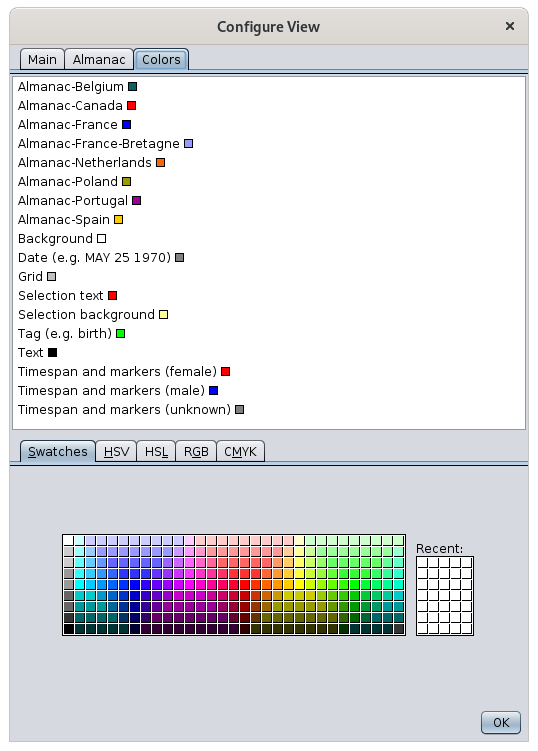](https://docs.ancestris.org/uploads/images/gallery/2020-10/en-timeline-configure-colors.png) This tab lets you choose the color of the almanacs and the color of all the elements in the timeline display area. Four tabs are available to help you choose your colors in classic color modes.Did you know that?
The **Swatches** mode allows you to choose a color according to a color palette. The **HSV** model (Hue Saturation Value) is a computer color management system. The **HSL** model (Hue Saturation Lightness) are the three parameters for describing a color in a psychological approach to this perception. The **RGB** model (Red Green Blue) is the computer color coding system closest to the hardware. The **CMYK** model (Cyan, Magenta, Yellow, Key) is a process of quadrichromy of printing making it possible to reproduce a broad range of colors starting from three elementary colors.Any action on a filter in this window immediately updates the map.
Filters from different groups are combined with each other so that the displayed markers will have to match all conditions.The use of filters is particularly interesting. It allows for example to answer the question: where are all the people of my genealogy whose occupation is a baker ?
To do this, simply search for all individuals with a baker occupation in the [Advanced search](https://docs.ancestris.org/books/user-guide/page/advanced-search-%28l%29 "Advanced search") window. Leaving this window open, go to the geographic filters above and check the "Search for individuals" box. The map will then display only the places that have had an event from a baker. You can also check the "Birth" box to have only the places of birth of the bakers. ## Customization It is possible to change the appearance of the markers : - Their size - Automatic adjustment of their size with the zoom level - Their color To do this, from the Configure View Settings, go to the Markers tab and make your choice of size and color. [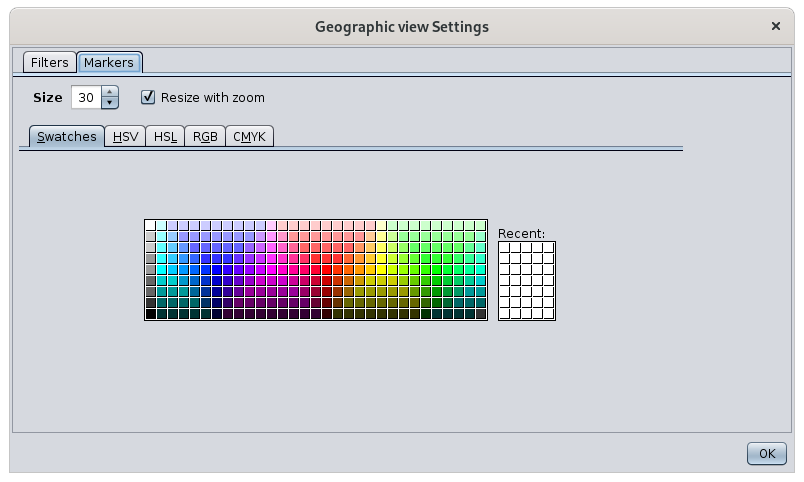](https://docs.ancestris.org/uploads/images/gallery/2020-09/en-map-configure-colors.png) By default, the size of the markers adjusts to the zoom level used. - The closer the map is, the larger the markers are, as they are more easily visible and do not overlap each other. - The further away the map is, the more markers there are and the more you need to reduce them in size. On the other hand, since the map gives less detail of the topology of the places, they are also more visible and therefore do not need to be as large. If you do not want Ancestris to change the size of the markers, uncheck the "Resize to fit zoom" box. # Graph The **Graph** shows a view of your genealogy in the form of a graph, where all individuals are displayed only once, and are related to each other according to their genealogical relationships. You can create your genealogy graphs as you wish. The shape of the graph can vary from one time to the next for the same genealogy, and also with each addition or deletion of individuals. [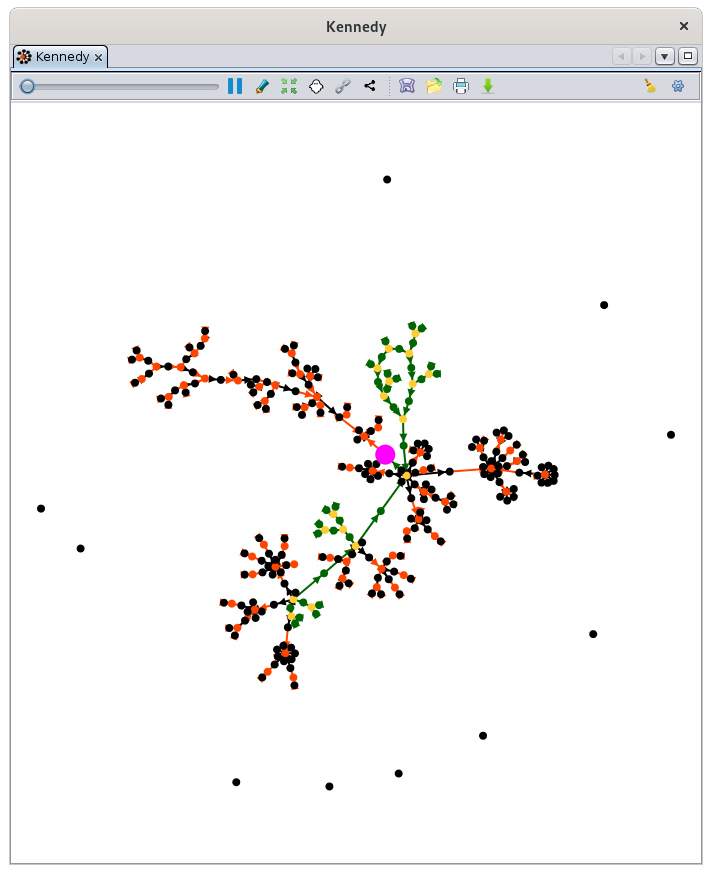](https://docs.ancestris.org/uploads/images/gallery/2020-10/en-graph.png) ## Description This view displays the graph of your genealogy and a toolbar allows you to make the settings you need. ### The graph The graph materializes all the individual and family entities of your genealogy as points. Other entities are not represented. These points are connected by arrows. #### The points of individual and union ##### Individuals The De Cujus individual, if it exists, is a point of larger size and **pink** color. If [Sosa numbers have been generated](https://docs.ancestris.org/books/user-guide/page/generate-sosa-numbers "Generate Sosa numbers") in the genealogy, one or more De Cujus individuals may exist and you will see several pink points. If no pink point is visible, it means that you have not yet generated any Sosa, or Sosa-d'Aboville numbers. [](https://docs.ancestris.org/uploads/images/gallery/2020-04/graphe_indi_decujus.png) All other individuals are materialized by **green** points if they are in a Sosa lineage of a De Cujus, or by **black** points otherwise.| [](https://docs.ancestris.org/uploads/images/gallery/2020-04/graphe_indi_sosa.png) | [](https://docs.ancestris.org/uploads/images/gallery/2020-04/graphe_indi_non_sosa.png) |
| Sosa individual | Non Sosa individual |
| [](https://docs.ancestris.org/uploads/images/gallery/2020-04/graphe_union_sosa.png) | [](https://docs.ancestris.org/uploads/images/gallery/2020-04/graphe_union_non_sosa.png) |
| union Sosa | Union non Sosa |
| [](https://docs.ancestris.org/uploads/images/gallery/2020-04/graphe_lien_noir1.png) | [](https://docs.ancestris.org/uploads/images/gallery/2020-04/graphe_lien_noir2.png) |
| Non Sosa child from a Sosa union | Non Sosa child from a non Sosa union |
| [](https://docs.ancestris.org/uploads/images/gallery/2020-04/graphe_t%C3%A9moin_isol%C3%A9.png) | [](https://docs.ancestris.org/uploads/images/gallery/2020-04/graphe_t%C3%A9moin_reli%C3%A9.png) |
| Single individual at the top left | In fact, it is a witness of a non Sosa wedding. |
| [](https://docs.ancestris.org/uploads/images/gallery/2020-04/graphe_famille_nombreuse_sosa.png) | [](https://docs.ancestris.org/uploads/images/gallery/2020-04/graphe_famille_nombreuse_non-sosa.png) |
| Large Sosa family | Large non Sosa family |
| [](https://docs.ancestris.org/uploads/images/gallery/2020-04/graphe_sommet_couple.png) | [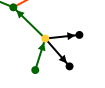](https://docs.ancestris.org/uploads/images/gallery/2020-04/graphe_sommet_mono1.png) | [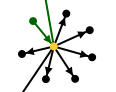](https://docs.ancestris.org/uploads/images/gallery/2020-04/graphe_sommet_mono2.png) | [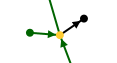](https://docs.ancestris.org/uploads/images/gallery/2020-04/graphe_sommet_mono3.png) |
| Couple of treetop ancestors with a child | Treetop ancestor alone with 3 children | Treetop ancestor as a single parent of a family of 7 children (6 of which can be seen here) | Treetop ancestors only and a non Sosa child. |
The implexes are in fact ancestors that appear several times in a classic family tree. In the graph, they appear only once.
We therefore propose another definition of the implex: it is the union from which a consanguineous marriage will be born a few generations later. For each implex, we thus find ourselves with a loop in the graph, with the union of the implex ancestors at the top of the loop, and the consanguineous union at the base. Here is an example from the Kennedy genealogy (the top of the loop reads in the direction of the arrows, it is at the bottom here) : [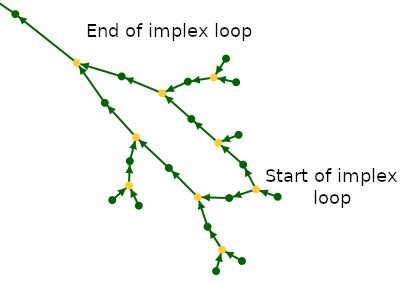](https://docs.ancestris.org/uploads/images/gallery/2020-09/en-graph-implex.png) ##### Case Study Here is an example summarizing several of the interpretations above. In the following example from the Bourbon genealogy, we see our De Cujus in pink who happens to be Louis XVI. To his right is his marriage with Marie-Antoinette whose ancestors are not shown. If we go up the green arrows, the long branch is his ancestor line, where in each generation there is only one spouse. The other children are not shown if there were any. We notice that this branch reaches a green individual, who is Louis XIV, from whom a first loop of implexe starts. It is Louis XIII who had as children Louis XIV and Philip I whose two descendants married each other. We find a second loop of implexe upper in the ancestor line. It is surrounded by two large families: at the base of the implexe, that of Henri IV. At the top, that of Henri II. We also locate an isolated individual who is not a witness, and probably shows that we have not finished grasping his relationship with the Bourbon. [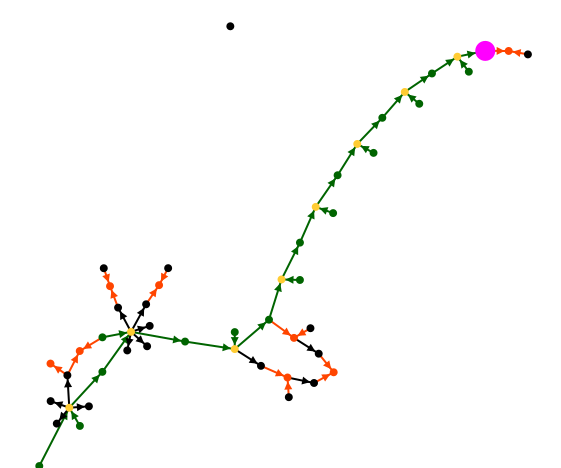](https://docs.ancestris.org/uploads/images/gallery/2020-04/graphe_cas_pratique.png)The graph is an Ancestris invention and like you, we had never seen our genealogy in this form before. We are still discovering possible interpretations to this form of visualization. Let us know what you discover !
All colors are customizable. See the paragraph on [customization](#bkmrk-personnalisation "Customization") below. ### Toolbar The graph toolbar allows you to customize the appearance of the graph. Hover over each icon to display the tooltip explaining its function. [](https://docs.ancestris.org/uploads/images/gallery/2020-10/en-graph-toolbar.png) The toolbar presents the following controls: #### Zoom slider This slider is used to adjust the zoom level of the graph display. #### Pause automatic arrangement Button At each opening of the graph view, the graph is built progressively until all the points are spread and visible. This button is used to stop/restart the construction of the graph. #### Show / Hide names Button Click here to show or hide the name of individuals and unions at each point. For names display, several choices are possible. Refer to the [Configure View parameters](#bkmrk-personnalisation "Configure View parameters"). #### Center graph on click Button This button allows you to center the graph where you click. It switches the mouse to "centering mode" when it is pressed. It works in three steps: 1. First you click on the button to activate the "centering mode". 2. Then you click on the point of the graph that you want to put in the center of the display area. 3. You press the button again to quit the "centering mode". #### Hide branches Button This button is used to hide branches of the graph. It switches the mouse to "Hide mode" when it is pressed. It works in three steps: 1. First you click on the button to activate the "Hide mode". 2. Then you click on an Individual point or a Union point. A menu appears to select if you want to hide the ancestors or the descendants branch. [](https://docs.ancestris.org/uploads/images/gallery/2020-10/en-graph-hide-menu.png) 3. You press the button again to quit the "Hide mode" After your choice, the graph adjusts accordingly. The impact on the display is quite logical: a branch disappears. Sometimes the result can be quite curious: your tree can be separated into several pieces and individuals can be isolated. You can re-display the hidden branches by clicking on the "[Reset](#bkmrk-bouton-r%C3%A9initialiser "Reset")" button. #### Show / Hide association links Button This button shows or hide with a grey line, the relationships between isolated individuals and the rest of the graph. #### Shortest path Button This button shows the shortest path between two points on the graph. It switches the mouse to "Shortest Path mode" when it is pressed. It works in four steps. 1. First you activate the "Shortest Path mode" 2. Then you click on the first point 3. Then you click on the second point 4. You press the button again to quit the "Shortest Path mode" After your choice, the shortest path between the two points appears in blue and a window lists all the individuals between the two selected points. Clicking on an individual displays it in the other views of Ancestris. #### Save Button This button saves your graph at any time in the current form. The file will be saved with the name of the current tree and can only be opened with this Graph function. #### Open Button This button loads a previously saved graph. This will save you time when you reopen the graph by preventing it from rebuilding itself or to make sure you get back to a look you liked. #### Print Button This button prints your graph. Ancestris will open it automatically with your svg file viewer (SVG is a vector image format.). You will be able to print it from there. #### Export Button This button exports your graph to GEXF, Graph Exchange XML Format, which is a language to describe networks of complex structures, and developed by Gephi since 2007. Gephi is a free software for network analysis and visualization. #### Reset button This button resets the zoom, name display and hidden branches. #### Configure view Button This button allows you to change the display preferences of the graph. See the [Customization](#bkmrk-personnalisation "Customization") section below for more details. ## Usage The purpose of this view is twofold: 1. To present your complete genealogy visually in an esthetic form that you like 2. Understand your genealogy and identify the parts that are sufficiently complete or conversely the parts that deserve further research. ### Present your genealogy As soon as the Graph is launched, the graph organized itself progressively. #### Generation of the graph With many individuals, this can take a little time. If you have already built and saved a graph previously, simply click on the Pause button to stop the construction, then click on the Open button to fetch a previously generated graph. While building the graph, Ancestris tries to find a way to arrange all branches so that each one is clearly visible. For example, here is the construction of a graph with 4200 individuals and 1300 families:| [](https://docs.ancestris.org/uploads/images/gallery/2020-04/graphe_use_1.png) | [](https://docs.ancestris.org/uploads/images/gallery/2020-04/graphe_use_2.png) | [](https://docs.ancestris.org/uploads/images/gallery/2020-04/graphe_use_3.png) | [](https://docs.ancestris.org/uploads/images/gallery/2020-04/graphe_use_4.png) | [](https://docs.ancestris.org/uploads/images/gallery/2020-04/graphe_use_5.png) |
| Start | 1 minute | 2 minutes | 3 minutes | 3.5 minutes |
| To the first seconds, the graph looks like a "big ball of dots". | Your graph looks better. Branches are forming. | The branches are now better detached. | The changes are much less frequent. The graph is almost finished. | The graph "stops moving". It is finished. |
If your graph suits you, remember to save it. It is difficult to find the exact same position from one time to the next.
#### Selection Clicking on a point on the graph selects the individual or family in other windows. Conversely, a click on an individual or family in another window will refocus the graph on this entity, provided it is not in a hidden branch. #### Analysis of your graphThis is the most interesting moment! You had never seen your tree like this, neither had we.
To analyze and understand your graph, you can proceed in different ways. First there is a global macroscopic view, where you can see whether your tree is made up of a single family group or several. Each family group is in fact disjoint from the others. In the example above, there is a single family group, with isolated individuals who are probably associations (witnesses, etc.). Here is a larger view to see better: [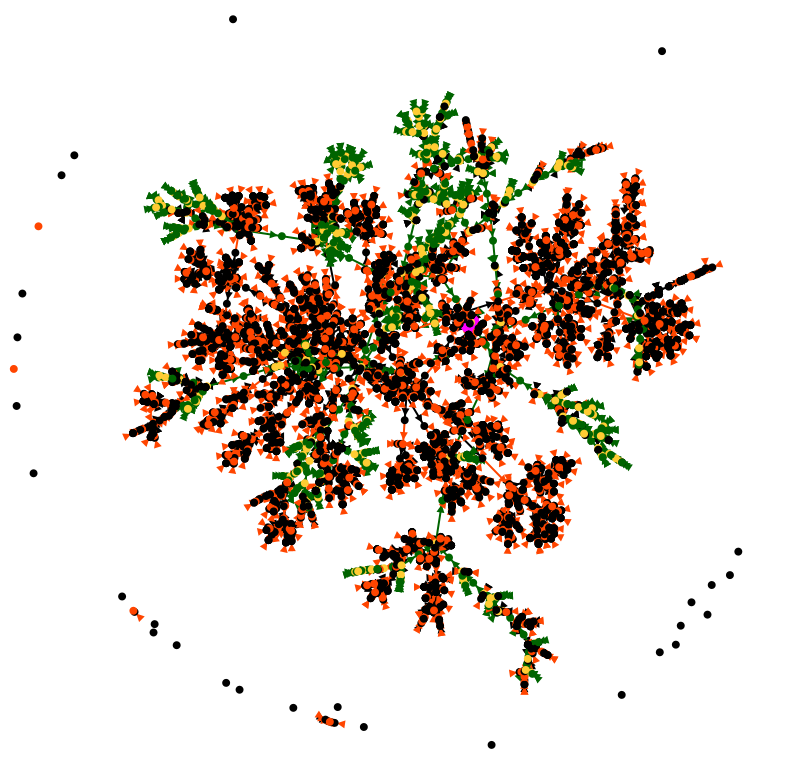](https://docs.ancestris.org/uploads/images/gallery/2020-04/graphe_analyse_macro.png) From the De Cujus in pink, we see a few ascending lines in green/yellow, and many descendants or "cousins" in black/orange. The longer the green lines, the more generations of ancestors. We can also guess that there are a few implex loops, but we will have to get closer to be sure. You can draw many more conclusions from this macro analysis, but let's move now to a closer view. You have to realize that we have here about 5500 points in front of our eyes, the 4200 individuals and 1300 unions, and if you manage to see more, let us know! By using the cursor button and the mouse to move the graph, we can get closer to De Cujus. When we are close enough, we can then display the names to know who we are talking about, using the toolbar button. You can then hide the branches that might interfere with the view with the Hide Branches button or show them again with the Reset button. Your analysis can then be done from branch to branch, successively from De Cujus to the most branches and to cousins or to ancestors. To have the details of each point, just click on it and the other views will tell you which individual or family it is. #### Shortest path As you navigate through your graph, you may want to identify the link between two individuals. You can do this by using the "Shortest Path" feature, available through or the corresponding button on the toolbar.In the window that lists the individuals on the path, you can click on each of the names to make them appear in the other views of Ancestris and thus analyze this path in detail.
#### Update The update is done in real time. Any change in your genealogy that leads to the creation or deletion of a family or individual, or the creation of a relationship between them, will update the graph instantly. #### ## Customization The customization of the graph is done with the Configure View Settings Button. [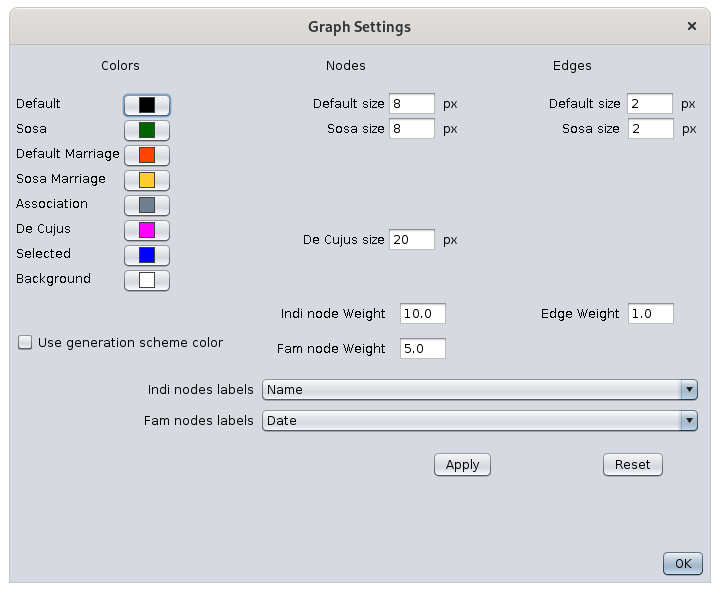](https://docs.ancestris.org/uploads/images/gallery/2020-09/en-graph-configure.png) ### Colors The left-hand column represents the current colors of the graph elements. By simply clicking on these buttons, you can change the color of the corresponding points and arrows, and the background color of the display. Clicking on a color will open the color selection window. See the instructions for choosing a color in the [Timeline view](https://docs.ancestris.org/books/user-guide/page/timeline#bkmrk-choix-des-couleurs "Changing colors") which has the same color. A change of color in the settings window immediately happens in the graph but does not generate any modification of the graph structure. ### Modification of the graph structure It is possible to modify the apparent structure of the graph. These changes lead to the reconstruction of the graph, they do not immediately affect the graph. It is necessary to click on the Modify button. The middle column sets the size of the points. The right column sets the size of the arrows. The weights adjust the size of the points relative to the arrows. The checkbox Color gradient by generation helps distinguish the generations by color. This function colors each generation with the same color gradient from the selection color to black. For the gradient to be clearly visible, it is necessary to approach light pastel colors, as in this example : [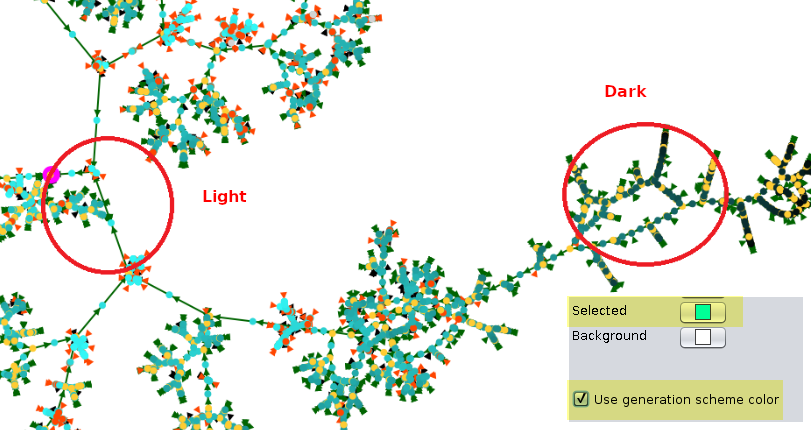](https://docs.ancestris.org/uploads/images/gallery/2020-09/en-graph-colors.png) The two drop-down menus allow you to indicate the labels of the points and arrows to be applied. #### Modify Button This button validates the above structure choices and refreshes the graph display without closing the parameters window. It modifies the display of the names according to the choices in the drop-down menus if the labels were already visible. #### Default values Button This button updates the structure of the graph to its default values. #### OK Button This Button closes the settings window. leaving the graph as it appears. ## Tutorial There is a tutorial on graphs. It is in French and in PDF format. You can download it [here](http://www.ancestris.org/compteur_dl.php?/dl/pub/ancestris/docs/B-A_BA_Graphe.pdf). # Cygnus editor The **Cygnus editor** is one of the three main editors of Ancestris. [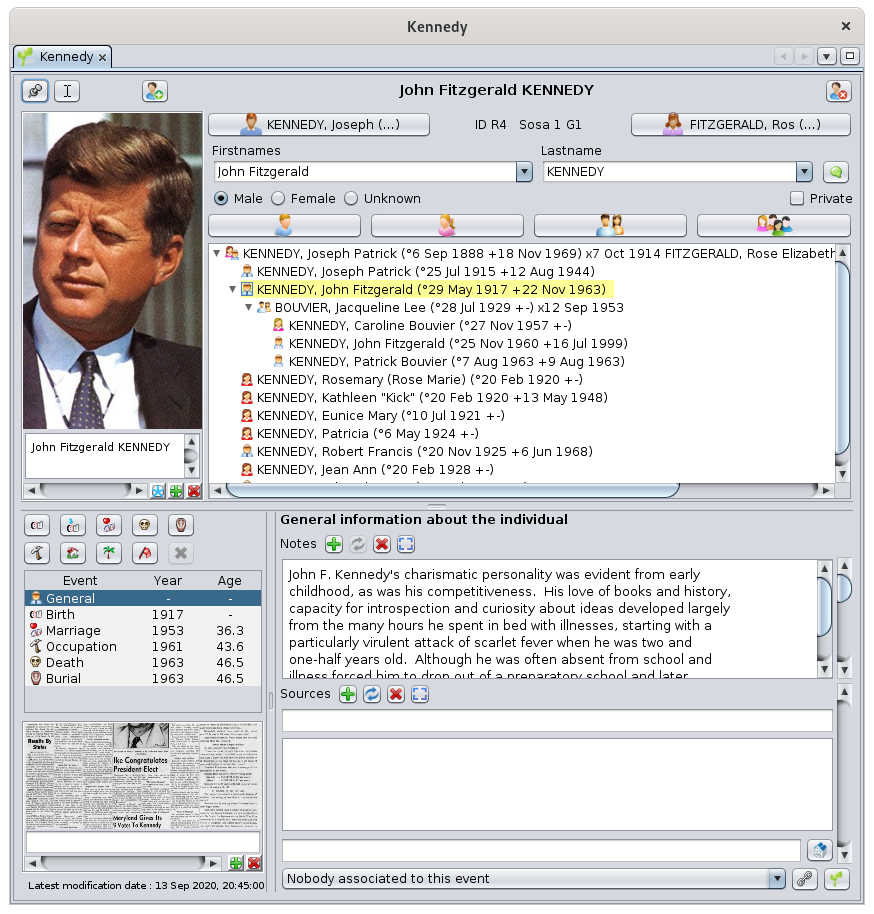](https://docs.ancestris.org/uploads/images/gallery/2020-09/en-cygnus.png) The philosophy of the Cygnus editor comes from the need for simplicity of use.The simplicity of being able to manipulate individuals and everything that relates to them, at a glance
Without worrying about how information is stored behind the scenes,
All other information, families, sources, notes, etc. are ultimately only complementary information relating to the life of the individual. For instance, the individuals' marriage should be listed with the other events. This is what Cygnus does.
The advantage is to see almost everything at a glance, like a bird watching the earth from the sky.Did you know that? Its name comes from the large and brilliant constellation of the Swan. With its stars mainly arranged according to a large cross, it is represented as a bird spreading its wings.
Cygnus efficiently does a lot of work for you behind the scenes. Creating a spouse, for example, takes just one click, whereas it requires more steps with the other two editors. The compromise is that only the most important genealogical information can be edited with this editor, but still covers 80% of users' needs. There is a solution for everyone, and Ancestris users often choose to use two main editors: Cygnus + Gedcom, or Aries + Gedcom. Some prefer to use only the Gedcom editor. Here is a comparison of the 3 editors if you still had to make a choice.| **Cygnus** | **Gedcom** | **Aries** | |
| Focus | The individual and his close environment | The Gedcom standard | Completeness of information |
| Ease of use | ++ | +++ | + |
| Ergonomics | +++ | + | +++ |
| Coverage of needs | 80% | 100% | 100% |
| Data transparency | + | +++ | ++ |
| Efficiency | +++ | + | + |
| Editable Gedcom entities | Many | All | All |
| Compliance with Gedcom standard | 100% | 100% | 100% |
Cygnus displays the individual in the upper part of the window with the Title bar, his family nucleus just below, and the details of his/her life in the lower part, with the associated life events.
### Title bar The title bar displays the name of the [selected individual](https://docs.ancestris.org/books/user-guide/page/relationships-between-windows#bkmrk-une-s%C3%A9rie-de-fen%C3%AAtre "Relationships between windows") and some buttons. [](https://docs.ancestris.org/uploads/images/gallery/2020-09/en-cygnus-title.png) Hovering over a button displays a tooltip. #### Pin Button Freezes the editor on this individual even if another entity is selected in Ancestris. #### Cursor Button Keeps the focus on the editor when changing entities. A mouse selection of an individual in the entity table or in the tree, for example, normally causes the focus on the Cygnus Editor to be lost. If you want to keep the focus on the editor, this button brings the focus back to the first name of the individual and positions the cursor there. #### Warning sign When the warning sign icon appears, it means the information included in the individual data includes an invalid piece of data or an invalid value.. Press the icon to display the source of the invalidity. Anomalies are detected according to criteria defined in the [Ancestris preferences, Extension selection, Validation tab](https://docs.ancestris.org/books/user-guide/page/preferences#bkmrk-volet-extensions "Preferences"). #### Create a new individual Button Creates a new individual and places him/her in the editor. #### Delete this individual Button Deletes the individual displayed with a confirmation request. #### Contextual menu Right-clicking on this title bar displays the [context menu](https://docs.ancestris.org/books/user-guide/page/menu-bar "Menu Bar"). ### Separation bar The separation bar shown in yellow below can be moved with the mouse. It allows you to adjust the respective sizes allocated to the family nucleus and to life events. [](https://docs.ancestris.org/uploads/images/gallery/2020-09/en-cygnus-separation-bar.png) The position of the separation bar is set for each genealogy. ### Family nucleus Above the separation bar is the individual's family nucleus. [](https://docs.ancestris.org/uploads/images/gallery/2020-09/en-cygnus-nucleus.png) #### Photo frameThis frame displays all the photos and other media (video, soundtrack, etc.) of the individual and of his or her life events.
The photos displayed at each moment are those of the event selected in the [life events section](#bkmrk-zone-inf%C3%A9rieure "Life event section"). - Photos not related to a particular event are attached to the General event. - Birth photos are linked to the Birth event, etc. Media included in the sources are not displayed here, but in the [Source photo frame](#bkmrk-les-sources "Source photo frame"). The media displayed for a photo is the photo itself. For other media (sounds, videos, documents), the media displayed is the corresponding media icon. A horizontal scroll bar allows you to scroll through the photos of a given event. You can specify a short description for each photo. There are 3 buttons in the photo frame. - The button [](https://docs.ancestris.org/uploads/images/gallery/2020-05/EditeurCygnus_Etoile.png) sets the preferred photo to be displayed by default for the individual, in all Ancestris views, in particular the [Dynamic tree view](https://docs.ancestris.org/books/user-guide/page/dynamic-tree "Dynamic tree"). - The button [](https://docs.ancestris.org/uploads/images/gallery/2020-05/EditeurCygnus_Ajouter.png) adds a photo, which will be placed in the selected life event. - The button [](https://docs.ancestris.org/uploads/images/gallery/2020-05/EditeurCygnus_Supprimer.png) deletes the displayed photo Several actions are possible regarding the displayed media. - A single left click changes the media, whatever it is - Right-clicking displays the media in your computer's media viewer. - If it's a photo, the photo will be displayed in large size in your image viewer. - If it is a video or a soundtrack, it is played in your default media player. - When the media is a photo - Drag and drop with the mouse to crop the photo - The mousewheel allows you to zoom in and out. - A Ctrl+Click save the photo cropping The choice of a photo is made via the media selection window. [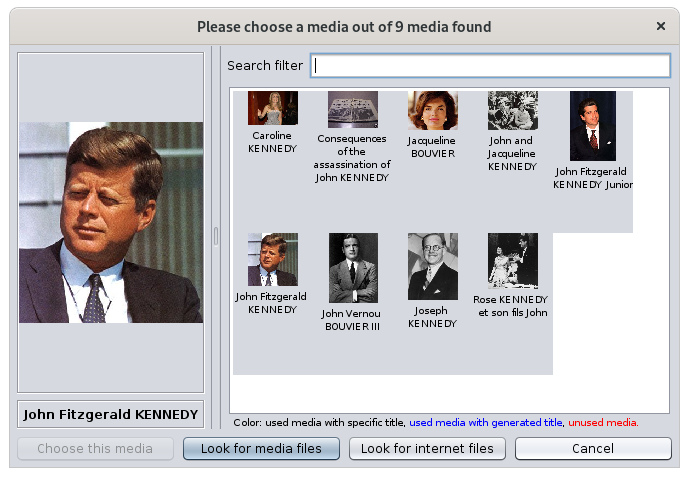](https://docs.ancestris.org/uploads/images/gallery/2020-09/en-cygnus-photos.png) The media are displayed on the right hand side. The left hand side displays the selected media. The media titles have three possible colors. - In black the media whose title is included in with the media - In blue the media whose title is deduced from the entity that uses it - In red unused media The **Choose this media** button associates it with the individual and closes the window. The **Look for media files** button is used to get a file from your computer, not yet used in the genealogy. #### Description of the individual This panel section is used to edit the name and gender of the individual. First and last names are edited with two drop-down menus. - The Firstname drop-down menu selects a firstname among those already used in the genealogy. - The Lastname drop-down menu selects a lastname from those already used in the genealogy. The button [](https://docs.ancestris.org/uploads/images/gallery/2020-05/EditeurCygnus_Noms.png) specifies the other elements of the individual's name via another panel that appears. [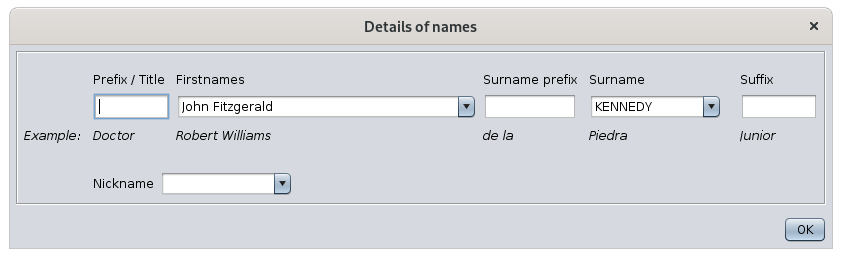](https://docs.ancestris.org/uploads/images/gallery/2020-09/en-cygnus-names.png) The radio buttons [](https://docs.ancestris.org/uploads/images/gallery/2020-10/en-cygnus-sex.png) set the gender of the individual. The checkbox [](https://docs.ancestris.org/uploads/images/gallery/2020-10/en-cygnus-private.png) marks this individual as private. For more details on this subject, see the [Privacy page in the Preferences](https://docs.ancestris.org/books/user-guide/page/preferences#bkmrk-onglet-donn%C3%A9es-priv%C3%A9 "Privacy preferences"). Above the first and last names is indicated the [identification number of the individual](https://docs.ancestris.org/books/user-guide/page/generate-id-numbers "Generate ID numbers") and the [Sosa number when it is generated](https://docs.ancestris.org/books/user-guide/page/generate-sosa-numbers "Generate Sosa numbers"). Around this description are arranged **6 relationships buttons** for the parents of the individual, brothers and sisters, spouse and children. These **Relationship buttons** have multiple functions. - A **left click on the button** will not have the same result depending on whether the related individual already exists or not yet. - If the individual already exists, it is selected and the editor will navigate to this individual and display it. - If the individual does not exist, it is created. - A **right-click on the button** displays a menu with the choices that seem most relevant to that individual and for the corresponding relationship. These choices are arranged in four categories: - **Navigation to the related individuals**, if there are several brothers, sisters, spouse or children - **Creation of the related individual** in the genealogy and creation of the relationship with him/her - **Creation of the relationship** if the individual already exists - **Detachment of the relationship** if the relationship already exists #### Family Tree This tree structure presents: - in yellow, the [selected individual](https://docs.ancestris.org/books/user-guide/page/relationships-between-windows#bkmrk-une-s%C3%A9rie-de-fen%C3%AAtre "Selected individual"), - his/her parents at the upper level - his/her siblings at the same level in the chronological order of births - his/her spouse(s) are listed below - and the corresponding children at the lower level [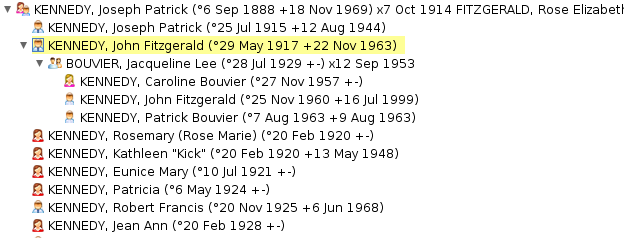](https://docs.ancestris.org/uploads/images/gallery/2020-09/en-cygnus-family-tree.png) A double-click on any of the individuals selects it. ### Life events This part of the Cygnus editor details the events of an individual's life. A vertical separation bar delimits the list of events and the media of the associated sources on the left, and the details of these events on the right. It can be moved and its position is memorized from one time to another for each genealogy. #### Events ##### List of events We distinguish the **General event** from the others. - It is a particular event that allows you not to define a particular event precisely. - It can associate notes and sources to the individual to characterize the whole of his life, without attaching them to a particular moment of life. All other events are those that the Gedcom standard allows to define. They are numerous (birth, marriage, profession, residence, death, burial, etc.).**All events are listed in a single lifeline, including unions**. You can therefore create a baptism event and a wedding event in the same place and in the same way.
Indeed, unlike the other two editors, Cygnus being focused on the individual, there is no distinction to edit all events, whether they are the individual entity events or the family entity events. The list displays the default events in chronological order, using event logic when a date is not indicated (i.e. a death occurs after a birth). The list can be sorted by clicking on the column header, in ascending order with one click, or descending order with a second click. The width of the columns can be adjusted with the mouse.Selecting an event displays its details on the right hand side, and its associated photos in the [photo frame at the top of the editor](#bkmrk-cadre-photo "Photo frame"), and source documents in the source media frame at the bottom left of the editor.
##### Buttons for creating or selecting events A set of 10 buttons manage the most common events more efficiently. [](https://docs.ancestris.org/uploads/images/gallery/2020-05/EditeurCygnus_boutons_%C3%A9v%C3%A9nements.png) - The first 8 buttons from the top are the most common events used in genealogy. - The first is that of birth. A click on this button creates the birth event if it does not already exist, and selects the birth event otherwise - The one underneath is that of the occupation. As there can be several occupations for the same individual, a click on the button displays a drop-down menu asking if you want to create an occupation or offers you to select one of the existing occupations. When there are none, it creates it. - The penultimate button is a button that displays all other possible events in a list. It is up to you to choose the one you want to create - The last button deletes the selected event. The General event cannot be deleted #### Details of an event For each selected event, the right hand part of the panel allows you to enter the same information, except for the General event which does not need some of it. All this information is aligned to the [Gedcom standard tags](https://docs.ancestris.org/books/user-guide/page/tags "Tags"). ##### Description of the event It is a dropdown list of already defined descriptions, in case the description can be reused. ##### Date and time See the [dates page](https://docs.ancestris.org/books/user-guide/page/dates "Dates") for more details. Below the date is displayed the day of the week if it is dated, and the age of the person at the time of the event except for the day of birth. ##### Place The drop-down menu allows you to choose an existing place from the ones known in the genealogy. The first characters entered display a filtered list of places containing these characters. If the place does not already exist or if you want to modify it, click on the place button next to it. See the description of [places](https://docs.ancestris.org/books/user-guide/page/places "Places") or the [Place Editor](https://docs.ancestris.org/books/user-guide/page/places-editor-%28l%29 "Places editor") for more details. ##### Notes It is possible to enter one or more notes, specific or shared. See the difference in the [Shared Information page](https://docs.ancestris.org/books/user-guide/page/shared-information "Shared Information"). [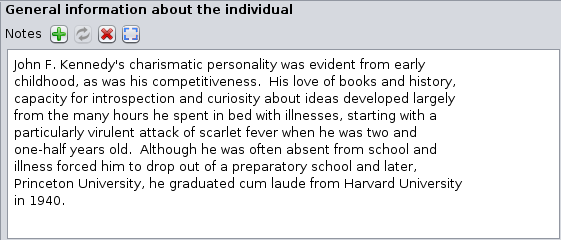](https://docs.ancestris.org/uploads/images/gallery/2020-09/en-cygnus-note.png) Cygnus can recognize, display and edit both shared and specific notes, but will only create shared notes. The mouse wheel is used to scroll through the note text if it requires more lines than there is room to display. The right scrollbar allows you to do the same. It appears when all the lines cannot be displayed. By pressing the <Ctrl> key and using the mouse wheel, you can scroll through the notes. The other scrollbar on the right allows you to do the same thing. Hovering the right scrollbar with the mouse displays the rank of the displayed note in relation to the total number of notes attached to the event. The first 3 buttons allow you to create, change and delete a note. The last button allows you to enter the note in a large window in which it is possible to enlarge the font size. The creation and change of a note opens the note selection window: [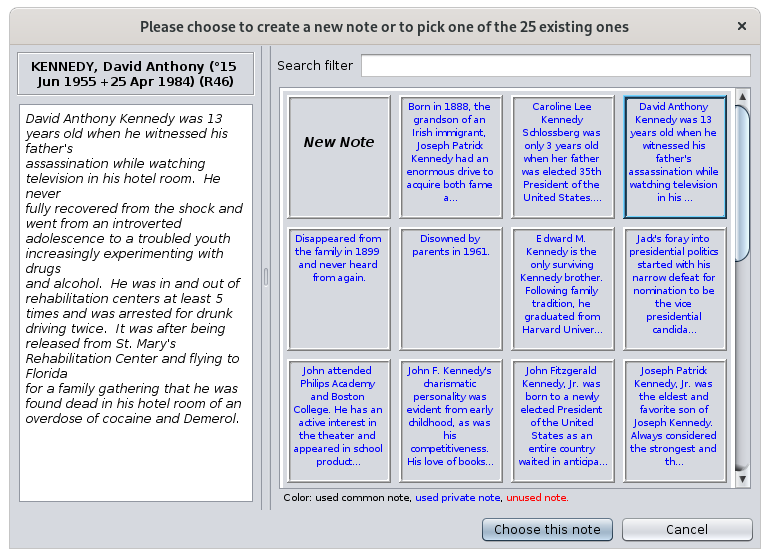](https://docs.ancestris.org/uploads/images/gallery/2020-09/en-cygnus-choose-note.png) The right part lists all the known notes of the genealogy. They are of three origins. - In black, the notes used in the genealogy and contained in Note Entities (shared notes) - In blue, the notes used in the genealogy and contained in Notes specific to certain entities. - In red, unused notes. ##### Sources It is possible to enter one or more sources, specific or shared. See the difference in the [Shared Information page](https://docs.ancestris.org/books/user-guide/page/shared-information "Shared Information"). For example, here is a source of the baptismal certificate of Louis XIV. [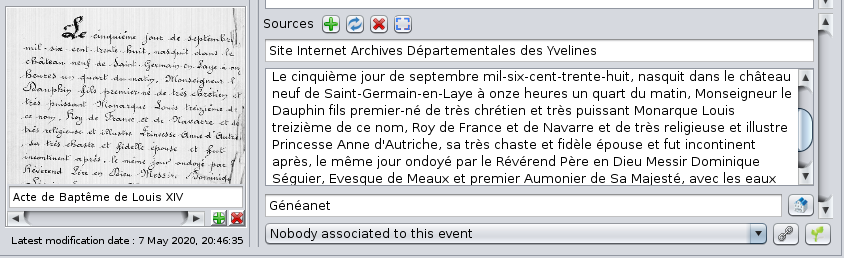](https://docs.ancestris.org/uploads/images/gallery/2020-09/en-cygnus-source.png) The information for the sources is as follows: - The name of the source - A text that is generally used to present a transcription of the source text. Indeed, it is better to make the effort once to decipher a handwritten text that is difficult to read, rather than to do it every time you need it. - The name of the repository where the source can be found - Media associated with the same source (on the left) Sources work on the same principle as notes in terms of : - the 4 buttons - scrollbars - the use of the mouse The photo frame of the source of an event works on the same principle as the photo frame of the individual. Clicking on the media displays the source selection window: [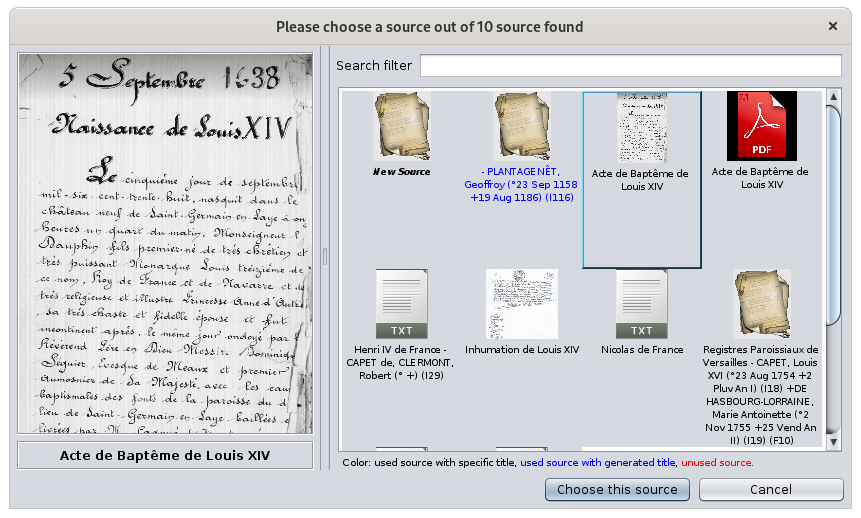](https://docs.ancestris.org/uploads/images/gallery/2020-09/en-cygnus-choose-source.png) The Repository field allows you to choose the repository from which the source is taken with the button on the right. [](https://docs.ancestris.org/uploads/images/gallery/2020-05/EditeurCygnus_bouton_d%C3%A9p%C3%B4t.png). [](https://docs.ancestris.org/uploads/images/gallery/2020-09/en-cygnus-choose-repository.png) This window contains all the information of the repositories already created or that you would like to create when editing the current individual. ##### Relations This is where we enter other individuals in relation to an event, such as witnesses at a wedding or the godparents of a baptized person. [](https://docs.ancestris.org/uploads/images/gallery/2020-09/en-cygnus-relation.png) The relationship field is actually a drop-down menu that lists all the relationships currently entered for the selected event. It is possible to select one of them and then click on the button [](https://docs.ancestris.org/uploads/images/gallery/2020-05/EditeurCygnus_bouton_relation_s%C3%A9lection.png) to navigate to the corresponding individual. The button [](https://docs.ancestris.org/uploads/images/gallery/2020-05/EditeurCygnus_bouton_relation_choisir.png) allows you to manage individuals in relation to the selected event. Clicking on this button brings up the following window: [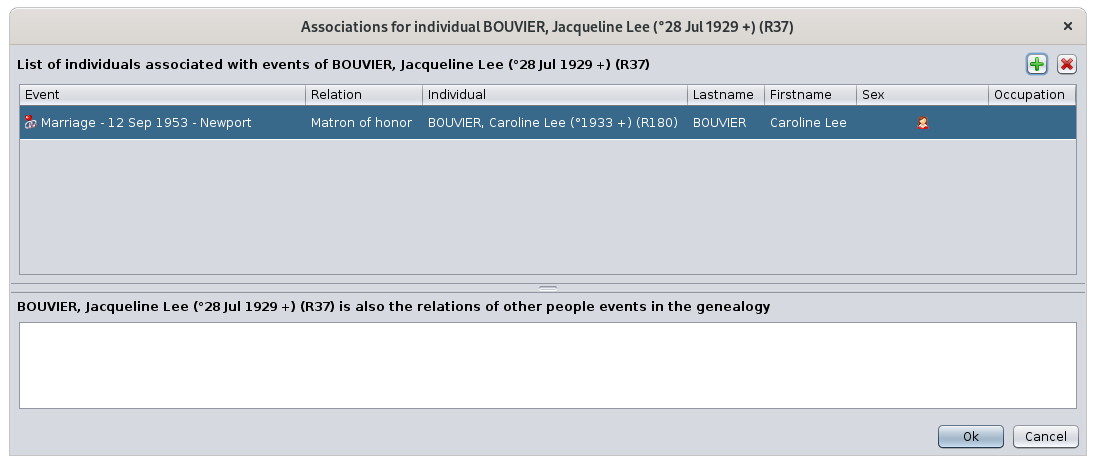](https://docs.ancestris.org/uploads/images/gallery/2020-09/en-cygnus-manage-relations.png) In the upper part, this window allows you to add, modify or delete relationships. For each relationship in the list of relationships that appears, it is possible to define the event to which you wish to associate a relationship, the type of relationship (witness, declarer, etc.), the name of the relationship, its sex and occupation. In the lower part, it displays, for information only, the events of other individuals for which the selected individual is himself or herself associated. #### Time stamp of last modification of the entity The last information visible in the Cygnus Editor is the last modification date of the information. [](https://docs.ancestris.org/uploads/images/gallery/2020-09/en-cygnus-modifications.png) This date is updated automatically at each update. ## ## Synchronization with other views As we have seen, in Ancestris, at every moment an entity is selected. When this entity is an individual, this one appears as the main person in the Cygnus editor. When this entity is not an individual (a family, a note, etc.), the Cygnus Editor displays the individual related to this entity. You can then edit the selected entity as per the various screens described in this page. The selected entity will be related to the event automatically selected in Cygnus. Example: if a family is selected in the Entities table, Cygnus will display the husband, select the spouse in the family tree in Cygnus, and select the marriage event. # Gedcom editor The **Gedcom editor** is one of the three main editors of Ancestris. [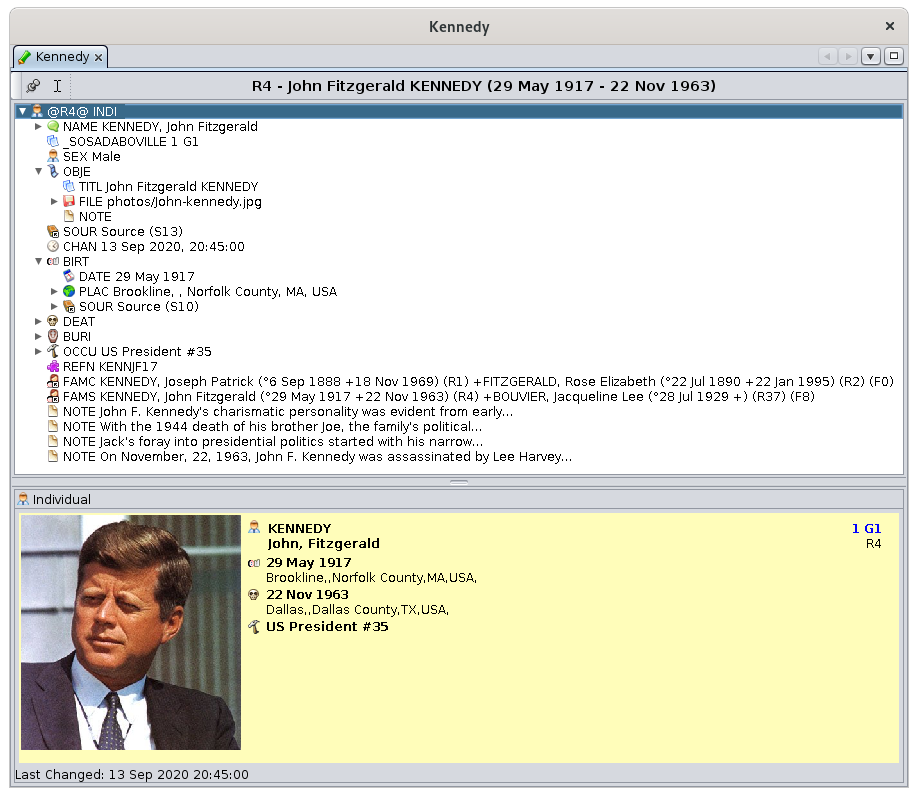](https://docs.ancestris.org/uploads/images/gallery/2020-09/en-gedcom.png) The philosophy of the Gedcom editor comes from the will to be transparent and to be based on the way the [Gedcom standard](https://docs.ancestris.org/books/user-guide/page/gedcom "Gedcom standard") structures genealogical information.Information transparency where the user sees 100% of the information stored in his genealogy, which makes it easy to store and control all of the data.
Willingness to comply 100% with the Gedcom standard for a better sustainability of ones work
The advantage is to have all the information for any entity in a structured form. While both the Aries and Cygnus editors are visual and graphical, the Gedcom editor displays information in a text mode. This can be confusing for a beginner but it provides a lot of trust later on. This is because the Gedcom editor directly manipulates the hierarchical organization of the different entities in the Gedcom file using Gedcom labels and syntax. It gives access to all the possibilities of the standard. It displays only one entity at a time, from any [category](https://docs.ancestris.org/books/user-guide/page/entities "Entities") (individual, family, source, etc.). It allows you to modify the current entity (individual, family, etc.) as precisely as possible. This makes it extremely simple to use, but requires time to adapt. There is a solution for everyone, and Ancestris users often choose to use two main editors: Cygnus + Gedcom, or Aries + Gedcom. Some prefer to use only the Gedcom editor. Here is a comparison of the 3 editors if you still had to make a choice.| **Cygnus** | **Gedcom** | **Aries** | |
| Focus | The individual and his close environment | The Gedcom standard | Completeness of information |
| Ease of use | ++ | +++ | + |
| Ergonomics | +++ | + | +++ |
| Coverage of needs | 80% | 100% | 100% |
| Data Transparency | + | +++ | ++ |
| Efficiency | +++ | + | + |
| Editable Gedcom entities | Many | All | All |
| Compliance with Gedcom standard | 100% | 100% | 100% |
It is possible to add a Media property directly from the file explorer of your computer through drag-and-drop. It is actually possible to drag-and-drop a media from other software too (e.g. digiKam, etc)
To do this, simply drag and drop the file from the file explorer to the Gedcom Editor tree. You see below the black line just before releasing the mouse. Once the click is released, the property [](https://docs.ancestris.org/uploads/images/gallery/2020-04/file.jpg) will be added as a sub-property of [](https://docs.ancestris.org/uploads/images/gallery/2020-04/obje.jpg). [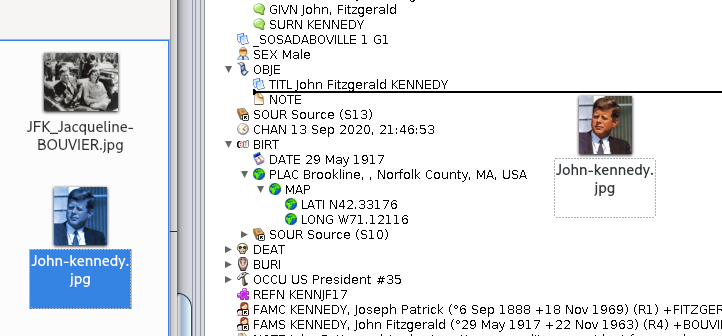](https://docs.ancestris.org/uploads/images/gallery/2020-09/en-gedcom-drag-n-drop-photo.png) #### Multimedia file - Media file on external disk Whatever your system, if you use drag and drop above, you should see how to specify the name of an external file. On Windows, it is also possible to write the file with 3 slashes as follows: `file:///E:\images\image.jpg` where E is the external drive. On Linux, it is enough to indicate the name of the disk as it is mounted on your system, which may vary from one distribution to another. For example : [](https://docs.ancestris.org/uploads/images/gallery/2020-09/en-gedcom-external-file.png) #### Multimedia file - Internet link You just have to indicate the classic URL of the file: `https://www.siteweb.com/images/image.jpg`. #### Multimedia file - Local and found Ancestris helps you quickly identify if a file is local and if it exists on disk. Two user defined tags are used for this - **\_LOCAL** is '1' if file is local, '0' otherwise. - **\_FOUND** is '1' if local file exists on disk or is file is remote, '0' if local file is not found. These values are read only and are updated when the Gedcom file is opening and when the FILE property is edited or checked for validation. ### Moving or copying a property **Classically, moving and copying a property is obtained via the [Context Menu](https://docs.ancestris.org/books/user-guide/page/context-menu "Context Menu"), whose right click must be made on the line concerned by the current processing, or by Drag&Drop.** #### Through the context menu - To move a property, command Cut, then command Paste, with a new right click on the line to receive the moved property. - To copy a property, command Copy, then command Paste, with a new right click on the line to receive the copied property. #### By Drag / Drop [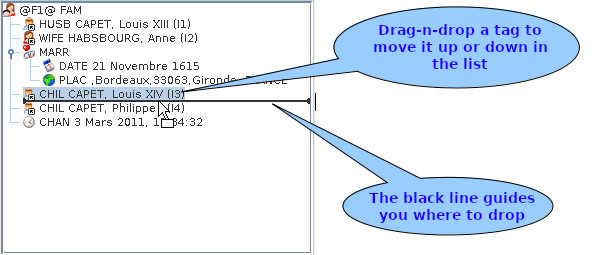](https://docs.ancestris.org/uploads/images/gallery/2020-09/en-gedcom-move-property.png) #### Order of children, and properties in general You can order the children in the desired order this way. Ancestris will keep the order displayed in the file. This method applies to the order of all properties. ### Deleting a property To delete a property line, right-click on the line to be deleted and choose **Delete the selected properties**. As usual, a confirmation window is displayed before the command is executed. It is obvious that the deletion of a line also deletes the lines hierarchically placed below this line. ### Confirming an entry and saving the genealogy Changes made in the lower part of the window need to be confirmed in order to be saved. As soon as a piece of information is modified, the following buttons appear at the bottom right of the editor. Simply click **OK** to validate, or **Cancel** to cancel: [](https://docs.ancestris.org/uploads/images/gallery/2020-04/okcancel.jpg) These buttons may not appear. This is the case for users who prefer to automate this confirmation when navigating to another entity. This is a setting in the [Preferences, Edit pane and in the Editor section](https://docs.ancestris.org/books/user-guide/page/preferences#bkmrk-volet-%C3%89ditions "Preferences"). [](https://docs.ancestris.org/uploads/images/gallery/2020-09/en-gedcom-confirm.png)Warning: in both cases, with or without clicking OK, your changes are not yet saved in your file on disk. But if you try to quit Ancestris, it will warn you and ask you to save all your changes.
### Modification of a place When you want to modify a place selected in the properties of the Gedcom Editor, there are two ways to enter or modify this place. This display mode is chosen in the [Preferences, Editor pane](https://docs.ancestris.org/books/user-guide/page/preferences#bkmrk-volet-%C3%89ditions "Preferences for places"), in the section concerning places. - Display all places jurisdictions on a single line: [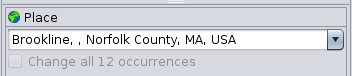](https://docs.ancestris.org/uploads/images/gallery/2020-09/en-gedcom-place-one-line.png) - Display the place with one jurisdictions per line: [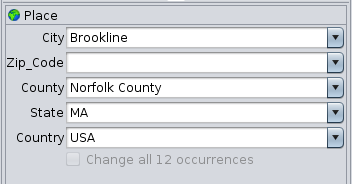](https://docs.ancestris.org/uploads/images/gallery/2020-09/en-gedcom-place-multiple-lines.png) #### Auto-complete As you can see above, for each field it is possible to display the list of values already entered by using the drop-down list. The other possibility is to start typing a place name, and Ancestris will offer you all the places starting with these first entered characters. This is called "auto-complete". This makes sure the same places get spelt the same way and it saves typing time. You can also see why displaying on a single line can be more efficient. It then allows you to enter all the jurisdictions of the place in one go. #### Global change of all identical places It is sometimes necessary to apply a place correction to all identical places. The Gedcom Editor not only tells you how many places are identical, it also lets you spread a correction to all the others at the same time. To do this, check the box below the place fields: [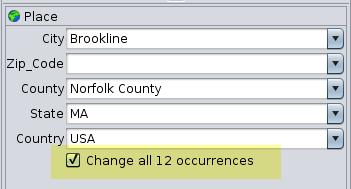](https://docs.ancestris.org/uploads/images/gallery/2020-09/en-gedcom-place-multiple-lines-replicate.png) The confirmation window asks you to confirm. [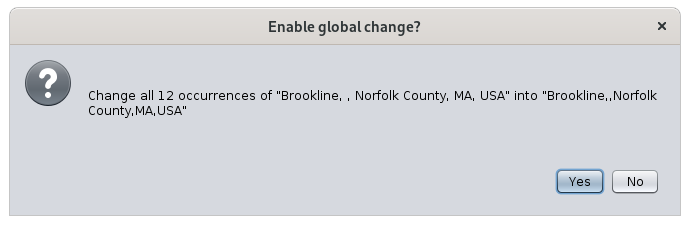](https://docs.ancestris.org/uploads/images/gallery/2020-09/en-gedcom-place-confirm.png) Then validate your modification by clicking on Yes. ### Modification of the display of entities When the entity first line is selected in the upper part, the one with the identification number, the corresponding [blueprint](https://docs.ancestris.org/books/user-guide/page/blueprints "Blueprints") is displayed in the lower part. To change this blueprint, just right-click on the current blueprint and choose "**Change display**". Here is the part of the window corresponding to the change of the display in the Gedcom Editor for all individuals. [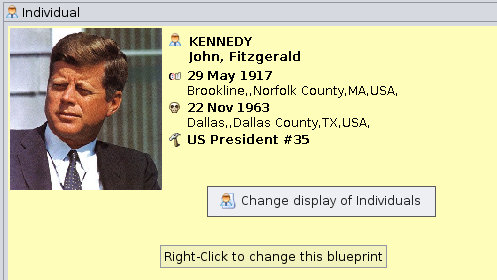](https://docs.ancestris.org/uploads/images/gallery/2020-09/en-gedcom-change-blueprint.png) The Blueprint window appears. Follow the instructions in the corresponding [blueprint](https://docs.ancestris.org/books/user-guide/page/blueprints "Blueprints") page. # Aries editor The **Aries editor** is one of the three main editors of Ancestris. [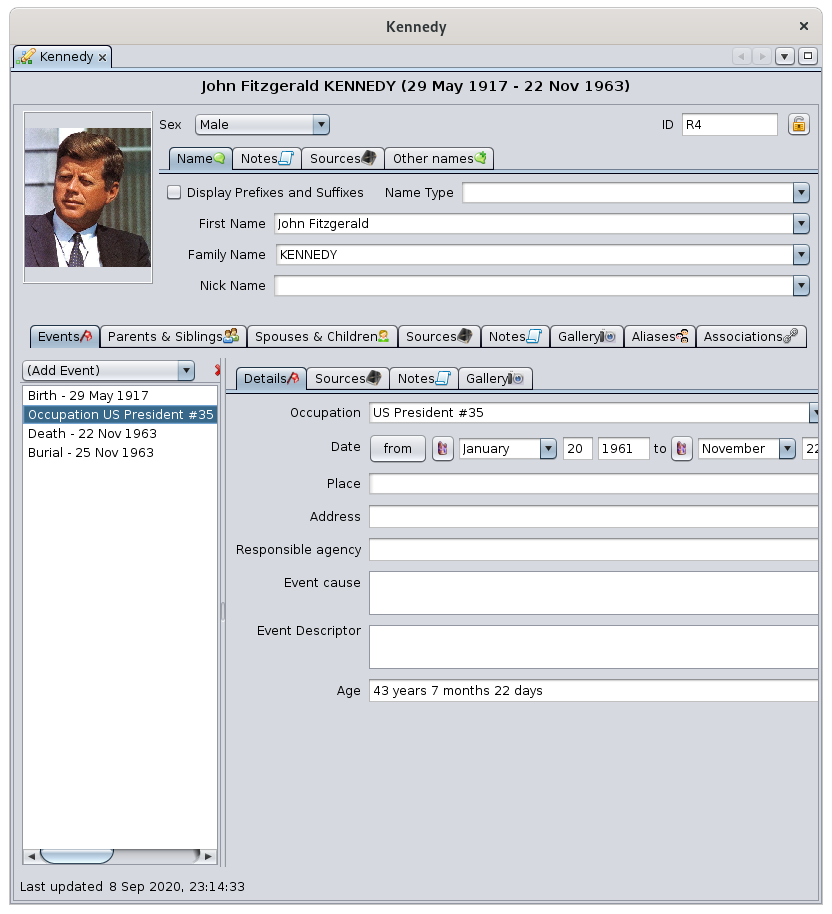](https://docs.ancestris.org/uploads/images/gallery/2020-09/en-aries.png) The philosophy of the Aries editor comes from the need for ergonomy and exhaustiveness.The possibility of being able to provide all the information allowed by the [Gedcom standard](https://docs.ancestris.org/books/user-guide/page/gedcom "Gedcom").
In a user-friendly interface with ergonomic windows
The advantage is to be able to do everything, from A to Z, from Alpha to Omega.Did you know? Its name comes from the constellation of Aries, the first constellation of the zodiac, crossed by the sun in spring. The horns of Aries, in the shape of spirals, also symbolize the impulse towards life, the eternal restarting or rebirth of life, of light, also corresponding to the beginning of spring in the cycle of seasons.
The possibilities of Aries are numerous and cover 100% of the needs. The compromise is that adding the same information can be done in several ways and you will have to choose your most efficient mode. There is something for everyone, and Ancestris users often choose to use two main editors: Aries + Gedcom, or Cygnus + Gedcom. Some prefer to use only the Gedcom editor. Here is a comparison of the 3 editors if you still had to make a choice.| **Cygnus** | **Gedcom** | **Aries** | |
| Focus | The individual and his close environment | The Gedcom standard | Completeness of information |
| Ease of use | ++ | +++ | + |
| Ergonomics | +++ | + | +++ |
| Coverage of needs | 80% | 100% | 100% |
| Data Transparency | + | +++ | ++ |
| Efficiency | +++ | + | + |
| Editable Gedcom entities | Many | All | All |
| Compliance with Gedcom standard | 100% | 100% | 100% |
The source needs to be attached at the event level, via these 2 buttons. You can attach for example birth and death certificates, after having previously entered and documented them in [Source Entities](#bkmrk-entit%C3%A9-source "Source Entities").
The other fields are: - **Role in event**: this is a free text but roles such as husband, wife, father, mother, wife, child are proposed. - **Certainty assessment**: qualifies the quality of the information according to the following predefined criteria: [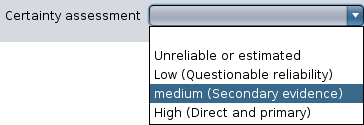](https://docs.ancestris.org/uploads/images/gallery/2020-09/en-aries-event-source-edit-quality.png) - **Recording date**: date when the vent was recorded, and therefore not necessarily the date of the event of the individual we have been talking about since the beginning. - **Text from source**: extract of the source text justifying the individual's event. - If the text of the source has already been transcribed in the Source entity, it is not worthwhile to put it here. The **Notes Tab** and **Gallery Tab** of the window modifying the quotation characterize the source quotation. These tabs are used throughout the Aries Editor like the other Notes and Gallery tabs. Apart from this difference in how they are attached to source citations, you will find their use in the [Notes Tab](#bkmrk-onglet-notes-0 "Notes Tab") and [Gallery Tab](#bkmrk-panneau-galerie "Gallery Tab") of an individual. Regarding the photos of the sources (deeds, certificates, etc.), they'd rather be put in the gallery of the source than the gallery of the individual. ##### Notes Tab Notes can be added to an individual's event using the Notes Tab. [](https://docs.ancestris.org/uploads/images/gallery/2020-09/en-aries-event-note.png) This tab is used throughout the Aries editor. Apart from this difference in the attachment to events, you will find its use in the [Notes Tab](#bkmrk-onglet-notes-0 "Notes Tab") of an individual. ##### Gallery tab Media can be added to an individual's event using the Gallery Tab. [](https://docs.ancestris.org/uploads/images/gallery/2020-09/en-aries-event-gallery.png)We will put here, at the level of the event, the photos of the individual at the time of these events.
This tab is similarly used throughout the Aries editor. Apart from this difference in the attachment to events, you will find its use in the [Gallery Tab](#bkmrk-panneau-galerie "Gallery Tab") of an individual. #### Parents and Siblings tab This tab manages the parents and siblings of the selected individual. [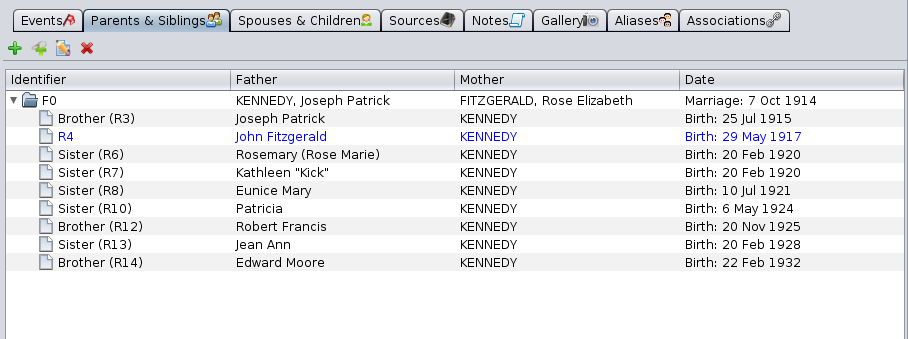](https://docs.ancestris.org/uploads/images/gallery/2020-09/en-aries-parents.png) This tab is in the form of a [Tree list](#bkmrk-liste-arborescente "Tree list") with [Edit buttons](#bkmrk-boutons-communs "Edit buttons"). Their principle is the same as described in the corresponding paragraph, namely : - The button **Add parents to that person** [](https://docs.ancestris.org/uploads/images/gallery/2020-05/EditeurAries_Boutons_Edition_Cr%C3%A9er.png) allows you to add the father and mother of the selected individual. - A new window of the Aries editor opens on a Family entity, where you can specify the parents. - The **Link to an existing family** button [](https://docs.ancestris.org/uploads/images/gallery/2020-05/EditeurAries_Boutons_Edition_Lier.png) allows you to create a genealogical link between the selected individual and an existing family in the genealogy. - A new window is displayed with a list of already registered families. - The **Edit Selected Family** button [](https://docs.ancestris.org/uploads/images/gallery/2020-05/EditeurAries_Boutons_Edition_Modifier.png) edits the family that is selected in the list underneath. Aries opens a new editor positioned on the family. - The **Delete Selected Family** button [](https://docs.ancestris.org/uploads/images/gallery/2020-05/EditeurAries_Boutons_Edition_Supprimer.png) deletes the family that is selected in the list underneath. #### Spouses and children tab This tab manages the different spouses of the selected individual as well as the children he or she has had with each of them. [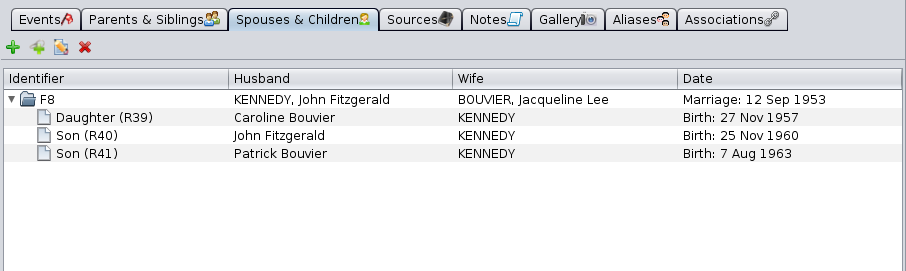](https://docs.ancestris.org/uploads/images/gallery/2020-09/en-aries-spouse-children.png) This tab is in the form of a [Tree list](#bkmrk-liste-arborescente "Tree list") with [Edit buttons](#bkmrk-boutons-communs "Edit buttons"). Principles are the same as the tab described above. #### Sources Tab Sources can be added to the individual directly through a Sources Tab. This tab is used throughout the Aries Editor. Apart from this difference in the attachment to an individual, you will find its use in the [Sources Tab of an event](#bkmrk-panneau-sources "Manage the source tab"). #### Notes Tab This tab is in the form of a [selection list](#bkmrk-liste-de-s%C3%A9lection "Selection list") with the [Edit buttons](#bkmrk-boutons-communs "Edit buttons"). [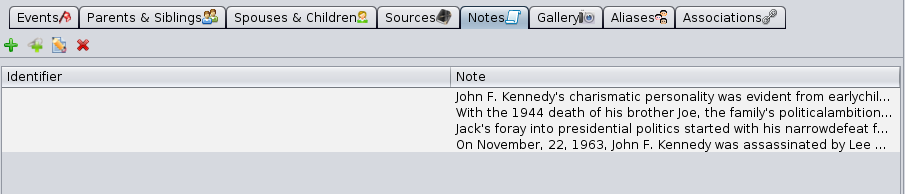](https://docs.ancestris.org/uploads/images/gallery/2020-09/en-aries-note.png) The notes created or attached qualify the selected event. We can see that there can be two types of notes in the list: - **Notes Entities**, therefore shareable with other entities of the genealogy, identified by an ID number. - **Specific (embedded) notes**, not shareable, without ID number. See [shared information](https://docs.ancestris.org/books/user-guide/page/shared-information "Shared Information") for more details. With the create button [](https://docs.ancestris.org/uploads/images/gallery/2020-05/EditeurAries_Boutons_Edition_Cr%C3%A9er.png) it is possible to create a shared Note Entity or a note specific to the event (therefore embedded) as indicated by the check mark in the window that appears. [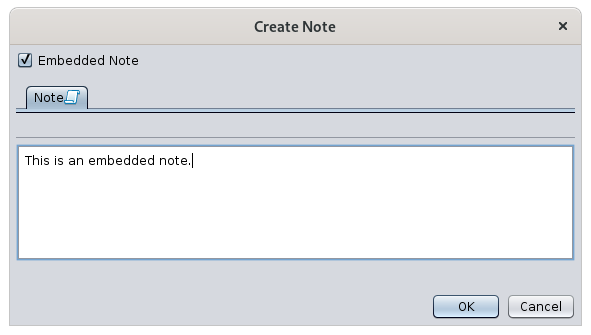](https://docs.ancestris.org/uploads/images/gallery/2020-09/en-aries-note-create.png) With the edit button [](https://docs.ancestris.org/uploads/images/gallery/2020-05/EditeurAries_Boutons_Edition_Modifier.png) it is possible to modify a note. In this case, if the References tab is visible and if the window shows an identification number for the note, it is a shared note (window below). Otherwise it is a specific note (similar to the window above). [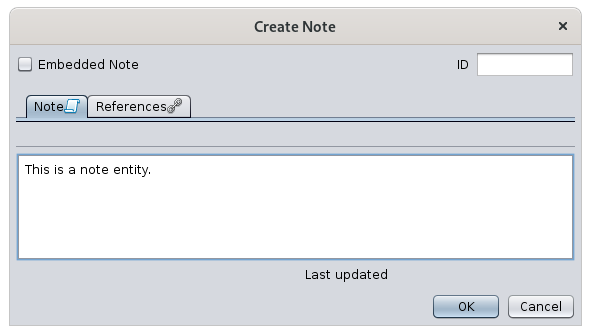](https://docs.ancestris.org/uploads/images/gallery/2020-09/en-aries-note-create-entity.png) The References tab is described below. #### Gallery tab This tab is in the form of a [selection list](#bkmrk-liste-de-s%C3%A9lection "Selection list") with the [Edit buttons](#bkmrk-boutons-communs "Edit buttons"). [](https://docs.ancestris.org/uploads/images/gallery/2020-09/en-aries-gallery.png) The media created or attached qualifies the individual independently of any event.We will put here, at the level of the individual, and not at the level of the events, the pictures of this individual that will be displayed in the [Dynamic tree](https://docs.ancestris.org/books/user-guide/page/dynamic-tree "Dynamic tree").
Note here the blue star [](https://docs.ancestris.org/uploads/images/gallery/2020-05/EditeurAries_Boutons_Edition_Pr%C3%A9f%C3%A9rer.png) which allows you to specify the media to be displayed by default in the family tree, in case there are several media to choose from for the individual. The buttons for creating, linking or editing a media displays the media editing window. #### Aliases Tab This tab manages the different aliases of the selected individual.An alias is a relationship between two individuals who are supposedly distinct a priori but who perhaps designate the same person.
- Their identification numbers are different - Their names may or may not be identical, indicating that there is a possibility that these two individuals are in fact one and the same person. When such a possibility exists, the user can create an alias in order to bring the two individuals together, so that the Aliases tab of the first individual will mention the name of the second, while, conversely, this same tab of the second individual will mention the name of the first. The presence of an alias expresses a simple hypothesis. - If later it turns out that the two individuals are two distinct physical persons, the alias must naturally be removed. - If, on the contrary, it is proven that the two individuals are one and the same natural person, the two records must then be merged. The Alias tab is presented in the form of a [selection list](#bkmrk-liste-de-s%C3%A9lection "Selection list") with the [Edit buttons](#bkmrk-boutons-communs "Edit buttons"). [](https://docs.ancestris.org/uploads/images/gallery/2020-09/en-aries-alias.png) - The **Add an Alias** button [](https://docs.ancestris.org/uploads/images/gallery/2020-05/EditeurAries_Boutons_Edition_Cr%C3%A9er.png) associates the selected individual with another individual by means of an alias. - The **Edit selected alias** button [](https://docs.ancestris.org/uploads/images/gallery/2020-05/EditeurAries_Boutons_Edition_Modifier.png) edits the record of the individual whose alias is selected in the grid below.This command opens a new editor window inviting you to modify the data of the individual. - The **Delete selected alias** button [](https://docs.ancestris.org/uploads/images/gallery/2020-05/EditeurAries_Boutons_Edition_Supprimer.png) allows you to delete the alias selected in the list below. - The deletion does not remove the individual itself but the link between the two individuals. - An alias is a reciprocal link between two individuals. Consequently, the deletion of an alias from the first individual, induces the automatic deletion of the same alias from the second individual. #### Associations Tab This tab manages associations between the selected individual and other individuals in the genealogical.An association is a link put between two individuals to indicate that one has been involved in one of the other's events. Example: the godfather of a baptism, the witness of a groom.
An association is a separate link from parental relationships or aliases. The Association tab is in the form of a [selection list](#bkmrk-liste-de-s%C3%A9lection "Selection list") with the [Edit buttons](#bkmrk-boutons-communs "Edit buttons"). [](https://docs.ancestris.org/uploads/images/gallery/2020-10/en-aries-association.png)This list of associations contains the events of people in which the edited individual has been involved and the role of the edited individual in these events.
In the example above, if we assume that the individual referenced being edited is called Jacqueline Bouvier, this means that Jacqueline Bouvier was witness of Caroline Lee's blessing (and not that Caroline Lee was informant of Jacqueline Bouvier's blessing). The associations listed here have therefore been added: - Either by using the **Associate a person to this event** button on the **Event Details** tab of the associated person. - In the example above, it is therefore by editing the individual Caroline Lee, selecting her blessing event, clicking on the association button, choosing the individual Jacqueline Bouvier and specifying "Informant". - [](https://docs.ancestris.org/uploads/images/gallery/2020-09/en-aries-association1.png) - Either by using the Add Association button in this tab: [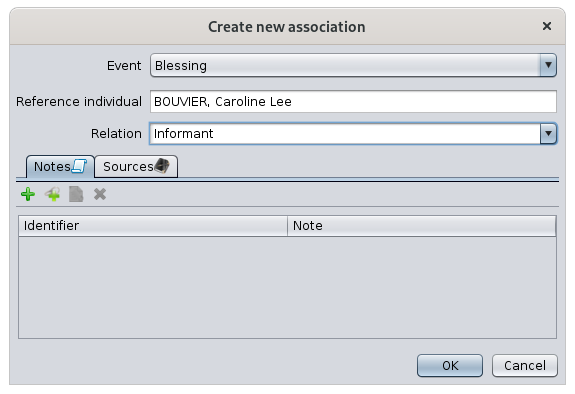](https://docs.ancestris.org/uploads/images/gallery/2020-09/en-aries-association2.png) As you can see, it's the same window and only the person's name changes. It is therefore the starting point that indicates the meaning of the involvement of an individual in the event of the other. - Either we start from the event that took place, and we go and look for the individual involved, - Or we start with the individual involved and point out the event of the other. --- ## Family Entity When the selected entity is a family, the Aries Editor is divided horizontally into two areas: the description of the couple at the top, and the events and relationships of the family at the bottom, with tabs. ### Description of the couple The upper area is dedicated to the description of the two individuals of the couple currently selected in Ancestris. [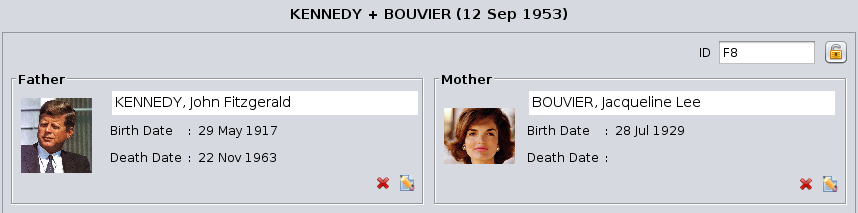](https://docs.ancestris.org/uploads/images/gallery/2020-09/en-aries-family.png) #### ID number Before the couple, at the top right, the family [ID number](https://docs.ancestris.org/books/user-guide/page/generate-id-numbers "Generate ID numbers") is displayed. #### Privacy padlock There is also a Padlock button [](https://docs.ancestris.org/uploads/images/gallery/2020-05/EditeurAries_cadenas.png). It marks the family as confidential if pressed. #### The couple The husband is on the left and the wife on the right. For each of them there is a description, which can be modified with the Modify button: - Photo - Last and first names - Date of birth - Date of death Depending on whether this description is occupied by an individual or not, the following buttons appear. #### Buttons - The **Add button** [](https://docs.ancestris.org/uploads/images/gallery/2020-05/EditeurAries_Boutons_Edition_Cr%C3%A9er.png) creates an individual, male or female, in order to add him/her to the selected family. - This button appears only when no individual is in the description . - The **Link button** [](https://docs.ancestris.org/uploads/images/gallery/2020-05/EditeurAries_Boutons_Edition_Lier.png) allows you to select the person you are looking for from the list of individuals already registered in the genealogy. - This button appears only when no individual is in the description. - The **Modify button** [](https://docs.ancestris.org/uploads/images/gallery/2020-05/EditeurAries_Boutons_Edition_Modifier.png) modifies the description of the couple's individual. Aries opens the edit window for an individual, as described above. - This button only appears when an individual is already in the description. - The **Delete button** [](https://docs.ancestris.org/uploads/images/gallery/2020-05/EditeurAries_Boutons_Edition_Supprimer.png) removes the individual from the family. It does not delete the individual, it simply removes him/her from the family. - This button appears only when an individual is already in the description. ### Events and relations with the Family The lower area is dedicated via tabs to the events of the Family entity, and to the relationships of this family with other entities. [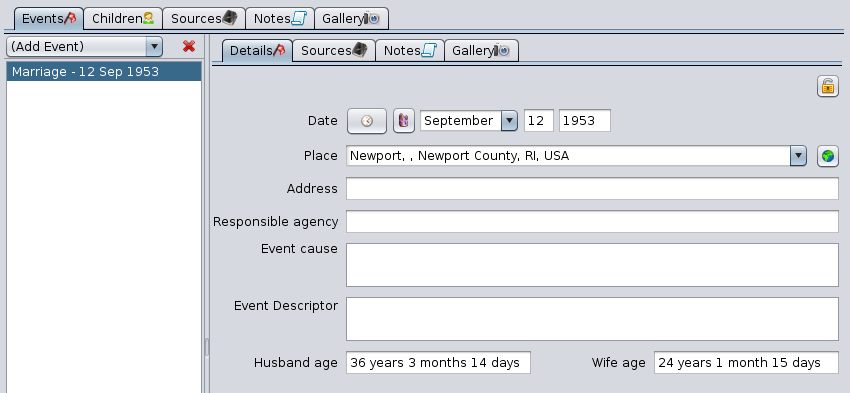](https://docs.ancestris.org/uploads/images/gallery/2020-09/en-aries-family-events.png) The Events, Sources, Notes and Gallery tabs have been described in the [Individual section](#bkmrk-zone-inf%C3%A9rieure-de-l "Individual section"). #### Children Tab This tab manages the children of the selected family, their respective spouses, as well as the children they have had with each of them. [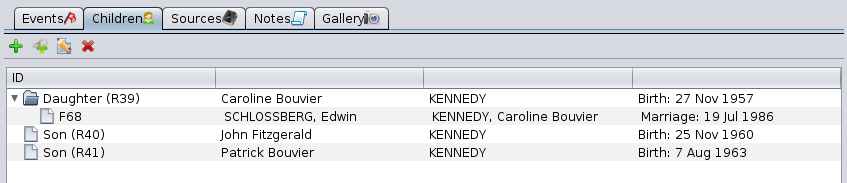](https://docs.ancestris.org/uploads/images/gallery/2020-09/en-aries-family-children.png) This tab is in the form of a [Tree list](#bkmrk-liste-arborescente "Tree list") with the [Edit buttons](#bkmrk-boutons-communs "Edit buttons") and works as described in the corresponding paragraphs. ## Multimedia Entity When the selected entity is a multimedia entity, the Aries Editor displays the exact name of this object in the Title field and, below it, the Image, Note and References tabs. [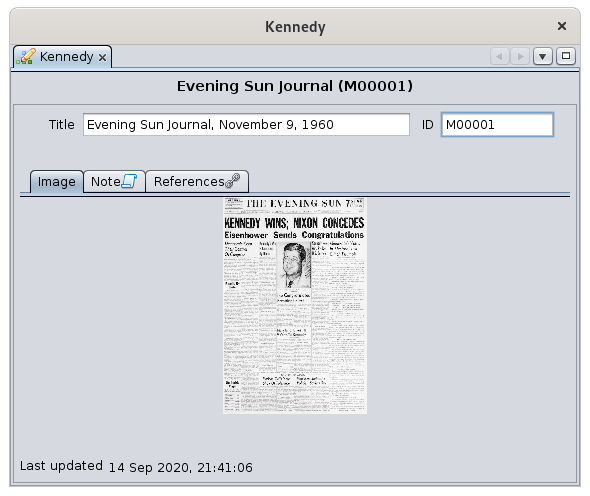](https://docs.ancestris.org/uploads/images/gallery/2020-09/en-aries-multimedia.png) The [Note](#bkmrk-onglet-notes-0 "Note tab") and [References](#bkmrk-panneau-r%C3%A9f%C3%A9rences "References") tabs are common to all entities. They are described in this page. ### Image Tab It displays the image associated with the currently selected media. Clicking on the image or on its location modifies it or loads another one. The **Please choose an image** window that appears prompts you to choose the file corresponding to the image to be displayed. ## ## Note Entity When the selected entity is a Note entity, the Aries editor displays two tabs. For the purpose of the demonstration, we have created a note entity out of the note property provided in the Kennedy file example. [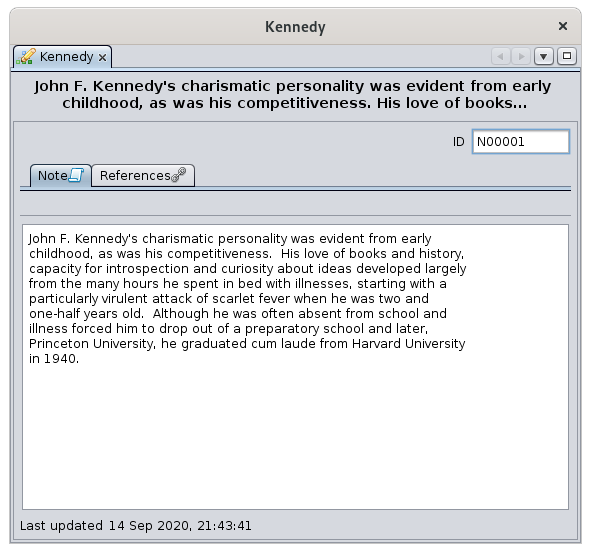](https://docs.ancestris.org/uploads/images/gallery/2020-09/lMDen-aries-note.png) The [References](#bkmrk-panneau-r%C3%A9f%C3%A9rences "References") tab is common to all entities. It is described below. ### Note text tab This tab displays the text content of the selected note, for consultation or for modification.This tab should not be confused with the common Notes tab present in the other entities. Indeed, the latter is used to list and manage the notes associated with these entities, while the Notes tab of the Notes entity displays the value of the note itself.
## Source Entity When the selected entity is a source ensity, the Aries Editor displays four fields describing the source and then a few tabs underneath. The [Notes](#bkmrk-onglet-notes-0 "Notes"), [References](#bkmrk-panneau-r%C3%A9f%C3%A9rences "References") and [Gallery](#bkmrk-onglet-notes-0 "Gallery") tabs are common to all entities. They characterize the source but their use is the same as described in the Individual section. [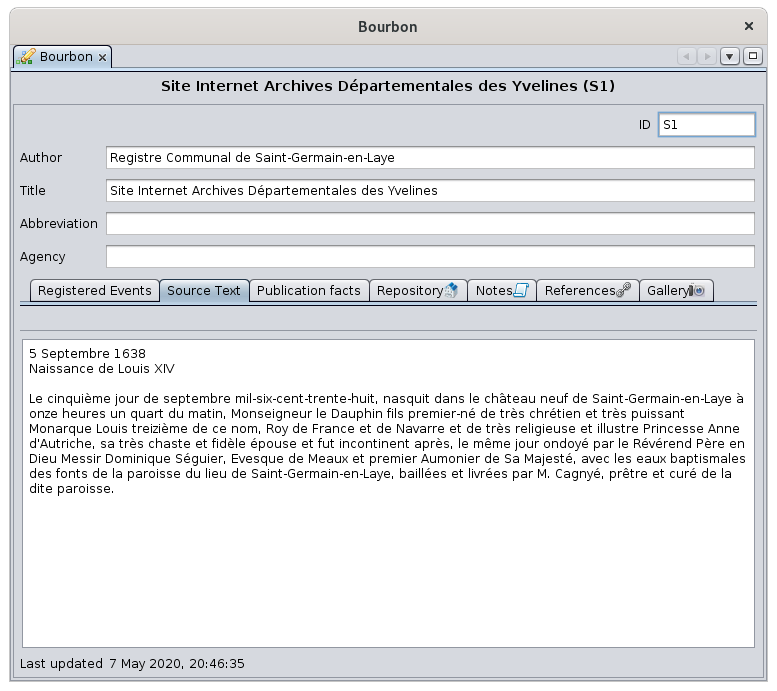](https://docs.ancestris.org/uploads/images/gallery/2020-09/en-aries-source.png) ### Description of the Source - **Author**: this is the name of the author or creator of the source. - **Title**: this is the most important field in the record, since it is the one used by other entities to refer to it. - Consequently, the user is strongly encouraged to fill in this field in a very precise and sufficiently detailed manner, so that the source can be identified without risk of confusion. - **Abbreviation**: this is the abbreviation of a source, or an organization associated with it. - **Agency**: is the person or organization responsible for managing that source. ### Source Text Tab This tab lets you enter or modify the source text as it appears on the original document or physical support. It is displayed above. It is by far the most useful information of the source. ### Repository tab It indicates the **repository** or storage location containing the currently selected source. There can only be one repository. [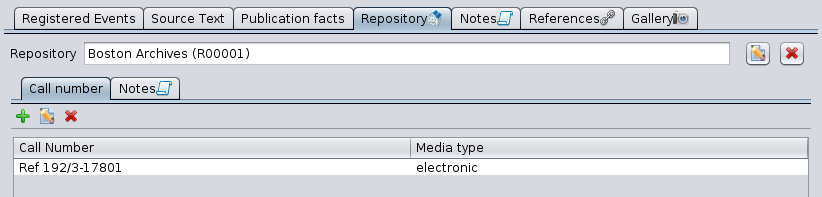](https://docs.ancestris.org/uploads/images/gallery/2020-10/en-aries-source-repository.png) This tab displays the name of the repository, followed by the [Edit buttons](#bkmrk-bouton-modifier "Edit buttons"): - select the repository with the **Add repository** button [](https://docs.ancestris.org/uploads/images/gallery/2020-05/EditeurAries_Boutons_Edition_Cr%C3%A9er.png) or **Link existing repository** button[](https://docs.ancestris.org/uploads/images/gallery/2020-05/EditeurAries_Boutons_Edition_Lier.png) - edit [](https://docs.ancestris.org/uploads/images/gallery/2020-05/EditeurAries_Boutons_Edition_Modifier.png) - delete it [](https://docs.ancestris.org/uploads/images/gallery/2020-05/EditeurAries_Boutons_Edition_Supprimer.png) The buttons appear depending on the situation and work as described in the corresponding section. #### Buttons for selecting or modifying the repository One - and only one - repository must be indicated in order to locate the selected source. Whether you are creating or modifying a repository, the following window for editing a repository appears. We will see it in the [Repository Entity](#bkmrk-entit%C3%A9-d%C3%A9p%C3%B4t "Repository Entity") section below. [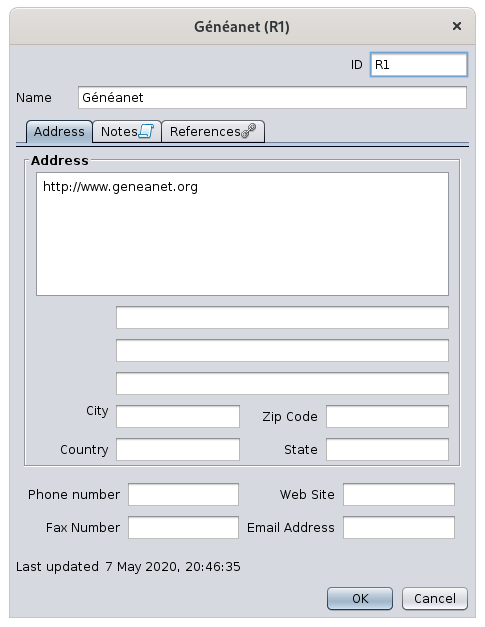](https://docs.ancestris.org/uploads/images/gallery/2020-09/en-aries-source-repository-edit.png) Once the repository is filled in, two tabs, **Call number** and **Notes**, appear underneath. The [Notes](#bkmrk-onglet-notes "Notes") tab is common to all entities. It characterizes here the attachment of the source to the repository, but its use is the same as the one described in the individual section. #### Call number tab The **Call number** tab lists the different references and media types used in the repository to specifically identify the source in that repository. Example: call number referenced Ref 192/3-17801 for parish registers in a regional archive building, in electronic format. For each item in the source, if there are several, indicate the name of the call number and the type of media (audio, card, electronic, card, film, newspaper, book, magazine, manuscript, photo, tombstone, video, etc.). Use the [Edit buttons](#bkmrk-bouton-modifier "Edit buttons") to add, edit or delete a call number / media type line item. ### Recorded Events tabs This tab lets you describe the list of different events in the selected source. [](https://docs.ancestris.org/uploads/images/gallery/2020-09/en-aries-source-registered-events.png) For each date and location mentioned in the source, it consists listing the types of events that took place on that date at that location. - The Create Source Event button [](https://docs.ancestris.org/uploads/images/gallery/2020-05/EditeurAries_Boutons_Edition_Cr%C3%A9er.png) creates a new row. It opens a window that allows you to define events for a given place and date. [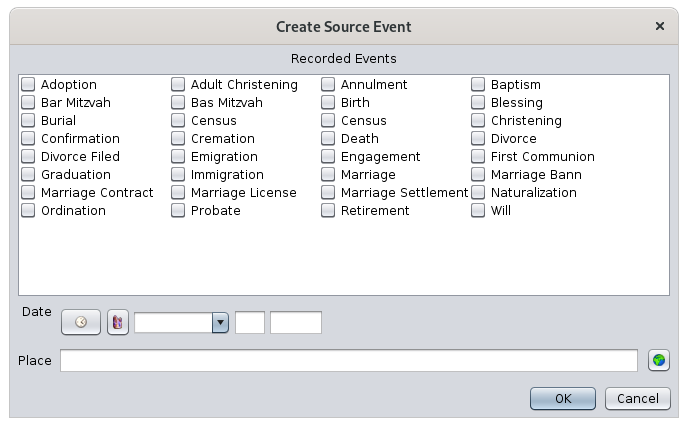](https://docs.ancestris.org/uploads/images/gallery/2020-09/en-aries-source-registered-create-source.png) - - Check the corresponding events - Enter the date of these events - Enter the location of these events - The **Edit Source Event** button [](https://docs.ancestris.org/uploads/images/gallery/2020-05/EditeurAries_Boutons_Edition_Modifier.png) opens the same window for editing the information. ### Publication data tab This tab allows you to indicate the publication details of the source, at least where and when the source was created. [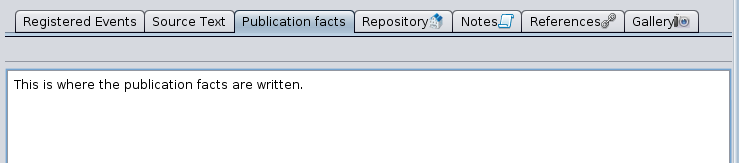](https://docs.ancestris.org/uploads/images/gallery/2020-09/en-aries-source-publication-facts.png) These indications are made by entering a free text. For published sources, the city of publication, the name of the advertiser, and the year of publication must be indicated. For unpublished sources, the date and place of the source must be indicated. ## Submitter Entity When the selected entity is a submitter entity, the Aries Editor displays the description of the submitter and three tabs underneath. [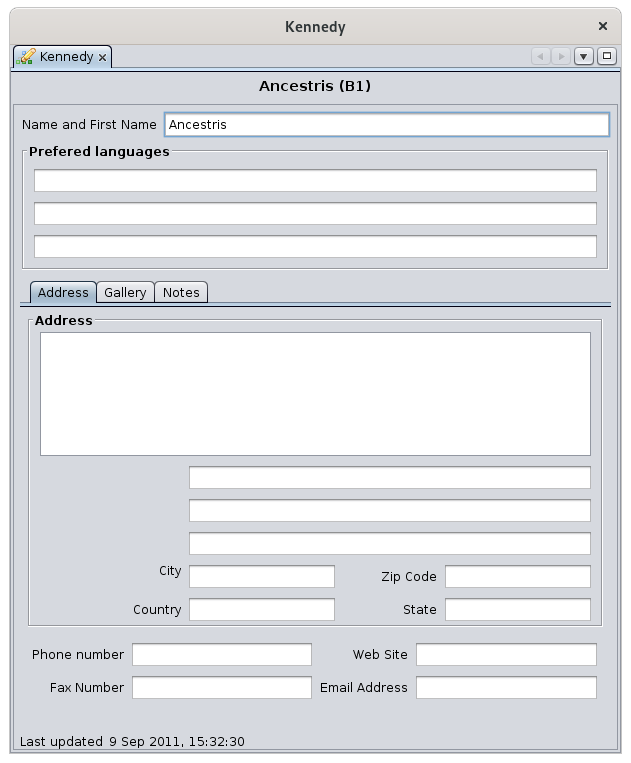](https://docs.ancestris.org/uploads/images/gallery/2020-09/en-aries-submitter.png) The first field, Name and First name, indicates the identity of the information submitter. The three fields below allow you to enter the three preferred languages of this submitter. The [Gallery](#bkmrk-panneau-galerie "Gallery") and [Notes](#bkmrk-onglet-notes-0 "Notes") tabs are common to all entities. They characterize the Information Submitter here, but their use is the same as described in the Individual section. The [Address](#bkmrk-onglet-adresse-0 "Address") tab is used in the same way as the tab for a Repository. ## Repository Entity When the selected entity is a repository or storage location entity, the Aries editor displays the following window: [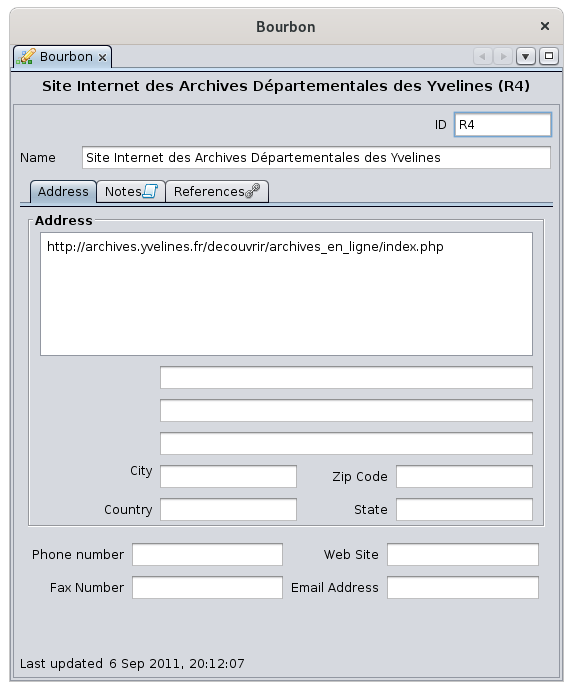](https://docs.ancestris.org/uploads/images/gallery/2020-09/en-aries-repository.png) You enter the exact name of this repository in the Name field, and underneath, three tabs Address, Notes and References allow you to complete the description. The [Notes](#bkmrk-onglet-notes-0 "Notes") tab is common to all entities. It characterizes the repository here, but its use is the same as that described in the Individual section. ### Address tab It allows you to enter the precise adress of the repository. It presents the fields of a classic address form (zip code, city, country, etc.). See picture. You can also enter the Internet details (e-mail address and website) as well as telephone numbers. ### References tab The References panel is in the form of a [selection list](#bkmrk-liste-de-s%C3%A9lection "Selection list") with three columns. [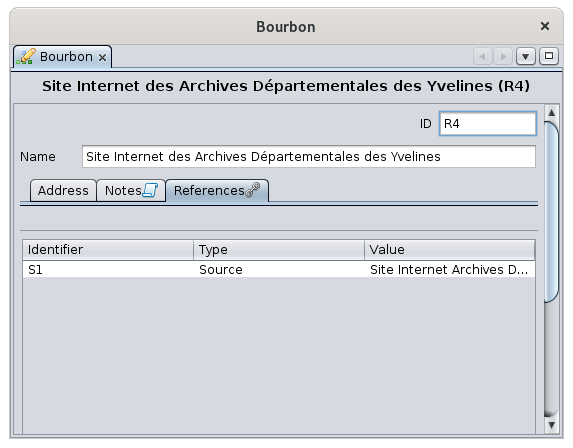](https://docs.ancestris.org/uploads/images/gallery/2020-09/en-aries-repository-reference.png) The table lists all the sources that use this repository. This References tab is also used in other circumstances, for other entities than for repositories. So more generally, the table is related to a given entity, and it lists all the entities that use that given entity. - The **Identifier** column, which indicates the ID number of the entity using the given entity - The **Type** column, which indicates the category of entity - The **Value** column, which indicates the name of the entity (for example, for an individual entity, it will be the name of the individual). This tablee is for information only. It cannot be edited or modified. - Examples : - In the image above, the repository being edited is used by Sources S1, named Site Internet Achives. - If a record individual I1, contains in his birth certificate a link to a source S2, this entity S2 will display in its References tab a line corresponding to the individual I1.When you are about to delete an entity such as a media file, note, source or repository, it is strongly recommended that you first check that the References table of this entity is empty. When this table is not empty, a deletion will generate a broken link of the entities using it to an entity that no longer exists.
--- ## Common editing controls The following controls are used in the Aries Editor in several places. ### This list is for consultation and selection of the displayed data. [](https://docs.ancestris.org/uploads/images/gallery/2020-09/en-aries-list.png) **Selection**: a simple click on one of the lines selects it. **Edition** : when the line represents an entity, a double-click opens an aries editor window to edit the entity clicked. **Sorting**: column headers can be clicked to sort. A new click reverses the sort direction. **Move column**: the columns can be moved with the mouse by clicking and dragging the column header. The column order is memorized from one time to the next. ### Tree list This is a list of individuals ordered in an certain way according to the genealogical hierarchy. It has a flap to unfold or fold the branches. [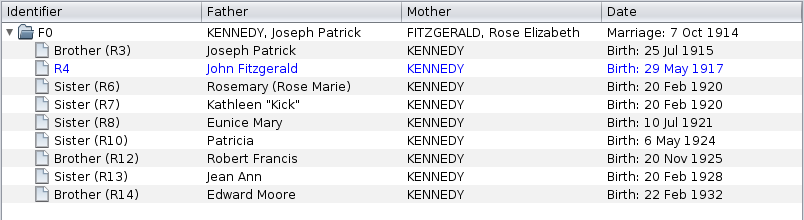](https://docs.ancestris.org/uploads/images/gallery/2020-09/en-aries-tree-list.png) This type of list is present for the editions of the Individuals ([Spouses and Children and Parents and Siblings tabs](#bkmrk-panneau-parents-et-f "Individual tabs")) and Families ([Children tab](#bkmrk-panneau-enfants "Children tab")) entities. **Selection**: a single click selects the line. **Edition**: when the row represents an entity, a double-click opens an entity edition window. **Sorting**: This list is not sorted since it would disorganize the tree structure. **Moving column**: Columns can be moved with the mouse by clicking and dragging the column header. The column order is not memorized from one time to the next. ### Edit Buttons The Edit buttons allow you to create, link, modify, delete, prefer data. They are used by most categories of entities. [](https://docs.ancestris.org/uploads/images/gallery/2020-05/EditeurAries_Boutons_Edition.png) These buttons work in conjunction with the selection list displayed below them. They appear according to the status of the list. #### Add Button [](https://docs.ancestris.org/uploads/images/gallery/2020-05/EditeurAries_Boutons_Edition_Cr%C3%A9er.png) The Add button adds an item to the selection list by creating it from scratch. #### Link Button [](https://docs.ancestris.org/uploads/images/gallery/2020-05/EditeurAries_Boutons_Edition_Lier.png) The Link button adds an item to the list without creating it, but linking it to the shared entity already existing in the genealogy. #### Edit Button [](https://docs.ancestris.org/uploads/images/gallery/2020-05/EditeurAries_Boutons_Edition_Modifier.png) The Edit button allows you to modify the indicated item. #### Delete Button [](https://docs.ancestris.org/uploads/images/gallery/2020-05/EditeurAries_Boutons_Edition_Supprimer.png) The Delete button deletes the indicated item. When the item is an entity, the deletion does not delete the entity itself, but the connection only. #### Favorite button [](https://docs.ancestris.org/uploads/images/gallery/2020-05/EditeurAries_Boutons_Edition_Pr%C3%A9f%C3%A9rer.png) The Prefer button designates the default media to be used if there are several. This button is only used for the media of an individual (Gallery tab) and is used to designate which one should be displayed by default in the dynamic tree. ### # List of places The **List of Places** is a list of all places and corresponding events of the genealogy.Note: when the Places editor is called from the list of places, it will edit all places of the genealogy that have the same name and coordinates.
If you only want to edit the location of a particular event, use the Cygnus, Aries or Gedcom editor to edit this particular event, and then edit the single place from within the event. [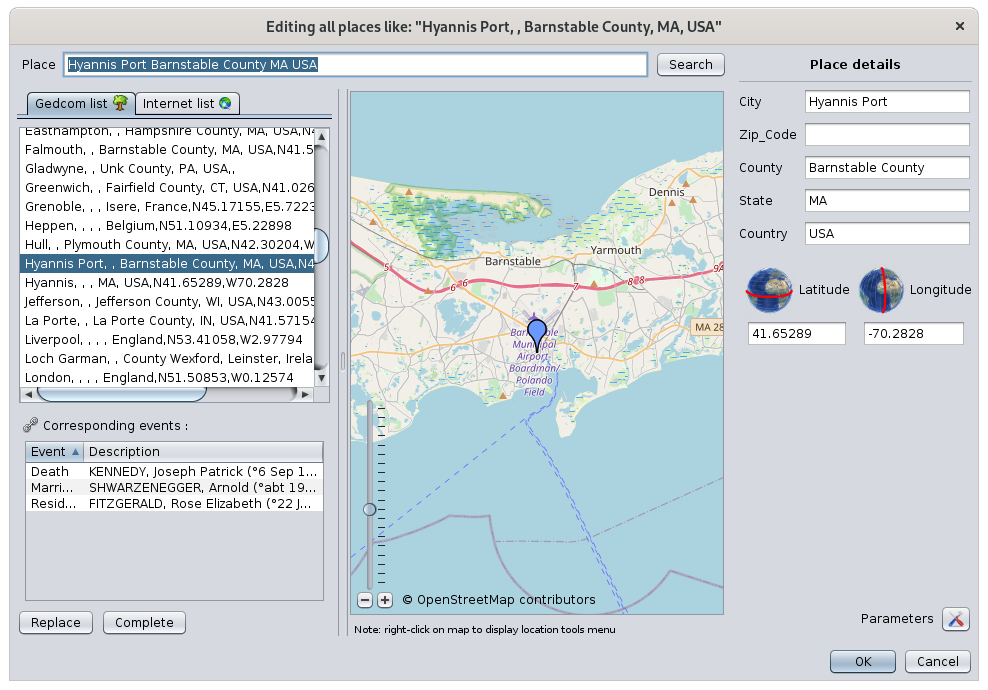](https://docs.ancestris.org/uploads/images/gallery/2020-09/en-places-list-edit-places.png) For more details on how to use it, see the [Places Editor](https://docs.ancestris.org/books/user-guide/page/places-editor-%28l%29 "Places editor") page. #### Copy this place to later erase another location The purpose of this action is to merge two places. The action copies to the clipboard the full name with its coordinates of the clicked place. You will later be able to paste it onto another place using the actions described next. The first place is the one you wish to keep. Copy the first one onto the second one to overwrite it with the first one. For example, I copy here the Jefferson place, which contains the event Residence of Rosemary Kennedy: [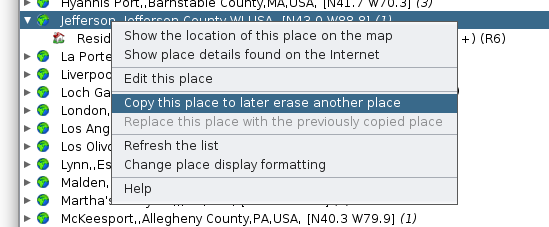](https://docs.ancestris.org/uploads/images/gallery/2020-10/en-places-list-copy.png) #### Replace this place by the previously copied place This action is the counterpart of the previous one to merge two places. The place from which this second action is performed will be erased. At the time of this action, this place disappears from the list and the events that were attached to it are placed under the first place next to the events that were already there. In the following example, if I replace the place Hyannis Port with the one I have just copied: [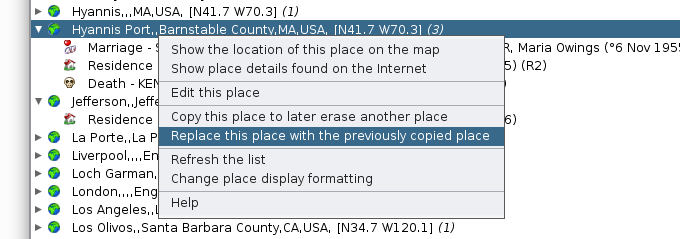](https://docs.ancestris.org/uploads/images/gallery/2020-10/en-places-list-paste.png) I then find the following list of places, where Hyannis Port has disappeared, and Jefferson contains 4 events resulting from the merging of the two places: [](https://docs.ancestris.org/uploads/images/gallery/2020-10/en-places-list-result.png) #### Refresh the list This action forces the refresh of the list and associated events. Modifying a place updates the list immediately, but it may be necessary sometimes to force this refresh. #### Change place display formatting This action lets you customize the way the places are displayed in the list and therefore to sort them differently. Refer to the [Customization section](#bkmrk-personnalisation "Customization") below. ### After unfolding the list of events of a place, a right-click on an event shows a specific context menu for events. [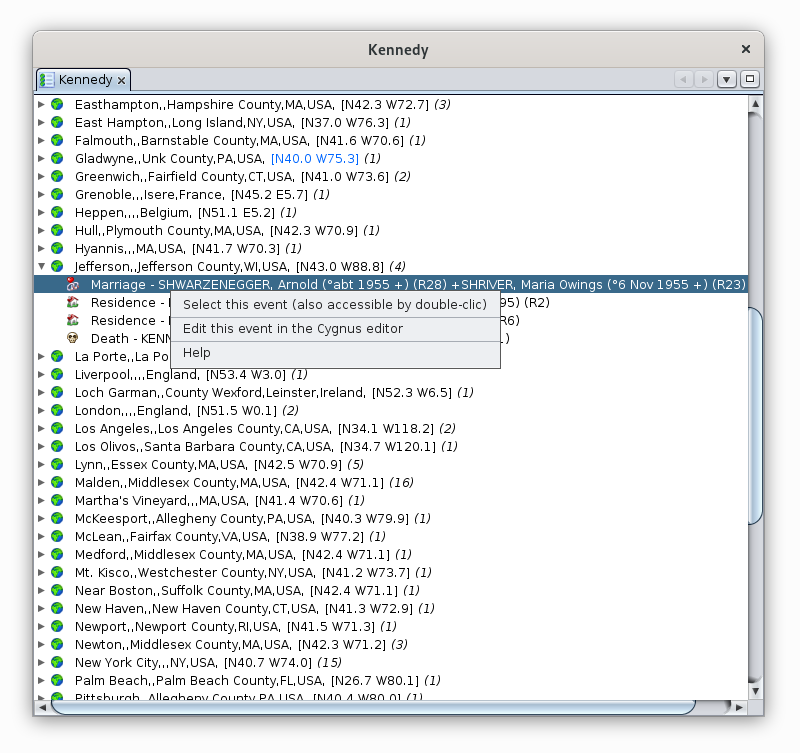](https://docs.ancestris.org/uploads/images/gallery/2020-10/en-places-list-event-menu.png) The following describes the actions of this menu. #### Select this event This action, also accessible by double-clicking, selects the individual in all Ancestris views. #### Edit this event in the <default> editor This action opens the default editor, here it is Cygnus on the example, in order to make changes to the entity associated with the selected event. You can change the default editor in the [Preferences](https://docs.ancestris.org/books/user-guide/page/preferences#bkmrk-volet-%C3%89ditions "Preferences"). The name in the context menu of the event will then reflect the change. #### Help Displays this page. ####Column's order and sizes, as well as sorting criteria and filtered column are memorized for each genealogy.
### Filter bar The filter displays places corresponding to the criteria entered in the filter. This filter includes the following controls: - The **Filter by** drop-down menu: selects the jurisdiction column on which to filter. The list differs for each Genealogy since the list of jurisdictions is read from the Gedcom header file itself. The choice "\*" filters on all columns at the same time. - The **input field** is the string criteria to filter places. The filtered places have to contain this string in order to be displayed. Ancestris uses regular expressions to filter, letting you indicate smart filtering. - The **Filter button** executes the filtering once a string has been entered. The **Enter key** can be used as well. - The **Clear button** clears the input field which removes the filter and display the full list again. - The **Place format settings** button can be used to change the place format. - The **Export button** exports the table to a CSV file. - The **total number of different places** in the genealogy is displayed to the right of the bar. Please note that the same place used many times in the genealogy would count as one. ## Usage The **Table of Places** can be used to visualize all places, to edit them as you would in a spreadsheet, to search for a place on the Internet and edit it in details, or to export places. ### Visualization The table simply gives a global overview of all your places and let to classify, analyse them, etc. as in a table. #### Context menu / Show related events From each place, you can also identify quickly which individuals and events are association with a place. For that, a context menu accessed by right click can show you these related events. Select one to display the corresponding event in the Ancestris editors. [](https://docs.ancestris.org/uploads/images/gallery/2021-03/en-places-table-popup-event.png) ### Global editing You can edit places by directly editing the table cells. Either directly enter text in the cells, drag-and-drop other cell content or paste some text in cells. #### Validating changes When a cell is modified, the OK and Cancel buttons appear at the bottom right corner of the Table Places. For this, you need to have set your preferences to confirm changes (please refer to Preferences / Edition / Confirm changes for more details). Press Enter or click OK to confirm changes, or else press Esc key to cancel. [](https://docs.ancestris.org/uploads/images/gallery/2021-03/en-places-table-ok-cancel.png) If a change is confirmed, the cells of the Table of Places will be refreshed, potentially changing the order of the lines. In the editing mode where the modifications are automatically taken into account without confirmation, the simple fact of going to another cell validates the modification made to the previous cell. This displays the table again and is likely to change the order of the rows.For greater efficiency when modifying cells, it is best not to automatically accept changes in the Editing preferences.
#### Drag-and-Drop You can drag and drop one cell or several cells at a time. When dropping cells onto other cells, Ancestris will maintain the same cell structure. For instance, in the image below, we are dragging 4 cells on one column and dropping them on the next column. [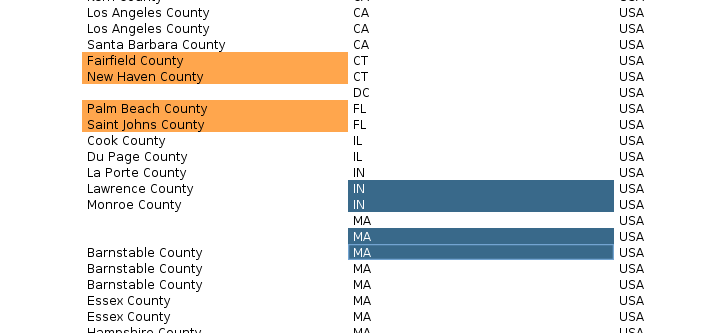](https://docs.ancestris.org/uploads/images/gallery/2021-03/en-places-table-drag-drop.png) #### Context menu for Cut / Copy / Paste To copy and Paste cells, select on or several cells and use the context menu to either copy or cut. In a second step, select the cells where you want to paste the content, right click to display the context menu and paste the cells. The content will be pasted in the selection in one of two ways: - If only one cell has been selected for the paste, the whole copied area will be pasted using this selected cell as the top left corner. - If more than one cell has been selected, two situations can occur: - Either the selected area is smaller than the copied area : in this case, Ancestris will truncate the content to the selected area. - Or the selected area is larger than the copied area : in this case, Ancestris will repeat the content throughout the selected area. [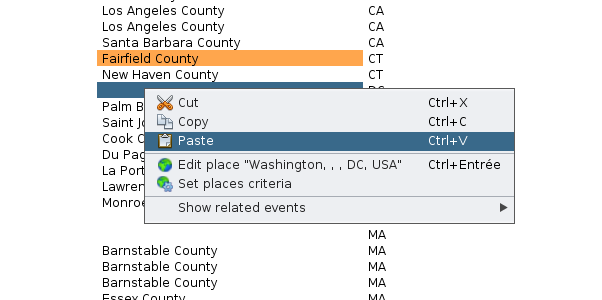](https://docs.ancestris.org/uploads/images/gallery/2021-03/en-places-table-copy-paste.png) ### Search and Detailed editing Double-clicking on a place in any column opens the [Places Editor](https://docs.ancestris.org/books/user-guide/page/places-editor-%28l%29 "Places editor") where you can edit it. [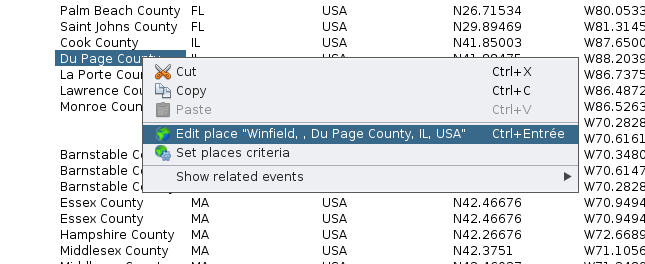](https://docs.ancestris.org/uploads/images/gallery/2021-03/en-places-table-popup-edit.png) All events that use this place will be modified at the same time.Note: when the Places editor is called from the table of places, it will edit all places of the genealogy that have the same name and coordinates.
If you only want to edit the location of a particular event, use the Cygnus, Aries or Gedcom editor to edit this particular event, and then edit the single place from within the event. ### Set place criteria If you need to align all places to a given place format, or if you want to rename or change the order of the jurisdictions, you will need to use this tool. From the context menu or from the toolbar button, the following panel will appear. [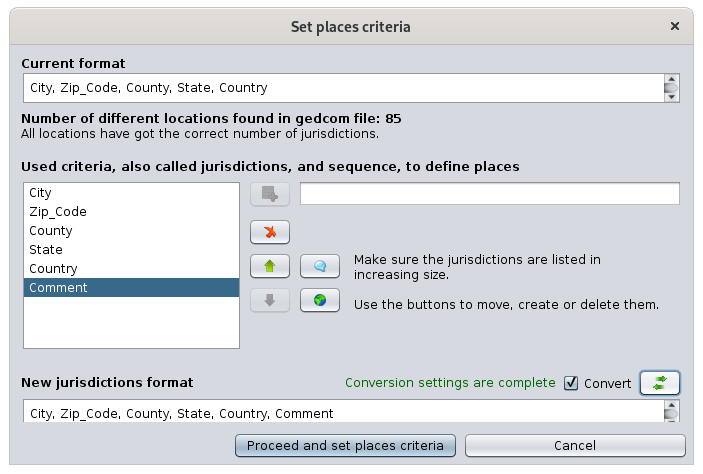](https://docs.ancestris.org/uploads/images/gallery/2021-03/en-places-table-format-correct.png) If you change the place format, yo will need to indicate to Ancestris how you convert from the existing format to the new format. Use the Convert button for this. The following panel will appear. Follow the instructions and press OK. [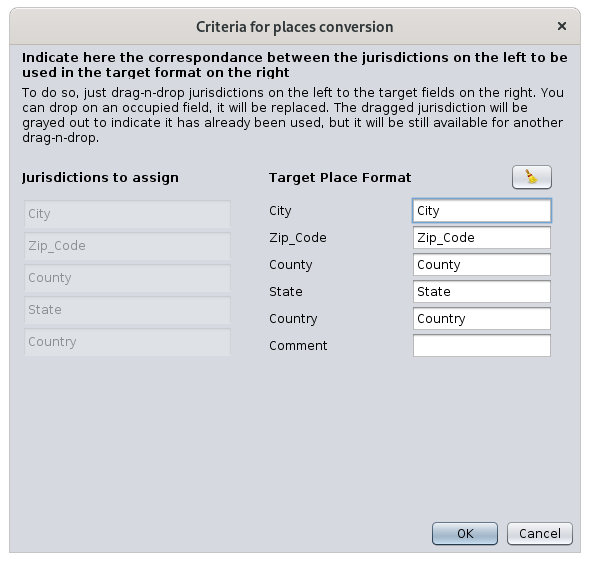](https://docs.ancestris.org/uploads/images/gallery/2021-03/en-places-table-converter.png) Once you confirm the transcription of the jurisdictions, yo are taken back to the previous panel. Press "Proceed and set places criteria" to make the change in the genealogy. The cells of the Table of Places will be refreshed. ### Exporting places Use the **Export** button to get a file with all the places of the list. The file will be in a TXT or CSV format that can be used in any standard spreadsheet software. It is also possible to partially export places using the clipboard. - To do this, select the cells you ant to export, or type Ctrl+A to select all locations - Ctrl+C to copy them to the clipboard. - Ctrl+V from a spreadsheet to paste them ## Customization Apart from memorizing filters and columns, there are no customizable elements in the location table. # Places editor The **Places editor** is an editor dedicated to adding or modifying places, by standardizing their name thanks to a database of places available on the Internet. [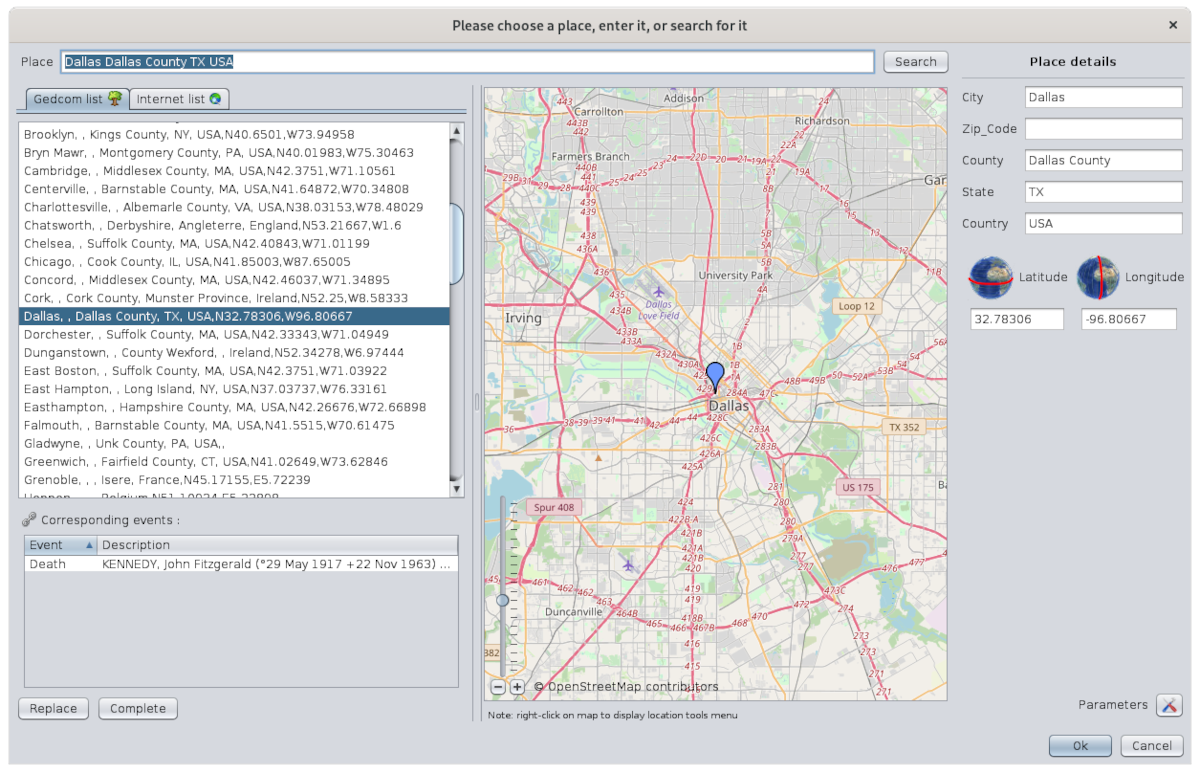](https://docs.ancestris.org/uploads/images/gallery/2020-09/en-places-editor.png) The Place editor is only accessible from a place. It is not accessible from the menu bar. ## Description The window includes: - a **title** that is important - the **name of the place** to be modified or searched - **two lists of places** matching the search place - the **list of all events** that use this place in the genealogy - **buttons** to retrieve details of a found place - a positionning **map** - **details of the place** - a **Parameters** button - the **OK and Cancel buttons** to confirm your modification ### Window title There are **two possible titles** for this window depending on whether you are editing the location of a single event or several at at the same time. - **One**: it is the modification of the place of a particular event for a particular entity in the genealogy. - **Several at a time**: it is the modification of the place for all the events that use it in the genealogy. All the events that use this place are therefore modified at the same time. In the case of the modification of a single place, you launched the Place Editor from one of the editors, Cygnus, Aries or Gedcom, and the title bar should say this: [](https://docs.ancestris.org/uploads/images/gallery/2020-09/en-places-editor-title-mono.png) In the case of editing the place of several events at the same time, you launched the Place Editor from the List of Places view or from the Table of Places view, and the title bar should say "**Editing all places like**" and specify the name of the place. For example, here is what the window title says if you edit the place Dallas from the List of Places view of the Kennedy genealogy: [](https://docs.ancestris.org/uploads/images/gallery/2020-09/en-places-editor-title-multi.png) Before validating the modification of a place, look at this title to be sure of the context you are in. ### Place to modify or search [](https://docs.ancestris.org/uploads/images/gallery/2020-09/en-places-editor-search.png) The **Place field** displays the place currently being modified or lets you enter a place to search. The Search button launches a search of the place on the Internet. It uses the Geonames database. This button is greyed out while the search is in progress. ### Lists of places found The places found correspond to all the places "similar" to the criteria entered in the Place field. On the left side of the window are two lists of found places, depending on whether they were found in the current genealogy Gedcom or on the Internet. #### Gedcom list Tab [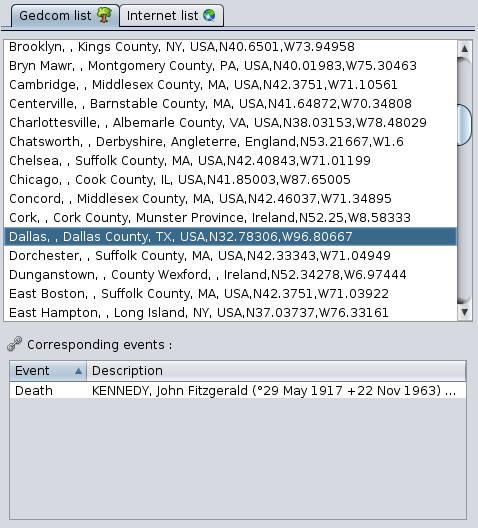](https://docs.ancestris.org/uploads/images/gallery/2020-09/en-places-editor-search-result-gedcom.png) This tab has itself two lists that work together: - At the top, the **list of places found** in the Gedcom file of the currently open genealogy - At the bottom, **the list of genealogy events** corresponding to the location selected in the Gedcom list. The event list has two columns: - The Event column indicates the type of event (birth, baptism, marriage, occupation, etc.). - The Description column shows the name and ID number of the individual involved in the event; if it is a family, the column shows the name and ID number of each member of the corresponding family. Clicking on the column headers does an alphanumeric sort of the rows. #### Internet list Tab [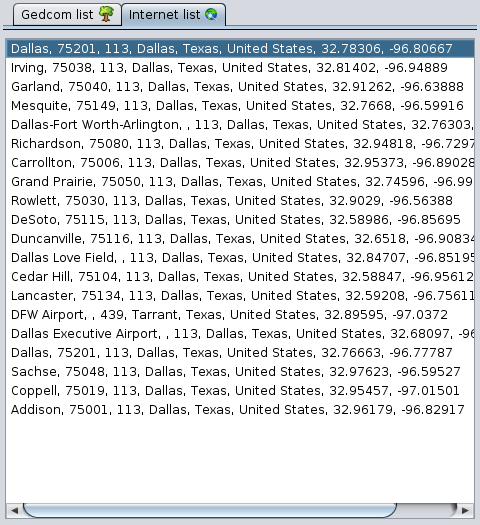](https://docs.ancestris.org/uploads/images/gallery/2020-09/en-places-editor-search-result-internet.png) This tab lists the main places found on the Internet - Geonames - for the last search performed. This list is empty when the window is opened. #### Buttons for retrieving details of a location These buttons are used to retrieve all or part of the details of a selected place from the list of found places. [](https://docs.ancestris.org/uploads/images/gallery/2020-09/en-places-editor-buttons.png) ##### Replace Button It replaces all the details of the place to be modified by those of the newly found place. ##### Complete Button It only adds the missing details of the place to be completed with those of the newly found place. ### Positioning map [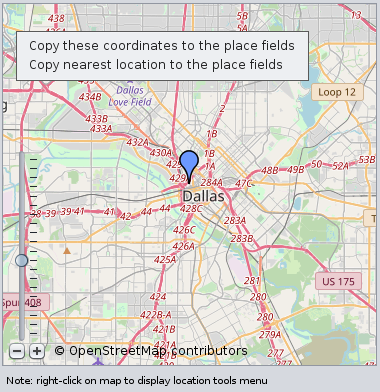](https://docs.ancestris.org/uploads/images/gallery/2020-09/en-places-editor-map.png) The central area of the place editor displays a map to position either the place being edited or the place selected in either of the two lists of places found. A scale, at the bottom left, allows you to adjust the zoom. This map offers a context menu that opens with a right click on any point of the map. This specific context menu lets you determine the coordinates of the point clicked. It contains the following actions: - **Copy these coordinates to the place fields**: copies the geographical coordinates of the clicked point on the map to the Latitude and Longitude fields of the Place details. - **Copy nearest location to the place fields**: copies the geographical coordinates of the nearest place of the clicked point on the map to the Latitude and Longitude fields of the Place Detail. ### Detail of the place [](https://docs.ancestris.org/uploads/images/gallery/2020-09/en-places-editor-place-details.png) The details of the place are in the right-hand panel. It includes the [place jurisdiction fields](https://docs.ancestris.org/books/user-guide/page/places "Places") - defined in the currently open genealogy- and the place Geographic coordinates fields. The list of fields displayed may therefore differ from one Gedcom file to another. The definition of the jurisdictions is done via [Menu/File/Properties](https://docs.ancestris.org/books/user-guide/page/file-properties#bkmrk-crit%C3%A8res-de-lieux "File Properties"). ### Parameters Button [](https://docs.ancestris.org/uploads/images/gallery/2020-09/en-places-editor-parameters.png) It opens the following window, which matches the names of the jurisdictions used by Geonames with the current open Gedcom file. Follow the instructions that are displayed in the window and press OK. [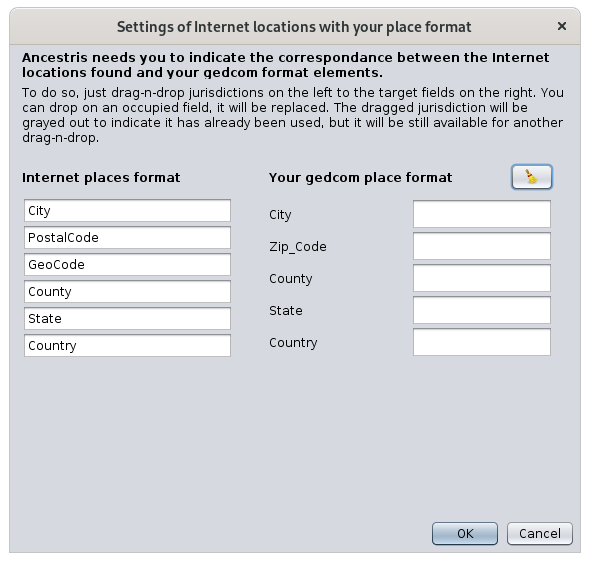](https://docs.ancestris.org/uploads/images/gallery/2020-09/en-places-editor-parameters-window.png) ### OK button Validates the modifications made to the place and closes the places editor. If the Places editor was editing all the instances of the same place, all of them will be modified. ### Cancel button Cancel the modifications and closes the places editor. ## UsageThe purpose of the Place Editor is to provide you with place names from around the world in a standardized format that matches the structure of your places in your genealogy.
You may need this editor in several situations: - **Creating a place**: you have an event that took place in a place that you had not yet entered. - **Using an already entered place**: you have an event that took place in a place you have already entered, and you want to enter it exactly as it was spelt, to avoid ending up with duplicate places. - **Modification of a place already entered**: you have entered a place and you want to make a correction to it, but it is used in many places in your genealogy and you want to correct all of them in one go. In all cases, the principle of use is the same: 1. Search the place in your Gedcom or on the Internet 2. Verify the place information: on the map and in the corresponding events in the [Gedcom list](#bkmrk-onglet-dans-le-gedco "Gedcom list") tab 3. Update the place details 4. ValidatePlease note that places can only be deleted from the Gedcom Editor.
### Search the place in your Gedcom or on the Internet The search is based on the text entered for the place in the [Place field](#bkmrk-bandeau-sup%C3%A9rieur "Place field"). The search in your genealogy is immediate upon entering this text and the result is displayed in the in the [Gedcom list tab](#bkmrk-onglet-dans-le-gedco "Gedcom list tab"). The search on the Internet is done in the free Geonames database of all places around the world once you click on the **Search button**. During the Internet search, the button is greyed out. Once the search is finished, the button is accessible again and the result is displayed below in the [Internet list tab](#bkmrk-onglet-sur-internet "Internet list tab"). If no place matches your search, or if the results do not match at all, you can change the search field and launch another search. ### Verify the place information The search results are in the two list tabs: internal to your Gedcom file, and external on the Internet. #### Positioning The selection of one of the place item in either of these lists immediately positions the place on the map so you can see where the place is located.Please note this only works for places with geographic coordinates, which might not be the case for all places of your Gedcom file. To fill them in, if this is not the case, you have to edit the place from the List of Places or the Table of Places, because the editing will be done for all events that use this place at the same time.
#### Related events If it is a place already present in your genealogy, the list of corresponding events is displayed, allowing you to evaluate the impact of your modification, depending on whether you are modifying a single event or several.Double-clicking on an event line displays the entity in the other views of Ancestris. This allows you to have all the details about this event.
### Update place details #### Replace or Complete place details from the place found Once you have found the right place, you can retrieve all the details of the place in your genealogy with the [**Replace**](#bkmrk-bouton-remplacer "Replace button") button, or only the parts you are missing with the [**Complete**](#bkmrk-bouton-compl%C3%A9ter "Complete button") button. If the place is retrieved from the Internet and this is the first time you are retrieving one for your genealogy, Ancestris will need to know the correspondence with your place structure. Indeed, places on the Internet generally have a different structure than yours, and Ancestris wants to be able to copy the right jurisdictions into the right fields. At this point, Ancestris offers you the Parameters window. All you have to do is drag and drop jurisdictions from the left into the right boxes and save. Ancestris will remember this for future times. For example, here is a correspondence after having assigned 5 of the Internet fields and having left out the field PostalCode. [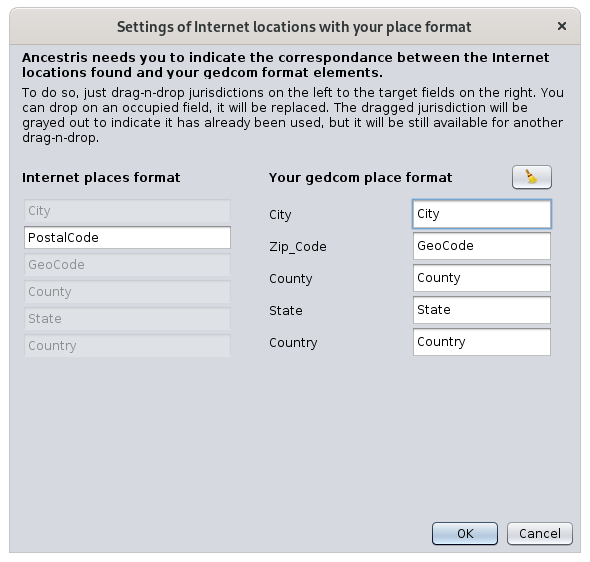](https://docs.ancestris.org/uploads/images/gallery/2020-09/en-places-editor-personalization.png) As soon as you click OK, the items you wanted are copied into the Place detail. #### Retrieving geographic coordinates from the map It is possible to enter geographic coordinates using the map instead of entering them by hand. To do this, right click on the map at the exact point or approximate (surrounding area) places you want to use. The [context menu](#bkmrk-zone-centrale "Context menu") with both actions appears. The geographical coordinates are then copied in the detail of the place. #### Changing details To do the final touch to your place details, it is also possible to modify the elements that interest you directly by hand. These fields can be modified and an auto-fill mechanism makes it easy to enter already known jurisdictions. It works like this: if a low-level jurisdiction is changed, the higher-level jurisdictions are immediately changed as soon as you type, based on known genealogical locations. If there is no match, the higher-level jurisdictions are reset to their pre-entry value. ### Validate If you are sure of your change and you checked the window title to see if you were editing a single event or several, press OK. The window closes and you are back to where you were when the window opened. If in doubt, it's best to cancel your manipulation and start again. If you make a mistake, you can always undo it with the [Undo](https://docs.ancestris.org/books/user-guide/page/toolbar#bkmrk-groupe-annuler-%2F-r%C3%A9t "Toolbar") button on the Ancestris toolbar. The <Escape> key closes the window without validating. ## Customization Three elements can be customized in this window. ### Jurisdictions The jurisdictions listed in the location details only reflect those defined in the properties of the Gedcom file. Before any modification of the location, it is preferable to check that they are the ones you want. Refer to the [corresponding section](https://docs.ancestris.org/books/user-guide/page/file-properties "File Properties") to modify the properties of the file, accessible from the Menu bar, then File, then Properties. ### Window size This window is rich in information and its size is memorized. You can therefore enlarge it to the maximum to get a good view of the lists and the map. ### Divider bar It is possible to adjust the respective size of the map and the lists by moving the vertical separation bar between the two. Its position is memorized from one time to the next. # Simple navigator The **Simple navigator** allows you to navigate efficiently through the family nucleus of the [selected individual](https://docs.ancestris.org/books/user-guide/page/relationships-between-windows#bkmrk-une-s%C3%A9rie-de-fen%C3%AAtre "Relationships between windows"). [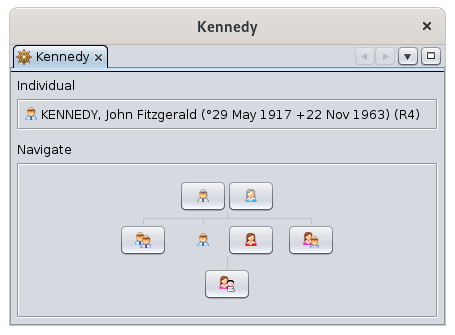](https://docs.ancestris.org/uploads/images/gallery/2020-09/en-simple-navigator.png) ## Description This simple browser displays the last selected individual in the middle of his/her close relatives. It only displays individuals and not entities from other categories. At the top, it displays the full name of the selected individual. In the lower part, it schematically displays the family nucleus in the form of an action button displaying figurines. The selected individual is the one that is not in the form of a button. Above are his/her two parents. On the left his/her big brothers and big sisters. On the right, first his/her spouse and then his/her little brothers and sisters. Below are his/her children. A button is greyed out when the person it represents does not exist. ## Usage ### Hovering Hovering over a figurine gives you its role in the family. [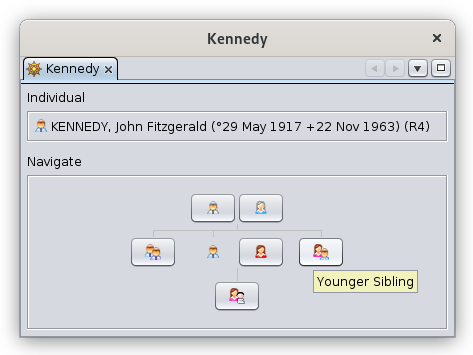](https://docs.ancestris.org/uploads/images/gallery/2020-09/en-simple-navigator-hover.png) ### Click Clicking on a button selects the corresponding individual. The selected individual then changes and finds himself in his turn in the middle of the family nucleus. All other Ancestris windows will then update with the new selected individual to be displayed, provided they have not pinned the previous entity and the individual exists in the displayed selection. Here, after clicking on the spouse, this becomes the central individual. [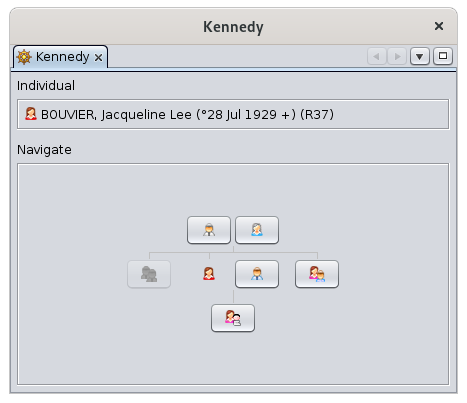](https://docs.ancestris.org/uploads/images/gallery/2020-09/en-simple-navigator-wife.png) ### Long click If one of these figurines has several people, a long click on the button lets you display the list of people and thus select the one you want. Clicking outside the list will exit the list. [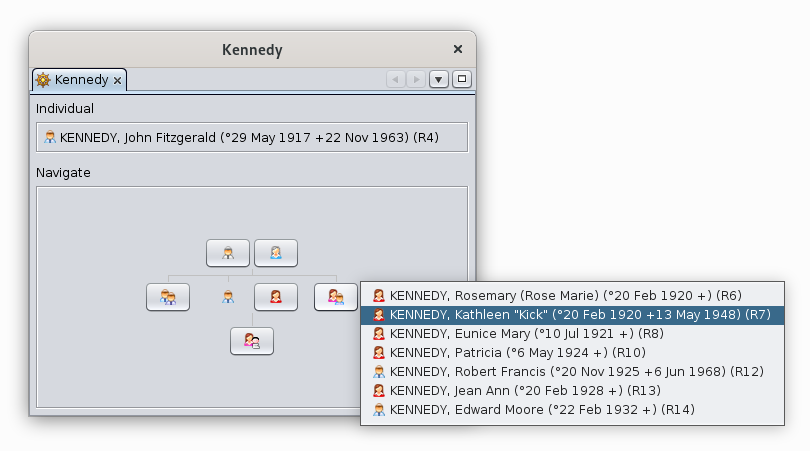](https://docs.ancestris.org/uploads/images/gallery/2020-09/en-simple-navigator-menu.png) ## Customization This window does not have any customization possibilities. # Extended navigator The **Extended navigator** allows you to navigate in the genealogical from the family nucleus, and to create individuals step by step along the way. [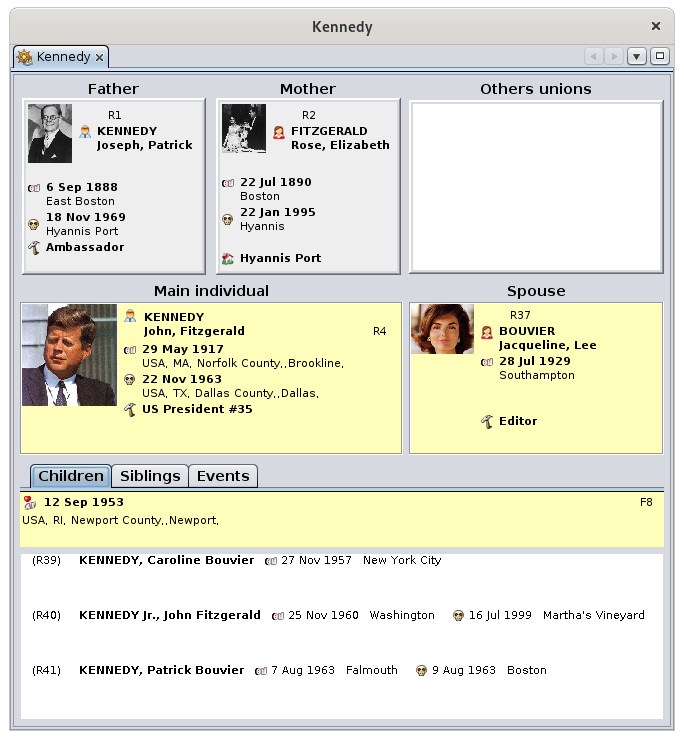](https://docs.ancestris.org/uploads/images/gallery/2020-09/en-extended-navigator.png) From the [selected individual](https://docs.ancestris.org/books/user-guide/page/relationships-between-windows#bkmrk-une-s%C3%A9rie-de-fen%C3%AAtre "Relationships between windows") taken as the center of its family nucleus, it is possible to move to one of his/her relatives (father, mother, brothers, sisters, spouses, children) with a click of a mouse. This person then becomes the center of the new family nucleus, and so on. This way of navigating can also be used to create the family nucleus: the [context menu](https://docs.ancestris.org/books/user-guide/page/context-menu "Context Menu") obtained by right-clicking on one of the individuals makes it possible to create the other individuals, and also to add sources and associated notes. ## The **Extended navigator** includes at trhe center the main couple made of the selected individual on the left and the other spouse on the right. Above are the parents of the selected individual, and below are 3 tabs for children, siblings, and the events of his/her life. ### Central part: the couple The currently **selected individual** is displayed on the left. The **spouse** of the selected individual is displayed on the right. If there is more than one union, the list of **Other unions** of the selected individual appears above this spouse. A simple click on one of the other spouses displayed in this list, moves this one to the Spouse frame. These two frames therefore form the couple currently selected. ### Top part : parents The **two parents** of the selected individual are displayed above the couple: - On the left is displayed the **father** of the selected individual, - On the right is displayed the **mother** of the selected individual. To the right of the mother is therefore displayed the list of **Other unions** of the selected individual as seen previously. ### Lower part: the lists The lower part displays 3 tabs giving access to the following lists: - The **Children** tab displays the list of children of the displayed couple. Above this list is the date and place of the **couple's union**. - The **Siblings** tab displays the list of children from parents displayed at the top. They are therefore the brothers and sisters of the selected individual. Above this list is the date and place of **union of the parents** of the selected individual. - The **Events** tab displays the list of the main life events of the selected individual. ## Usage The purpose of the extended browser is twofold: 1. **navigate between relatives** of the selected entity to consult the essential information of individuals of the selected family nucleus, 2. **modify, create, or delete individuals** gradually around the family nucleus. ### Navigate between relatives The **Extended navigator** only displays individuals and families with their photo if they have one. It does not display any notes, sources, or other media. To make a desired individual appear in the place of the selected individual, it must therefore be selected in one of the Ancestris windows. This can be done either by this navigator if this individual is a relative to the one already there, or by selecting it in another view, or even using the search bar. From there, a simple click on the individuals in the various boxes or lists of the navigator makes this new individual the one who will be active. It is possible to go back in this navigation by clicking on the back arrow in the [navigation bar](https://docs.ancestris.org/books/user-guide/page/navigation-bar "Navigation Bar"). ### Modify, create or delete individuals Double-clicking on any of the individuals displayed in the extended browser activates or opens the default editor. This is the one indicated in the [Editing pane of Preferences](https://docs.ancestris.org/books/user-guide/page/preferences#bkmrk-volet-%C3%89ditions "Preferences"). From there, you can start entering changes. Right-clicking on one of the individuals displays the [Context Menu](https://docs.ancestris.org/books/user-guide/page/context-menu "Context Menu") for that individual. From here you can **create** a parent, spouse, sibling or sister for the clicked individual. The created individual then becomes the selected individual that you can edit in the visible editor, or obtained by double-clicking as previously. This same context menu allows you to add or link sources, notes, media, etc. This same menu also allows you to delete the clicked entity. If you make a mistake, press the [Undo button in the toolbar](https://docs.ancestris.org/books/user-guide/page/toolbar#bkmrk-groupe-annuler-%2F-r%C3%A9t "Toolbar") to go back on a modification. This will cancel both a modification and a creation or deletion of an individual. ## Customization You can change the [blueprint](https://docs.ancestris.org/books/user-guide/page/blueprints "Blueprints") used to display the information of individuals from the extended browser. To do so, you just need to choose [Change display of individuals](https://docs.ancestris.org/books/user-guide/page/context-menu#bkmrk-s%C3%A9lectionner-calque "Context Menu") from the context menu. You can also change the [blueprint](https://docs.ancestris.org/books/user-guide/page/blueprints "Blueprints") of families, provided you click on a family for the Context Menu. In this case, the blueprint manager is displayed. After modification, the new blueprint is immediately reflected in the navigator. # Advanced search The **Advanced search** is a powerful tool to search for entities that match multiple criteria, throughout a genealogy. [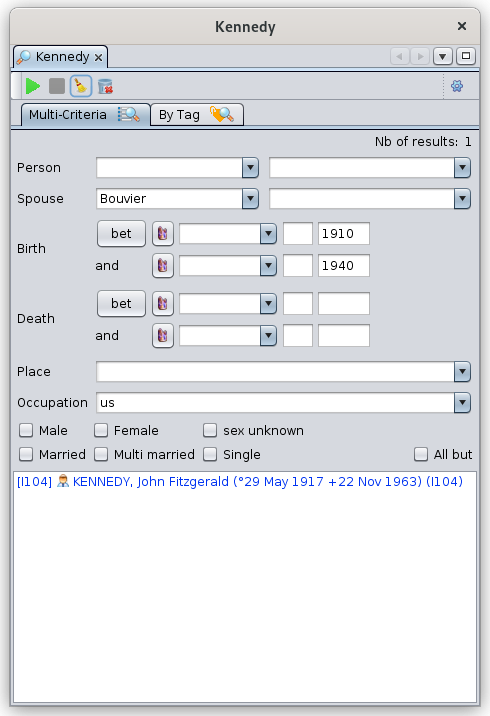](https://docs.ancestris.org/uploads/images/gallery/2021-12/en-advanced-search.png)The result list can then be exploited in other Ancestris tools, in particular be positioned on the [geographical map](https://docs.ancestris.org/books/user-guide/page/geographic-map#bkmrk-options "Geographic map"), be [exported in a specific Gedcom file](https://docs.ancestris.org/books/user-guide/page/save-as#bkmrk-utilisation "Save as"), be used in the [Find/Replace tool](https://docs.ancestris.org/books/user-guide/page/find-replace "Find / Replace"), [be marked as special entities](https://docs.ancestris.org/books/user-guide/page/mark-special-individuals#bkmrk-recherche-avanc%C3%A9e "Mark special individuals"), or be used for the [Information Sheets of Individuals/Families](https://docs.ancestris.org/books/user-guide/page/information-sheets-of-individualsfamilies-%28l%29#bkmrk-comment-utiliser-le- "Information Sheets of Individuals/Families") report.
## Description The Advanced search offers two different search modes: - **Multi-criteria mode** - Search according to a set of predefined properties - Multiple criteria - Among the genealogy individuals - The result of the search is a list of individuals - **Property mode** - Search according to any property - Single criteria - Among all the properties of the genealogy - The result of the search is a list of properties, grouped by entity ### Toolbar The toolbar works in the same way for both search modes. [](https://docs.ancestris.org/uploads/images/gallery/2020-05/Recherche_Avanc%C3%A9e_Barre_Outils.png) #### Start Search Button This button launches the search according to the criteria entered in the visible tab, and displays the results underneath. The number of results found is shown in the upper right corner of the visible pane. #### Cancel Search Button This button stops the search if it should last for too long. #### Clear Search Criteria Button This button resets the criteria and clears all fields. The criteria previously entered is kept in the different drop-down menus of each of the search tabs. #### Clear Search Criteria History Button This button clears the history of the drop-down menus. A confirmation request is made before deleting. #### Change Settings Button This button opens the Search Settings panel which lets you to set the following options: - **Maximum number of results displayed**: limits the number of results to the first 'n' found. The default value is 5000 - The checkbox **Case sensitive** forces the search to match upper and lower case letters. ### Multi-Criteria The Multi-criteria tab searches for individuals according to the predefined criteria displayed. [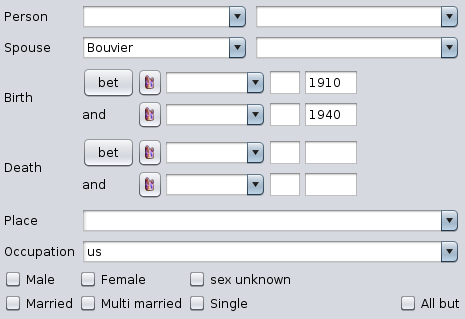](https://docs.ancestris.org/uploads/images/gallery/2021-12/en-advanced-search-criteria.png) The different criteria are explicit with the second lastname field being the spouse lastname. If several criteria are filled in, all conditions must be met. In the example above, we are looking for all individuals whose spouse name is "Bouvier", born between 1910 and 1930, having the "US" letters in their occupation, and married. If you want to reverse a set of conditions, simply check the "All but" box. The choice for the criteria family status includes: - **Married**: individuals have been married at least once - **Multi-Married**: individuals have been married at least twice - **Single**: individuals have never been married ### By Tag The By Tag tab searches for all the [properties](https://docs.ancestris.org/books/user-guide/page/properties "Properties") of the genealogy that meet a certain criterion. [](https://docs.ancestris.org/uploads/images/gallery/2020-09/en-advanced-search-tag.png) #### Search value - The field is the search criteria. It is a string of characters. - The Regular expression checkbox, when checked, asks Ancestris to interpret the search criteria as a search pattern, also called a **regular expression**. See the examples in the [Usage section](#bkmrk-utilisation "Usage section") and check the internet for [Regular Expressions](https://en.wikipedia.org/wiki/Regular_expression "Regular Expressions (source: Wikipedia)"). - The "..." drop-down menu, located on the left, offers examples of the main regular expressions used. #### Search tag - The field is the name of the Gedcom property, or tag, on which the search must be carried out. - The "..." drop-down menu on the left allows you to choose among frequently used properties. ### List of results The list of results is displayed in alternating colors by entity, to better locate the different lines of the same entity, especially for the results of the search by property.Each result can be clicked. It will display the corresponding entity in the other Ancestris views and editors.
As said at the top of this page, the list is usable in other views and tools. - In the [Geographic map](https://docs.ancestris.org/books/user-guide/page/geographic-map#bkmrk-options "Geographic map") view to view the features found on the map - In the [Save As](https://docs.ancestris.org/books/user-guide/page/save-as#bkmrk-utilisation "Save as") function to make a Gedcom file extract - In the [Find / Replace](https://docs.ancestris.org/books/user-guide/page/find-replace "Find / Replace") function to make a targeted text replacement - In the [Special Individual marking](https://docs.ancestris.org/books/user-guide/page/mark-special-individuals#bkmrk-recherche-avanc%C3%A9e "Mark special individuals") tool ## Usage The Multi-Criteria search is quite explicit. You have an example at the top of this page. We don't go into more details here. On the other hand, searching by Property requires a few examples. ### Search for a text anywhere The following example searches for the word "assassinated" in the whole genealogy. There are 5 properties located in 3 entities that meet the criteria. [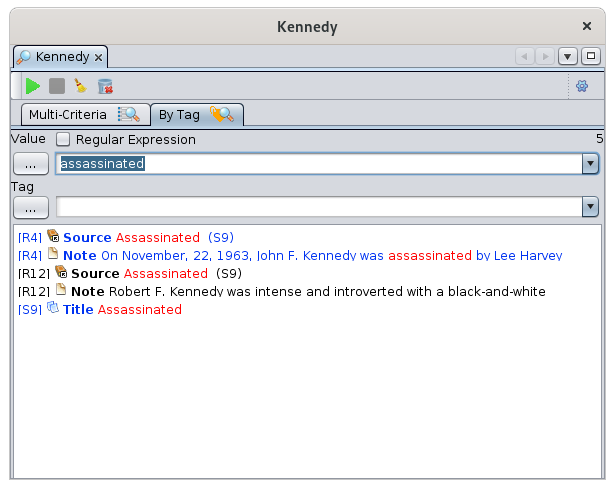](https://docs.ancestris.org/uploads/images/gallery/2020-09/en-advanced-search-tag-result.png) ### Search for a particular name The following example searches for all names containing the word "John". In the genealogy, the name of an invidividual is a property registered with the label NAME. You can find out the name of a label by looking at the [Gedcom editor](https://docs.ancestris.org/books/user-guide/page/gedcom-editor "Gedcom editor") since in this editor each line starts with the name of the label. The result is 28 properties, in 14 entities. [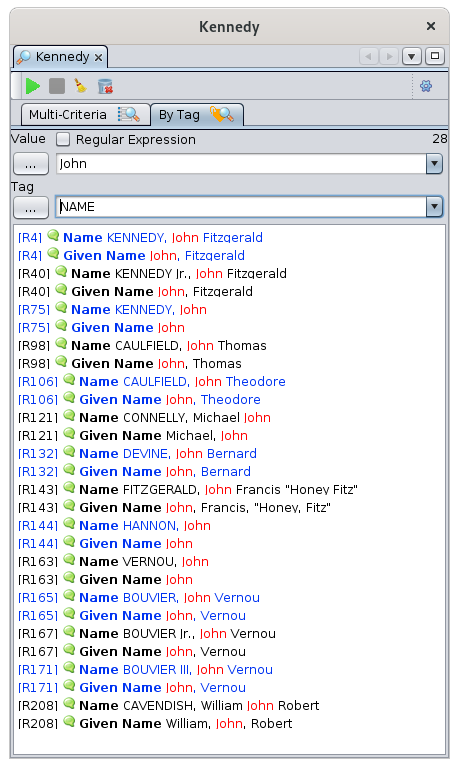](https://docs.ancestris.org/uploads/images/gallery/2020-09/en-advanced-search-name.png) ### Search for first names ending in "hn" As soon as the search requests differs from "contains the characters", it is necessary to use a regular expression.In computer science, a **regular expression** is a word that describes a set of words. Regular expressions are also called **regex** (a word suitcase formed from the English regular expression). Regular expressions are derived from mathematical theories of formal languages from the 1940s.
By clicking on the "..." button you have some basic rules for writing a regular expression. [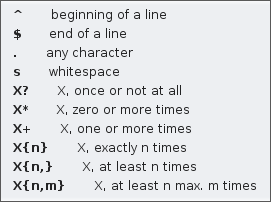](https://docs.ancestris.org/uploads/images/gallery/2020-09/en-advanced-search-regular-expression.png) - For example, the word `ex-(a?e|æ|é)quo` describes all words that begin with "ex-" that end with "quo", and that in between have one of the following 3 groups of letters: "a or not" + e", "æ" or "é". So the words "ex-equo", "ex-equo", "ex-aequo" and "ex-aequo" are included. But the words "ex-equo", "ex-aequo", "ex-aeko", "ex-aequo" are not part of it. - Another example if you want to select pure \_SOSA numbers from \_SOSADABOVILLE numbers: `^[^-]*$` selects all strings that do not include "-". The following example searches for all first names ending in "hn". The regular expression is written "hn$". And first name matches the GIVN label according to what you see in the Gedcom editor. Click Regular Expression and press Enter. [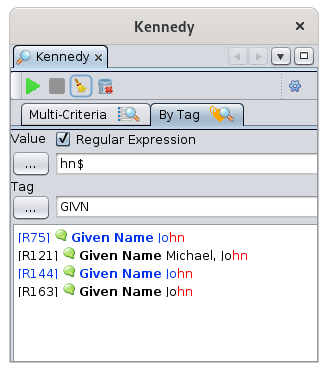](https://docs.ancestris.org/uploads/images/gallery/2020-09/en-advanced-search-regular-expression-example.png) ## Customization There are no customization elements in this tool. # Genealogy compare The **Genealogy compare tool** compares genealogies to find common geographical areas, with similar cities and lastnames, and similar events. It can as easily compare genealogies that you have or that are held by other Ancestris users, with no need to share any sensitive information to anybody. To compare with other Ancestris users, you simply need to let Ancestris share basic information. Your genealogy is never transferred to a server or to anybody and private information can remain confidential. If a match is found, you can contact the corresponding Ancestris user by email. [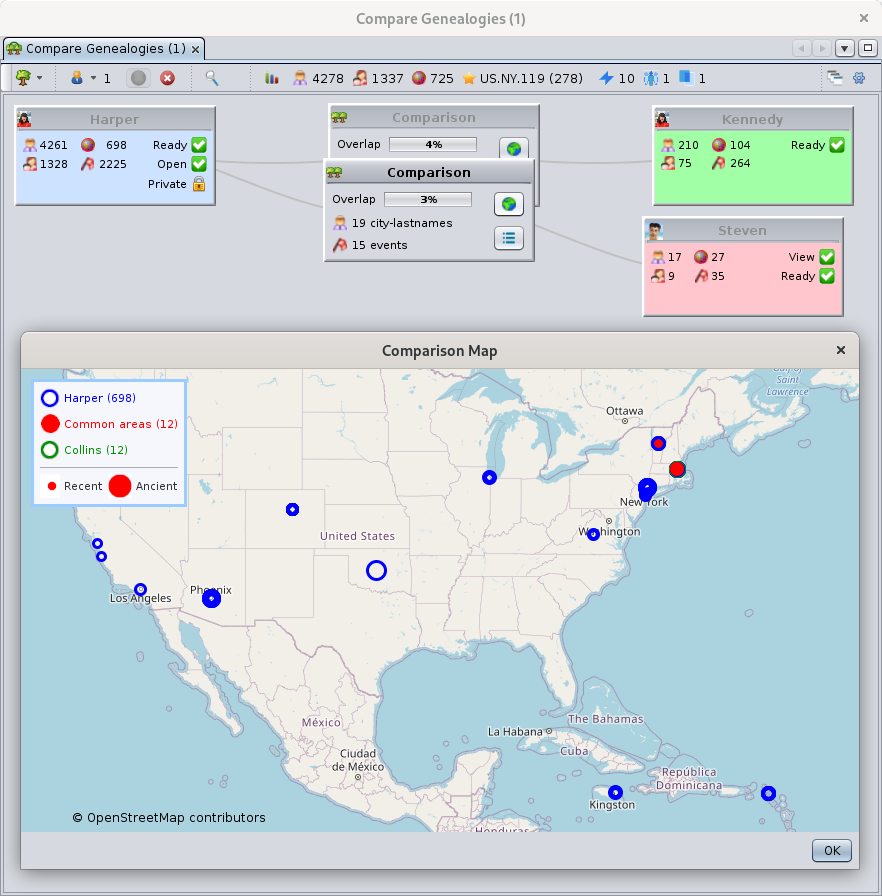](https://docs.ancestris.org/uploads/images/gallery/2021-01/en-compare-gedcom.png) ## ## An Ancestris innovation The idea behind this innovation is to exploit the data of the Ancestris user community without having to give the data away nor to upload it on a server.The objective of this tool is to find connections between genealogies, which will then help you develop your own genealogy.
This tool is very easy to use and gives you in just a few mouse clicks a quick overview showing whether two genealogies have anything in common. A genealogy can be compared with several other genealogies at the same time. These other genealogies can be made of local gedcom files open in your Ancestris application, or they can be genealogies of other users using Ancestris at the same time as you. When comparing genealogies across different users, your data remains protected and you keep control of your data. This is a key principle of the Ancestris community we are part of. You can compare genealogies and find connections between you and other users' genealogies in two ways: - In a **proactive way**, to identify the users likely to have ancestors common with yours, - In a **listening way**, to identify these same users when they do proactive search themselves. > Either you find them or they find you. Either way, you will benefit. Once users have found possible common ancestors, they can contact each other to find out more. They are free to establish the contact or not. Common ancestors are only possible if they both share an event in the same space-time ! ### Area-period, a "space-time" concept In order to easily compare genealogies, we have defined area-periods. We have divided the physical world space into areas. These areas follow the definition of the [Geonames](https://docs.ancestris.org/books/user-guide/page/list-of-places#bkmrk-recherche-des-lieux "Use of the Geonames database") database. An area is approximately a county in the US, a district in England or a department in France. In this tool, an area is made of 3 elements separated by a dot : the country, the first level of Geonames jurisdiction, and the second level. - For instance, "US.NY.119" would be the county number "119", which is the Westchester county of the New York state of the United States. We have divided the time dimension into periods. We have defined periods of 10 years to match with the decennial tables that may exist in the official genealogical repositories. Each located and dated event of a genealogy can therefore be located in an area-period. An area-period can include several events. - For instance, the area-period "US.NY.119 \[1890-1899\]" would include all the events that occurred in the Westchester county of the New York state between 1890 and 1899.As a result, two genealogies have something in common if at least an event of each genealogy took place in the same area-period.
## ## Data Privacy When comparing genealogies across different users, information sharing is carried out in complete confidentiality and following a deliberate choice from you to "share" some basic information about your genealogy.The basic information shared is the "flash list report of events" of your genealogy. It is made of city names, lastnames, and dates of events. None of this information is sent to a server. It is merely exchanged through temporary messages.
- Only users who agree to share their data can compare their genealogies with others. - Private data can be hidden from the comparison - Users can only see from your genealogy the events that they also have on their own genealogy. In other words, only common data can be seen by each user.Users do not have access to your computer. **The data exchange works like a phone call**. Your Ancestris application chats with the other person's Ancestris application and only when common information is detected can you see the corresponding overlaps and events if they exist.
## ## Pre-requisites There are 2 pre-requisites to use all possibilities of this tool.In order to compare genealogies, **you must locate and date as many events as possible**, and [you must specify the locations of your genealogy using the places editor](https://docs.ancestris.org/books/user-guide/page/places-editor "Places editor"). If you did not use this editor to structure your places descriptions, Ancestris will try to find these places directly in the geonames database and make the best of it. Dates can be approximated or use date ranges. Events that are neither dated nor located cannot be compared for obvious reasons.
In order to compare genealogies with other users, [you must fill in your user profile](#bkmrk-profil-ancestris "Ancestris profile") with a username, a picture and an valid email.
## ## Description The Genealogy compare tool handles **local genealogies** and **'connected' genealogies**. **Local genealogies** are Gedcom files that you have on your computer. **Connected genealogies** are the Gedcom files held by other Ancestris users who have decided to share their genealogy for comparison.The tool compares one main local genealogy with all the other ones, local or connected.
You decide which one of the local genealogies will be the **main genealogy** to compare with all others. Only the main genealogy of each user can be shared at a given time with the other users. Each genealogy is represented by a little window and placed into the display area of the workspace, [the comparison area](#bkmrk-titre-de-la-fen%C3%AAtre "Comparison area"). The rest of the tool is made of a [window title](#bkmrk-window-title "Window title") and a [toolbar](#bkmrk-barre-d%27outils "Toolbar"). ### The comparison area The central part of the window shows 3 types of windows : - **local genealogy** windows, the **main genealogy** and the other ones - **connected genealogy** windows - **comparison** windows #### Local Genealogies Each open genealogy in Ancestris appears and is represented by a little window. - The **main genealogy** to compare is represented by default at the top left corner and is a blue window - The **other local genealogies** are represented by green windows. There are placed along the right hand side of the display area, around the main genealogy. These windows look like this:These statistics only include comparisons made across connected users. They do not include comparisons made between two local genealogies.
#### Arrange Window Button This button re-arranges the windows in the display area. [](https://docs.ancestris.org/uploads/images/gallery/2020-09/en-genealogical-search-tidy.png) This can be useful after you have moved around the windows, to display everything neatly again. #### Set preferences Button This button customizes your profile. [](https://docs.ancestris.org/uploads/images/gallery/2020-09/en-genealogical-search-configure.png) See the [Customization section](#bkmrk-personnalisation "Customization") below for more details. ## Usage The purpose of the comparison tool is to find common ancestors between your genealogy and someone else's genealogy. Either you get someone to send you its Gedcom file or else you ask that person to load it in Ancestris. Either way, you then use the Genealogy compare tool to assess the commonalities. Because you do not necessarily know where your next findings will come from, you can turn on the sharing mode on your main genealogy and wait for someone to have an overlapping genealogy with yours. In case you are comparing your genealogy with other user's genealogies, follow [the instructions below.](#bkmrk-v%C3%A9rifiez-que-d%27autre "Connected user comparison") If you are not interested in comparing with other users' genealogy, simply follow [these other instructions](#bkmrk-contact-a-user "Local comparisons"). ### Check connected users The first things you will see when launching the Genealogy compare tool is the set of connected users. They will appear as [red 'Connected genealogy' windows](#bkmrk-les-amis "Connected users"). You will also see them by using the [Connected users button](#bkmrk-connected-users-butt "Connected genealogies button") of the toolbar. ### Turn on the sharing mode - **Open up your main genealogy**. Feel free to open more than one if relevant. - Go back to the **Genealogy compare window**. - **Make sure you select your main genealogy** if you have more than one. It should appear in the top left corner. - **Press the 'Ready' button** corresponding to your main genealogy. This will calculate the [area-periods](#bkmrk-area-period%2C-a-%22spac "Area-periods"). Please note that the first time you calculate the area-periods of a genealogy, it might take a bit of time if locations have no geo-coordinates. Ancestris will look for them on the Geonames database. - Once ready, **press the sharing mode Green button**. If the connection is successful, you should hear a ringing bell noise. Now, if people from the Ancestris community are also using the Genealogy compare tool at the same time, they will see you appear on their screen, within a minute or so. If your profile is not filled in, simply go to the Preferences and fill it in. [See the Profile section](#bkmrk-profil-ancestris "Profile section") in this page. You can then either wait for someone else to scan your genealogy, or else launch a scan yourself. ### Scan connected genealogies Once in sharing mode, you can scan connected genealogies one by one or all at once. - Click each **View button** of each connected genealogy if you want to pick which genealogy to compare. - Click the **Scan button** in the toolbar to scan all of them. The scan will begin. You can see the little wheel turning and the name of each user whose genealogy is being scanned. The scan results appear as overlaps in the comparison windows. This scan is a efficient way to select and later compare only the genealogies where an overlap exists. ### Compare connected genealogies For genealogies that overlap with yours, you can then perform a comparison. - Click the **Ready button** of the corresponding genealogies. The comparison starts and will also retrieve the user profile. At the end of the process, the photo of the user should appear in the window title and both checkboxes should be selected and green. ### Check for resultsWhether you made the comparison yourself or the other user did, you will both see the same results. A slight difference might exist depending on whether you both showed or hid the private information, or only one of you did.
Final results are made of 3 levels: - **The overlap level** : it indicates the percentage of common area-period between two genealogies. A common area-period only means that you and the other user have ancestors who happened to have events within the same area and within the same 10-year period. Nothing more. - **The city-lastnames level**: it indicates the cities and the lastnames that are both the same in the common area-periods. A common city-lastname only means that among the ancestors events mentioned above, are related to people with the same lastname and in the same city. - **The event level** : it indicates the events that do match exactly. Common events are among the ones mentioned above and match in terms of type of event (birth, marriage, death or other), in terms of lastname, in terms of city, and in terms of year. The overlap level is expressed as a percentage of all the area-periods of the compared genealogies. Both you and the other user should see the same percentage. Open the Comparison map to see where the corresponding areas are. The city-lastnames level is expressed as a number. The details are listed in the Comparison list. The event level is expressed as a number. The details are listed in the Comparison list. If no results are displayed, it means that there was no match. You can then hide the user using the checkbox in the Connected users list, or using the context menu the connected user window. ### Contact a user In case there are enough common elements between you and a user, you may contact them. For that, use the Mail button in the user profile or use the Context menu of the Connected user window. The email button allows you to automatically generate an email to this person with your email client. All you have to do is complete the email and send it. ### Special circumstances - **Updated genealogies**: if you or the other users have updated their genealogy since the previous comparison, it is possible to reset it. Use the corresponding context menu, local or remote, to refresh the comparison elements. - **Inactive users**: If a user has turned of the sharing mode, it will remain visible by you until you close Ancestris. It will no longer be possible to compare, but your last comparison will remain visible. It this user comes back sharing, Ancestris will reactivate it. - **Change main genealogy**: You can decide to change your main genealogy to compare. In this situation, simply change the main genealogy using the Local genealogy drop down menu. Ancestris will switch local genealogies. This will turn off the sharing mode if it was on. You will need to turn it back on. ### Local comparisons The comparison between local genealogies is a simpler version of the steps above: - Open the genealogies in Ancestris - Go the the Genealogy compare tool - Choose which one is the main one to be compared with the other ones - Press the 'ready' buttons of the genealogies to compare - Check each results in the comparison windows. The same indicators [as described above](#bkmrk-r%C3%A9sultats "Check results") apply. ## Customization It is possible to customize your profile. ### Ancestris Profile [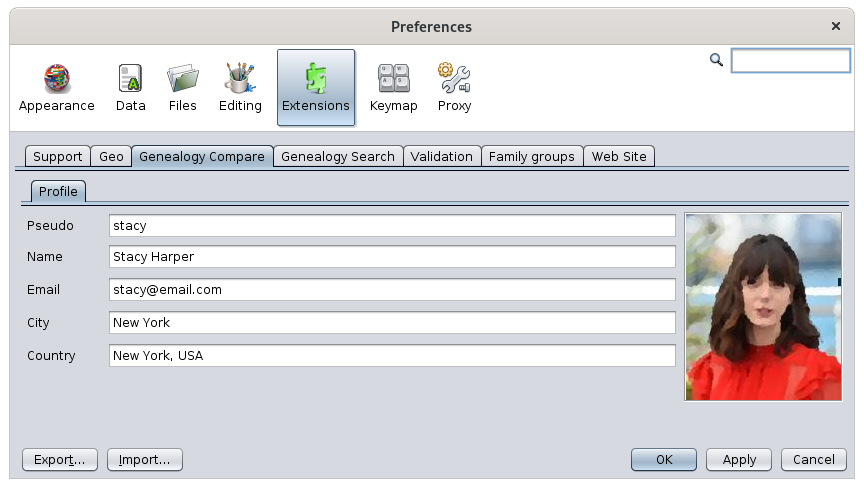](https://docs.ancestris.org/uploads/images/gallery/2021-01/en-compare-preferences.png) If you want to compare your genealogy with the genealogy of other users, you will need to indicate your profile here. It serves two purposes: - It generates confidence and thus you will be able to carry out comparison with other users. - It provides your contact details to the other users, and provides an indication of your location in case some users live next to you. Of course, you can indicate anything you like in these fields, and put the picture of Zorro for instance. But as with social networks, you will sooner or later get banned and no one will want to let you compare your genealogy. So it is in your best interest to give the right information if you want to benefit from this comparison feature. # Registers records The **Registers records** tool is designed to develop your genealogy from genealogy records entered by yourself or others. This tool is very powerful and allows you to perform **mass entry of genealogy registers records** (civil, parish, etc.), to then retrieve them in your genealogy by difference, or to export them for the benefit of others. It is designed to also facilitate the **entry of isolated act records**. This tool is not installed by default when you install Ancestris. To install it, go to the Tools Menu and select [Manage extensions](https://docs.ancestris.org/books/user-guide/page/extensions "Extensions"). [](https://docs.ancestris.org/uploads/images/gallery/2020-09/en-registers.png)A register inventory is a mass entries operation by an individual or a genealogical association of all the acts of a parish or civil status register with a more or less complete and exhaustive transcription of the information. Source: Wikipedia
In our case, we will speak of both a complete register and only a few records from it, the principle remaining the same. ## Principle The analyses are carried out by city, the record acts are thus recorded by city in a file. In order to be exploited by others, each file must therefore only include acts from a single city. This comes from the fact that it is a file in simple text format where each line represents an act preceded by the address of the city, which is the same on all lines. The acts of the city are entered one by one thanks to an editor on the right side of the window. The acts entered are arranged in tables on the left side of the window, according to the types of events they transcribe. From the act tables, it is then possible to drag and drop rows one by one to the [Dynamic Tree](https://docs.ancestris.org/books/user-guide/page/dynamic-tree "Dynamic tree") view to enrich one's genealogy. See the [Drag and Drop section](#bkmrk-glisser-d%C3%A9poser-dans "Drag and Drop in the dynamic tree") for more details. ## ## Demo To discover the **Registers Record** tool, it is easier to use the example of records provided, which includes about twenty Bourbon records. Click on the **File button** then choose **Demo file** to open it. [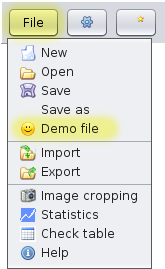](https://docs.ancestris.org/uploads/images/gallery/2020-09/en-registers-menu.png) The file will be loaded, corresponding to the city of Versailles, with the corresponding acts.It is a copy of the Demo file. Feel free to modify it if you want to practice.
Also open the Bourbon genealogy. You will then be able to experiment the instructions illustrated in the following sections. ## ## Description On the left hand side of the window are five tables where the records of the registers will be stored. These are the [**Acts** tables](#bkmrk-tables-des-relev%C3%A9s "Acts tables"), or Records tables. - the births table - the marriages table - the deaths table - the table of miscellaneous records / acts such as marriage publications, marriage contracts, wills, receipts, etc. - the summary table of all the records, which is the sum of the four previous tables On the right-hand side is the [Act Editor](#bkmrk-%C3%89diteur-d%27actes "Act editor"). It manages the registers files and edits the records for a given city. You will notice that the **Act Table** and the **Act Editor** work together. - When a table is selected on the left part, the Editor adapts itself to the type of act to be entered - When an act is selected in a table, the Editor displays the corresponding data Adjust the widths of the table columns for a better view. The separation bar between the Tables and the Editor is also adjustable. The File button shows a [File menu](#bkmrk-les-fichiers "File menu") giving access to the register's file management and to other tools. ### ### Acts tables The acts are classified into five tables: Births, Marriages, Deaths, Miscellaneous and All (the summary table of acts). Each table is displayed in a tab. To see the contents of a table, click on the corresponding tab. Each line represents one act. Each column represents a record of an act, or to simplify, an act. The columns displayed differ according to the type of act. Here, it is the summary table of all the acts that is selected, and the **Type** column displays the type of the act of each row: N for birth (naissance in French), D for Death, M for marriages. [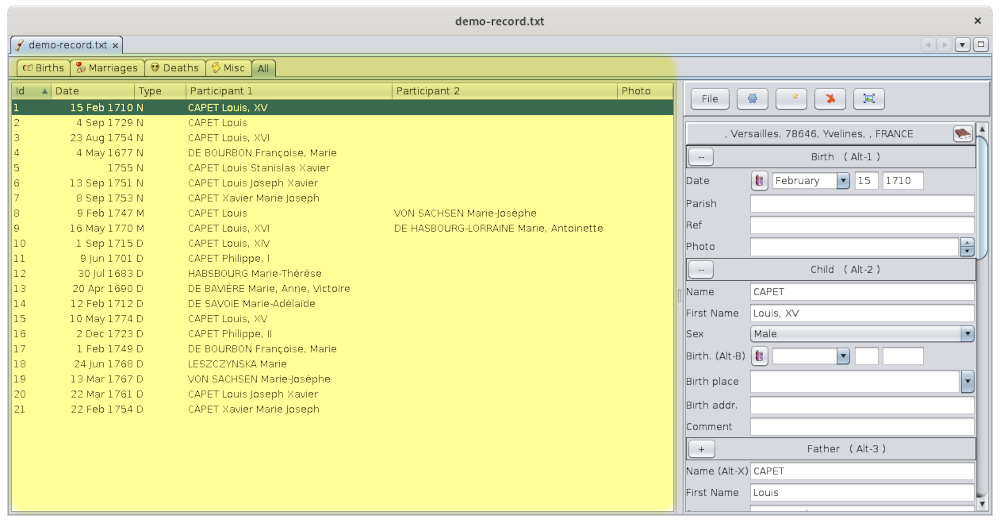](https://docs.ancestris.org/uploads/images/gallery/2020-09/en-registers-table.png) #### See the detail of an act Click on a line in the table so that the details of the act are displayed in the editor on the right hand side. In this example, a birth is selected so the editor has adapted to enter the data that is usually found on birth certificates. #### Dropdown menu Right-clicking anywhere in the left part of the window displays a drop-down menu that allows you to manipulate and renumber the acts. [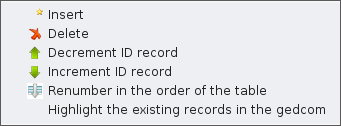](https://docs.ancestris.org/uploads/images/gallery/2020-09/en-registers-table-dropdown-menu.png) The use of the "**Highlight the existing records in the Gedcom**" checkbox is [described below](#bkmrk-surligner-les-actes- "Highlghting Acts"). #### Link between act tables and other Ancestris windows **For highlighted acts only**, there are two possibilities of synchronization with the other Ancestris windows. - A simple click on an individual's act displays the individual in the other Ancestris views. - A double-click on an act allows to reconstruct the tree starting from the individual of the act as root #### Column Sorting Click on the column title to sort the table alphabetically or by date according to the type of data in the column. #### Columns order To move a column, click on the column title and **move the mouse sideways** while holding down the button. ### Act editor The Act Editor allows you to manage the register files and to record the acts for a given city. [](https://docs.ancestris.org/uploads/images/gallery/2020-09/en-registers-editor.png) The act editor is composed of a title indicating [the name of the city](#bkmrk-le-nom-de-la-commune "The name of the city"), the [form to record the acts](#bkmrk-le-formulaire-de-sai "Form to record the acts"), a [toolbar](#bkmrk-la-barre-d%27outils "Toolbar"), whose [File Menu](#bkmrk-les-fichiers "File menu") gives access to the register file management and to tools. #### The name of the city [](https://docs.ancestris.org/uploads/images/gallery/2020-09/en-registers-city-name.png) This title indicates the name of the city of the register being recorded or read. This is an address. The button on the right lets you change the address. [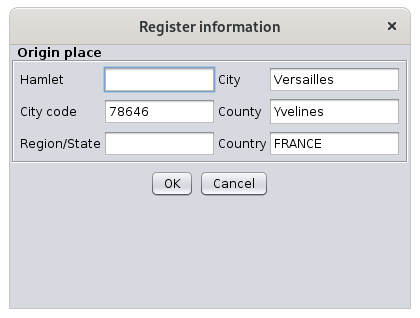](https://docs.ancestris.org/uploads/images/gallery/2020-09/en-registers-editor-register.png) All the acts entered will be saved in the same file. The name of the file will the name of the city. Each line of the file will start with this address. #### The form to record the acts The data entry form depends on the type of act to be recorded and corresponds to the type of act selected in the acts table. - It displays a birth form for a birth, a marriage form for a marriage, a death form for a death. - It displays a Miscellaneous form for other acts, which allows you to enter any type of act. A drop-down menu at the beginning of the form allows you to give a name to the type of act. Each form is divided into sections and each section has a title with a button on the left. [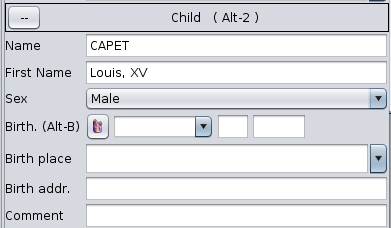](https://docs.ancestris.org/uploads/images/gallery/2020-09/en-registers-editor-child.png) - The title of the section indicates the type of stakeholder the data relates to. - The button on the left of the title at the top lets you add or remove lines to be entered - A '--' button indicates that you can only remove lines. - A "+" button indicates that you can add some - Clicking on the button brings up the drop-down menu of displayable fields. You have to check them to display them. For example, here is the drop-down menu of the data that can be entered for the child of a birth certificate (these are all checked by default) [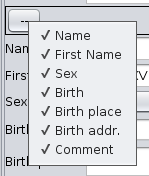](https://docs.ancestris.org/uploads/images/gallery/2020-09/en-registers-editor-child-menu.png) In the form, the field being edited appears with a blue background. [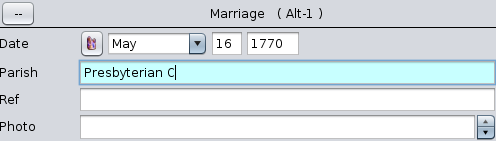](https://docs.ancestris.org/uploads/images/gallery/2020-09/en-registers-editor-editing.png) The form benefits from input help and keyboard shortcuts [described below](#bkmrk-facilit%C3%A9-d%27%C3%A9dition "Editing features"). #### Toolbar [](https://docs.ancestris.org/uploads/images/gallery/2020-09/en-registers-menubar.png) The toolbar includes the following actions. ##### File Button This button opens the [File Menu](#bkmrk-les-fichiers "File menu") which allows you to manage the registers files (only 1 city per file), to access a tool for cropping act pictures, and to check the data of the acts entered. ##### Options Button This button opens the Ancestris preferences, [the Extensions pane and the Registers tab](#bkmrk-personnalisation "Preferences"). This allows you to set your preferences for the Act editor, the browser of certificate photos, and the way to copy records to a Gedcom file. ##### Create Act Button This button generates a new record (or act, certificate) line in the act table, ready to be entered. First select the tab of the act table corresponding to the type of act you are going to enter before creating it. ##### Delete Act button This button deletes the act selected in the acts table. ##### Floating Editor Button This button opens a floating window containing a second Act Editor that can be combined with an [Act Viewer](#bkmrk-les-fichiers-0 "Act viewer"). [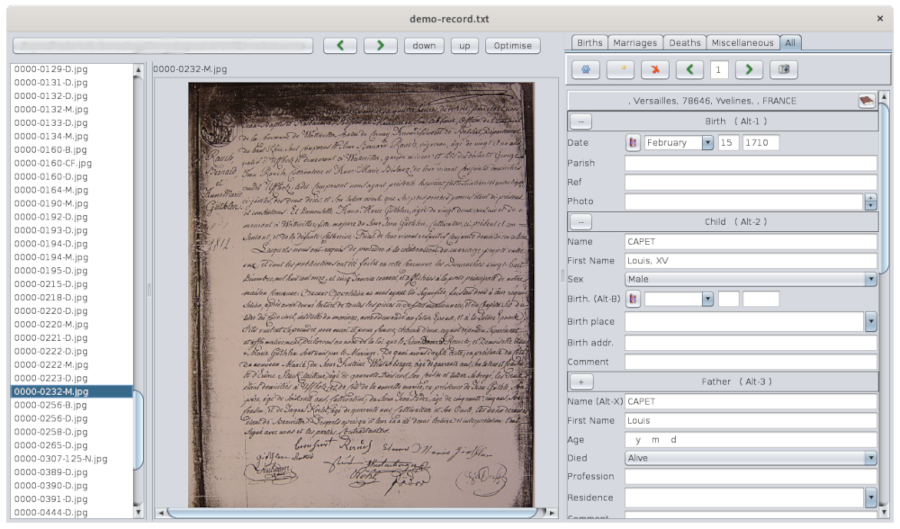](https://docs.ancestris.org/uploads/images/gallery/2020-09/en-registers-browser.png) The size of its window is small enough to be placed next to the photos of the acts to make the mass editing. It is attached to the Act Editor's floating window on the right hand side. The viewer displays the list of act pictures in the left column, and the act being viewed in the middle. This floating editor contains a slightly different toolbar from the main Act Editor. [](https://docs.ancestris.org/uploads/images/gallery/2020-09/en-registers-browser-menu.png) The left and right arrows allow you to move through the acts, and the Photo button allows you to show or hide the photo viewer of the acts. ### This menu allows you to open or save register files. These files cannot be opened with the File menu from the Ancestris Menu bar. This menu is as follows: [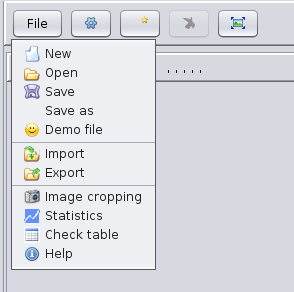](https://docs.ancestris.org/uploads/images/gallery/2020-09/en-registers-menu-only.png) #### New Creates a new register file of acts for another city. If data was being entered, a message warns you to save what you were doing. [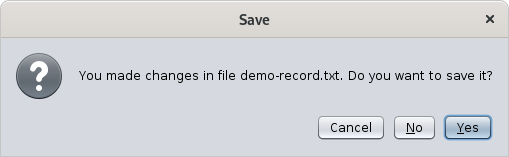](https://docs.ancestris.org/uploads/images/gallery/2020-09/en-registers-confirmation.png) If you confirm, the act table will be cleared and Ancestris will offer you to start creating a new record. #### Open Opens a register file of acts previously saved by Ancestris or coming from other sources. - The different file formats are automatically recognized ([Ancestris format](https://docs.ancestris.org/books/user-guide/page/registers-records---appendix-%28l%29#bkmrk-format-ancestris%C2%A0 "Registers records - Appendix - Ancestris format"), [EGMT format](https://docs.ancestris.org/books/user-guide/page/registers-records---appendix-%28l%29#bkmrk-format-des-fichiers--0 "EGMT format") or [NIMEGUE format](https://docs.ancestris.org/books/user-guide/page/registers-records---appendix-%28l%29#bkmrk-page-title "NIMEGUE format")). - If Ancestris detects lines that do not comply with a known file format then an error message is displayed indicating the list of erroneous lines. #### Save Saves the data in a file in [Ancestris format](https://docs.ancestris.org/books/user-guide/page/registers-records---appendix-%28l%29#bkmrk-format-ancestris%C2%A0 "Registers records - Appendix - Ancestris format"). If the reading has already been recorded once, the data are saved in the same file. If this is the first time the file is saved, a file name is first requested. #### Save As Requests a new file name and saves the data in this new file in [Ancestris format](https://docs.ancestris.org/books/user-guide/page/registers-records---appendix-%28l%29#bkmrk-format-ancestris%C2%A0 "Registers records - Appendix - Ancestris format"). #### Demo file Opens a Bourbon demo file and displays its records. #### Import Adds data from another file to the data already present. This merges the imported file with the already opened file. All the data in memory must relate to the same city. If some readings in the imported file relates to a different city, it is suggested to either ignore the readings or to replace their city by the city of the data in memory. #### Export Exports the data to a file in [EGMT format](https://docs.ancestris.org/books/user-guide/page/registers-records---appendix-%28l%29#bkmrk-format-des-fichiers--0 "EGMT format") or [NIMEGUE format](https://docs.ancestris.org/books/user-guide/page/registers-records---appendix-%28l%29#bkmrk-page-title "NIMEGUE format"). [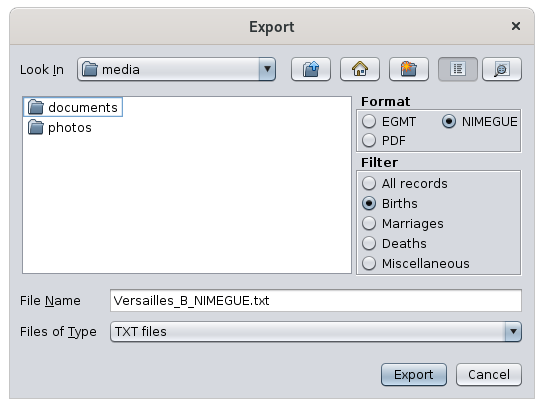](https://docs.ancestris.org/uploads/images/gallery/2020-09/en-registers-export.png) It is necessary to specify, - the chosen format of the export file - the type of records to be exported (Births, Marriages, Deaths, Miscellaneous or all records) - the name of the export file #### Crop photos Allows you to crop photos of acts. Clicking on the button displays the [**Image cropping tool**](#bkmrk-table-de-v%C3%A9rificatio "Crop photos"), in which it is possible to crop the act photos. #### Statistics Displays the number of readings records in the file. [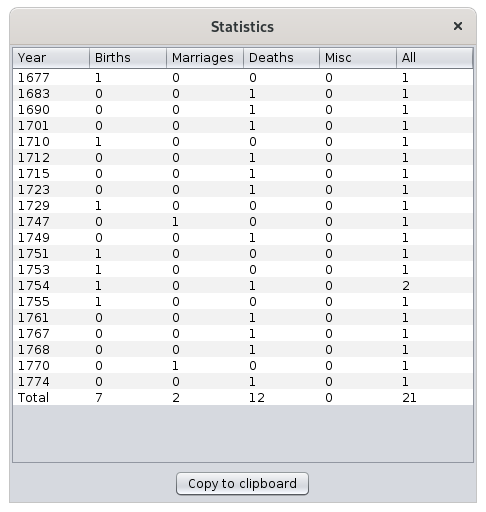](https://docs.ancestris.org/uploads/images/gallery/2020-09/en-registers-stats.png) #### Check table Displays a table with all the data contained in the file for global verification. There is a possibility to search for a particular act and a button to open the floating editor. [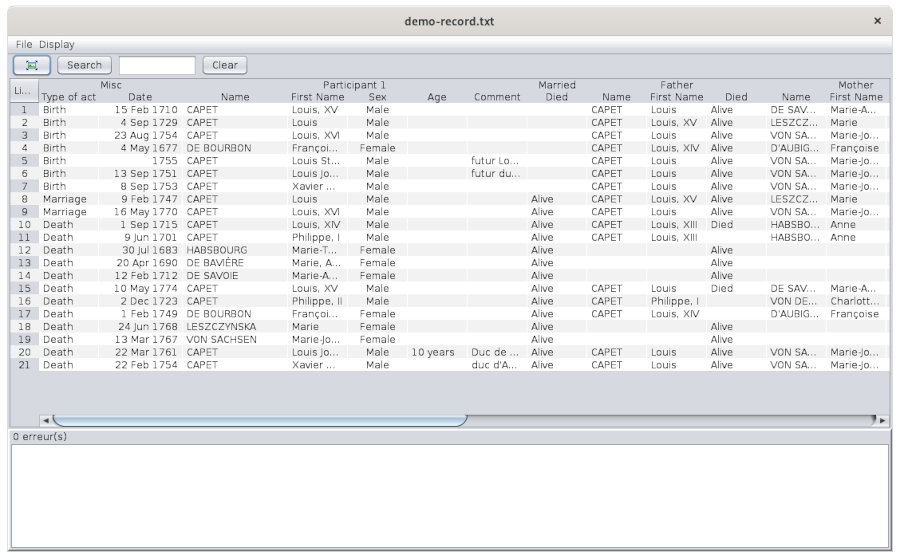](https://docs.ancestris.org/uploads/images/gallery/2020-09/en-registers-check-table.png) ## Usage ### Methodology The **Registers Records** tool covers several needs. #### Develop your genealogy - **From photos of acts** you may have found or obtained: - the tool first allows you to enter the acts simply from the photos - and then retrieve the data to develop your genealogy. - **From record files** made by others: - the tool allows you to retrieve the acts you are interested in to feed your genealogy. #### Helping others to develop their genealogy - **Mass entries of acts from registers or photos during a "register's inventory"** - **Then export the file for the benefit of others**. In any case, if you have photos of the acts, you can choose whether or not to automatically link the photos to the acts. - when browsing through the acts: this allows you to switch from one act to another and the corresponding photo is displayed. - when consulting your genealogy from an Ancestris view: the display of a source shows you the original act used during the analysis. #### Suggested methodology The rest of the page is a description of how to use the different features of the Register records tool and record acts according to a generic method that you are free to adapt. 1. **Start from the stock of raw digital photos of the original acts, and crop them to extract one photo per act, which you will place in folders by city, of official photos referenced by its register and its number in the register.** - These photos can indeed contain several acts, often with writings that are difficult to read. To facilitate reading in the long run, it is preferable to separate the acts. - This step can be done with the [Image cropping tool](#bkmrk-fen%C3%AAtre-de-recadrage "Image cropping tool"). - Each photo can be saved with the file name, the reference of its dimension in the register and a number. 2. **Start with the photos cropped to capture the acts by city, with the right odds and the right photo numbers.** - This step is done with the [Act viewer](#bkmrk-les-fichiers-0 "Act viewer"). When you are more familiar with the editing, you can set the input options that best suit you in the [Preferences](#bkmrk-personnalisation "Preferences"). - To ensure the link between the act and its photo, it will be necessary to specify it beforehand to Ancestris in the [Preferences](#bkmrk-personnalisation "Preferences") and to indicate where the official photos are located. - Each city entered will be the subject of a separate file, which you will place in a registers folder. - For the input part, the [Act editor](#bkmrk-%C3%89diteur-d%27actes "Act editor") allows a great efficiency of use thanks to [keyboard shortcuts](#bkmrk-raccourcis-clavier-p "Shortcuts"), input [controls](#bkmrk-fonctions-de-contr%C3%B4l "Controls"), and a [function of auto-completion](#bkmrk-compl%C3%A9tion-des-noms%2C-0 "Auto-completion") of the information being entered. 3. **Move the acts by commune and chronologically, from a register to your genealogy** - This step requires [Highlighting the already existing acts in the Gedcom](#bkmrk-surligner-les-actes- "Highlighting acts") in Ancestris. - Then you have to [Copy by drag and drop the acts in the Dynamic Tree view](#bkmrk-glisser-d%C3%A9poser-en-d "Drag and drop to Dynamic tree"). Ancestris determines the correspondence and suggests how to integrate the act - You may also need to give Ancestris a first and last name equivalence to improve the matches - Then you will be able to [view the photos of the acts from the Ancestris views](#bkmrk-visionner-un-acte-%C3%A0--1 "View acts from Ancestris views"). - There is an appendix describing the [Mapping between the registers data and the Gedcom data](https://docs.ancestris.org/books/user-guide/page/registers-records---appendix-%28l%29 "Registers records - Appendix") of your genealogy. 4. **Export statements by municipality and send them to interested parties, if applicable.** - There are several official file formats for the counts: the NIMEGUE format and the EGMT format. - These formats and the Ancestris format are described in the [Appendix on File Formats](https://docs.ancestris.org/books/user-guide/page/registers-records---appendix-%28l%29 "Registers records - Appendix") ### Image cropping tool This window is different from the [Act viewer](#bkmrk-les-fichiers-0 "Act viewer"), even though it is very similar. It is accessed through the [File menu](#bkmrk-les-fichiers "File menu") of the Act Editor, item **Image cropping**. [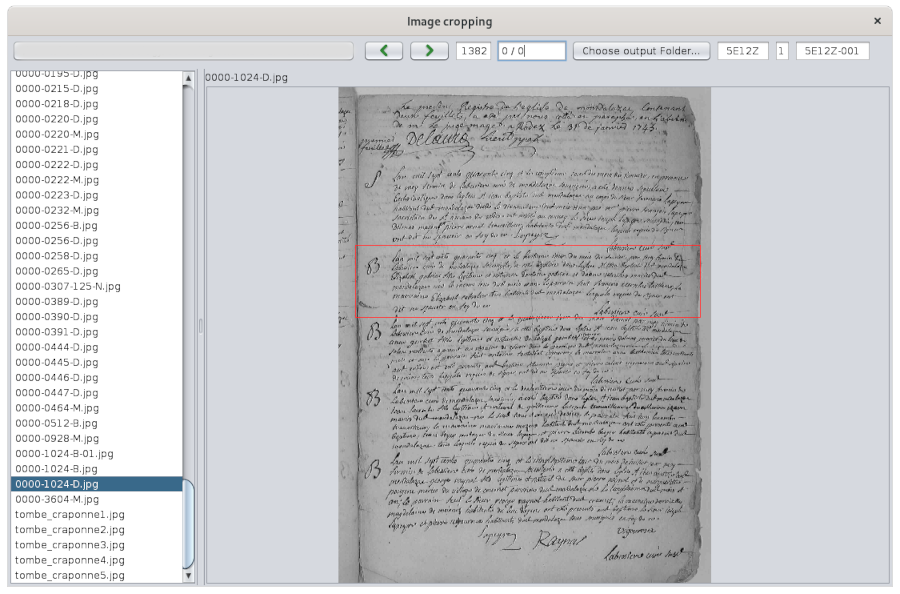](https://docs.ancestris.org/uploads/images/gallery/2020-09/en-registers-image-cropping.png) Hovering over the buttons or fields gives a tooltip to know what they do. The principle of this tool is as follows. - With the left button, you define an entry directory where your raw photos are stored, and with the right button you define the one where they will be saved. - You choose the format of the names of the photos when they are saved in the two fields on the right (register number and photo number). - You navigate through the photos with the forward and backward arrows. - On each photo, you move the edges of the red frame to define the crop lines of the photo. It keeps a fixed position from photo to photo - A double click on the photo performs the cut and moves to the next photo. Go back to the previous photo with the arrow if it contained other acts to be cut out. - A right click of the mouse allows you to place / remove an extra aiming-cross, which allows you to move the photo at the time of cutting. - This is optional. To understand how it works, wedge the photo on the top left corner: the top left part of the aiming-cross will disappear, the photo will move to the top left, and then the cut will be made according to the red frame. - This allows to have all the photos of the same size, that of the red frame. ### The act viewer The **act viewer** capture the acts from their photo, and then maintain the link afterwards. It is then possible to display the photo of an act from its act selected in the Editor. The act viewer is accessed from the button [](https://docs.ancestris.org/uploads/images/gallery/2020-04/releve_bouton_visionneuse.png) on the toolbar of the Act Editor. #### Entering acts To enter the acts, indicate the act directory with the button on the top left, select the act, and create the act to be entered on the right, fill in the address of the city. After the first entry, you should have something like this [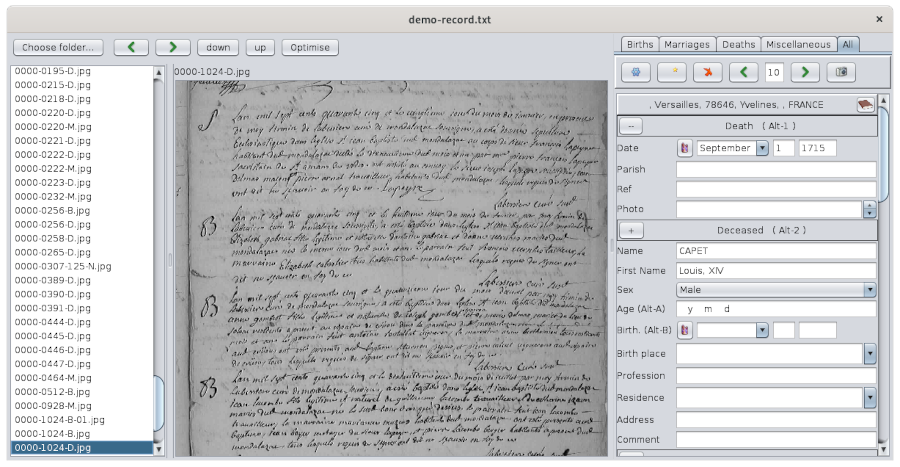](https://docs.ancestris.org/uploads/images/gallery/2020-09/en-registers-image-viewer.png) The arrows are used to view the previous or next photo. The photo can be moved and zoomed with the mouse. The **Optimize** button is used to force the contrast of an area of the photo. After clicking on the button, select a rectangular area of the photo. To exit the optimization, click on the button again. [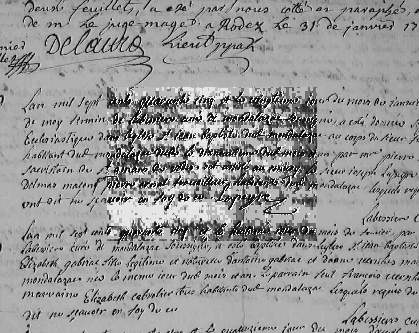](https://docs.ancestris.org/uploads/images/gallery/2020-04/releve_visionneuse_optimise.png) Then refer to the description of the [act editor](#bkmrk-%C3%89diteur-d%27actes "Act editor") and the [editing features](#bkmrk-facilit%C3%A9-d%27%C3%A9dition "Editing features") to enter the act. #### View a photo from the act To view a photo of an act . - If you are already in the act viewer, simply select the act with the navigation arrows on the right, above the input form or open the viewer panel if it is hidden. If the act does not have a photo reference, the displayed image remains unchanged. - If you are in the main act editor and the viewer is closed, just open it with the viewer button The automatic correspondence between the act and the photo only works under 3 conditions. - the act must indicate the reference of the photo in the line 'photo'. This reference can be a number or an alphanumeric text that must be uniquely located somewhere in the filename of the photo. It does not need to be the full name of the photo. If there are several photos with this reference, the last one is displayed. - in the Ancestris preferences, you must have checked the box '**Show image in standalone editor**' and added the photo folder in the list like this. [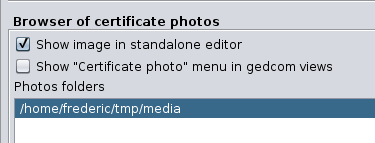](https://docs.ancestris.org/uploads/images/gallery/2020-09/en-registers-image-viewer-settings.png) - the folder of the photos on the disk indicated in the image above, must include a subfolder with the name of the city of the register, in or under which the photo of the act must be located. #### Suggestions for storage of files containing photos of the acts Several file organizations are possible. The viewer simply needs that there is a folder with the name of each city somewhere in the tree structure.| Example with subfolders by county, by city, and by reference | Example with subfolders by city |
|---|---|
| ``` /mydocuments/genealogy/acts /Yvelines /Versailles /5MI_123 /DSC00117.jpg /DSC00118.jpg /5MI_222 /DSC00200.jpg /DSC00201.jpg /photos_a_trier /DSC00251.jpg /DSC00252.jpg /Saint-Germain-en-Laye /5MI_333 /DSC00300.jpg /DSC00301.jpg /Essonne /Palaiseau /5MI_108 /SAM00400.jpg /SAM00401.jpg ``` | ``` /mydocuments/genealogy/atcs /Versailles /DSC00117.jpg /DSC00118.jpg /DSC00200.jpg /DSC00201.jpg /photo_a _trier /DSC00251.jpg /DSC00252.jpg /Saint-Germain-en-Laye /DSC00300.jpg /DSC00301.jpg /Palaiseau /SAM00400.jpg /SAM00401.jpg ``` |
| Example 1: the Photo section may contain only the number of the photo, i.e. the last digits of the name of the photo. City=Versailles Reference=5MI\_123 Photo=117 Note: in this example the viewer is looking for a photo whose name ends with "117" in the folder "Versailles" in the folder "5MI\_123" which is a sub-folder of "Versailles" and sub-folder of /mydocuments/genealogy/acts | Example 2 : - City=Versailles - Reference=5MI\_123 - Photo=DSC00117 Note: In this example the viewer looks for the photo whose name contains "DSC00117" in the folder "5MI\_123" which is a sub-folder of "Versailles" and sub-folder of /mydocuments/genealogy/acts. | Example 3: The Reference is optional. - City=Versailles - Reference= - Photo=DSC00200 Note: In this example the viewer searches for a photo whose name contains "DSC00200" in the whole folder of the commune "Versailles". | Example 4: the photo can be in any sub-folder of the city, for example the sub-folder "photos\_to\_sort". - City=Versailles - Reference=2E\_456 - Photo=DSC00251 Note: In this example, the viewer first searches for the photo in the subfolder of the city of Versailles containing the name of the reference 2E\_456 . If the folder corresponding to this reference does not exist, or if it does not contain the photo, it then looks for the photo in the other sub-folders of the city. |
| Example 5: the municipality is mandatory - City= - Reference= - Photo=DSC00117 Note: In this example the viewer cannot find the photo because the name of the city is mandatory and here it is missing. | Example 6 - PLAC=Versailles,78, Yvelines,,, - SOUR:PAGE=5MI\_123, DSC00117 Note : In this example, the viewer looks for the photo of the act in the folder "5MI\_123" which is a sub-folder of "Versailles" and sub-folder of /mydocuments/genealogy/acts. | Example 7: the reference is optional in the SOUR:PAGE tag. - PLAC=Versailles,78, Yvelines,,, - SOUR:PAGE=DSC00200 Note: In this example the viewer searches for a photo whose name contains "DSC00200" in the whole folder of the city "Versailles". | Example 8 : the SOUR:PAGE tag can only contain the number of the photo, i.e. the last digits of the name of the photo. - PLAC=Versailles,78, Yvelines,,, - SOUR:PAGE=117 Note : In this example the viewer is looking for a photo whose name ends with "117" in the "Versailles" folder. |
Register information can be copied to the dynamic tree using Drag and Drop . Thus it is not necessary to re-enter all the information of the register with an Ancestris editor to put it in your genealogy.
To copy, you must have both your Gedcom file open and your registers records, side by side. Take the example provided of the Bourbons and place the Bourbons dynamic tree on the left, and the Demo file of the Recording tool on the right open on the 'All' tab. We see that the acts in red are already filled in the Bourbons genealogy. [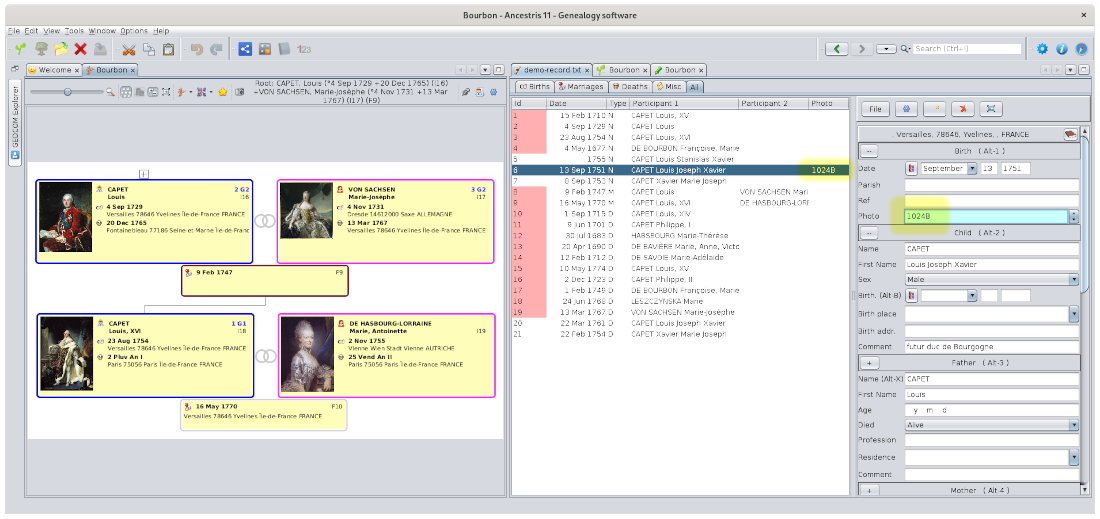](https://docs.ancestris.org/uploads/images/gallery/2020-09/en-registers-copy.png) #### Copy a birth certificate We will copy Louis Joseph Xavier CAPET's birth certificate of September 13, 1751, from the record of births to the marriage of his parents in the dynamic tree. It is not already present in the Gedcom because it is not highlighted in red. The photo of the birth certificate has been filled in in the photo above. It is highlighted in yellow. When we copy, the source will then be documented in the Gedcom file. Proceed this way to copy the act in the Gedcom: - click in the table on the birth certificate, - move it with the mouse by holding down the left button onto the family box dated February 9, 1747 in the tree and release the button.| [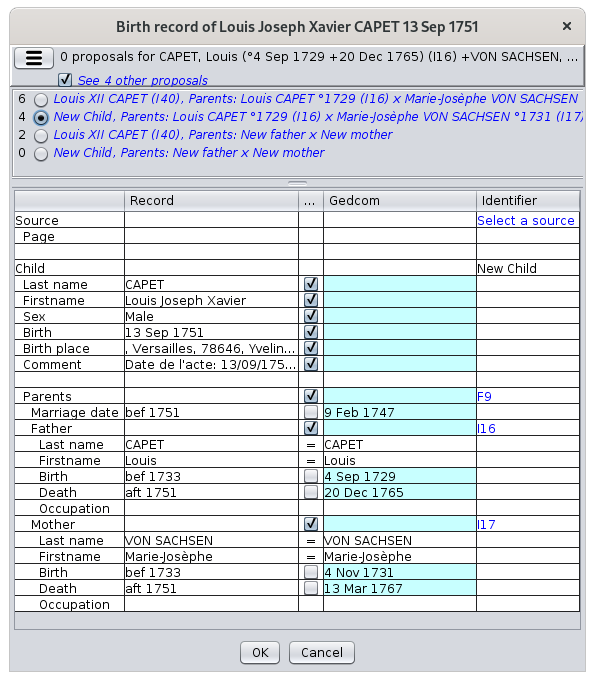](https://docs.ancestris.org/uploads/images/gallery/2020-09/en-registers-drag-n-drop-merge.png) | **Choosing the merge option** - Ancestris offers you a merge option and allows you to check a box to see all of them. - Several "radio buttons" allow you to select your merge option - An overview of the option gives you a summary of the matches and the entities that will be modified. **Choice of data to merge** - The data of the act are on the left - Gedcom data is on the right - The differences are in the blue boxes - Only the data checked in the central column will be copied to the Gedcom. - It is possible to uncheck the data that you do not want to copy. **Choice of identifiers** - The column titled Identifier specifies the entities impacted by the changes. - Clicking on an identifier selects the entity. - A click on "Select a source" allows you to choose the source previously defined in the Gedcom. In the example, a new individual will be created as a child of the F9 family. |
| [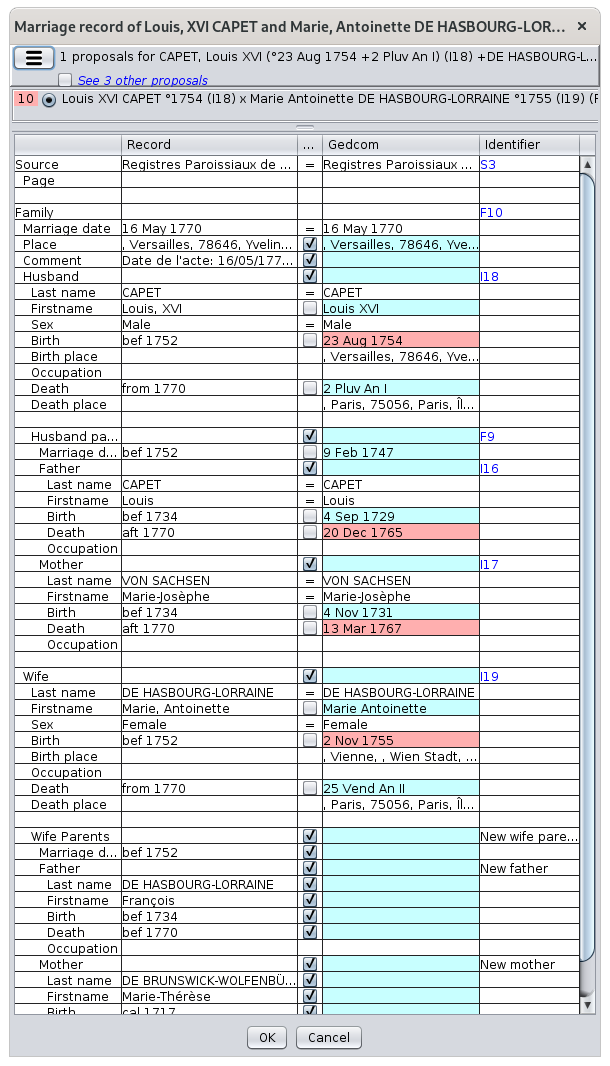](https://docs.ancestris.org/uploads/images/gallery/2020-09/en-registers-drag-n-drop-mariage-choices.png) | **Choosing the merge option** - Ancestris suggests to you the F10 marriage which already exists but you could check the box to see the 3 other proposals **Choice of data to merge** - Data in red already exists in Gedcom - Data in blue does not exist or is different - Missing data are pre-ticked. - It is possible to uncheck the data that you do not want to copy. - We note that the data for the wife's parents are all missing. They will therefore be created **Choice of identifiers** - The identifiers are already almost all filled in - Concerning the parents of the wife François DE HASBOURG-LORRAINE and Marie-Thérèse DE BRUNSWICK-WOLFENBÜTTEL, they will be added in the tree with the creation of a new family and two new individuals **Deduction of dates** - The dates of birth and death of the wife's parents are deducted from the data entered in the certificate. - An overview of the data in the Act column displays a tooltip that allows you to understand how these dates are inferred. - The rule for calculating the dates is shown below. |
| Birth certificate | Individual | ||
|---|---|---|---|
| IndiLastName IndiFirstName | INDI:NAME | Optional | replaces the name and lastname of the individual with the name in the record |
| IndiSex | INDI:SEX | Optional | replaces the sex of the individual with the sex in the record |
| IndiBirthDate | INDI:BIRT:DATE | Mandatory | adds (or replaces) the individual's date of birth with the date of birth from the IndiBirthDate record or, if the latter is blank, with the event date from the EventDate record. |
| IndiPlace | INDI:BIRT:PLAC | Optional | adds (or replaces) the place of birth. |
| IndiComment | INDI:NOTE | Optional | adds the comment in the note of the birth of the individual |
| IndiFatherLastName IndiFatherFirstName | father:NAME | Optional | If the individual already has parents, If the individual has no parents: searches for families with the same parents' names and with dates compatible with the date of birth (date of marriage, date of birth and death of the parents) If he has several, they are displayed in a list and the user chooses. If the individual does not already have an associated father in the gedcom: searches for individuals who could be the father (same surname and first name, date of birth and death consistent with that of the individual's birth). If he has several, they are displayed in a list and the user chooses. If no potential father is found, creates a new individual who will be the father and creates a family with the individual as a child. |
| IndiFatherOccupation | father:OCCU | Optional | |
| IndiFatherDead IndiFatherComment | father:NOTE | Optional | |
| IndiMotherLastName IndiMotherFirstName | mother:NAME | Optional | same algo as for father IndiFatherLastName |
| IndiMotherOccupation | mother:OCCU | Optional | same algo as for father's profession IndiFatherOccupation |
| IndiMotherDead IndiMotherComment | mother:NOTE | Optional | same algo as for Father IndiFatherComment |
| GeneralComment Witness1LastName Witness1FirstName Witness1Occupation Witness1Comment Witness2LastName Witness2FirstName Witness2Occupation Witness2Comment Witness3LastName Witness3FirstName Witness3Occupation Witness3Comment Witness4LastName Witness4FirstName Witness4Occupation Witness4Comment | INDI:BIRT:NOTE | Optional | These fields are concatenated and added in the note of the birth of the individual. |
| EventPlace | INDI:BIRT:SOUR | Mandatory | searches for the source associated with the common place of birth. Proposes to create a source if there is no corresponding source. |
| Cote | SOUR:REFN | Optional | |
| Photo | INDI:BIRT:SOUR:NOTE | Optional | |
| Parish | INDI:BIRT:SOUR:NOTE | Optional |
| Column | Birth | Marriage | Death | Miscellaneous | Comment |
|---|---|---|---|---|---|
| "ANCESTRISV4" | x | x | x | x | version of the format (mandatory) |
| CityName | x | x | x | x | city name |
| CityCode | city code | ||||
| CountyName | x | x | x | x | county name |
| StateName | x | x | x | x | state name |
| CountryName | x | x | x | x | country |
| ParishName | x | x | x | x | parish name |
| EventType | "N" | "M" | "D" | "V" | event type |
| EventTypeTag | ignoré | ignoré | ignoré | x | generic event type |
| EventTypeName | ignoré | ignoré | ignoré | x | description of generic event type |
| EventDate | x | x | x | x | event date |
| SecondDate | ignoré | ignoré | ignoré | x | date of insinuation or recording of the event |
| Cote | x | x | x | x | Register's reference |
| Freecomment | x | x | x | x | photo or folio number |
| Notary | ignoré | ignoré | ignoré | x | name of the notary |
| IndiLastName | x | x | x | x | Name of the : if N: new born, if M: spouse, if D: deceased, if V: speaker n°1 |
| IndiFirstName | x | x | x | x | firstname |
| IndiSex | x | x | x | x | sex |
| IndiBirthPlace | ignoré | x | x | x | place of birth or place of origin |
| IndiBirthDate | x | x | x | x | date of birth . For a birth it is by default the date of the event. |
| IndiAge | ignoré | x | x | x | age |
| IndiOccupation | ignoré | x | x | x | occupation |
| IndiResidence | ignoré | x | x | x | home |
| IndiComment | x | x | x | x | comment from the individual or speaker no. 1 |
| IndiMarriedLastName | ignoré | x | x | x | former spouse |
| IndiMarriedFirstName | ignoré | x | x | x | firstname |
| IndiMarriedDead | ignoré | x | x | x | deceased or not |
| IndiMarriedOccupation | ignoré | x | x | x | occupation |
| IndiMariedResidence | ignoré | x | x | x | home |
| IndiMarriedComment | ignoré | x | x | x | comment of former spouse |
| IndiFatherLastName | x | x | x | x | father's lastname |
| IndiFatherFirstName | x | x | x | x | firstname |
| IndiFatherAge | x | x | x | x | age |
| IndiFatherDead | x | x | x | x | deceased or not |
| IndiFatherOccupation | x | x | x | x | occupation |
| IndiFatherResidence | x | x | x | x | home |
| IndiFatherComment | x | x | x | x | comment for father |
| IndiMotherLastName | x | x | x | x | mother's lastname |
| IndiMotherFirstName | x | x | x | x | firstname |
| IndiMotherAge | x | x | x | x | age |
| IndiMotherDead | x | x | x | x | deceased or not |
| IndiMotherOccupation | x | x | x | x | occupation |
| IndiMotherResidence | x | x | x | x | home |
| IndiMotherComment | x | x | x | x | comment for mother |
| WifeLastName | ignoré | x | ignoré | x | wife (marriage) or witness n°2 (miscellaneous acts) |
| WifeFirstName | ignoré | x | ignoré | x | firstname |
| WifeSex | ignoré | ignoré | ignoré | x | sex |
| WifePlace | ignoré | x | ignoré | x | birthplace or orgine |
| WifeBirthDate | ignoré | x | ignoré | x | birthdate |
| WifeAge | ignoré | x | ignoré | x | age |
| WifeOccupation | ignoré | x | ignoré | x | occupation |
| WifeResidence | ignoré | x | ignoré | x | home |
| WifeComment | ignoré | x | ignoré | x | comment by the wife or speaker n°2 |
| WifeMarriedLastName | ignoré | x | ignoré | x | Ex-spouse of the woman or speaker n°2 |
| WifeMarriedFirstName | ignoré | x | ignoré | x | firstname |
| WifeMarriedDead | ignoré | x | ignoré | x | deceased or not |
| WifeMarriedOccupation | ignoré | x | ignoré | x | occupation |
| WifeMarriedResidence | ignoré | x | ignoré | x | home |
| WifeMarriedComment | ignoré | x | ignoré | x | comment by the woman's ex-spouse or speaker no. 2 |
| WifeFatherLastName | ignoré | x | ignoré | x | Father of the wife or of the speaker n°2 |
| WifeFatherFirstName | ignoré | x | ignoré | x | firstname |
| WifeFatherAge | ignoré | x | ignoré | x | age |
| WifeFatherDead | ignoré | x | ignoré | x | deceased or not |
| WifeFatherOccupation | ignoré | x | ignoré | x | occupation |
| WifefatherResidence | ignoré | x | ignoré | x | home |
| WifeFatherComment | ignoré | x | ignoré | x | father's commentary |
| WifeMotherLastName | ignoré | x | ignoré | x | Mother of wife or speaker n°2 |
| WifeMotherFirstName | ignoré | x | ignoré | x | firstname |
| WifeMotherAge | ignoré | x | ignoré | x | age |
| WifeMotherDead | ignoré | x | ignoré | x | deceased or not |
| WifeMotherOccupation | ignoré | x | ignoré | x | occupation |
| WifeMotherResidence | ignoré | x | ignoré | x | home |
| WifeMotherComment | ignoré | x | ignoré | x | mother's commentary |
| Witness1LastName | x | x | x | x | witness n°1 or godfather |
| Witness1FirstName | x | x | x | x | firstname |
| Witness1Occupation | x | x | x | x | occupation |
| Witness1Comment | x | x | x | x | comment from the witness or godfather |
| Witness2LastName | x | x | x | x | witness n°2 or godmother |
| Witness2FirstName | x | x | x | x | firstname |
| Witness2Occupation | x | x | x | x | occupation |
| Witness2Comment | x | x | x | x | comment from the witness or godmother |
| Witness3LastName | x | x | x | x | witness n°3 |
| Witness3FirstName | x | x | x | x | firstname |
| Witness3Occupation | x | x | x | x | occupation |
| Witness3Comment | x | x | x | x | witness's comment |
| Witness4LastName | x | x | x | x | witness n°4 |
| Witness4FirstName | x | x | x | x | firstname |
| Witness4Occupation | x | x | x | x | occupation |
| Witness4Comment | x | x | x | x | witness's comment |
| GeneralComment | x | x | x | x | general comment |
| Column | Birth | Marriage | Death | Miscellaneous | Description | Importing in Ancestris |
|---|---|---|---|---|---|---|
| "NIMEGUEV3" | x | x | x | x | Mandatory | |
| CityCode | x | x | x | x | ignored | |
| CityName | x | x | x | x | ||
| CountyCode | x | x | x | x | Ancestris uses CountyCode if CountyName is empty | |
| CountyName | x | x | x | x | ||
| EventType | "N" | "M" | "D" | "V" | Mandatory | Cannot be empty |
| Date | x | x | x | x | ||
| IncompletDate | x | x | x | x | ||
| Cote | x | x | x | x | ||
| Freecomment | x | x | x | x | ||
| EventTypeName | x | |||||
| EventTypeTag | x | |||||
| IndiLastName | x | x | x | x | ||
| IndiFirstName | x | x | x | x | ||
| IndiSex | x | x | x | |||
| IndiPlace | x | x | x | |||
| IndiBirthDate | x | x | x | |||
| IndiAge | x | x | x | |||
| IndiComment | x | x | x | x | ||
| IndiOccupation | x | x | x | |||
| IndiMarriedLastName | x | x | x | ex-spouse | ||
| IndiMarriedFirstName | x | x | x | |||
| IndiMarriedComment | x | x | x | |||
| IndiMarriedOccupation | x | |||||
| IndiFatherLastName | x | x | x | x | ||
| IndiFatherFirstName | x | x | x | x | ||
| IndiFatherComment | x | x | x | x | ||
| IndiFatherOccupation | x | x | x | x | ||
| IndiMotherLastName | x | x | x | x | ||
| IndiMotherFirstName | x | x | x | x | ||
| IndiMotherComment | x | x | x | x | ||
| IndiMotherOccupation | x | x | x | x | ||
| WifeLastName | x | x | ||||
| WifeFirstName | x | x | ||||
| WifeSex | x | |||||
| WifePlace | x | x | ||||
| WifeBirthDate | x | x | ||||
| WifeAge | x | x | ||||
| WifeComment | x | x | ||||
| WifeOccupation | x | x | ||||
| WifeMarriedLastName | x | x | ex-spouse | |||
| WifeMarriedFirstName | x | x | ||||
| WifeMarriedComment | x | x | ||||
| WifeFatherLastName | x | x | ||||
| WifeFatherFirstName | x | x | ||||
| WifeFatherComment | x | x | ||||
| WifeFatherOccupation | x | x | ||||
| WifeMotherLastName | x | x | ||||
| WifeMotherFirstName | x | x | ||||
| WifeMotherComment | x | x | ||||
| WifeMotherOccupation | x | x | ||||
| Witness1LastName | x | x | x | x | witness n°1 or godfather | |
| Witness1FirstName | x | x | x | x | ||
| Witness1Comment | x | x | x | x | ||
| Witness2LastName | x | x | x | x | witness n°2 or godmother | |
| Witness2FirstName | x | x | x | x | ||
| Witness2Comment | x | x | x | x | ||
| Witness3LastName | x | x | ||||
| Witness3FirstName | x | x | ||||
| Witness3Comment | x | x | ||||
| Witness4LastName | x | x | ||||
| Witness4FirstName | x | x | ||||
| Witness4Comment | x | x | ||||
| GeneralComment | x | x | x | x | ||
| RecordNo | x | x | x | x | register's number |
| Column | Birth | Marriage | Death | Miscellaneous | Comment |
|---|---|---|---|---|---|
| EventType | "birth" | "marriage" | "death" | "marriage contract" "will" | Event type (mandatory) |
| CountyCode | x | x | x | x | county code |
| CityName | x | x | city name | ||
| ParishName | x | x | x | x | parish name if there is more than one in the city |
| NotaryName | ignored | ignored | ignored | x | |
| Cote | x | x | x | x | |
| PhotoNo | x | x | x | x | photo number |
| Day | x | x | x | x | |
| Month | x | x | x | x | |
| Year | x | x | x | x | |
| IndiLastName | x | x | x | x | |
| IndiFirstName | x | x | x | x | |
| IndiSex | x | x | x | x | |
| IndiAge | ignored | x | x | x | |
| IndiPlace | ignored | x | x | x | |
| IndiComment | x | x | x | x | Writing: ancestris adds the date of birth, occupation and information on the former spouse (for a marriage, death or miscellaneous record). |
| IndiFatherFirstName | x | x | x | x | Reading: Ancestris uses the same name as the son (IndiLastName) |
| IndiFatherDead | x | x | x | x | |
| IndiFatherComment | x | x | x | x | Writing: Ancestris adds occupation |
| IndiMotherLastName | x | x | x | x | |
| IndiMotherFirstName | x | x | x | x | |
| IndiMotherDead | x | x | x | x | |
| IndiMotherComment | x | x | x | x | Writing: Ancestris adds profession |
| WifeLastName | ignored | x | x | x | |
| WifeFirstName | ignored | x | x | x | |
| WifeDead | ignored | x | x | x | |
| WifeAge | ignored | x | x | x | |
| WifePlace | ignored | x | ignored | x | |
| WifeComment | ignored | x | x | x | Writing: Ancestris adds the date of birth, profession and information on the former spouse (for a marriage, death or miscellaneous record). |
| WifeFatherFirstName | ignored | x | ignored | x | Reading: Ancestris uses the same name as the girl (WifeLastName) |
| WifeFatherDead | ignored | x | ignored | x | |
| WifeFatherComment | ignored | x | ignored | x | |
| WifeMotherLastName | ignored | x | ignored | x | |
| WifeMotherFirstName | ignored | x | ignored | x | |
| WifeMotherDead | ignored | x | ignored | x | |
| WifeMotherComment | ignored | x | ignored | x | |
| Heirs | ignored | ignored | ignored | x | heirs Reading: Ancestris adds this field in the general comment (GeneralComment) |
| Witness1LastName | x | x | x | x | witness n°1 or godfather |
| Witness1FirstName | x | x | x | x | |
| Witness1Comment | x | x | x | x | |
| Witness2LastName | x | x | x | x | witness n°2 or godmother |
| Witness2FirstName | x | x | x | x | |
| Witness2Comment | x | x | x | x | |
| GeneralComment | x | x | x | x | Writing: Ancestris adds the 3rd and 4th witnesses |
The datulator helps you determine the date of an event from the information in a register, a document, etc.
For example, it is often necessary to switch from the Republican calendar or Julian calendar to the Gregorian calendar, or vice versa. In the Datulator, you also have a precision range feature. ## Description ### Calendars The **Gregorian calendar** is the calendar used in most of the world. Designed at the end of the 16th century by a college of scientists under the direction of Christophorus Clavius to correct the secular drift of the Julian calendar, it bears the name of its instigator, Pope Gregory XIII. The starting point of the common era, the year 1, corresponds to the Anno Domini (Christian era), beginning approximately with the birth of Jesus Christ. The **Republican calendar**, or French revolutionary calendar, was created during the French Revolution, and was used from 1792 to 1806, as well as briefly during the Paris Commune (1871). The **Hebrew calendar** is a lunar-solar calendar composed of solar years, lunar months, and seven-day weeks beginning on Sunday and ending on Saturday, the Sabbath day. It takes as its starting point the beginning (Birechit) of Genesis, the first book of the Bible, which corresponds to the year-3761 of the Gregorian calendar. The **Julian calendar** results from the reform of the Roman calendar introduced by Julius Caesar in 46 BC. It is used in ancient Rome from -45 BC. It remained in use until its replacement by the Gregorian calendar at the end of the 16th century and, in some countries, until the 20th century. It is still used by the Berbers, in the monasteries of Mount Athos and by several National Orthodox Churches, including the Russian and Serbian Orthodox Churches. ### The datulator window The window allows you to enter the date to be converted in the first field. Two drop-down menus allow you to choose the source date calendar and the converted date calendar. The result is displayed in the "result" frame. The slider allows you to enter a year offset to be added to the result. A number of months can be entered to introduce an uncertainty. The result will then indicate an interval of dates whose duration will be the uncertainty. ## Usage Here are two examples of use. ### Example 1 :We find in our records an individual who died on 12 Floréal An IX at the age of 4 years and we are looking for his date of birth.
We enter 12 / Floréal / IX in the date and we specify the republican calendar, either in the calendar button at the left of the day, or in the first drop-down menu. By positioning the shift cursor on -4 we will have his date of birth. We can use the left and right keys of the keyboard to make changes of 1 year at a time. Since our individual may have been born at the beginning or end of a month and the records are not always accurate, we will introduce an uncertainty of ±1 month. Our individual was therefore born sometime between April 2, 1797 and June 2, 1797. [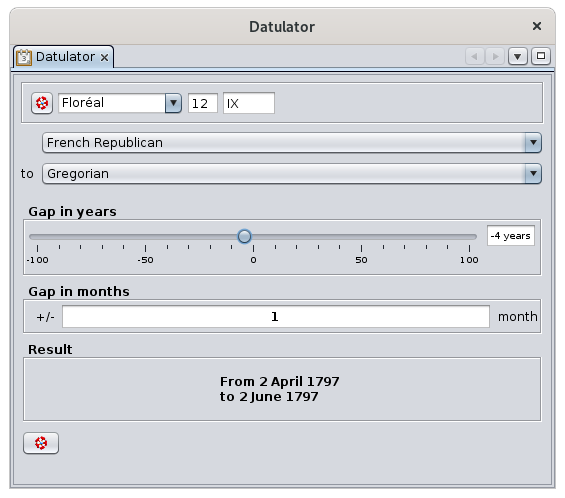](https://docs.ancestris.org/uploads/images/gallery/2020-09/en-datulator-example1.png) If you ask for the result in republican calendar, just change the output calendar and you should get this: [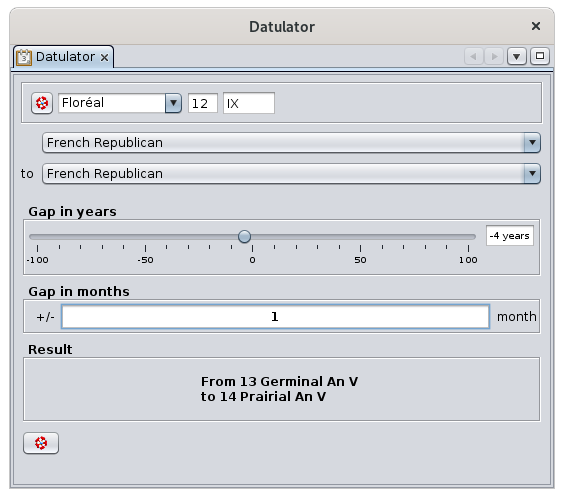](https://docs.ancestris.org/uploads/images/gallery/2020-09/en-datulator-example1-republican.png)If a result is not inside the Republican calendar and you ask for an output in the Republican calendar, it will not be possible and you will get the result in the Gregorian calendar.
### Example 2 :We find in our records a marriage dated May 1, 1752 with a 20 year old bride ; and we know that the bride died at the age of 61.
We enter 1 / 5 / 1752 in the date of the Gregorian calendar. We will position the shift cursor on +41 (= 61 - 20). Since our bride may have been born at the beginning or end of the year and the records are not always accurate, we will introduce an uncertainty of ±6 months. Our bride would thus have died between November 1, 1792 and November 1, 1793, this date being in the range of the republican calendar we can easily convert it. We then specify the republican calendar as the output calendar. [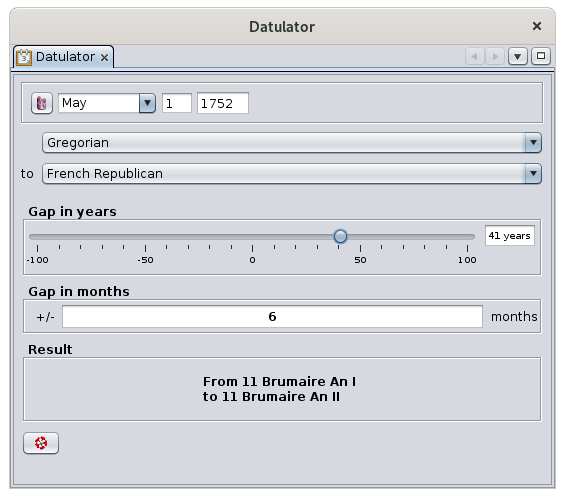](https://docs.ancestris.org/uploads/images/gallery/2020-09/en-datulator-example2.png) Other combinations are possible - these are just two examples, the uncertainty can be adjusted according to your experience with the hazards of the readings. ### Example 3 :Which day corresponds to the **12 Floréal Year I** with a manual method?
We use the button at the bottom left that displays the concordance between the Republican calendar and the Gregorian calendar. Sorry it is only available in French. We look at the column "12", the line "Floréal" and we find "May 1st". The **Year I** according to the first line would be 1792-1793. As May 1st in the table is after December 31st, we are in 1793. The correspondence is therefore **May 1st, 1793**. We can do the correspondence in the other direction. [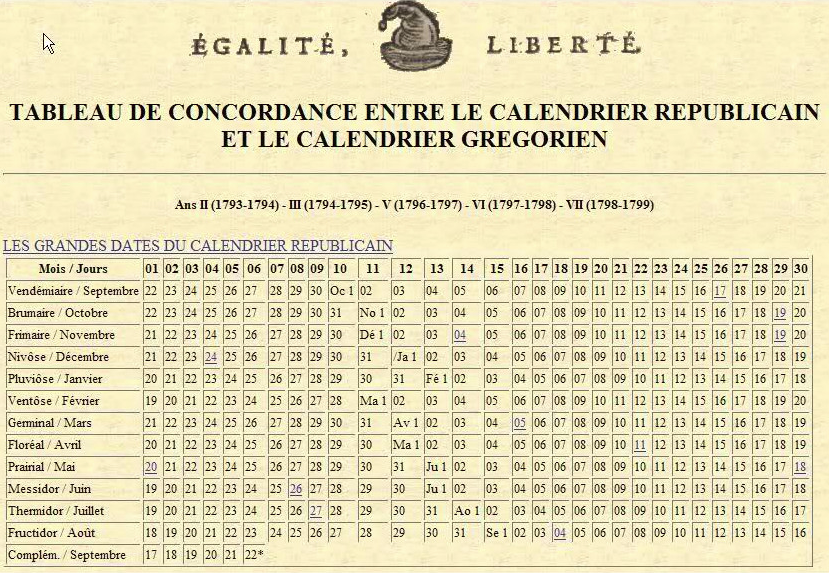](https://docs.ancestris.org/uploads/images/gallery/2020-04/datulette_calendrier_r%C3%A9publicain.png) Here is a translation of the months:| Vendémiaire | Vintage | September |
| Brumaire | Mist | October |
| Frimaire | Frost | November |
| Nivôse | Snow | December |
| Pluviôse | Rain | January |
| Ventôse | Wind | February |
| Germinal | Seed | March |
| Floréal | Blossom | April |
| Prairial | Meadow | May |
| Messidor | Harvest | June |
| Thermidor | Heat | July |
| Fructidor | Fruits | August |
Each entity number can be clicked. It selects the entity in the Ancestris views so you can see the details.
## Usage This tool covers two major needs. - a need for transmission and durability of your genealogy, since it enables you to respect the Gedcom standard as closely as possible - a need to control the data that has been entered Depending on the size of your genealogy file, a progress bar appears to perform the whole analysis. The report is then displayed.Click on the entity numbers to display them in the editors and correct any anomalies.
After correcting several anomalies, you can restart a new report that will present the remaining anomalies. You can also change the thresholds for triggering anomalies using the preference settings described below. ## Customization The controls to be performed are linked to the Preferences settings, Extensions pane, Validation tab. They are pretty much self explanatory so we will not provide more details at this stage. [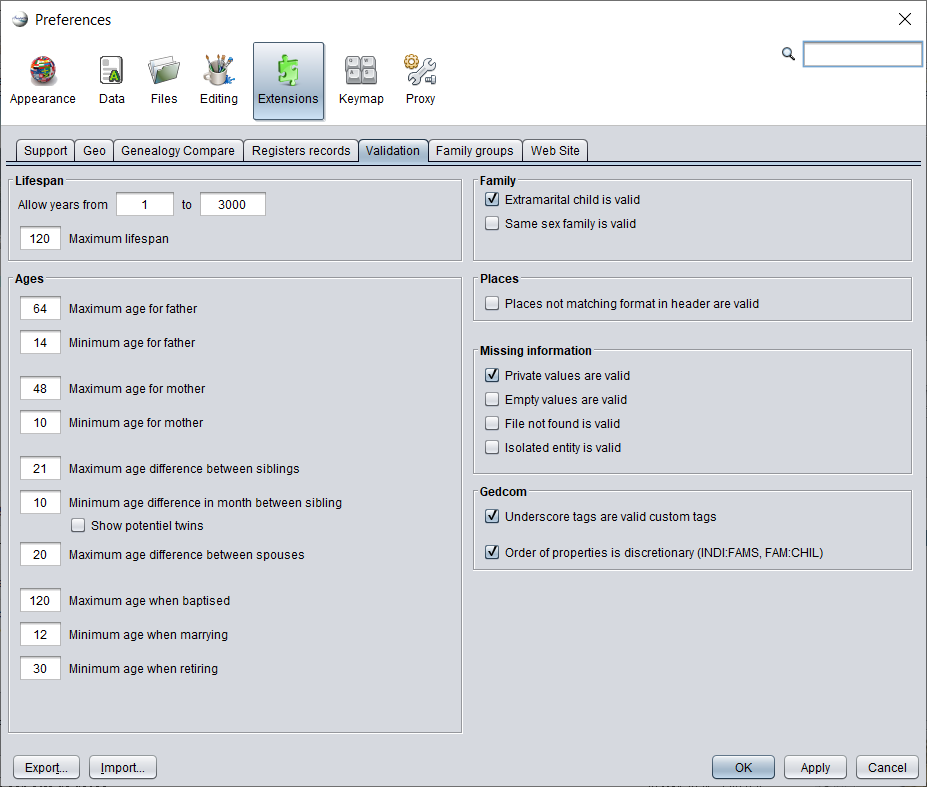](https://docs.ancestris.org/uploads/images/gallery/2021-04/en-validation-settings.png) # Merge duplicates This tool detects duplicate entities and allows you to merge them. [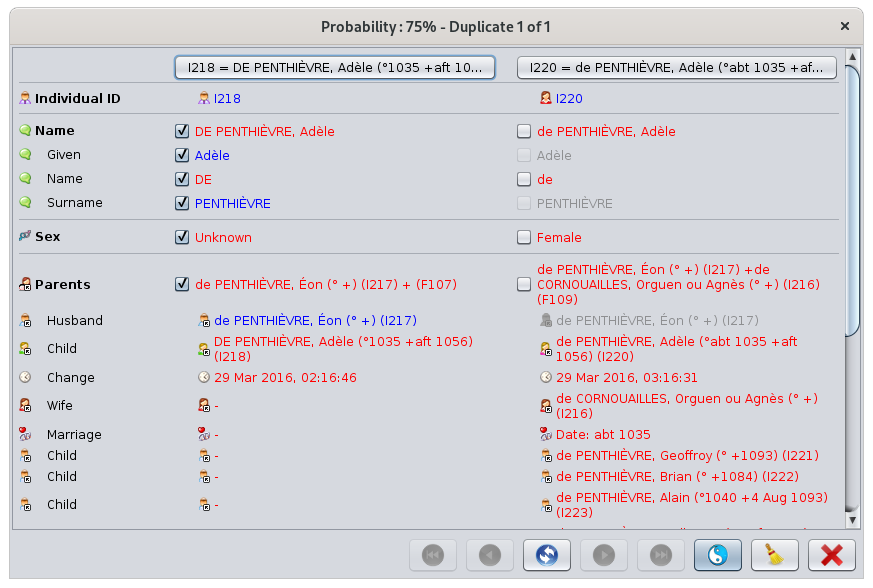](https://docs.ancestris.org/uploads/images/gallery/2020-09/en-merge.png) ## DescriptionThis tool gives the list of entities likely to be duplicates, from the most certain pair of duplicates to the least certain pair of duplicates, by category of entity. For each pair of similar entities, Ancestris gives you a similarity percentage.
This tool does not give 100% certain duplicates. Even a human being can sometimes have difficulty certifying that two individuals are the same or certainly not. Of course, one could stop at saying that two individuals with exactly the same surname, first name and date of birth are duplicates. But one of these pieces of information may be missing for one of the individuals, or it may be imprecise. What you are expecting from Ancestris is to alert you and say :"***It is not certain, but given the similarities in the information between these two individuals, they might be duplicates. And this is the level of confidence that they are***". Then it's up to you to decide. That is the purpose of this tool. ## Usage The duplicate merge tool works in two steps. First you specify the **detection criteria**, then you choose how to **merge duplicates**. ### Detection criteria When the tool is launched, the criteria selection window is displayed. [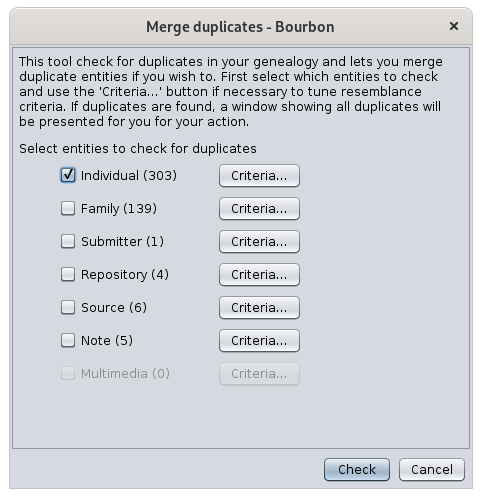](https://docs.ancestris.org/uploads/images/gallery/2020-09/en-merge-criteria.png) Check the entities for which you want to search for duplicates. Only the entities that are present in the Gedcom file are available. In the example above, as there are no media entities, the corresponding Criteria button is unavailable. Then check one by one the detection criteria for each category of entity. The most sophisticated criteria are those of individuals. Here they are. [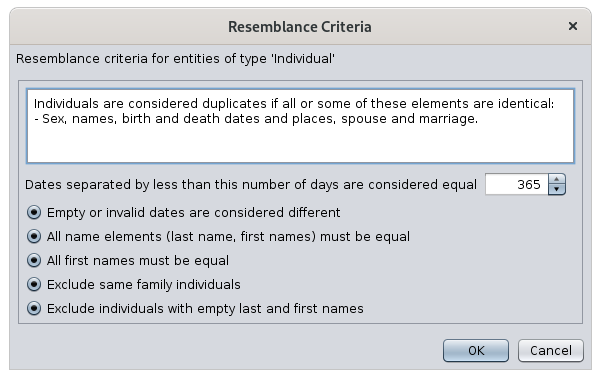](https://docs.ancestris.org/uploads/images/gallery/2020-09/en-merge-criteria-resemblance.png) The criteria are as follows. #### Identical dates When are two dates considered identical? When their difference in number of days is close or zero. If you indicate 365 days for example, i.e. 1 year, two dates will be equal if their difference is less than a year. If you indicate 30 days, two dates will be equal if they differ by less than a month. #### Empty or invalid dates If a known date is compared to an unknown date, Ancestris will consider them different. #### Name elements Forces all elements of the name to be identical. Conversely, can be identical if only some elements of the name are identical. #### First names Forces all first names to be identical. Conversely, can be identical if only some first names are identical. #### Exclusion of individuals from the same family Individuals from the same sibling or parent-child relationship are not compared. #### Exclusion of individuals without first or last name Individuals without first or last names are not compared. The criteria for other entities are either a sub-part of these criteria or are not modifiable. ### ### Merge window After starting the search for duplicates, the following window appears. [](https://docs.ancestris.org/uploads/images/gallery/2020-09/en-merge.png) #### Window The title of the window indicates the duplicate pair number displayed and the confidence that the two entities of this pair are in fact the same, and therefore to be merged. The two entities of the supposed duplicate pair are in the two columns. A button allows to select each of the entities in the editors for more details. For each property of the entities, the window displays the values of the property for each of the two entities of the supposed duplicate. In red are displayed the values that are different. In blue are displayed the identical values for the left entity, in grey for the right entity.The purpose of the comparison is to merge the right entity into the left one.
For this purpose the check boxes select the information of each entity to keep after merging. The buttons at the bottom navigate within the duplicate pairs, merge them or ignore them. #### Toolbar [](https://docs.ancestris.org/uploads/images/gallery/2020-05/Doublons_Choix_Boutons.png) ##### Go to first duplicate Button Displays the first duplicate in the order of the confidence index, i.e. the most likely duplicate. ##### Go to previous duplicate Button Displays the previous duplicate. ##### Swap Left and Right Entities Button Swap the left and right entities in order to merge the two entities on the left one. This is useful if most of the information to be kept after the merge is on the right hand side. ##### Go to next duplicate Button Displays the next duplicate. ##### Go to last duplicate Button Displays the last duplicate in the confidence index, therefore the least likely duplicate. ##### Remove duplicate Button Removes the potential duplicate from the displayed list. If the duplicate search is restarted, it will reappear. ##### Close Button Closes the window. #### #### Merger By clicking the Merge button, the left entity is removed from the Gedcom file and the information checked on the right is added to the left entity. For information that can only exist once (e.g. birth), it is only possible to keep the information from one of the two entities. As soon as the merge is done, the window displays the same duplicate with the result of the merge so that you can check that everything has been kept as you wanted. You can then move on to the next duplicate. ## Customization The personalization elements are the criteria. The criteria used are stored for the next time. There is no other customization option. # Common ancestors This tool identifies the **common ancestors of two individuals** in the genealogy and displays the corresponding lineages. [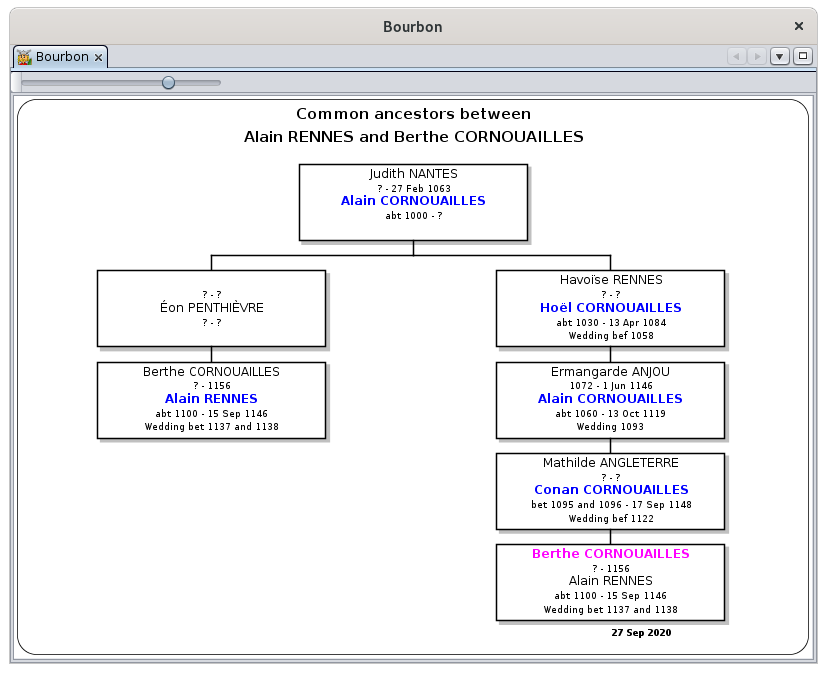](https://docs.ancestris.org/uploads/images/gallery/2020-09/en-common-ancestors.png) ## Description For each common ancestor found between two individuals, a result window shows you the corresponding lineages. The common individual is in the middle at the top, and the two lineages are on either side. Men are in blue, women in pink. You can zoom in or out with the cursor button at the top left, or with the mouse wheel. You can export the result to a file. ## Usage The Common Ancestors search tool works in two steps. First you specify the two individuals for whom you wish to identify possible common ancestors, and then you display the results. The indication of the individuals is done via the following window. [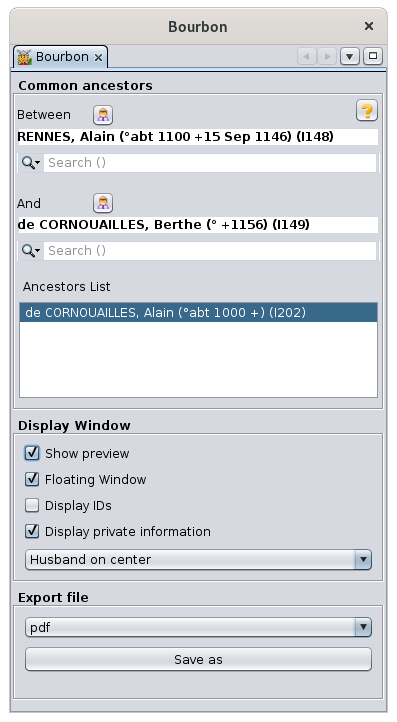](https://docs.ancestris.org/uploads/images/gallery/2020-09/en-common-ancestors-individuals.png) Enter both individuals in the two search fields above, and their names will appear in bold in the white fields above. There are two ways to indicate an individual. - Either by clicking on the button [](https://docs.ancestris.org/uploads/images/gallery/2020-05/Anc%C3%AAtres_Communs_Bouton.png) which will indicate the individual displayed in the Ancestris views. - Or by starting to type his name, which will bring up a drop-down menu with the list of corresponding individuals. Once the individuals are indicated, the calculation of common ancestors is done immediately. All the common ancestors found are displayed in the list in the center. Click on one of the common ancestors to see the result, of the type shown at the top of the page. In the result window, it is possible to put either the husband or the wife in the center of each frame. The dropdown menu allows you to export the displayed result in several file formats. Press the Save As button to export the result. ## Customization There is no customization element in this tool. # Lists and reports This function launches the **Ancestris reports**. [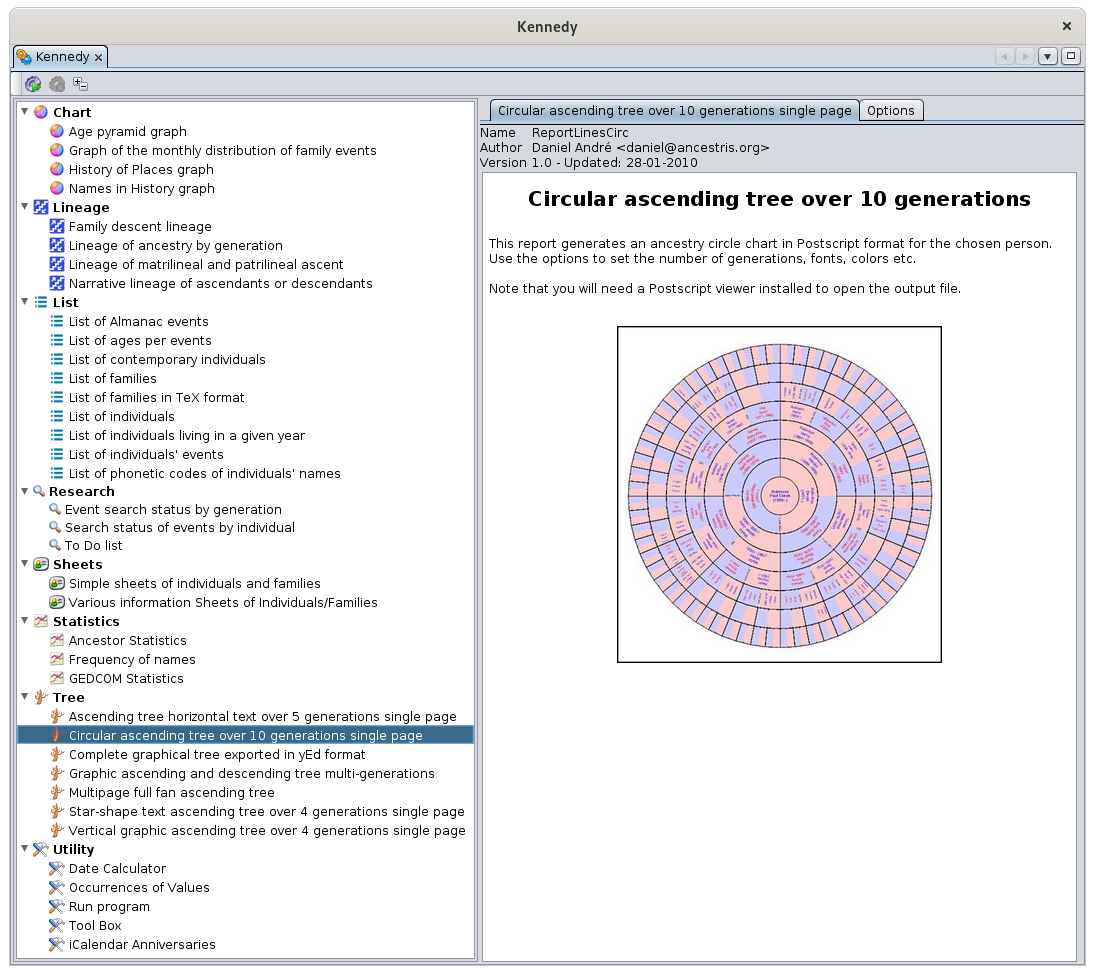](https://docs.ancestris.org/uploads/images/gallery/2020-09/en-reports-and-tools.png)Some reports can be run directly from the Ancestris [Menu, Menu/Tools/Quick Reports](https://docs.ancestris.org/books/user-guide/page/tools-menu#bkmrk-commande-rapports-di "Tools Menu"). They are: **Quick List**, **Family Group** and **Close Relatives** reports.
## Description This window lists all available reports on the left, and the explanation of the selected report is on the right. The toolbar allows you to launch the selected report or change the layout of the list. ### Toolbar [](https://docs.ancestris.org/uploads/images/gallery/2020-09/en-reports-and-tools-menu.png) #### Start Button This button starts the selected report. Make sure you have set your launch options beforehand. #### Stop Button This button is used to stop a report that would take too long to run. Indeed, depending on the size of your genealogy, some reports may take time to produce the result. #### Sort List Button This button toggles the list from a category list to an alphabetical list and vice versa. ### Reports List The reports in the list are sorted by category: charts, lineages, lists, research, etc. When a report is selected, its **description** and launch **options** appear on the right hand side in the corresponding two tabs.This list includes reports from several contributors and we gratefully thank them. The reports were originally the first way for each Ancestris user to meet specific needs. It is always possible to make your own reports in Java programming if you feel like it. We will help you make your first attempts. Check out the [contribution pages](https://docs.ancestris.org/books/contribution/chapter/develop-the-software "Contribution").
One of the consequences is that the reports might be different from one another, and the output formats may depend on each report. Therefore, it is important to read the description of each one. ### Description of a report The description of the report specifies the author and the date of creation. In general, you will find an illustration, a description and mainly the explanation of the launch options. ### Report Options This tab allows you to modify the launch options. Some reports have a lot of options. If the options or their explanations are not explicit enough, try to run it on a small amount of data to test the output. ## Usage Reports allow you to visualize your genealogy from different angles, make analyses, or even extract data from it.Did you know ? Ancestris has contributed to health science. In 2009 and 2010 the Ancestris team collaborated with Nadine Pellen, a cystic fibrosis researcher. Thanks to algorithms developed for the occasion in Ancestris, she was able to succeed in her research by manipulating 250 family trees and 258,000 individuals. On March 18, 2013, she published "Cystic fibrosis as an inheritance".
For her thesis, Nadine Pellen used a report that we produced quickly and specifically for her to codify the ancestry of patients carrying the cystic fibrosis gene and to produce a file from which she was then able to carry out all the analyses. ### Launching a report A report can be started in several ways. - From this window: **Lists and reports** from the [Menu / Tools](https://docs.ancestris.org/books/user-guide/page/tools-menu "Tools Menu"). - From the context menu "[Run a report](https://docs.ancestris.org/books/user-guide/page/context-menu#bkmrk-outils-et-ex%C3%A9cution- "Context Menu")". A report can deal with all the individuals in a genealogy (list of acts to be researched, age pyramid, etc.) or focus on a particular individual (ancestry report). When you launch a report from the **List and reports** window, you can sometimes choose the individuals on which you want to run the report if it is available in the options. When you launch the report from the **Context Menu**, the menus expand to offer you to launch the report for the whole genealogy or only for the entity you clicked on. [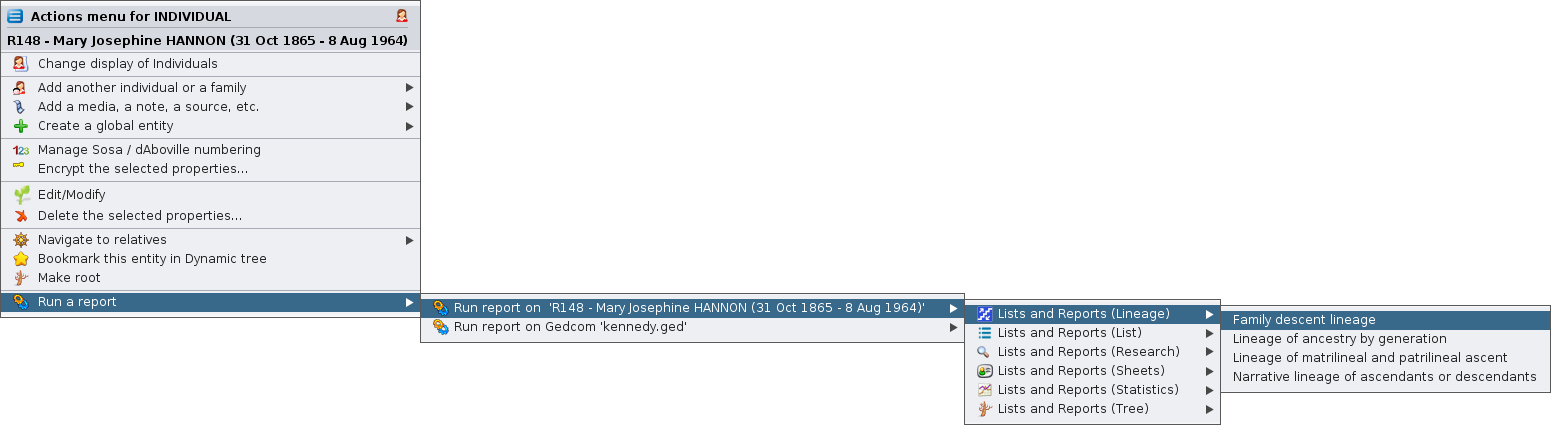](https://docs.ancestris.org/uploads/images/gallery/2020-09/en-reports-and-tools-context-menu.png) The following expanding sub-menus are the same reports that you find in List and Reports, arranged by category.Since the documentation of each report is included in its description, we do not document them again in this page.
Only complex reports that require further explanation will be detailed in this online documentation. This is the case of the [Information Sheets of Individuals/Families report](https://docs.ancestris.org/books/user-guide/page/information-sheets-of-individualsfamilies "Information Sheets of Individuals/Families"). It is described in a dedicated page. ## Tutorial There is a tutorial on printing trees from the reports list. It is in French and in PDF format. You can download it [here](http://www.ancestris.org/compteur_dl.php?/dl/pub/ancestris/docs/B-A_BA_Imprimer_son_arbre.pdf). # Information Sheets of Individuals/Families This report produces **summary sheets of individuals or families, trees, narrative sheets**, in a totally customizable way. ##### Individual sheet of the standard model [](https://docs.ancestris.org/uploads/images/gallery/2020-09/en-information-sheets.png) ##### Family sheet of the standard model [](https://docs.ancestris.org/uploads/images/gallery/2020-09/en-information-sheets-family.png) ## The Philosophy of this report The philosophy of this report is to allow each user to create customized sheets, both for the information to be included and for the layout. To make this as simple as possible, this report is therefore based on templates that the user can modify. The current version offers many different templates. The templates consist of several editable files that are located in the user directory.This report is also called the **Gedart Report**. Gedart is an acronym meaning "**GEnealogical Data Analysis and Report Tool**". In the word "gedart" we also have two components: GED and ART, i.e. presenting genealogical data in an artistic way or "use your artistic talents on your genealogical data".
## How to launch the report 1\. This report can be launched either from the [Lists and Reports window](https://docs.ancestris.org/books/user-guide/page/lists-and-reports-%28l%29 "Lists and reports") to generate all the records of the entire genealogy, [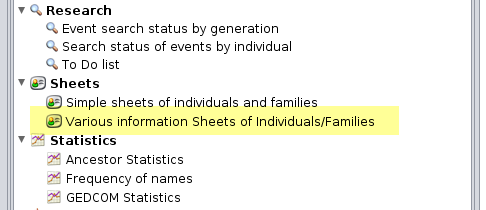](https://docs.ancestris.org/uploads/images/gallery/2020-10/en-gedart-launch.png) or from a given individual or family by right-clicking and using the [Context menu](https://docs.ancestris.org/books/user-guide/page/context-menu#bkmrk-outils-et-ex%C3%A9cution- "Context Menu"), to manage only the record of a single individual or family. When you launch this report from the [Lists and Reports window](https://docs.ancestris.org/books/user-guide/page/lists-and-reports-%28l%29 "Lists and reports"), Ancestris runs the reports with the selected individual or family and the close relatives. If the [Advanced search results](https://docs.ancestris.org/books/user-guide/page/advanced-search "Advanced search") includes individuals, they are used instead.**Do not run this report on a large genealogy.** Run this report i**ndividual by individual**, or **family by family** ideally, or **on a small number of individuals**. The generated html file would have a size that your browser would not be able to handle and you would saturate your computer's memory. A warning message will alert you if the size seems too large.
2\. Then, in the options of the report, make sure that the options meet your needs and choose the template from the first "Used model" option. This drop-down menu lists all the templates available. This is where templates that you can create yourself should also appear. [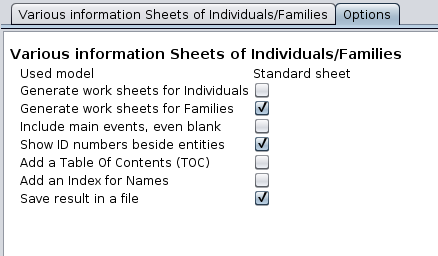](https://docs.ancestris.org/uploads/images/gallery/2020-09/en-information-sheets-options.png) The checkboxes are self-explanatory. 3\. Once you have chosen the options, **launch the report like the others using the "Start Report" button**. The report asks you for an output directory and file name to save the report. The report execution window appears and displays "Completed" if everything went well. Then your browser opens and displays the result. ## Models provided The models - or templates - provided will give you a good idea of what can be produced as a result. ### Ancestors treesThe WebBook works with the Map View if you want to generate a map.
## Navigation in the generated pages The pages generated constitute the sections of a "web book". Many sections are accessible from the home page and part of the content can be customized. **Lastnames:** This section lists the surnames and their frequency of appearance in the family tree. **Individuals list**: This section lists all the individuals in the tree in alphabetical order. **Individuals details**: This section gives a detailed description of all the individuals. For each individual, there are details about birth, marriage and other events. Details also include grandparents, parents, half-brothers and half-sisters, marriages, children, relationships (godparents, godmother, witnesses, etc.), and notes. This section also displays up to five photos or media related to each individual or their marriage(s). For each event a source icon allows you to see if a source exists. Simply click on the icon to see it. The images and media of the sources are not displayed in this section but in the **sources** section. **Sources**: The first page of this section displays the list of all the sources of the genealogy. The following pages give the details of each source. The source details include, where available, the text of the source and the images and media of the source and associated individuals and families. If the media is not an image then the document is considered to be of a different nature and an image representing a media file is displayed. Clicking on the image brings up the source document in its original size or launches the media (sound, video, etc). **Photos and other media**: The first page of this section displays a list of all the media in the genealogy that are associated with individuals and families. The following pages give the images of these media in the form of a photo album. This section does not contain the source material. If the media is not an image then the document is considered to be of another nature and an image representing a multimedia file is displayed. Clicking on the image brings up the source document in its original size or launches the media (sound, video, etc). If the media is not found, an image indicates this, allowing you to rectify your genealogy if necessary. **Geo map**: This section displays a geographic map with the location of all the cities identified in the family tree. This map is interactive and you can zoom in, show ancestors or cousins, birth, marriage or death, or events between two given years. By clicking on a city, you will see the main information about the events that took place there. These maps only work if the coordinates of the locations exist and are correct. For this, it is recommended to check the [Geographic map view](https://docs.ancestris.org/books/user-guide/page/geographic-map "Geographic map"). **Cities list**: This section gives the list of cities where at least one event in the family tree took place. **Cities details**: This section details for each location all the events that took place there. If you have generated the map, a small icon may show you the location of the city on the map. **Family Calendar**: This section lists the days of the year when at least one event in the family tree took place. **Calendar Details**: This section details for each day of the year all the events that took place there. **Statistics**: This section presents the frequency of surnames, places and days of the year, from the most to the least frequent. **Inbreeding degree**: This section presents the inbreeding ratio of the selected main individual. **Ancestors List**: This section presents the ancestors of the selected main individual. The ancestors are displayed in ascending order of [Sosa number](https://docs.ancestris.org/books/user-guide/page/generate-sosa-numbers#bkmrk-g%C3%A9n%C3%A9ralit%C3%A9s "Generate Sosa numbers"). **Individuals search**: This section is a tool to search for individuals in your family tree using a set of criteria. ## Web book generation wizard The wizard assists you to customize the pages of the Web book through 7 panels. At the end, it shows you the log of the generation. ### Welcome page This panel customizes the Welcome page of your family tree book. Hovering over a field displays a tooltip explaining its role. [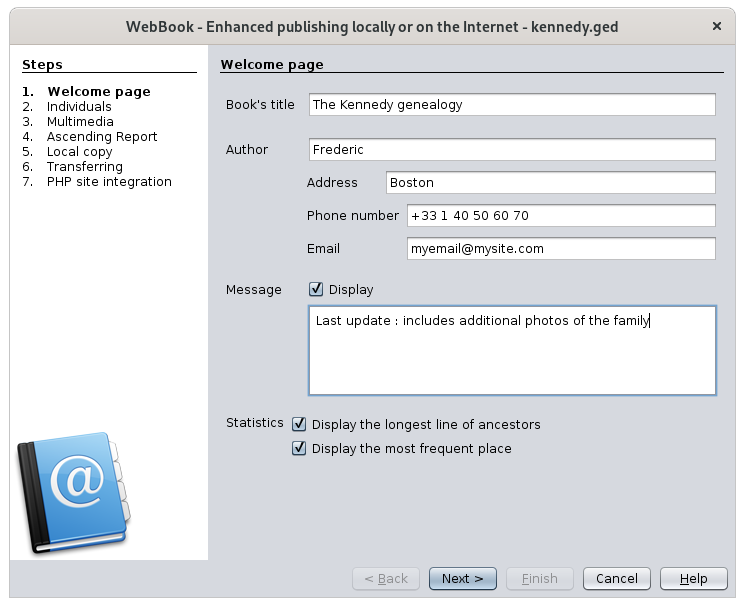](https://docs.ancestris.org/uploads/images/gallery/2020-09/en-webbook-1.png) - **Book's title**: title of your Genealogy book. It appears on the home page and in the title bar of the browser. - **Author**: name of the author of your Genealogy. - Address: address of the author. - Phone number & Email: contact information of the author. - **Message**: check the box and write a message to display it at the beginning of the home page. - **Display the longest line of ancestors**: display information about the longest ancestor line in your Genealogy. - **Display the most frequent place:** display this statistic on the home page. ### Individuals [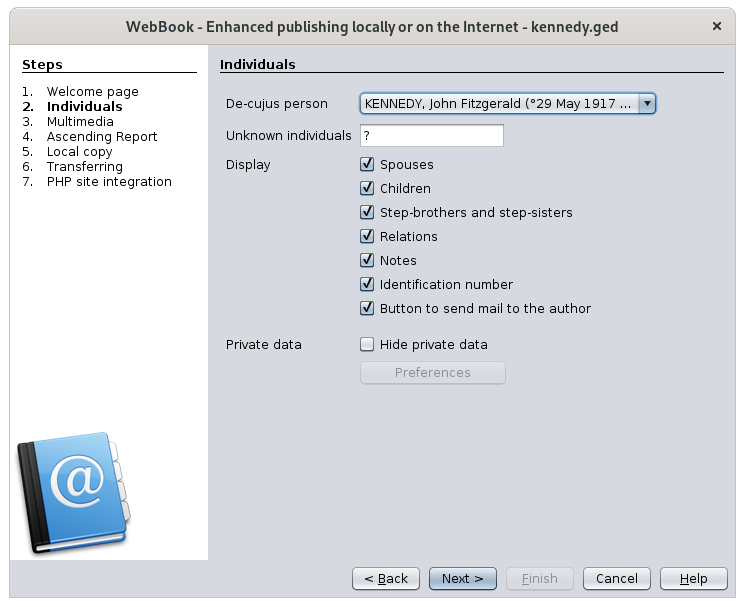](https://docs.ancestris.org/uploads/images/gallery/2020-09/en-webbook-2.png) - **De-cujus person**: main individual who will be accessible from the home page, and from whom the longest line of ancestors and the ancestor report will be built. - **Unknown individuals**: This is used to designate a person whose first and last names are unknown (example: you can put the word "unknown" in this field). - **Display:** information to display in the individuals details sections** ** - Spouses: display spouses information - Children: display children underneath the family information - Step-brothers and step-sisters: display step-brothers and step-sisters. These are referred to as uterin or consanguineous siblings. - Relations: display the relationships of the individual (events' witnesses, godparents, etc.) - Notes : add the notes associated with individuals and families. - Identification numbers: adds Ancestris ID numbers after the person's name. - Button to send mail to the author: display a "send email" icon at each individual section so that the visitor can easily send an email to the author about this individual. - **Private data**: - Hide private data: hides data defined in the [privacy preferences](https://docs.ancestris.org/books/user-guide/page/preferences#bkmrk-onglet-donn%C3%A9es-priv%C3%A9 "Preferences"). - Preferences: takes you to the privacy preferences to change them if necessary for the Web book - On a PHP site, private data will be generated but hidden ; a profile php function will have to exist in the site. - On an html site, data is static and private information will not be generated at all ### Multimedia [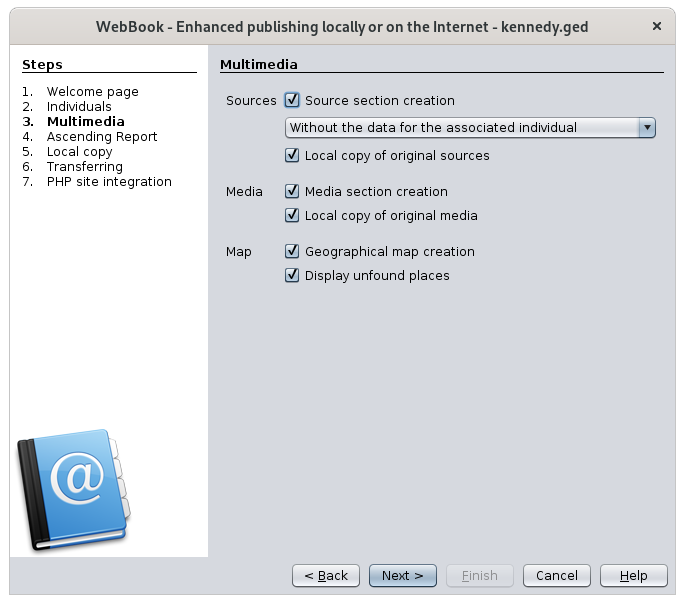](https://docs.ancestris.org/uploads/images/gallery/2020-10/en-webbook-3.png) - **Sources** - Source section creation: add a section to access sources. - Drop-down menu: choose how you want sources to be displayed : with the individual information only, with the text of the source and with the media. - Local copy of original sources: copy the original documents to your destination directory (local or website). Otherwise, file links are used. It is recommended not to select this option if the total size of your documents is large. If you later want to have these documents on your website, you can always replace the link files with smaller size files using the copy function of your system. - **Media** - Media section creation: add a section to access media. - Local copy of original media: copy the original media files to your destination directory (local or website). Otherwise, link files are used. This option is similar to the source option described above. - **Map** - Geographical map creation: add a section to display of map of events. - Display unfound places: display markers for cities whose coordinates were not found. Markers will appear in the middle of the Atlantic Ocean ### Ascending Report [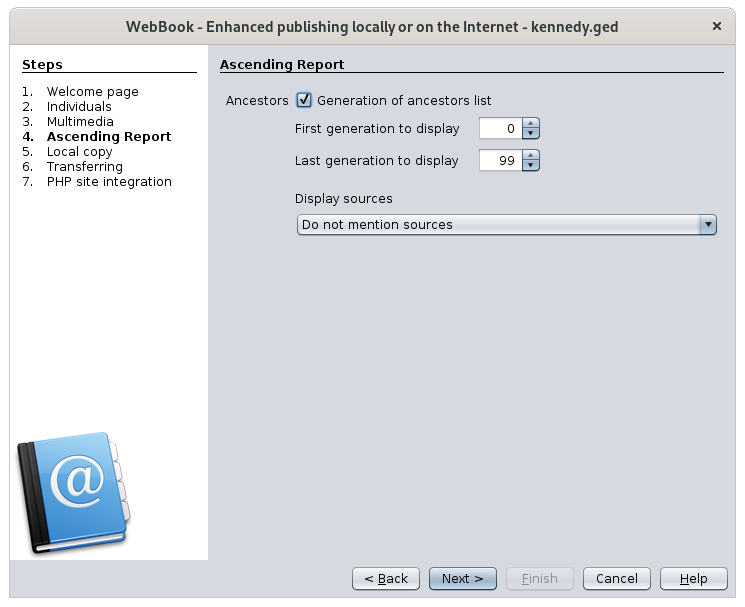](https://docs.ancestris.org/uploads/images/gallery/2020-09/en-webbook-4.png) - **Generation of ancestors list**: add the ancestor report using the De-cujus individual as the root. In this case you will be asked for the following options when generating this section - First generation to display: generation number from which the ancestors list will start. - Latest generation to display: generation number to which the ancestors list will stop. - Display sources: choose if and how to display sources in the ancestors report. ### Local copy [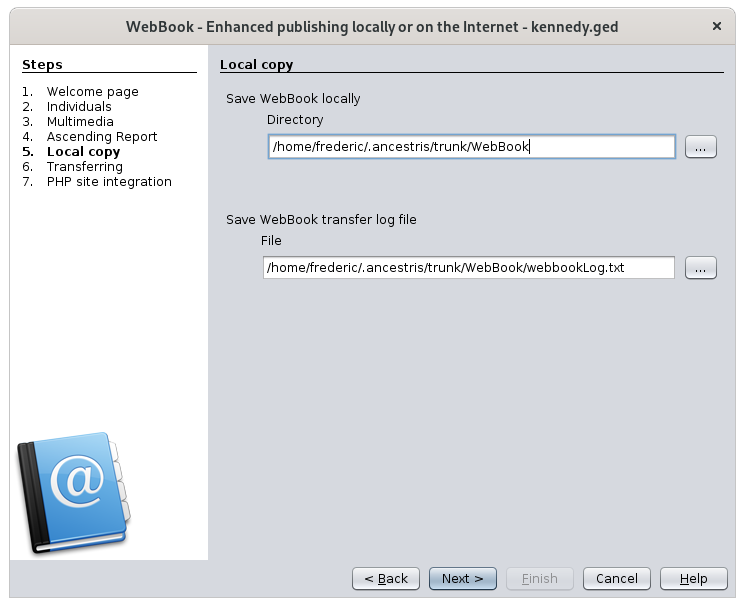](https://docs.ancestris.org/uploads/images/gallery/2020-09/en-webbook-5.png) - **Save WebBook locally**: specify the directory where the WebBook will be located on your disk. It is this directory that you will consult locally with an internet browser if you do not want have your genealogy on the Internet. If you want to upload it onto an Internet web site, the content of this directory will be uploaded. This is an option on the next panel.Watch out! This directory must be empty, otherwise the documents it contains will be deleted.
- **Save WebBook transfer log file**: indicate the directory where the WebBook creation log report will be located. It will contain the step-by-step creation and possible errors. ### Transferring - optional [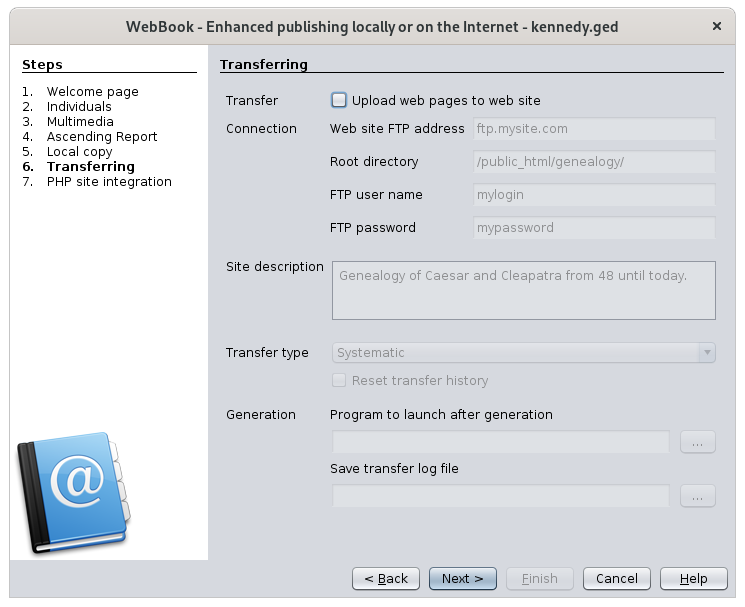](https://docs.ancestris.org/uploads/images/gallery/2020-09/en-webbook-6.png)If you only want to generate the pages locally, uncheck the first check box and simply click **Next**.
- **Upload web pages on web site**: uploads the pages that were saved locally on a website of your choice. You will need to provide additional information to enable the upload. These are the following options. If you choose to upload the pages on a website, the report will ask you to fill in the name of a log file. This file will contain a complete list of the uploaded files. - **Website FTP address**: address of your FTP site. Ex: ftp.mysite.myinternetprovider.com - **Root directory**: target directory where the pages must be uploaded. ex: /home/ - **FTP user name**: login to be used to access the FTP site. - **FTP password**: password to access the FTP site. - **Site description**: the sentence you will put here will appear in the headers of the html pages created as "meta name - Description". This element is important, because robots, search engines, will use this to index your pages. - **Transfer type**: allows you to improve the upload time. For example, if a photo of an ancestor is generated in the WebBook but it is identical to the one previously uploaded, there is no need to upload it again. - Drop-down menu: three options are possible: transfer all locally generated files to the server, even if they have not changed; transfer only those that have changed; or transfer those that have changed and also delete from the server those that are no longer generated. - Reset transfer history: restart file transfers from scratch. This will mean that all files will be systematically uploaded the next time they are transferred. The registry retains the details of the previous uploads and therefore allows you to determine which of the newly generated files need to be uploaded again. As long as you only use the WebBook to upload your pages, you should not need to reset the registry. However, if you sometimes use another FTP client, this registry may need to be completely refreshed, which is done by checking this option. - **Program to launch after generation**: name of a executable program to launch at the end of the WebBook creation. If the first character is '0' then this option is ignored. Launching a program at the end can be useful if there are still other things to do on your site to finalize its update. - **Save transfer log file**: directory where the upload log report will be saved. This log report shows the results of the uploaded pages. ### PHP site integration - optional [](https://docs.ancestris.org/uploads/images/gallery/2020-10/en-webbook-7.png)If you only want to generate the pages locally, uncheck the first check box and simply click **Finish**.
This part is technical and requires to know the principles of a PHP site including very precise page structures. - **PHP site**: if you want to leverage the fact that your site is written in PHP - **Codes:** username and password used to view private information. - **Existing site**: check this box if the genealogy pages are integrated in a larger site, and must then respect the same headers and footers for example - **Private data**: Indicate here the name of the PHP function that will test the codes for private data. - **Scripts**: Indicate here the PHP scripts corresponding to the different components of your PHP website ### Result of the creation of the pages Ancestris displays the [Output window](https://docs.ancestris.org/books/user-guide/page/window-menu#bkmrk-sortie "Window Menu") at the end of the process. You will see each of the two logs: creation of the pages and transfer of the pages if you asked for the upload.. Here is an example of a successful pages creation. [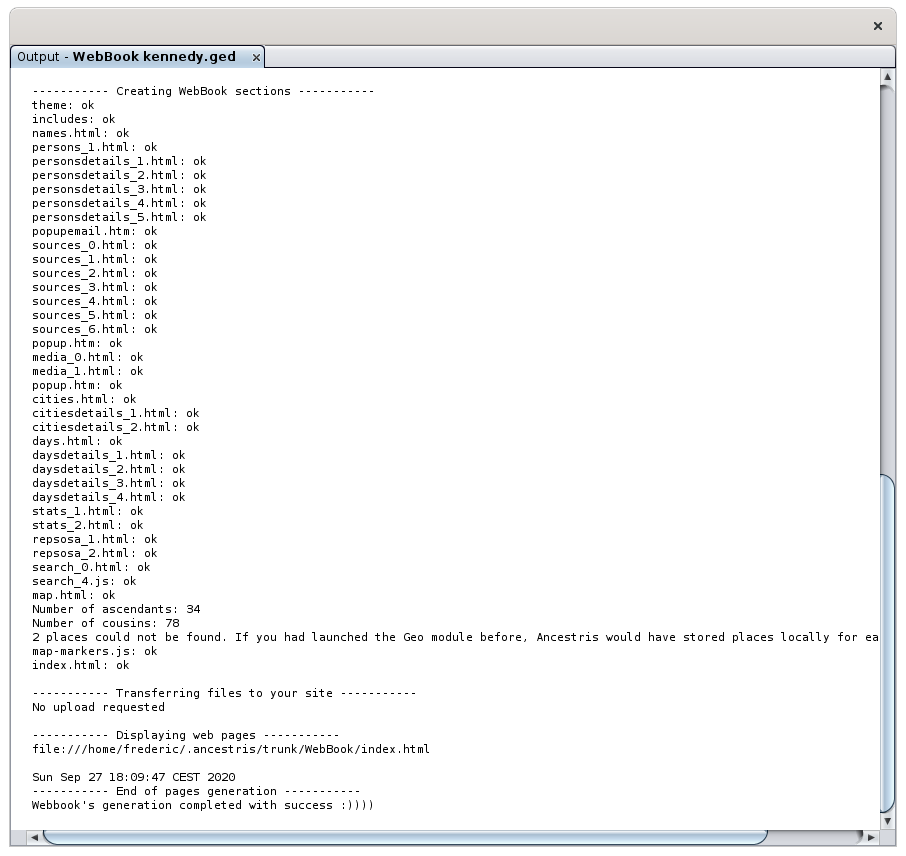](https://docs.ancestris.org/uploads/images/gallery/2020-09/en-webbook-log.png) ### Result of the transfer Here is an example of an unsuccessful transfer. [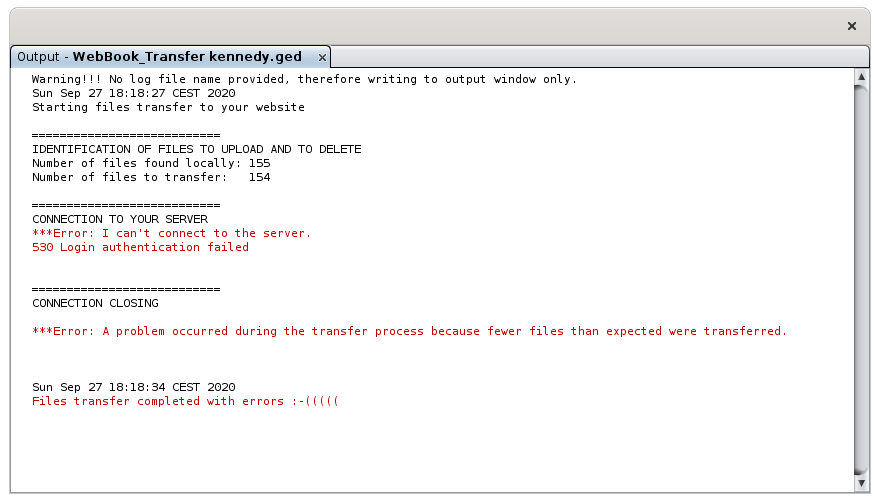](https://docs.ancestris.org/uploads/images/gallery/2020-09/en-webbook-log-failed.png) ### Additional information - Private information is managed using the Ancestris options. If an individual is considered private according to the Ancestris options, the WebBook will display "..." instead of the plain text details. - The Sosa numbering is taken into account if the labels "\_SOSA" or "\_SOSADABOVILLE" have been generated. Check out the [Generate Sosa numbers documentation](https://docs.ancestris.org/books/user-guide/page/generate-sosa-numbers "Generate Sosa numbers"). Make sure in this case that the main DeCujus individual defined at the beginning of the WebBook is the same as for the Sosa numbers. - If the local directory in which the pages will be saved is not empty, a message tells you so. - Generated html pages are W3C XHTML 1.0 certified. - Special characters are replaced in the pages by the equivalent html sequence (example: "é" is replaced by "é") - In order to optimize performance, media and source files are not copied (or linked) if they already exist in the target directory. To force this copy (or these links), just delete the files in the target directory. - A feature makes it easy for the website user to send email to the author - An feature saves considerable amount of time by only uploading files whose content has changed. This works very well as long as the WebBook is the only program used to upload pages because it keeps the details of the files transferred each time. # Web SiteIt is not necessary to send your information to a website.
The generated site is a set of files and directories that you will deposit on any support (hard disk, CD, USB key, your website...), or that you can send to a relative in a private way. You can also choose to create the pages in another language in addition to the English pages. ### Generated pages The first page of the site gives an overview of your genealogy. Indexes give access to pages for all individuals and sources. For each individual, you have his/her mini-tree over 4 generations, his/her information sheet, his/her parents, his/her notes, his/her sources. [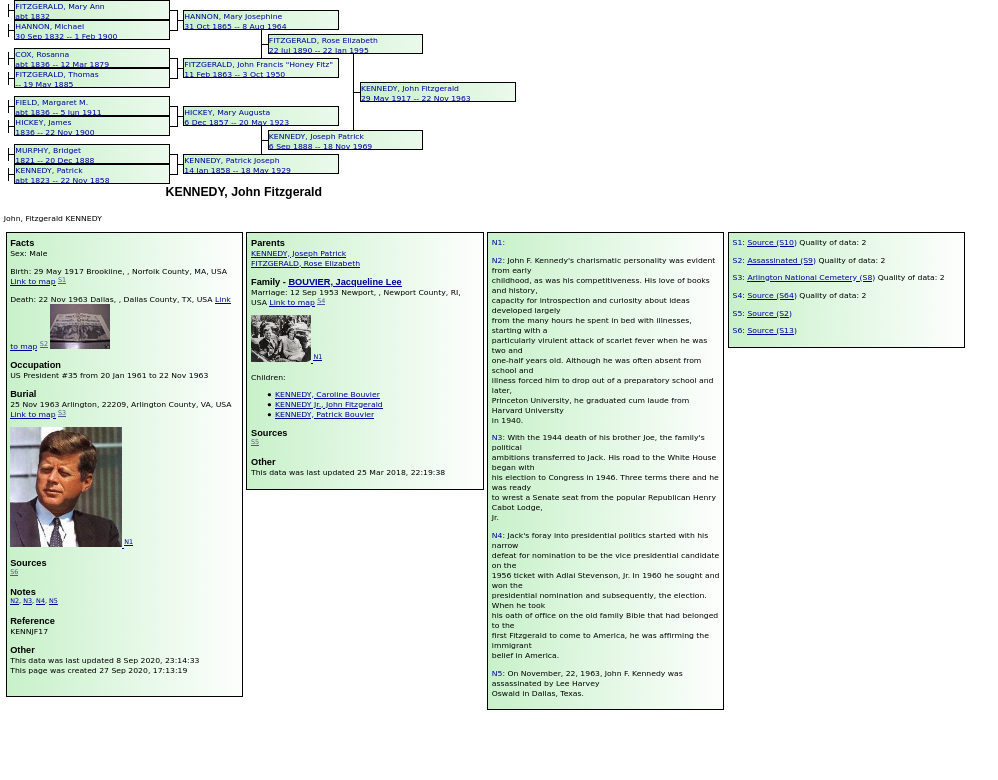](https://docs.ancestris.org/uploads/images/gallery/2020-09/en-web-site-individuals.png) ## Usage The website is very easily generated. Just choose the action from the **Menu / Tools / Publication / Website**. Ancestris asks you for a location to write the files that will make up your site. The indicated directory must be empty. The files in it will be deleted in any case. Ancestris warns you if this is the case. Once the directory is chosen, the site is generated immediately. The following window appears to give you the result of the generation. You can close it afterwards. [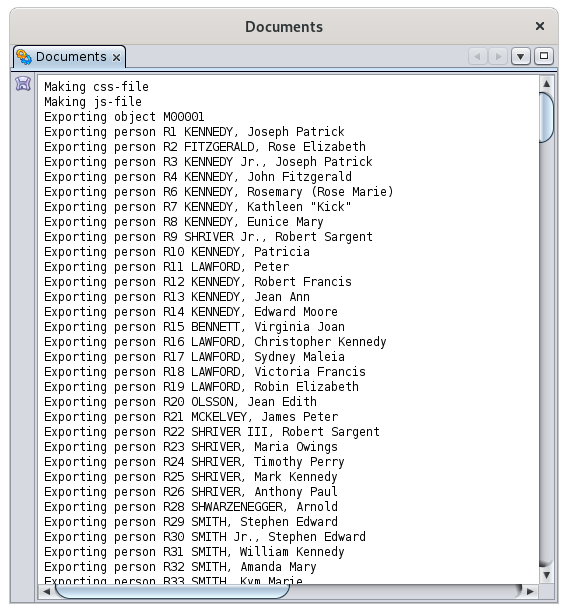](https://docs.ancestris.org/uploads/images/gallery/2020-09/en-web-site-log.png) At the end of the generation, your browser opens and displays the home page of the generated site. If you want to see the pages of the website again closing the browser, it is not necessary to regenerate the site. Just open the file **index.html** which is located in the directory you specified to generate the site. Furthermore, in case you would like to copy your site to another medium or send it by email, you can compress the directory containing the files. ## Customization The generated pages are customizable through the [Preferences Extensions page](https://docs.ancestris.org/books/user-guide/page/preferences#bkmrk-volet-extensions "Preferences Extensions page"), Website tab. [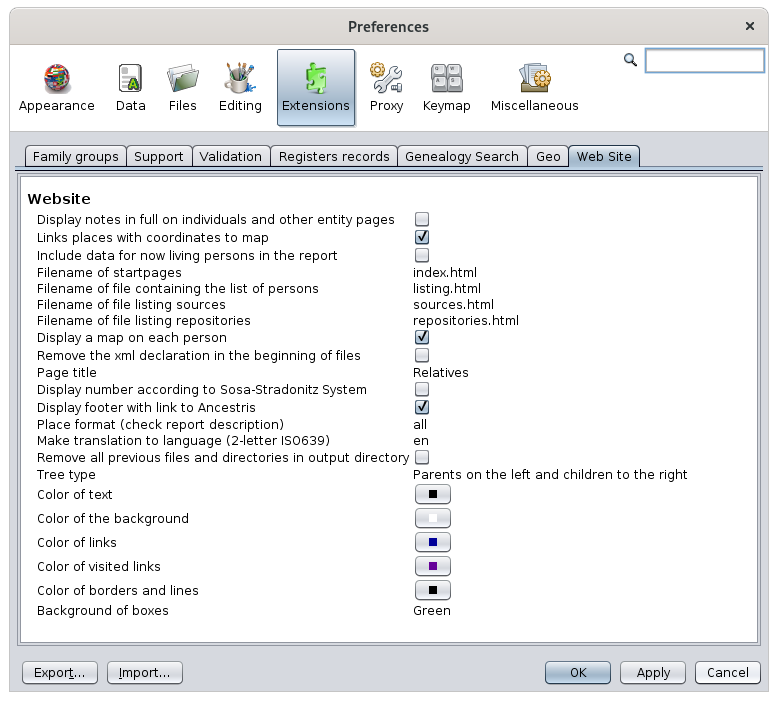](https://docs.ancestris.org/uploads/images/gallery/2020-09/en-web-site-individuals-settings.png) The customization options are rather explicit. Let us focus on the less explicit ones. - **Formatting of places**: "all" is the only value available at this stage. - **Translate to the following language (ISO639 2 letters, e.g. en)**: leave blank to not generate another language, or enter the country code on 2 characters otherwise. The available languages are: *da, de, el, es, fi, frit, nl, pt, sv*. # Print of current view This function prints the current view. [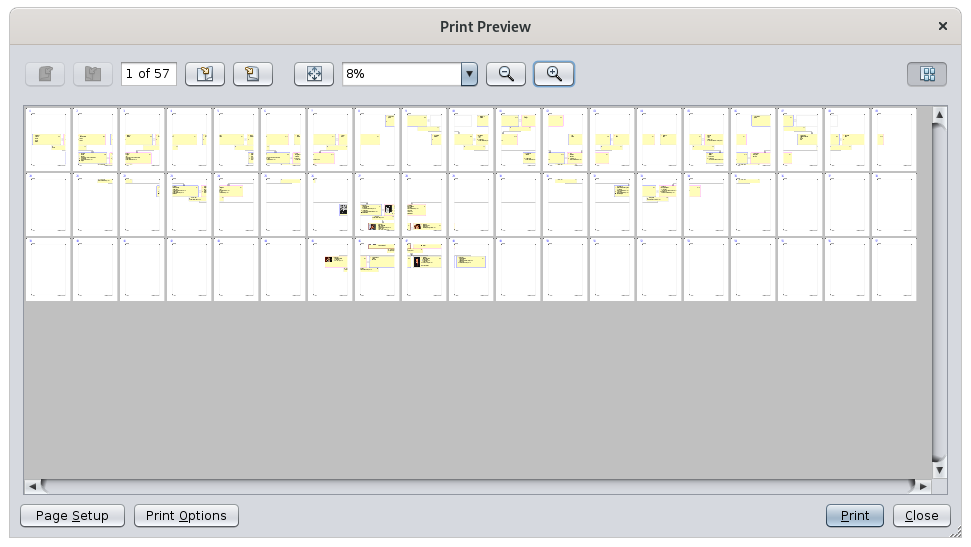](https://docs.ancestris.org/uploads/images/gallery/2020-09/en-print-view.png)At this stage, only the [Dynamic Tree view](https://docs.ancestris.org/books/user-guide/page/dynamic-tree "Dynamic tree") can be printed properly.
If other views can be printed, it is accidental and the rendering will probably not be of the quality you expect. ## Usage As soon as the action is launched, the Print Preview window appears. This is the one displayed at the top of this page. In the example, you can see that the tree will be printed on 54 pages. The different buttons allow you to zoom in or navigate from page to page. The **Page Setup** button displays the window to adjust the size of the print sheets, the margins and the portrait or landscape format. [](https://docs.ancestris.org/uploads/images/gallery/2020-09/en-print-view-page-setup.png) To further customize the printout, you need to set the print options. ## Customization The **Print Options** button allows you to customize the printout. [](https://docs.ancestris.org/uploads/images/gallery/2020-09/en-print-view-page-options.png) The zoom section set a number of pages in the width and height. It is useful to try different margins as well if you want to reduce the number of pages and make the connections from one page to another as small as possible. ## Tutorial There is a tutorial on printing trees. It is in French and in PDF format. You can download it [here](http://www.ancestris.org/compteur_dl.php?/dl/pub/ancestris/docs/B-A_BA_Imprimer_son_arbre.pdf). # Welcome page The **Welcome page** helps you get started with Ancestris as well as in its daily use. ## Description The Welcome page is automatically opened the first time you use Ancestris. It includes 3 tabs. ### Getting Started [](https://docs.ancestris.org/uploads/images/gallery/2020-09/en-welcome-getting-started.png) This tab contains the main elements necessary to get started. These elements are accessible via the corresponding buttons. - **Creating or migrating a genealogy** - **Two examples** of genealogy, Kennedys and Bourbons French kings - The **Ancestris flyer** - Access to a **guided tour** - The role of the **Ancestris association** to offer you this software. - And the possibility of **making a donation** to Ancestris to support our development. ### My Ancestris [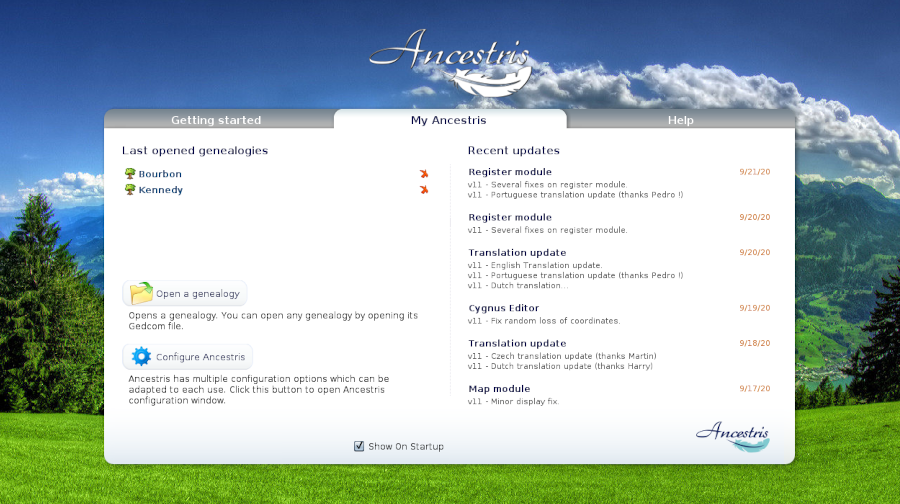](https://docs.ancestris.org/uploads/images/gallery/2020-09/en-welcome-my-ancestris.png) The second tab is for daily use. It gives a quick access to the latest genealogy files used. A click on the red cross removes the name from the history. It also gives you a quick access to open a genealogy or to modify your preferences. Finally, it gives you the list of the lastest modifications of the software. Click on a message to be taken to the forum where you can see the entire message as well as the complete list.. ### Help [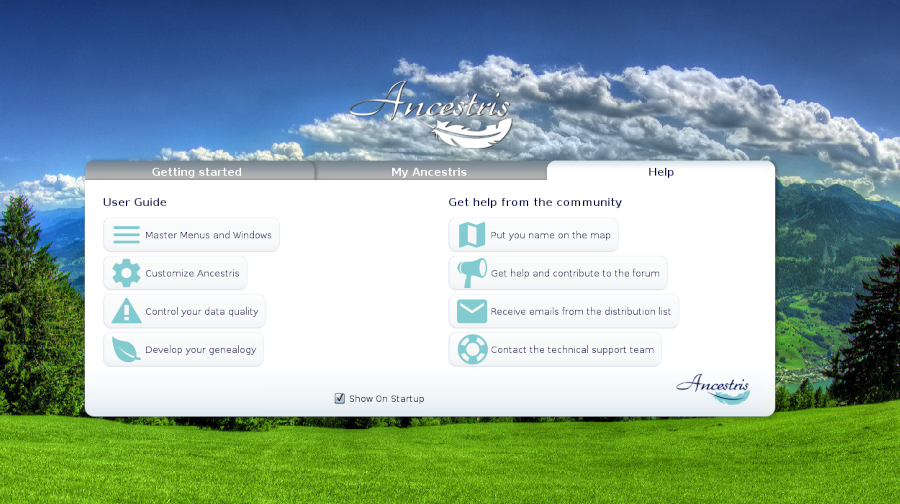](https://docs.ancestris.org/uploads/images/gallery/2020-09/en-welcome-help.png) This tab of the Welcome page gives you direct access to the main chapters of this comprehensive documentation. ## Usage Access the different functions by clicking on the corresponding tab and button.To see the full background image, click on the image.
It is also possible to change the background image by **ctrl+clicking** on the image.
A click on the Ancestris logo takes you to the Ancestris website. ## Customization It is possible not to display the Welcome page every time Ancestris is opened. If you want to hide the Welcome page at startup, uncheck the **Show at startup** check box. - Uncheck this check box so that the welcome page will not appear after the next startup. - To display it again, go to the **Window/Welcome Page** menu to make it appear, then you can check the box. # GEDCOM Explorer The **GEDCOM Explorer** is a special Ancestris window dedicated to the exploration of each open Gedcom file. [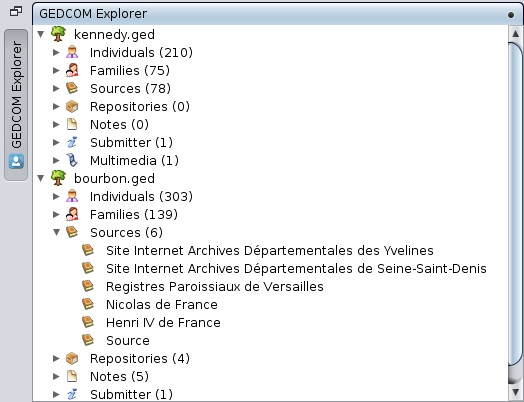](https://docs.ancestris.org/uploads/images/gallery/2020-09/en-explorer.png) ## Description It appears in the upper left corner of Ancestris, in the form of a [concealed window](https://docs.ancestris.org/books/user-guide/page/workspace-and-windows#bkmrk-concealed-window "Concealed window") with a vertical button. It is always present and always available, even if it can be temporarily hidden. The GEDCOM Explorer displays a summary of the different entities included in the Gedcom files currently open in Ancestris. If no genealogy file is open, it only displays a blank page. Each file opened in Ancestris is presented as a three-level tree structure. - First level: the name of the genealogy file - Second level: the name of one of the seven [categories of entities](https://docs.ancestris.org/books/user-guide/page/entities "Entities"), followed in brackets by the number of entities. - Third level: the name of the entities The tree structure is similar to that found in most file managers. - For better reading, the different lines are indented according to their level in the hierarchy - To limit the use of the vertical scrollbar, a flap allows you to show or hide the content of the lower level by clicking on it. In the example above, we see the GEDCOM Explorer with two open Genealogies, those of Kennedy and the Bourbons. We see for example that there are 210 individuals in the Kennedy genealogy, and 303 in the Bourbon genealogy. We can also see from the flaps that the Bourbon Sources are visible. ## Usage The GEDCOM Explorer helps you **select and count all the entities** included in the genealogy files currently open in Ancestris. It also provides a number of rather **practical possibilities**. ### Double-click A double-click on a line with a flap **unfolds or folds** the lines underneath. A double-click on an entity **selects the entity** and makes it the [selected entity](https://docs.ancestris.org/books/user-guide/page/relationships-between-windows#bkmrk-une-s%C3%A9rie-de-fen%C3%AAtre "Relationships between windows"). ### A right click on a Gedcom line opens a specific Gedcom context menu where you can perform a number of actions: - **Save**, **Properties** and **Close** are described in the [File Menu](https://docs.ancestris.org/books/user-guide/page/file-menu#bkmrk-propri%C3%A9t%C3%A9s-%28page-d%C3%A9d "File Menu"). - The other menu items are also in the main [Context Menu](https://docs.ancestris.org/books/user-guide/page/context-menu "Context Menu"). [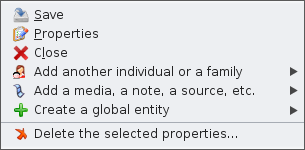](https://docs.ancestris.org/uploads/images/gallery/2020-10/en-gedcom-context-menu.png) A right-click on a category of entity does nothing. A right-click on an entity line opens the [Context Menu](https://docs.ancestris.org/books/user-guide/page/context-menu "Context Menu").From there, you can achieve many actions liek creating other entities, editing them, using tools and reports, etc. ## Possible configurations of the window ### Concealed The concealed position is the default position of the GEDCOM Explorer when Ancestris is opened. In this form, the tab remains at the top of the left edge of the main window and the panel is usually hidden. To show the GEDCOM Explorer pane. - either, hover (for a few fractions of a second) over its tab with the mouse - or, more radically, click on this button - or access it from the main [menu / Window / GEDCOM Explorer](https://docs.ancestris.org/books/user-guide/page/window-menu "Window Menu") To hide the GEDCOM Explorer pane again. - either, hover with the mouse (for a few fractions of a second) over any part of the screen outside this frame - or, more radically, click again on the button When the panel is displayed, GEDCOM Explorer can take the form of an anchored panel by clicking on the anchor pin, located at the top right of the open pane. ### Anchored The panel anchored to the main window is a non-overlapping pane: GEDCOM Explorer is therefore always visible, as long as the main window remains in the foreground. From this anchored frame pane, GEDCOM Explorer can take the following forms. - A open panel in a secondary window, using the **Undock** command of the pop-up menu managing the panel and window control, opened by right-clicking on the panel tab. - A concealed panel - either by using the Reduce window group button located at the top right of this anchored frame. It returns to the initial state in the form of an open concealed panel - or by means of the menu command main [menu / Window / GEDCOM Explorer](https://docs.ancestris.org/books/user-guide/page/window-menu "Window Menu"). It returns to the initial state in the form of an open concealed panel ### Panel in secondary window The Gedcom explorer can be put in a floating window, or freed, via the actions of the window menu. In this case, the Gedcom Explorer is autonomous from the main window from which it has been detached. From this freed window, the Gedcom Explorer can take the following forms. - A docked panel, using the Dock command in the context menu - A concealed panel, via the main [menu / Window / GEDCOM Explorer](https://docs.ancestris.org/books/user-guide/page/window-menu "Window Menu") . It returns to the initial state in the form of an open concealed panel # Preferences The Preferences is where you customize a lot of elements of Ancestris. This is what one of the many customization panels looks like. [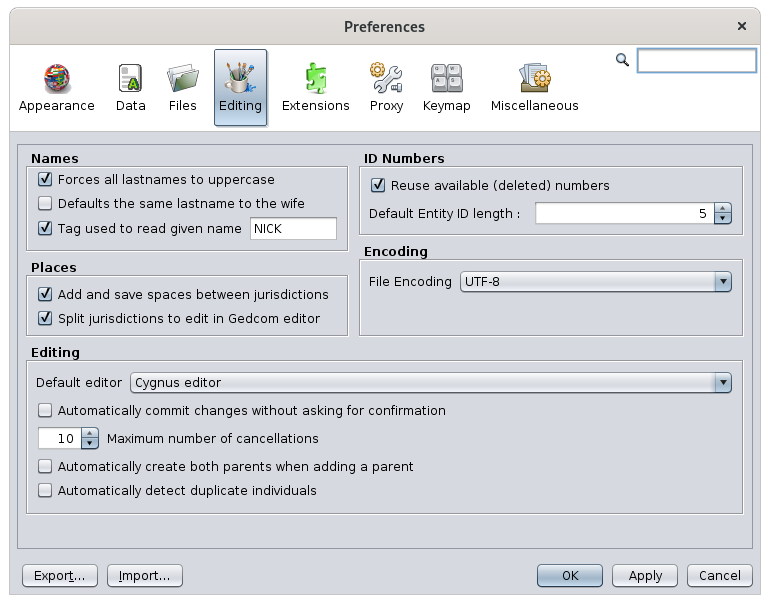](https://docs.ancestris.org/uploads/images/gallery/2020-09/en-preferences.png) For all the details concerning the different panels, the possible choices and their interest, please refer to the section [Personalization> Preferences](https://docs.ancestris.org/books/user-guide/page/preferences "Preferences"). # Update Ancestris This action checks if the version of Ancestris that is already installed on your computer is up to date, and if not, it will install the updates. [](https://docs.ancestris.org/uploads/images/gallery/2020-09/en-update.png) If your application is up to date, the above window will appear, indicating that your application is up to date. If not, the list of "extensions" that have been modified will appear and you will be able to proceed with their installation. You will then be in the [Updates tab of the Extensions manager](https://docs.ancestris.org/books/user-guide/page/extensions#bkmrk-volet-mises-%C3%A0-jour "Extensions") that we invite you to refer to for more details. # Manage extensions This menu allows you to check or force an Ancestris updates, and to customize Ancestris by installing or uninstalling modules according to your needs. [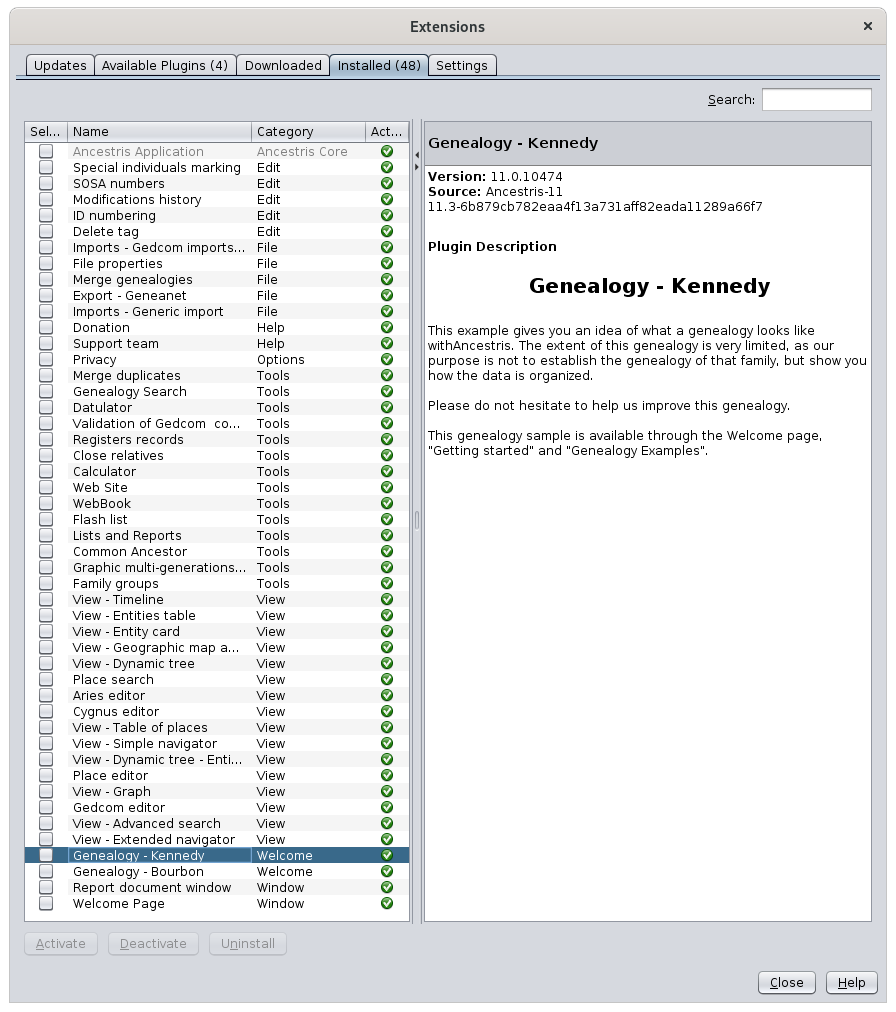](https://docs.ancestris.org/uploads/images/gallery/2020-10/en-extensions.png) In general, there would be little need to go through this kind of customization. Instructions to use the window are available in the Preferences chapter of this documentation. Please refer to the corresponding [Manage Extensions](https://docs.ancestris.org/books/user-guide/page/manage-extensions-%28l%29 "Manage extensions") page. # Contact Ancestris Support Team This feature helps you **contact the Ancestris support team by email**, describing your problem and automatically sending your system configuration items, as well as the Ancestris log file. [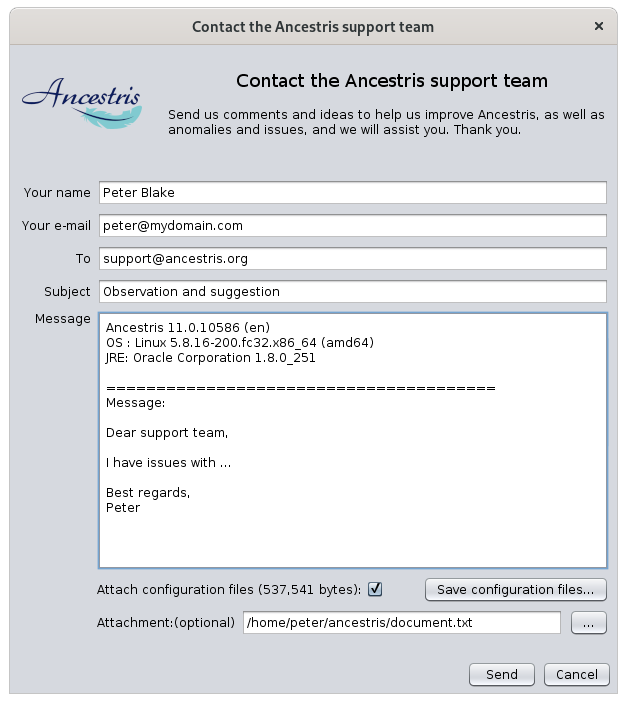](https://docs.ancestris.org/uploads/images/gallery/2020-11/en-support.png) ## Description The window that opens looks like an email ready to be sent. The recipient must remain support@ancestris.org. The subject and the message must be completed. A check box is available for you to attach the log file of the current Ancestris session. You can attach a file using the file field. ## Usage To contact support, simply complete the subject of your message and complete the message. It is advisable to leave the box checked to attach the configuration files. We will use the ancestris.log file to understand the potential issue. It is also advisable to put your name in clear so that we can answer you in a personalized way. If the message could be sent correctly, you should see this message [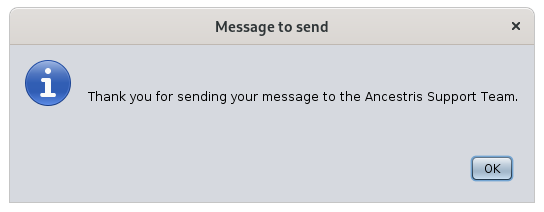](https://docs.ancestris.org/uploads/images/gallery/2020-11/en-contact-sent.png) It is not necessary to check your usual email client software because the email was sent by Ancestris. If Ancestris fails to send the email, you will get a message like this for instance, where we have here an unsuccessful connection to the smtp server. [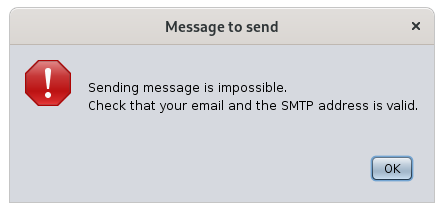](https://docs.ancestris.org/uploads/images/gallery/2020-11/en-contact-not-sent.png) If the mail does not reach its destination, you should receive an mail in your inbox a few minutes later telling you something like: Undelivered Mail Returned to Sender. ## Customization Prior to sending emails to us, the outgoing mail configuration corresponding to your internet service provider must be defined in Ancestris preferences. You are asked for these settings the first time you try to contact us, or by going to the [preferences, Extensions panel](https://docs.ancestris.org/books/user-guide/page/preferences#bkmrk-volet-extensions "Preferences"), **Support** tab. [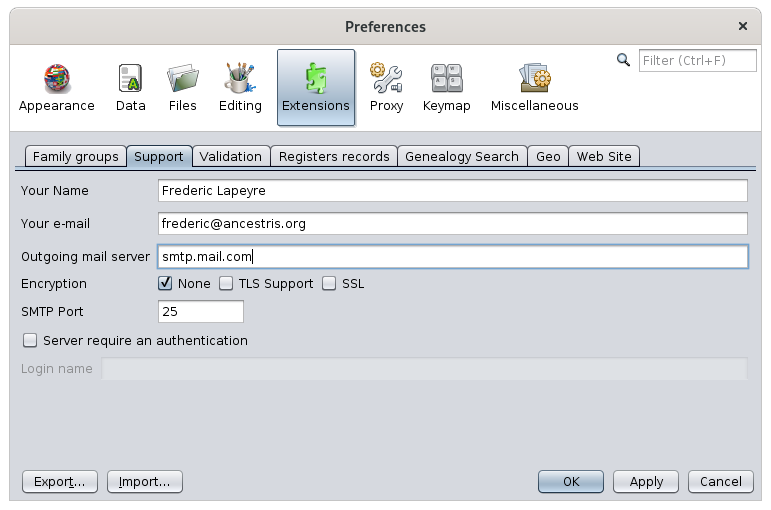](https://docs.ancestris.org/uploads/images/gallery/2020-09/en-contact-settings.png) You define the outgoing email parameters in the fields provided. The **SMTP server** of your Internet Service Provider is the one you put in your email client software to send messages, not to receive them. # Make a donation to Ancestris **Ancestris does not have any specific funding** since **we are all volunteers** and **your donations pay for the hosting of the application and participation in exhibitions**. The screenshot below explains what your donation will be used for and offers several means of payment for you to help us financially. [](https://docs.ancestris.org/uploads/images/gallery/2020-10/en-donate.png) The three payment methods are explained behind each of the buttons. Please visit the [Association page](https://docs.ancestris.org/books/association-e00 "Association") in this documentation to learn more, find out about members and donors. You can also make a donation directly by going to the [donations page](https://docs.ancestris.org/books/association-e00/page/making-a-donation "Making a donation").